How to backup iPhone to MacBook
Did you know you can backup your iPhone to your Mac? It's a great way to ensure you don't lose any important data, content, contacts, or special memories like photos and videos.
iPhones can get easily lost, broken, or stolen, so making regular backups should be at the top of your list. After all, you never know!
It's really simple to make an iPhone backup, and in this article, we'll walk you through the various methods — let's get going.
Why back up your iPhone to Mac?
As we mentioned above, iPhones are easily damaged, misplaced, or stolen, which not only puts you at risk of losing important contents but can also compromise your personal and private data.
Regular backups not only prevent data loss, but if you decide to upgrade your iPhone, you'll be able to seamlessly transfer your data onto your new device.
So, let's get started by taking a look at how you can backup your iPhone to your Mac using the Finder.
How to back up iPhone to Mac with the Finder
The Finder is a great way of backing up your iPhone. Here are the steps to follow:
-
Connect your iPhone using the correct cable to your MacBook.
-
Open a new Finder window and make sure your iPhone is unlocked.
-
Within the Finder, locate your iPhone under Locations and double-click to open it.
-
Click Back Up Now.
-
Select Encrypt Back Up, enter your Mac password, and then your iPhone password on your device.
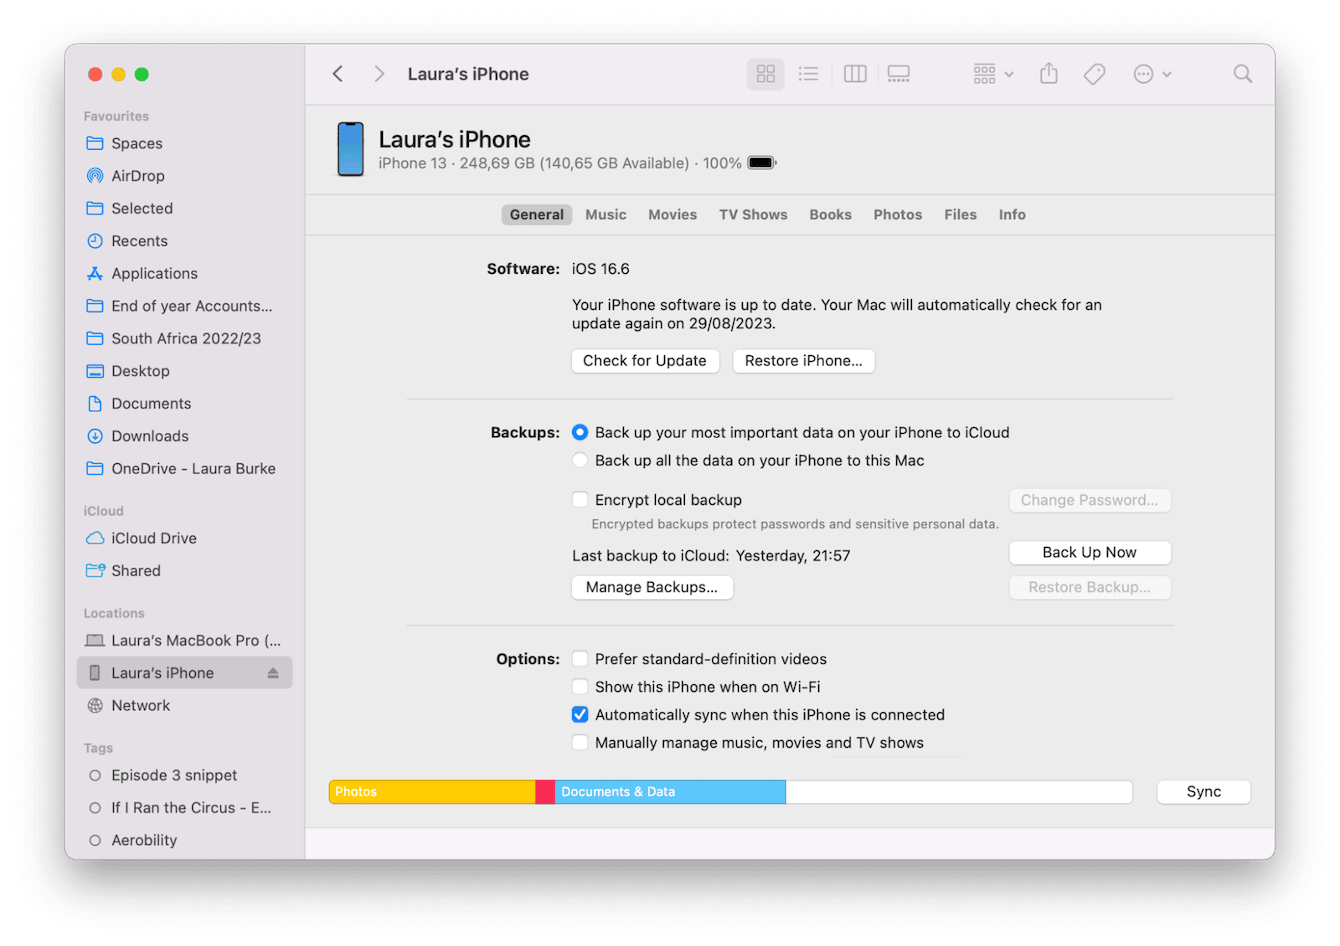
Now, all you need to do is wait for the backup to finish; depending on the last time you did this, it could take a while, so sit tight. The date and time stamp will indicate your backup was successful.
Get rid of clutter on iPhone before backing up it to Mac
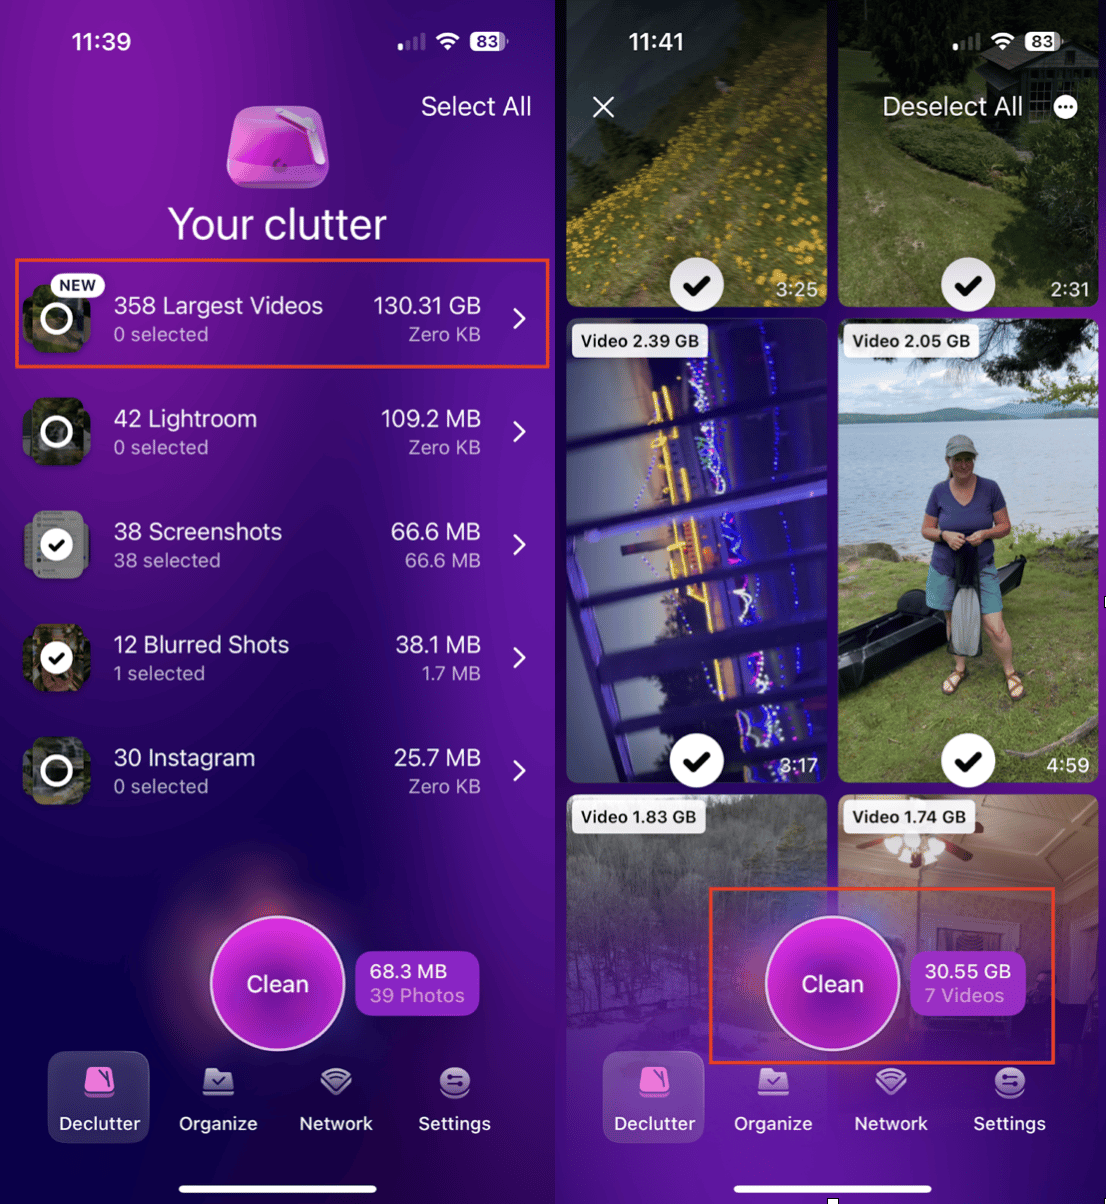
Photos and videos can take most of your space, and if you ehsitent to delete you old backups, it's better to use a tool that can help you with decluttering your media. CleanMy®Phone is the perfect app if you want to declutter your camera roll. The app helps finding the lagest videos, duplicates, similar photos, blurred images and more, so it's easy to delete photos and videos you don't need.
- Download the app.
- Choose Declutter.
- Delete Your clutter.
Where to find iPhone backup on Mac and remove it
iOS backups do take up valuable space on your Mac, so before we move on to other methods for backing up iPhone to Mac, it's important to know how to manage and remove your backups and other junk files on your Mac to keep your MacBook running smoothly and efficiently.
iOS backups are saved to a special backup folder; the location of this will completely depend on your device. Here's how to find it:
-
Open a new Finder window and press the Command + Shift + G keys together.
-
Enter the following file location and press Return.
~/Library/Application Support/MobileSync/Backup/ -
Select your backup within the Backup folder that opens.
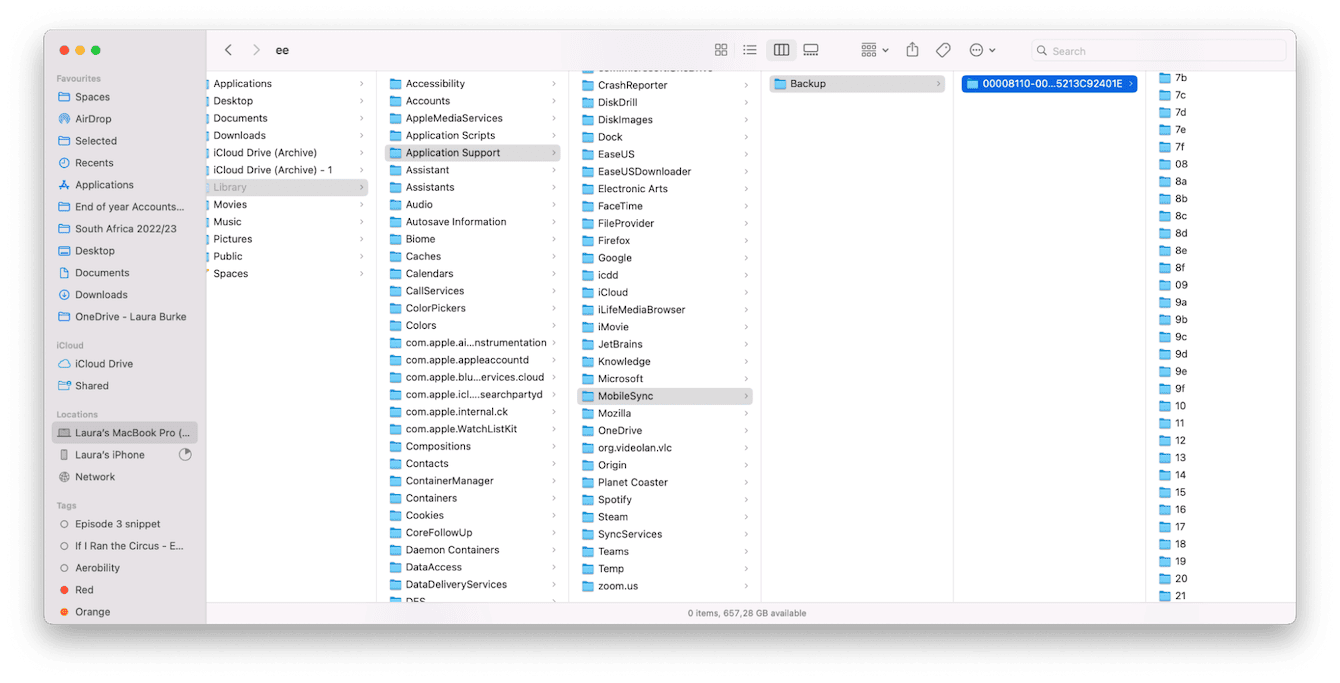
Now you know where to find your backup folder. It's important to mention you should never move its location. You can search through folders and remove any that you no longer need.
If you're operating a Mac with macOS Catalina or later, you can search for specific backups; here's how:
-
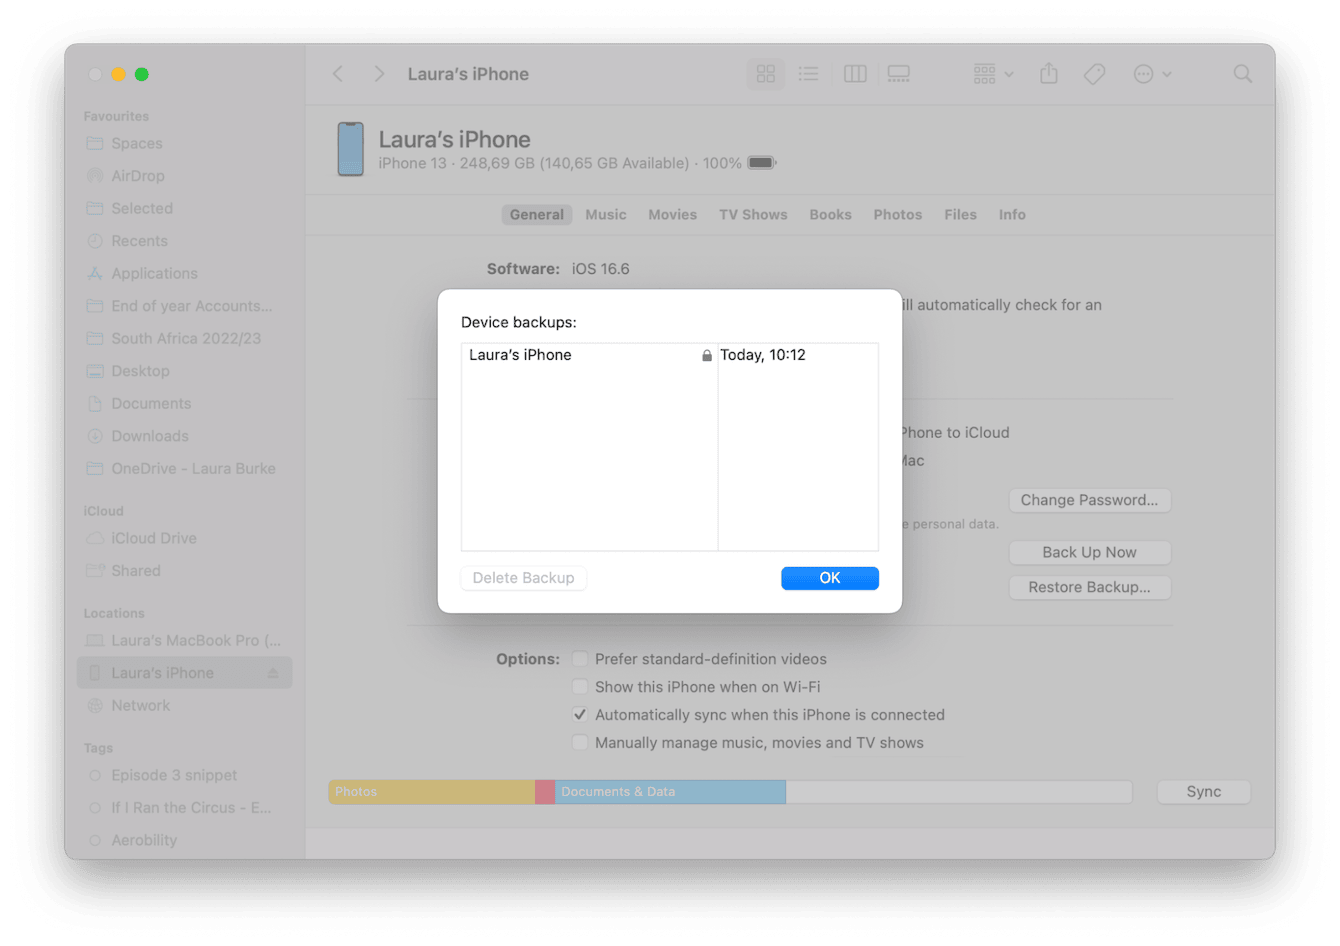
Open the Finder. Select your connected iPhone under Locations to open it.
-
Select the General tab and click Manage Backups.
-
See your recent backups displayed in the list. To remove one, select it and press Delete Backup.
-
Repeat as needed, then click OK when you're finished.
In macOS Ventura, you can also manage backups by going to System Settings > General > Storage and finding iOS files on the list under the colored graph.
Removing old backups is a great way of saving space on your MacBook, but it's not the only way. Removing useless junk, like cache, temporary or broken files, unneeded language files, and old system logs, is another way to seriously reclaim space.
The System Junk module from CleanMyMac was built exactly for this kind of task, helping you locate all kinds of system trash in one simple place for instant removal; here's how to use it:
-
Open the app or first take a moment to download the free version.
-
Select System Junk from under Cleanup and click Scan.
-
Once the scan is complete, click Clean. Alternatively, take a moment to review details and then click Clean.

Now you know how to keep your Mac in good shape and remove old backups and system junk, let's get back to some more iPhone-to-Mac backup methods.
How to back up iPhone onto Mac with iCloud
Another great option for how to backup an iPhone to a MacBook is to use your iCloud account.
Whenever you have a stable Wi-Fi connection, you can initiate a backup on your iPhone; there's no need for cables, and the data is always encrypted.
You will, of course, need to make sure you have enough storage capacity, and this may require you to upgrade to a paid iCloud account; the free 5GB won't last long.
Here's how to back up your iPhone to your Mac with iCloud:
-
On your iPhone, ensure you have a Wi-Fi connection.
-
Open the Settings app > select your name from the top > iCloud.
-
Select iCloud Backup and tap Back Up Now.
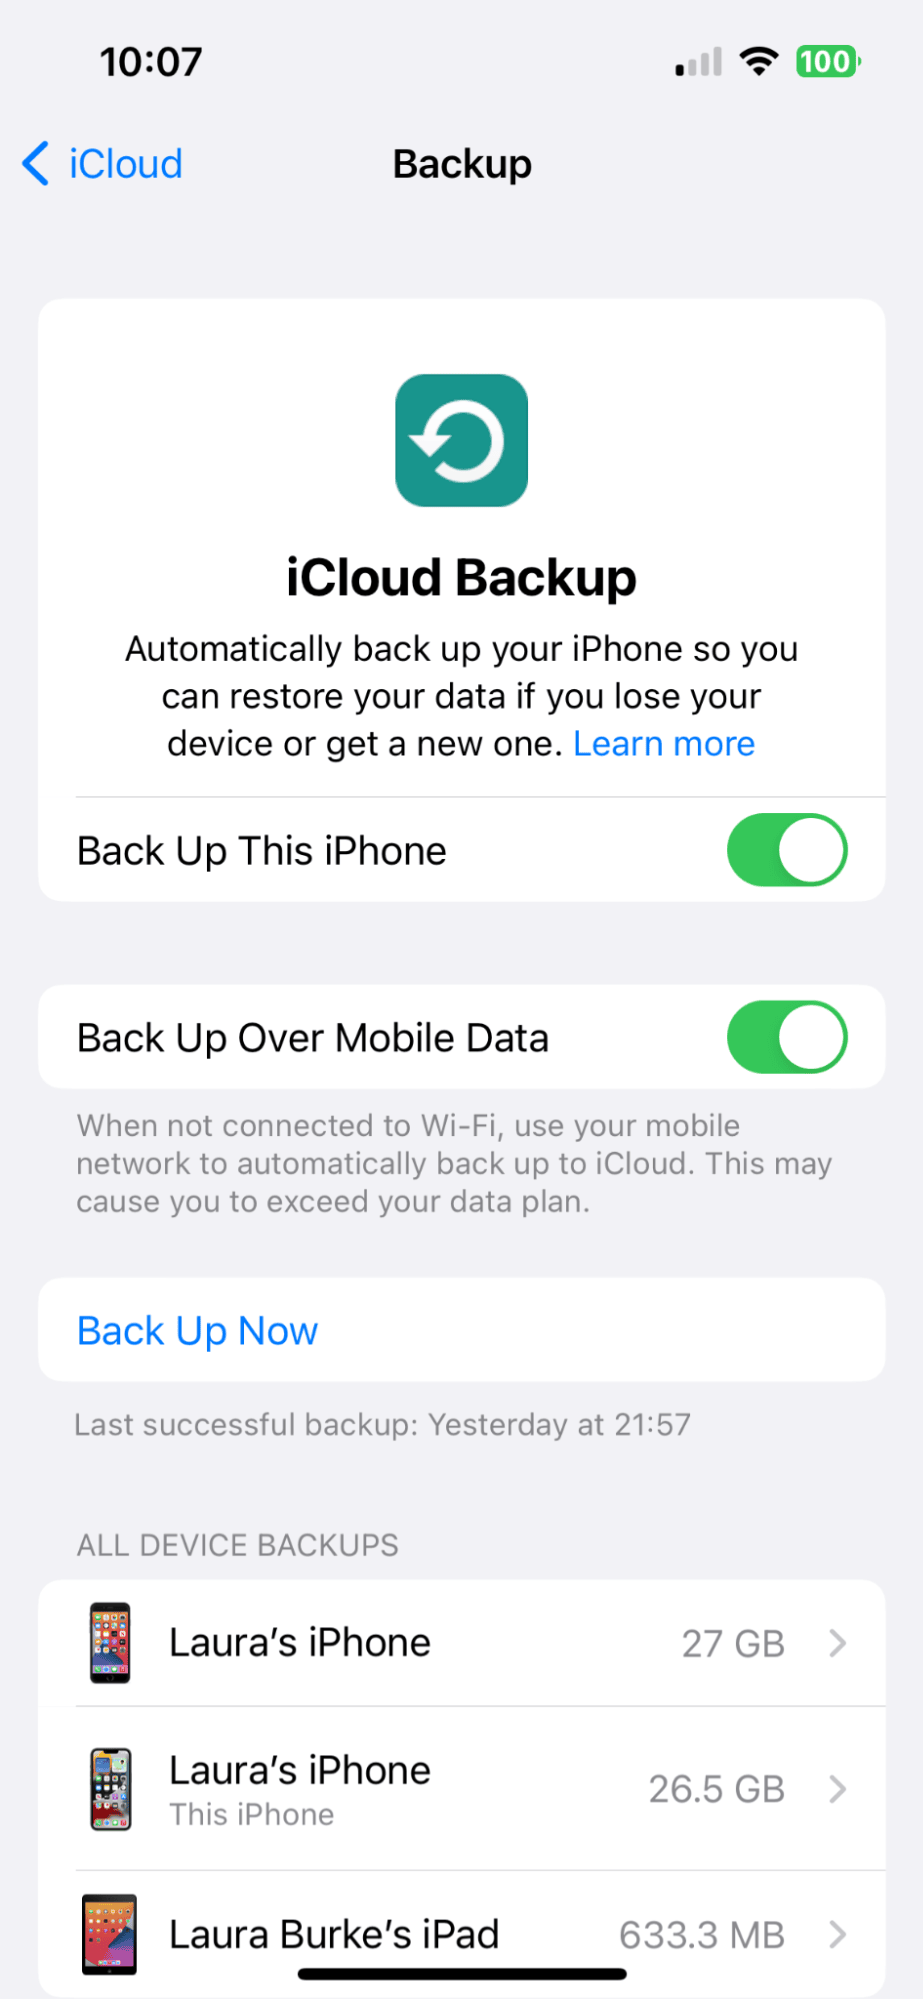
Now, your backup will start. You can see the progress bar, which will give you a time indication.
How to back up iPhone to MacBook with iTunes
Are you running an older macOS version? Mojave, perhaps, or earlier. Then you're able to use iTunes to back up your iPhone; here's how:
-
Use the right USB cable to connect your Mac to your iPhone.
-
Open the iTunes application and ensure your iPhone is unlocked.
-
Click Trust this computer if prompted.
-
Select the iPhone icon on the top left and click Summary > Backup.
-
Select This Computer and click Back Up Now.
So, let's finish up by answering some frequently asked backup questions.
FAQs: Backing up iPhone to Mac
How often should I back up my iPhone?
There's no set answer to this, but to ensure you don't encounter data loss, the more frequently, the better. For example, at least once a month.
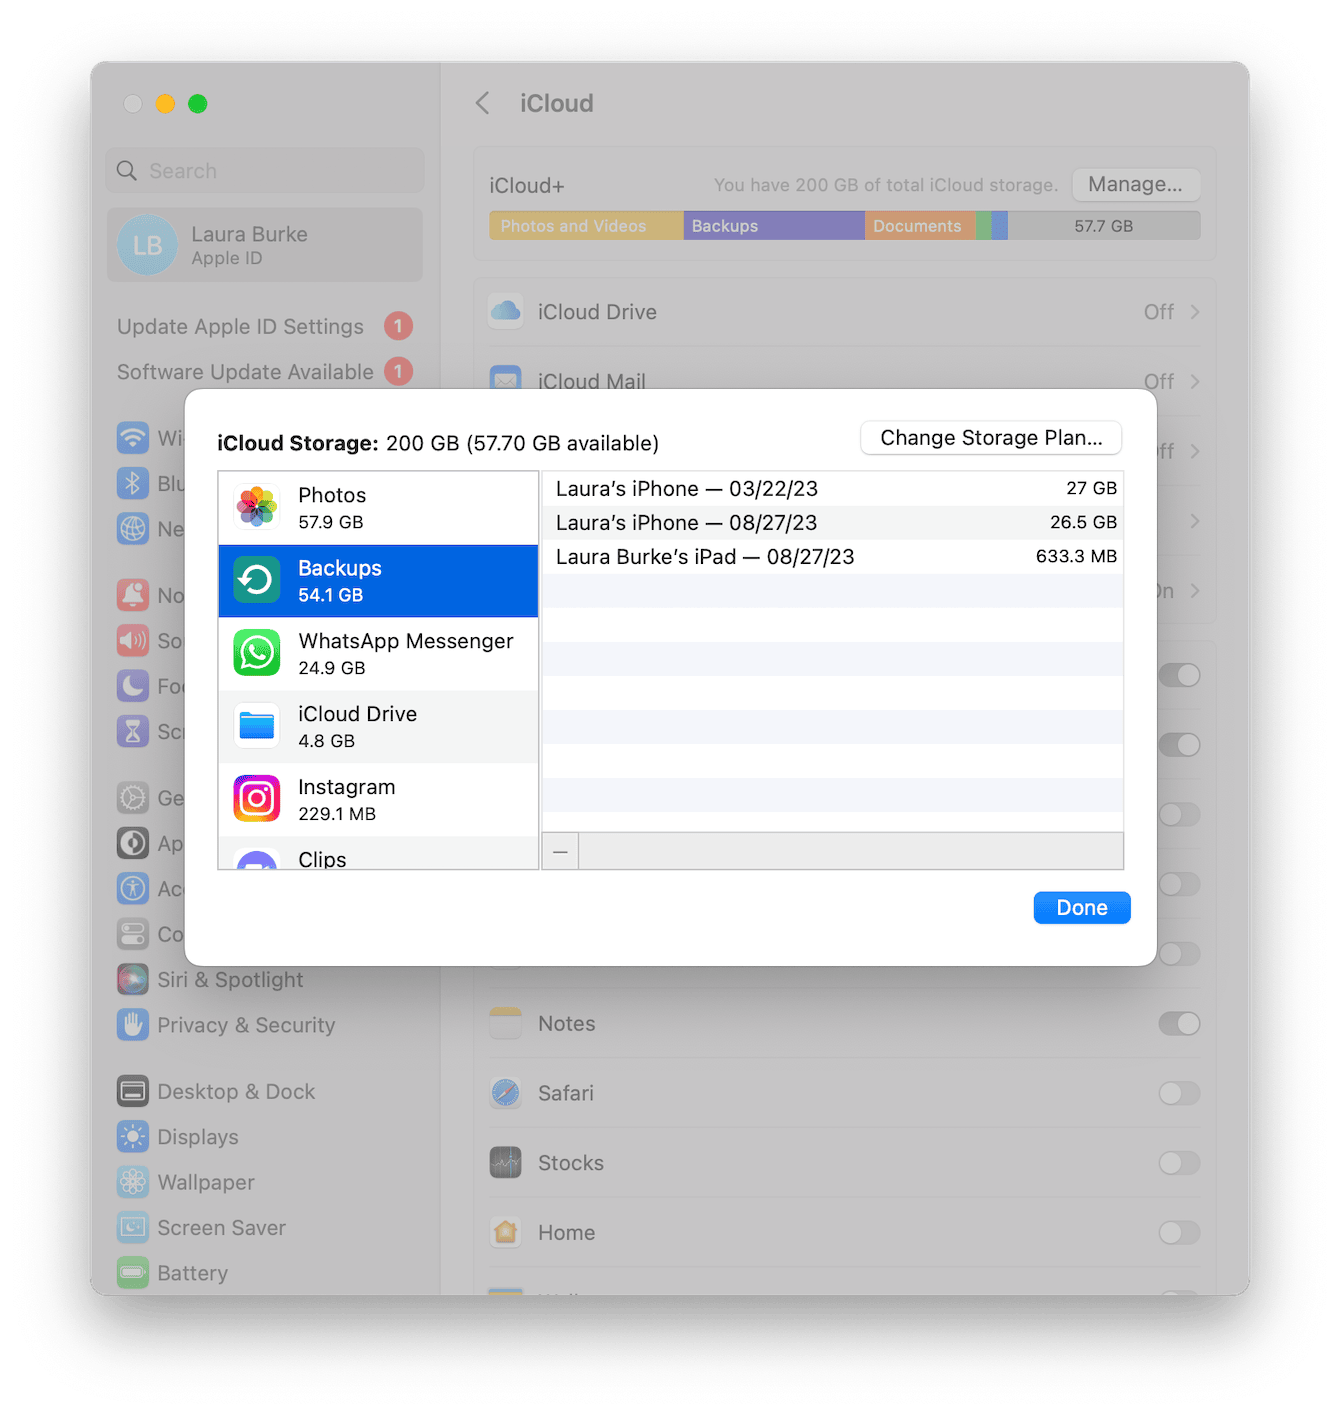
How do I access my iPhone iCloud backups on my Mac?
-
Select the main Apple menu > System Settings.
-
Select your name> iCloud > click Manage.
-
Select Backups.
How to restore my iPhone from a backup?
It's easy to restore your iPhone from a backup; simply follow the official help article from Apple here.
So, as you can see, it's pretty simple to backup iPhone to Mac. And if your Mac is running low on space, you also know how to remove old backups and system junk.

