How to compress a MOV file on Mac
Working with MOV files? Knowing how to compress a MOV file on a Mac will come in handy if you're looking to share your videos or save space on your device.
A .mov file is an extension of a QuickTime file (QTFF) developed by Apple back in 1998. These files consist of several multimedia tracks like audio, video, timecode, or text and are a widely used format today considered an ideal format for recording and editing high-quality videos.
The problem with MOV files is they take up a considerable amount of space on our MacBooks due to their large size, and it can make sharing media a challenge. So join us as we take a look at how you can compress a .mov file.
How to compress MOV files on Mac?
If you've attempted to send a MOV file by email or tried to upload it to one of your social media channels, like YouTube or Instagram, you've probably already discovered that the file needs to be compressed to make it compatible.
If you're new to media creation or file sharing, you might be wondering what the next step is. Well, look no further; here's how to compress .mov.
Use your preinstalled Mac apps
There's no need to install third-party tools to compress your MOV files — you can use Apple's built-in apps. Let's take a look.
1. QuickTime
Although QuickTime is a simple way to compress your MOV files, it doesn't provide controls over the compression quality. Also, files can only be saved as .mov files, meaning that you can't pick other formats.
- Open QuickTime on your Mac.
- From the top menu, click File > Open File.
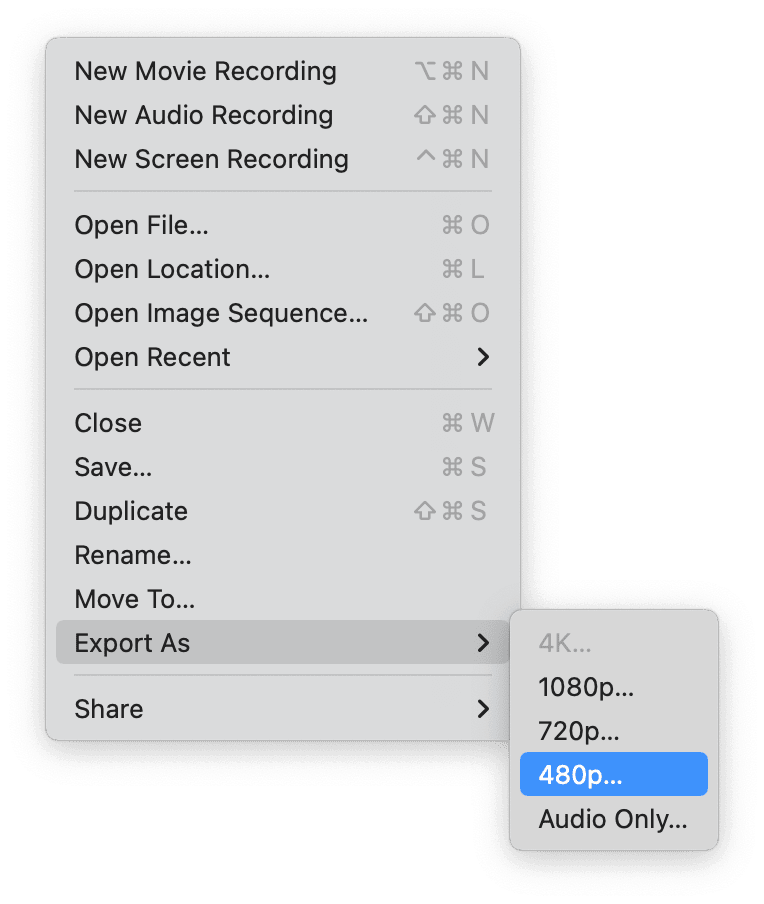
- Once open, click File > Export As and select your desired resolution.
- Give your file a new name and confirm its save location.
- Click Save.

2. iMovie
When it comes to knowing how to compress a .mov file on Mac, iMovie is another option with more control over quality. Files compressed via iMovie will be saved in MP4 format.
- Open iMovie and click the Media tab at the top.
- Now, from the top menu, select File > Import Media and select your file.
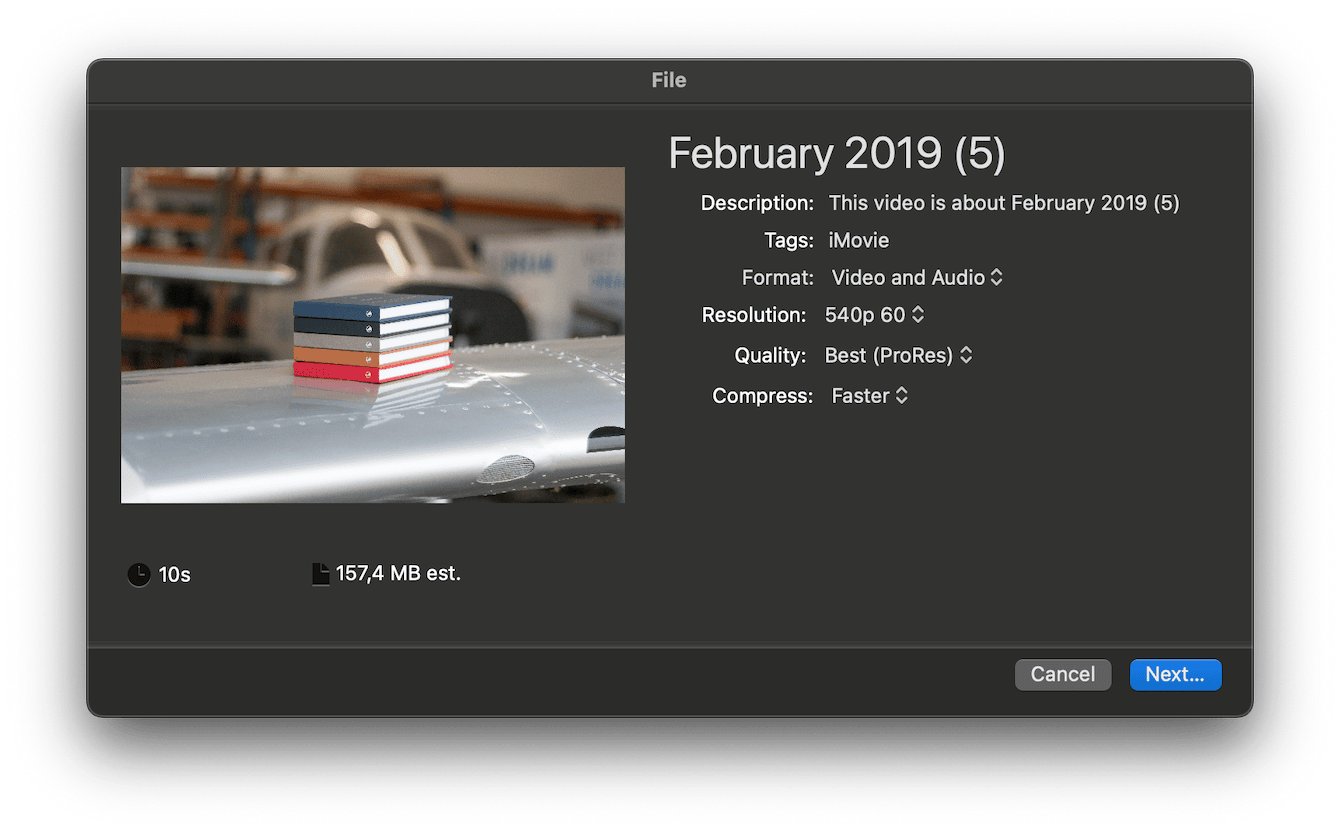
- Click File > Share > File.
- Here, you can rename your movie and select a resolution and quality.
- Finally, click Next to choose a save location and click Save.

Although useful, the preinstalled Mac apps for video compression are limited when it comes to quality and format options. Third-party tools offer a wider range of choices and features; here are a few of our recommendations below.
Use third-party tools
1. VLC
VLC is a popular, free, open-source media player that can handle multiple media types and works across various platforms like iOS and Windows.
This free tool is a Mac user favorite — it's simple and quick to use, and when it comes to compressing .mov files, there's no better option.
Once you've installed the software on your MacBook, check out the instructions below for how to compress MOV files on Mac:
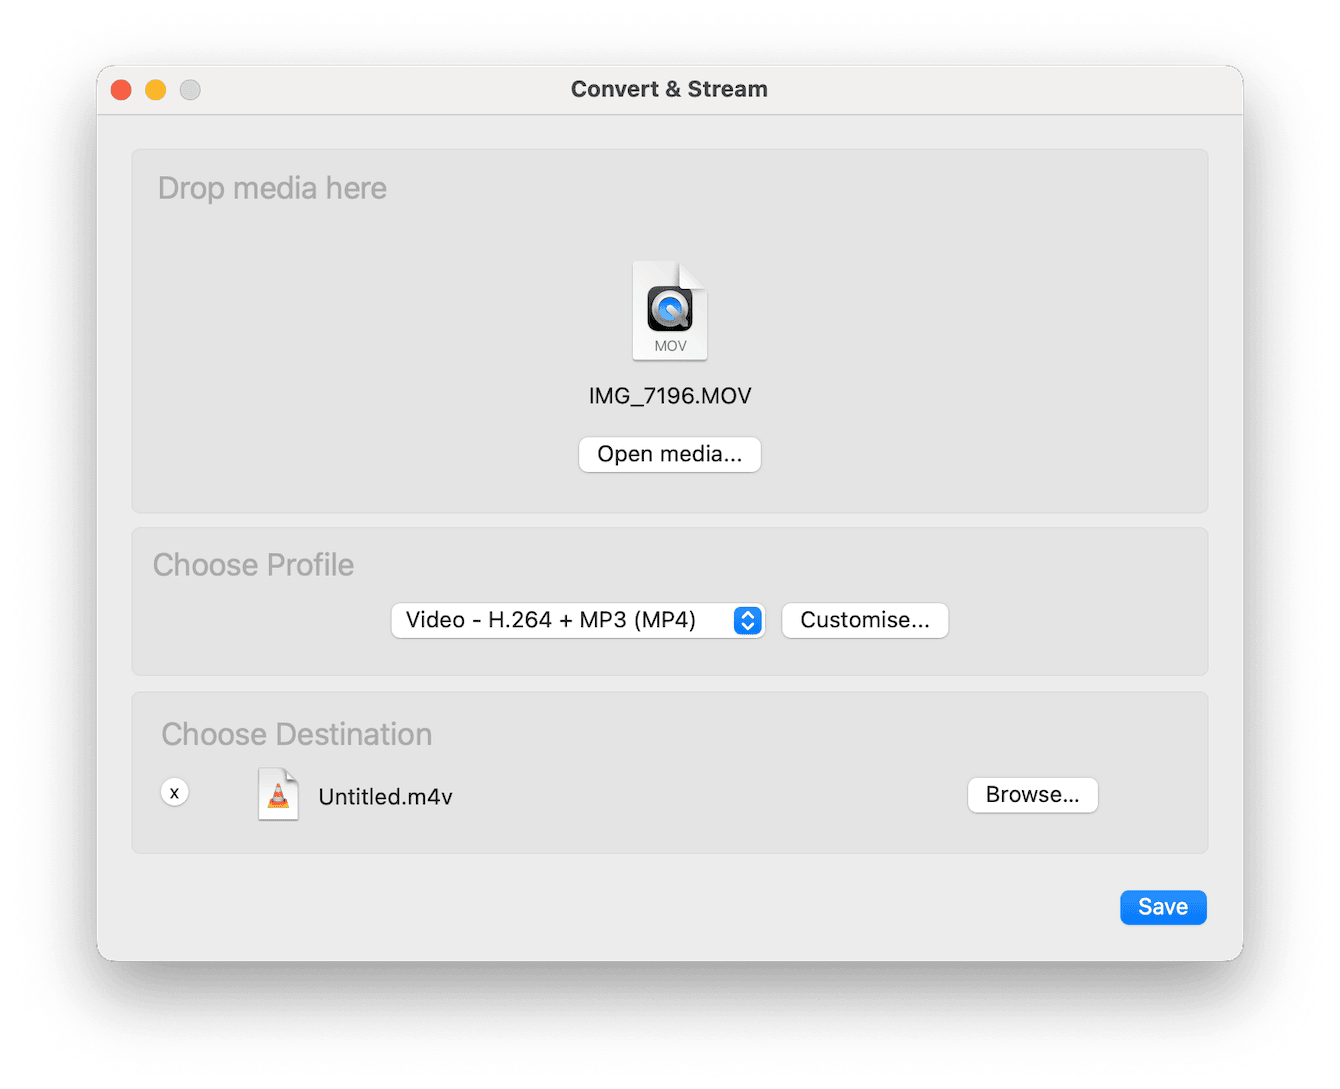
- Open VLC and either drag your video into the media window or click the Open Media button.
- From the top menu, select File > Convert/Stream.
- To compress a MOV file to MP4, choose Video - H.264 + MP3 (MP4).
- Choose a destination to save your File, and finally, click Save.

2. HandBrake
Another widely used and popular open-source video transcoder option is Handbrake. Compatible with Mac, Windows, and Linux, you can convert and compress a wide range of video file formats.
With plenty of video compression presets, this tool is another great option; here's how:
- Open Handbrake and click Open Source to select your chosen file.
- Select MP4 as the format and select your desired dimension.
- Click video and ensure the Video encoder setting is H.264.
- Select the Destination to choose your save location and click Start.
How to reduce a MOV file size on Mac?
Lots of people also ask how to reduce a .mov file size, but it's essentially the exact same thing as compressing a file. To make a file smaller, you'll need to reduce quality or dimensions.
You can use any of the methods outlined in the section above to reduce the size of your video files.
Do you want to know how to reduce mov file size on Mac because you're running out of space? Here's a useful tip below.
How to remove large and old video files
Media files are known for consuming vast amounts of hard disk space; they can often start to overflow, and it's easy to create duplicates or save them to locations on our Mac that we forget about.
One of the easiest ways to stay on top of this is to regularly clean old large media files from your device. It's quick and easy to do when you use a dedicated application, like the Large & Old Files module from the Mac utility CleanMyMac.
Once you've downloaded the free version from this Apple notarized tool, follow the instructions below.
-
Open the app and select Large & Old Files.
-
Click Scan.
-
Under Kind > Movies, search through the list and select movies you no longer need.
-
Finally, click Remove to clear them from your Mac and free up space.

FAQs: How to compress .mov?
Are there any other ways to make a video smaller?
If you've tried compressing your video down, but it's still too big, another option could be trimming the video, for example, cutting the intro or the ending.
Does compressing a video affect the quality?
It's a delicate balancing act. Compression ultimately will reduce the quality of your video, but by using third-party tools, you'll likely have more control over the reduction compared to the built-in Mac compression options.
We've come to the end, but now you know how to compress a MOV file on your Mac.

