How to connect a Play Station 4 controller to Mac
Are you trying to figure out how to start gaming on your Mac? While your Mac or MacBook may not be your very first choice as a gaming console, the truth is that most Macs come with great graphics and fast processors, making them an ideal choice for gaming.
You can easily connect your PS4 controller to your Mac using a few different methods, and there are a variety of gaming controllers that are also compatible with your Mac. We are going to focus solely on connecting a Play Station 4 controller to your Mac or MacBook, but you can use the same method to connect other types of compatible controllers. Let’s get started.
How to connect your PS4 controller to a Mac
You can pair your PS4 controller to your Mac via Bluetooth, with a micro-USB cable, or with a wireless adapter. Grab your controller, make sure the batteries are fully charged, and follow the instructions below.
First, is your PS4 controller supported on your Mac?
Your Apple device currency supports the following PlayStation controllers for gaming on a Mac:
-
PlayStation DualShock 4 Wireless Controller
-
PlayStation 5 DualSense Wireless Controller
-
PlayStation 5 DualSense Edge Wireless Controller

Connect a PS4 controller to a Mac via Bluetooth
The easiest way to connect your PS4 to a Mac is to use PS4 Bluetooth pairing. Here’s how to set it up for gaming on your Mac.
-
On your Mac, access the Bluetooth settings by clicking on the Bluetooth icon at the top of your screen.
-
Press the PS and Share buttons on your PS4 controller until the light starts flashing.
-
You should see your PS4 controller show up on the list of Bluetooth devices in the pop-up menu.
-
Click on the controller to pair it with your Mac.
-
You will see the controller light stop flashing and remain steady, which indicates that the pairing is successful and you’re ready to play.
How to connect a Play Station 4 controller to a Mac with a micro-USB cable
If you use a micro-USB cable to connect your controller to your PlayStation, you can use the same exact setup to connect it to your Mac or MacBook. This is great for times when the batteries on your PS4 controller aren’t fully charged because plugging the controller in to play charges the batteries at the same time.
To use your PS4 controller for your next gaming sesh on your Mac, simply open your game and plug in your controller to your Mac’s micro USB port. You’ll be gaming in minutes.
How to connect your PS4 controller to a Mac using a USB wireless adapter
While this next solution will not likely be your first choice due to the cost of the official DualShock USB Wireless Adapter, it’s a great workaround if you want to use your PS4 controller and you can’t use micro-USB or Bluetooth. This adapter can be used to connect your PS4 controller to use with any Mac games that support external controllers.
3 tips to optimize your Mac for gaming
Not all Macs are created equal, and not all Macs will work well for resource-intensive games. Here are a few tips to follow to make sure your Mac is pulling its weight on game night.
Speed things up with CleanMyMac
CleanMyMac is a fantastic tool for optimizing your Mac, ensuring that it runs as fast as possible, and is also great for protecting your Mac from malware and for cleaning up clutter. To optimize your Mac for gaming, use the Maintenance Module following these steps:
-
Download CleanMyMac here and open it on your Mac.
-
From the left sidebar, choose ‘Maintenance’.
-
You will see a list of maintenance tasks to choose from.
-
Add a checkbox next to the first three items — Free up RAM, Free up Purgeable Space, and Run Maintenance Scripts.
-
Click ‘Run’. CleanMyMac will do all the heavy lifting to optimize your computer.

Upgrade to SSD
Did you know that a solid-state drive (SSD) is almost 100 times faster than a traditional hard drive? Your Mac may already be using an SSD, and if so, it will work great for many different games.
If you are using an older Mac, you can upgrade to a fast SSD or invest in an external SSD that you can use for gaming. The SanDisk Extreme SSD hard drive supports up to 1,000mbs read and write speeds and will reduce lag time when playing heavy games that use a lot of resources.
Quit nonessential apps and resources while gaming
The amount of resources your Mac can use at one time depends on how much RAM you have. 8GB of RAM is plenty for running light games, but if you want to play something heavier, you will either need more RAM, or you will need to get rid of all background apps so that your game doesn’t lag when you’re playing.
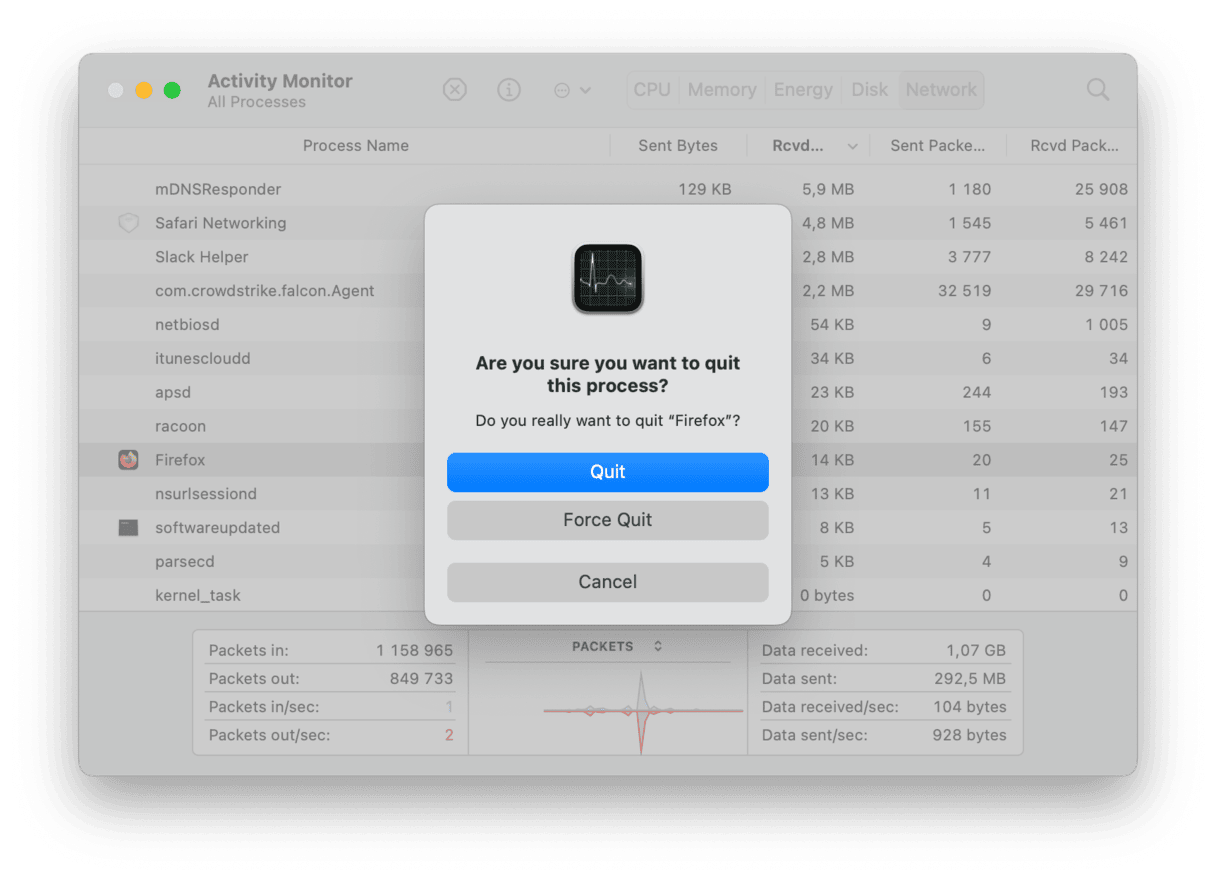
You can see what processes are using a lot of RAM in your Mac’s Activity Manager. Here’s how to do it:
-
Open Finder on your Mac.
-
Choose ‘Applications’ > ‘Utilities’ and open ‘Activity Monitor’.
-
Look through your processes and highlight the ones that you don’t want to run. Make sure not to quit system processes — research anything that seems like one before quitting it.
-
Click the small ‘X’ at the top of the screen and confirm that you want to quit the application.

While Macs have never been lauded as the ideal gaming computer, they are nimble enough to handle some pretty robust gaming capabilities, and they work seamlessly with your PS4 controller, making it a perfect solution for online and lightweight games or selections from Apple Arcade.

