How to control application permissions on Mac
Have you ever noticed that when you install an app on your MacBook, it requests access to things like your camera, microphone, files, or a specific file or drive location? While some permissions are necessary for apps to function properly, others may be excessive or even compromise your privacy.
Knowing how to change permissions on Mac is essential for keeping control over your data and security. But there's no need to panic; we'll walk you through everything you need to know, including how to review app access and other ways to optimize your Mac. So let's get started.
Why managing Mac permissions matters
We touched on it briefly in the intro above, but it deserves another mention because there are lots of apps out there that simply request permissions beyond what they truly need, and it's this that can be the issue; worst-case scenarios can lead to privacy risks or vulnerabilities.
But here are other things to consider:
- Protect your personal data — Limits access to sensitive files, camera, microphone, and location.
- Prevents unauthorized app behavior — Reduces the risk of background tracking or excessive system usage.
- Improves Mac performance — Restricts apps that use unnecessary resources.
- Enhances security — Stops potentially malicious apps from accessing sensitive areas of your system.
Regularly reviewing Mac permissions ensures that only trusted apps can access essential functions, so let's take a look at how you do it.
How to change permissions on Mac
Some apps genuinely need access to your microphone, camera, or storage to function properly. Here's a quick overview:
- Video conferencing apps (Zoom or Microsoft Teams) need access to your camera and microphone.
- File storage apps (Google Drive or Dropbox) require access to Files & Folders to sync documents.
- Photo editing apps (Photoshop or Lightroom) may request permission to access your Photos Library.
While these requests are often legitimate, always review permissions carefully and deny access to apps that don't need it. Apple makes this an easy task; here's how:
- Open System Settings from the main Apple menu.
- Scroll down to Privacy & Security.
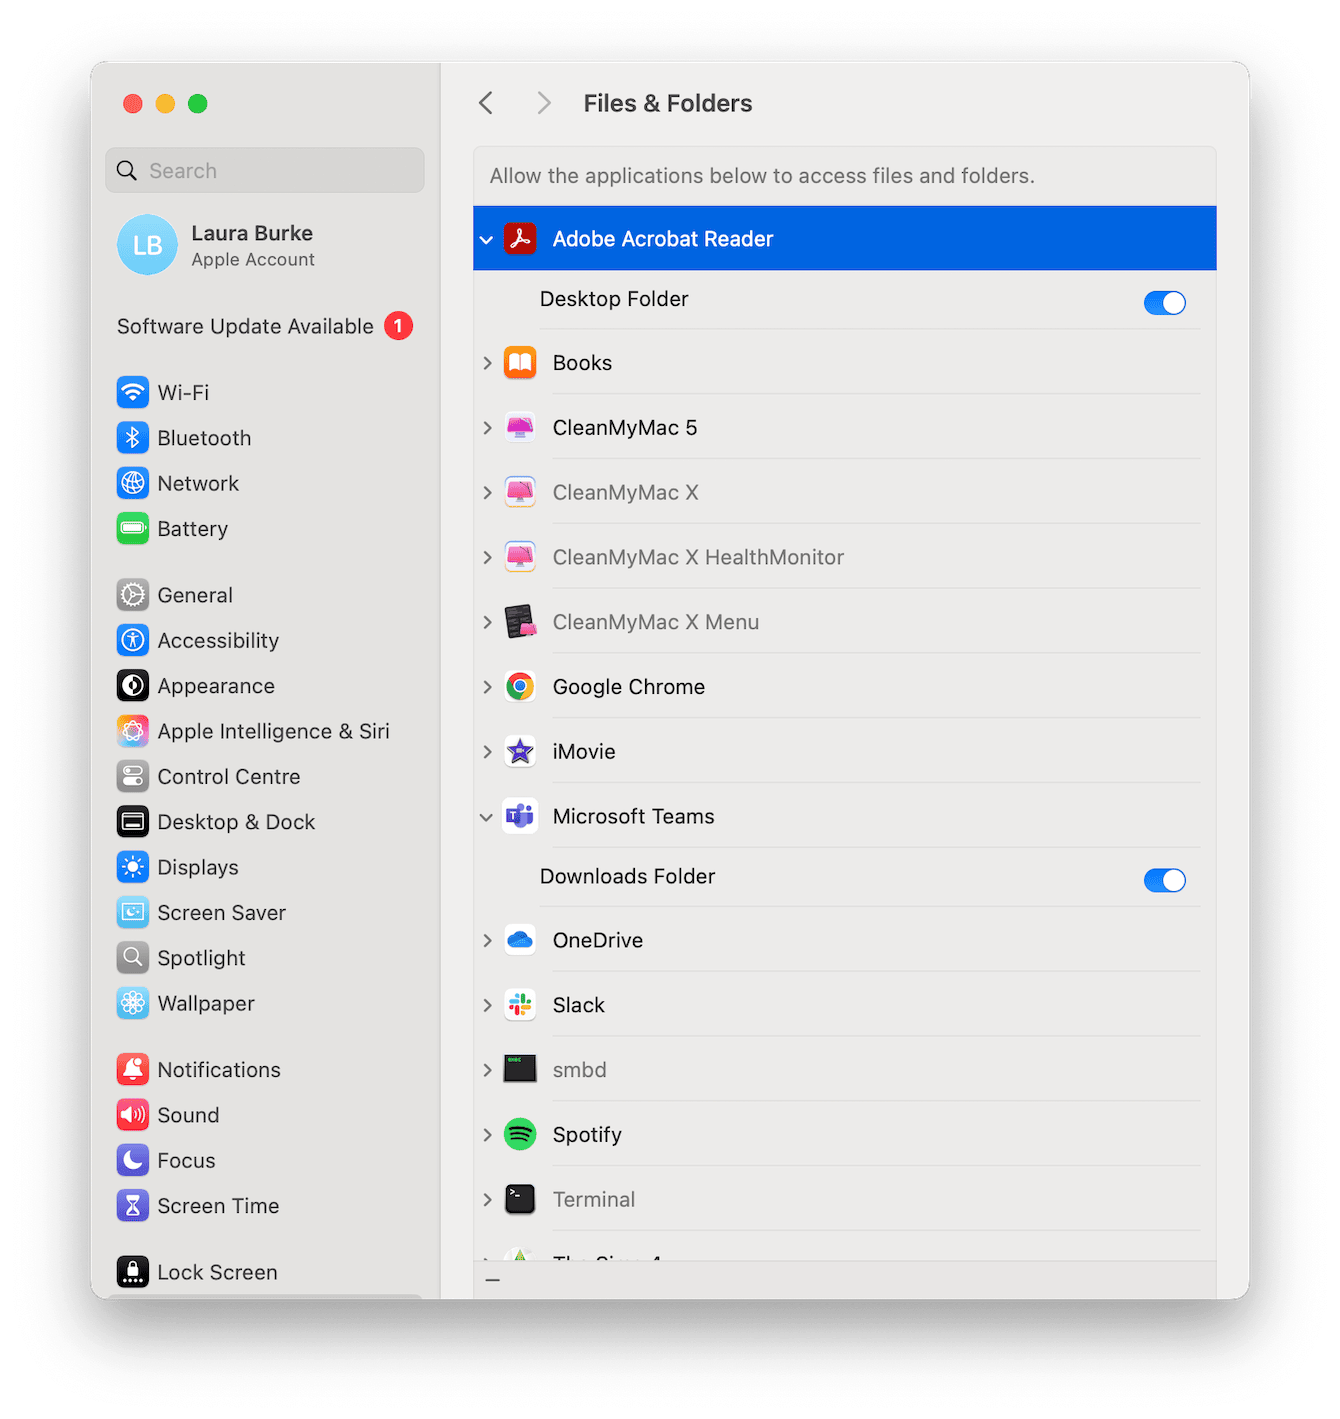
- You'll see a list of categories, such as Camera, Microphone, Files & Folders, and Location Services.
- Click any category to see which apps have access.
Toggle off any app you don't want to grant access to.

Extra permission tip
For Files & Folders, you can change whether an app can access your Documents, Downloads, and a few other locations; just click the expand option next to its name.

Managing full disk access Mac permissions
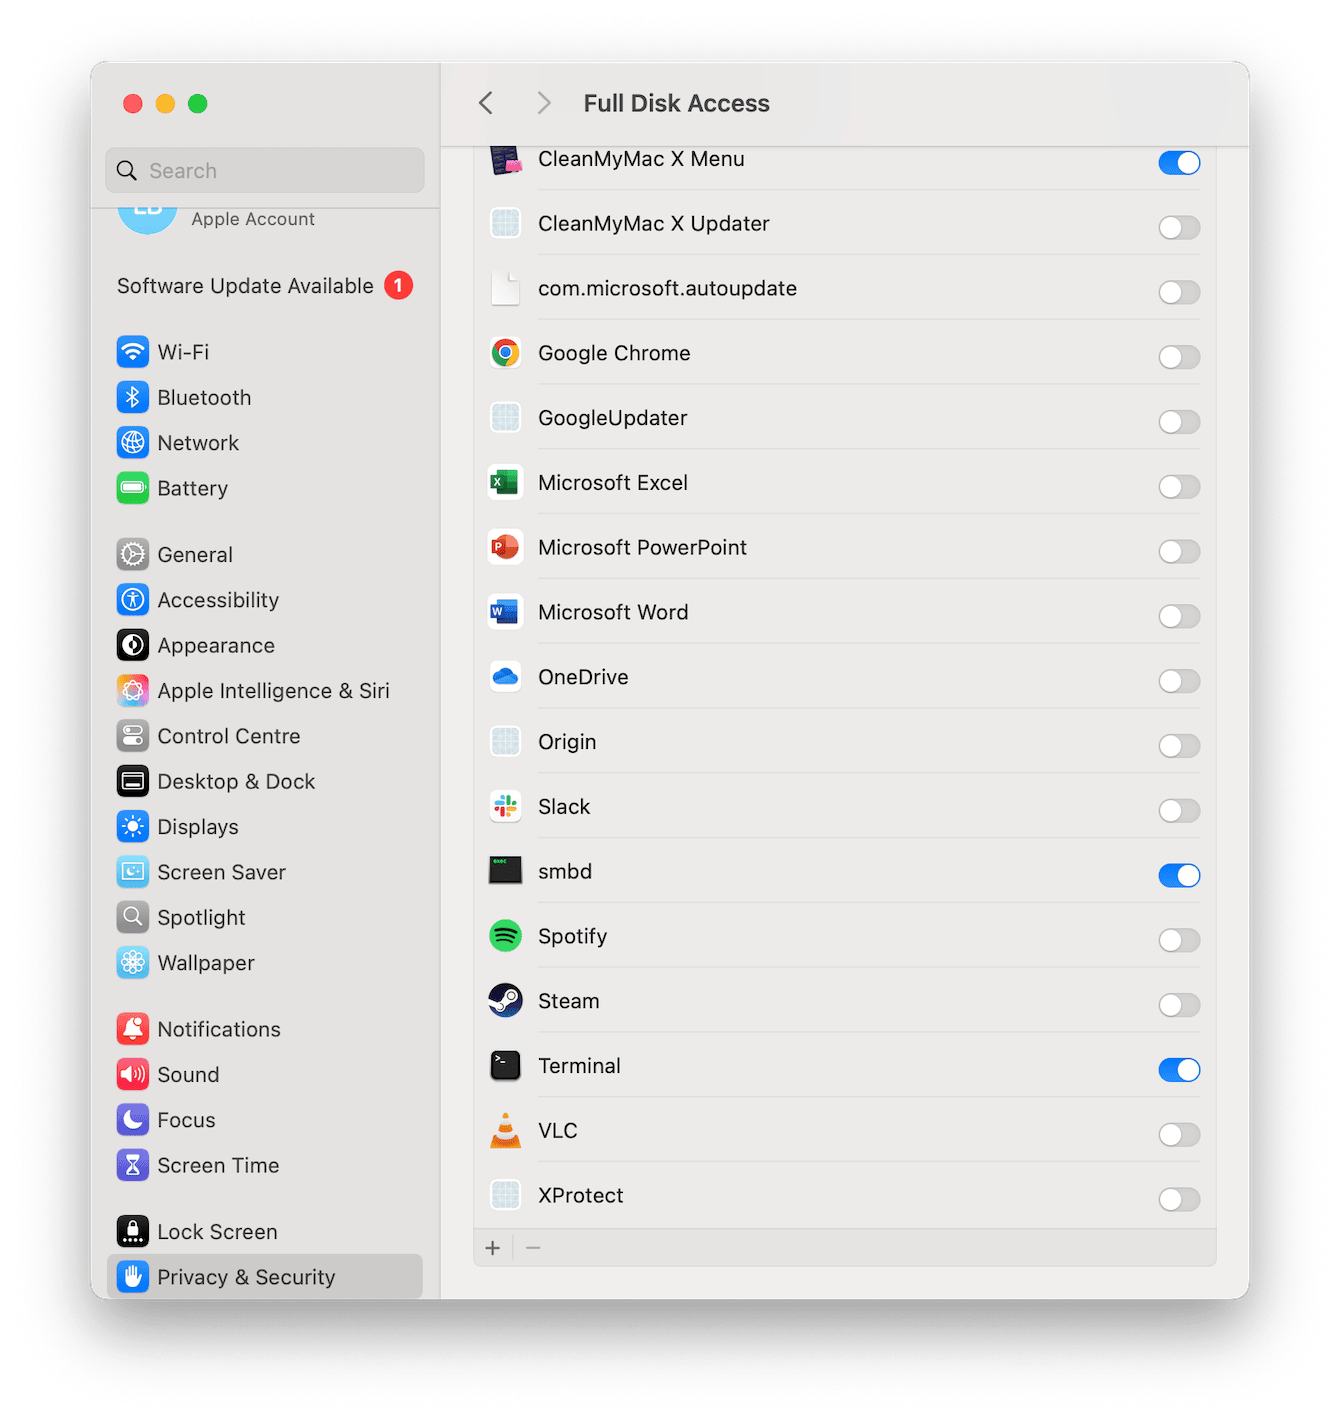
Some apps require Full Disk Access, which, as the name clearly states, grants them access to nearly all files on your Mac when enabled. Make sure only the apps you really need have access to this; here's how:
- Back in System Settings from the main Mac menu, click Privacy & Security.
- Select Full Disk Access.
- Toggle apps on or off as needed.

You might be asked to enter your password to make changes here. Changing permissions on Mac, as you can see, is pretty important, but there are other ways you can optimize your device output and ensure it's running smoothly and securely; let's take a look.
1. Monitor your Mac's output.
Managing permissions helps protect privacy, but Mac performance can still be affected by system clutter, outdated processes, and excessive background tasks. The Smart Care feature from CleanMyMac can help with:
-
Freeing up system space — Removes junk files, caches, and outdated data
-
Checking Mac health — Identifies performance issues and provides solutions
-
Stopping unnecessary background tasks — Reduces resource-heavy processes for a smoother experience
Here's how to use it:
-
Click Smart Care > Scan.
-
Once finished, review items and tasks, select what you want to carry out, and click Run.

Keeping your Mac optimized ensures it remains fast, efficient, and protected.
2. Keep your macOS Updated
Who doesn't want new updates, security fixes for vulnerabilities, and improved system efficiency? Lots of us put updates to the back of our to-do lists, but they're a great way to keep your Mac in good shape; here's how:
-
Open the main Apple menu and go to System Settings > General > Software Update.
-
Check for any new updates.

3. Remove unused apps
Apps you no longer use may still request permissions and slow down performance, so consider removing what you're not using.

Don't forget that deleting old apps is a little more complex than dragging them into your Trash can; make sure you remove all file leftovers and traces. If you need tips on how to do this properly, check out this article called, how to delete programs on a Mac.
4. Check Activity Monitor
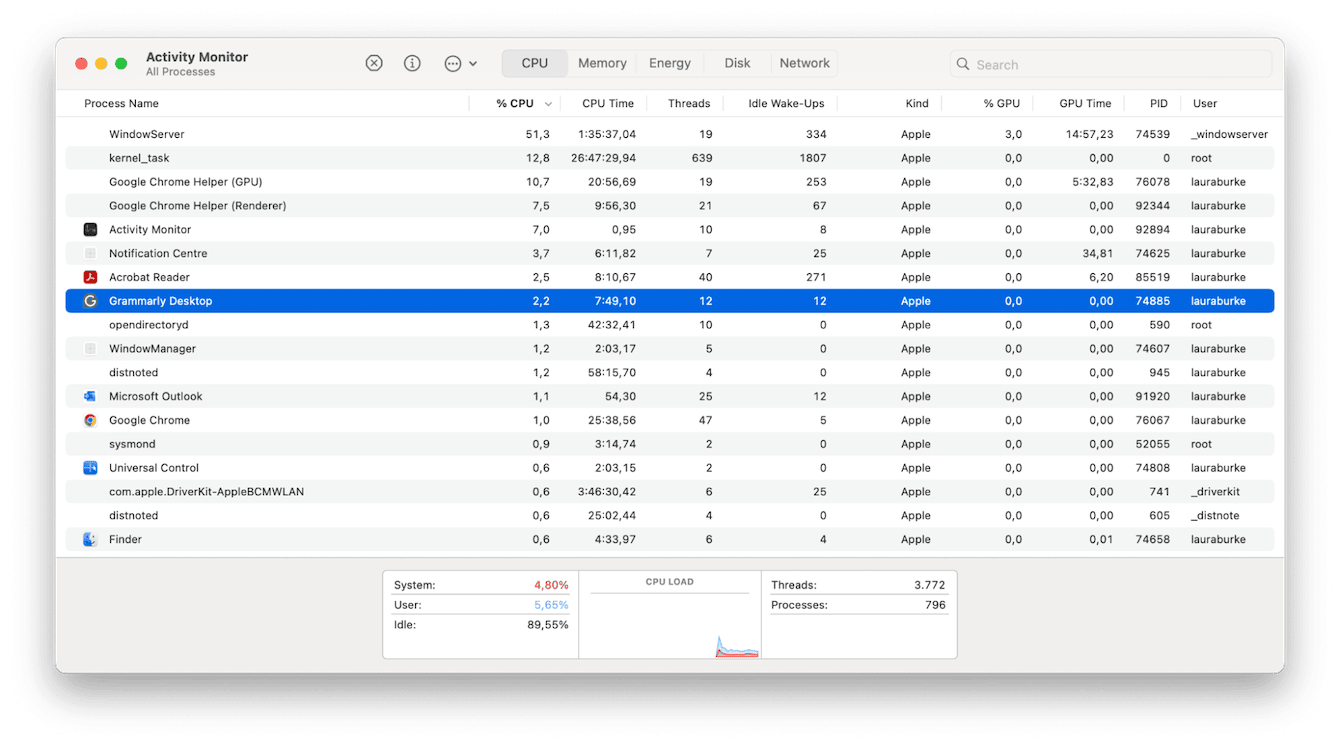
The last tip on the list is to keep an eye on resource-hungry apps and unnecessary background processes, which may be causing your Mac to slow down; the easiest way to do this is to quickly open Activity Monitor and take a look at what is happening on your Mac in real time; here's how:
-
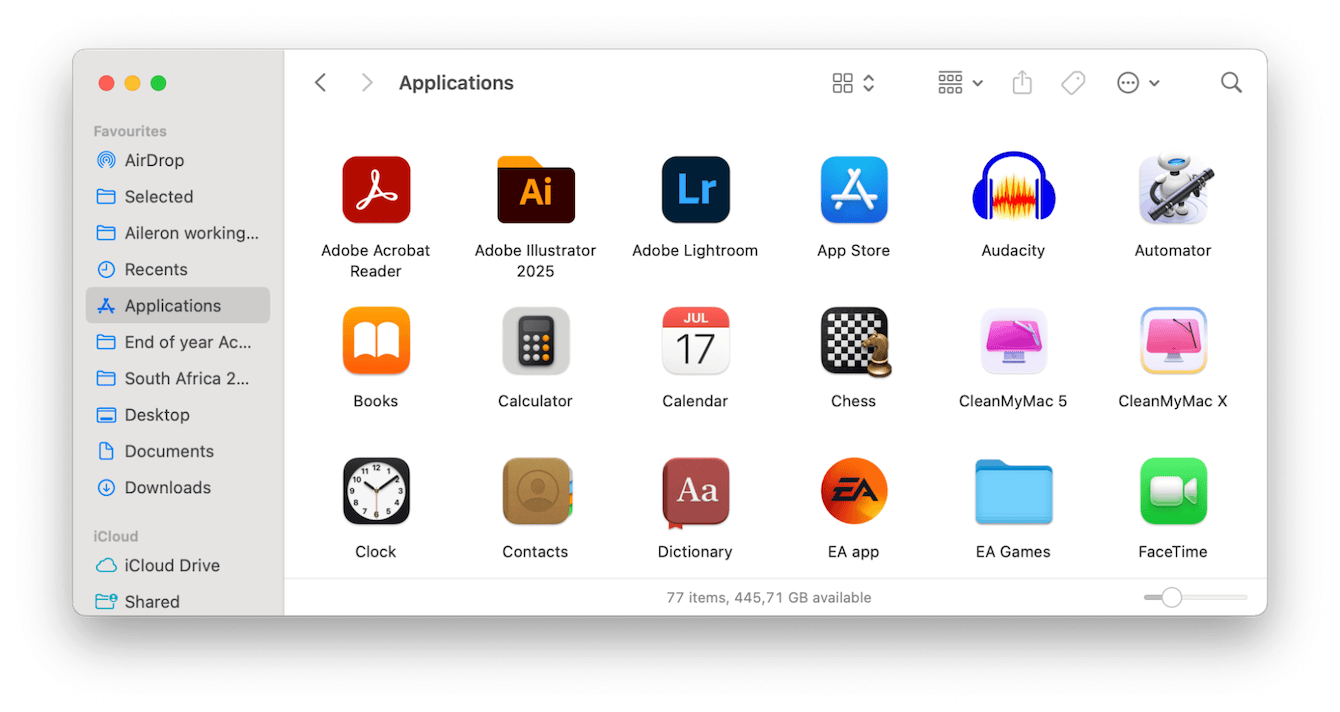
Go to the Finder > Applications > Utilities and open Activity Monitor.
-
Click CPU from the top and take a look at all the processes and open applications.
-
If you see something you don't like or don't need, select it and hit the X button to close it down immediately.

By combining permission management with system optimization, you create a more secure and high-performing MacBook.
Best practices: Change permissions on Mac
By actively managing app permissions, you reduce security risks and keep your Mac running efficiently. When it comes to your data, prevention really is key, so how often should you be monitoring? Let's take a look at a couple of best practices.
-
Review permissions regularly — Apps sometimes update and request new permissions without notice.
-
Be cautious with Full Disk Access — Only allow it for trusted apps that absolutely need it.
-
Limit location tracking — If an app doesn't need your location, disable access to protect your privacy.
Now you know how to change permissions on Mac.

