How to create a txt file on Mac
Of all the formats in which files are created and saved, one that is often overlooked is the humble plain text file, which has many uses and is compatible with more systems than any other file type. It’s so overlooked that even the macOS TextEditor TextEdit no longer uses plain text as its default file type. Does that mean you can no longer create a txt file on your Mac? Not at all! In fact, it’s pretty easy. We’ll show you how to do it in this article.
What is a txt file?
Txt files are one of the oldest file types in computing. They store plain text and can be used for everything from writing a novel or writing code to creating short notes or storing log files and raw data. They are very flexible and have the key advantage over other file types because they don’t store formatting or other additional data, so their file size is much smaller than comparable files. Add to that the fact that they are compatible with just about every system you could use, and maybe it’s time we all started using them more.
Plain text v rich text
When TextEdit stopped using plain text .txt files as its default, it switched to rich text rtf files. The only real difference between the two is that rtf files, as the name suggests, store formatting data as well as the text in the file.
How to create a txt file on your Mac in TextEdit
If you open TextEdit on your Mac and press Command-N to create a new file, you will create a rich text file, not a txt file. We need to make an adjustment first.
-
Go to Applications and open TextEdit.
-
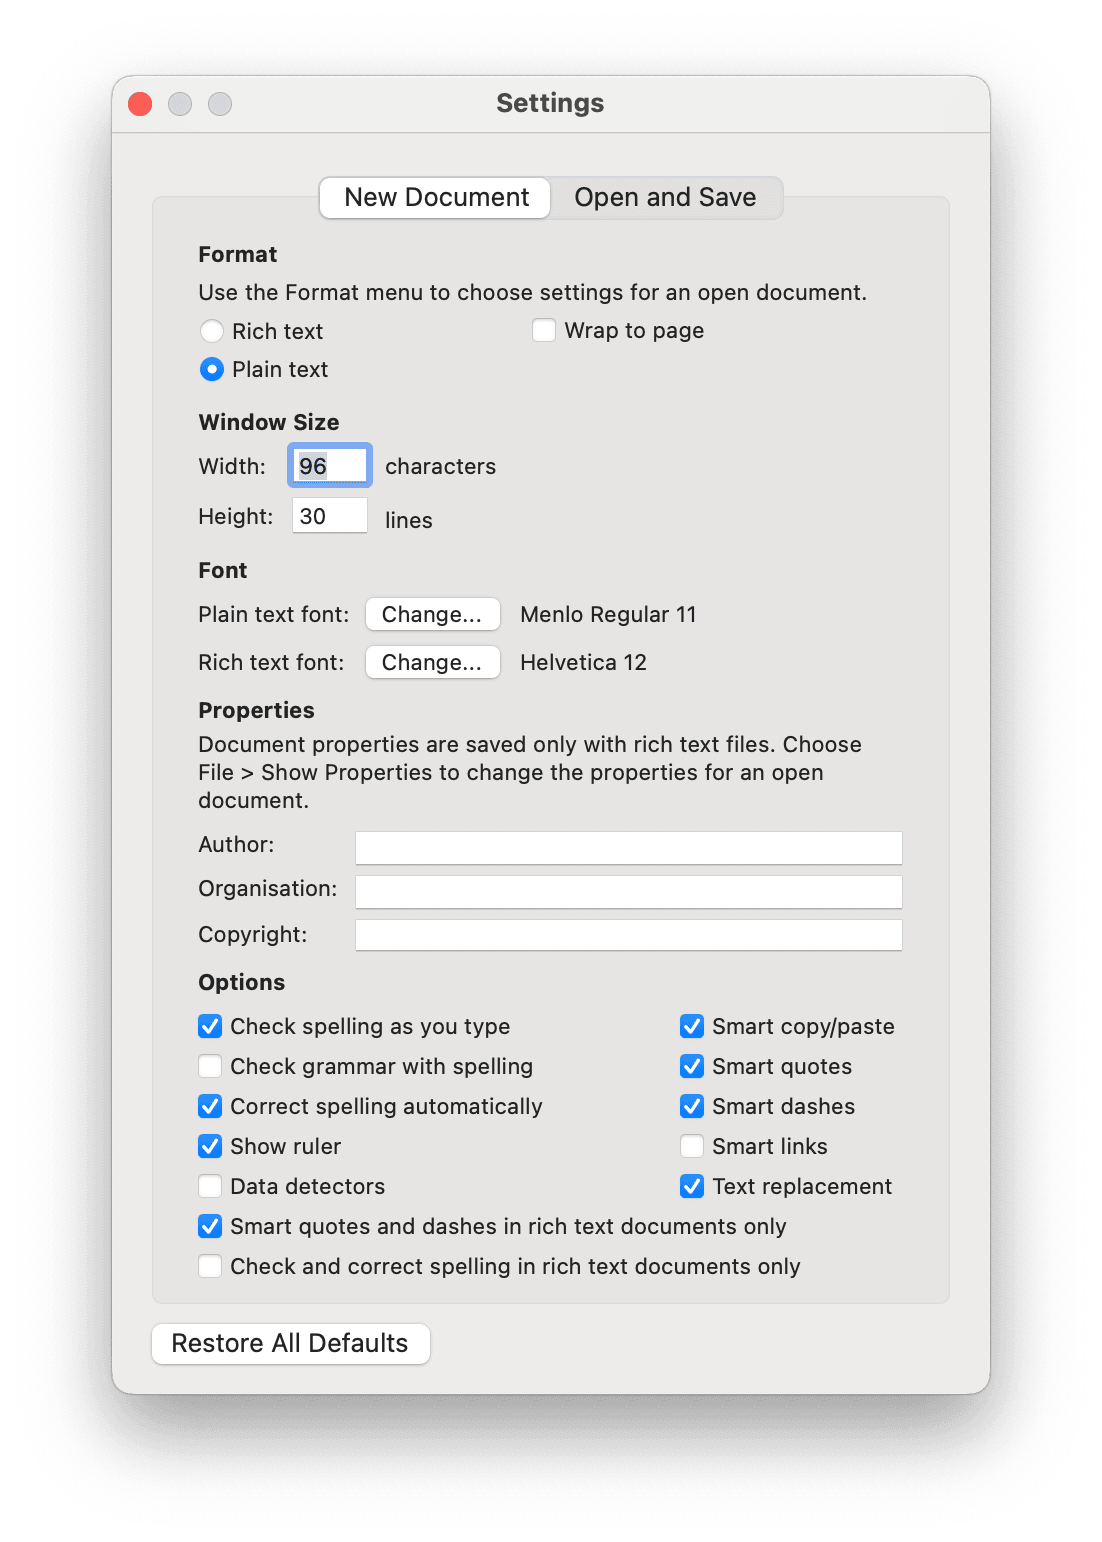
Click on the TextEdit menu in the menu bar and choose Settings.
-
Choose New Document and then check the Plain text radio button.
-
If you want to add the .txt extension to the end of file names, click Open and Save and, under When saving a file, select Add “txt” extension to plain text files.

How to create a txt file in Automator
-
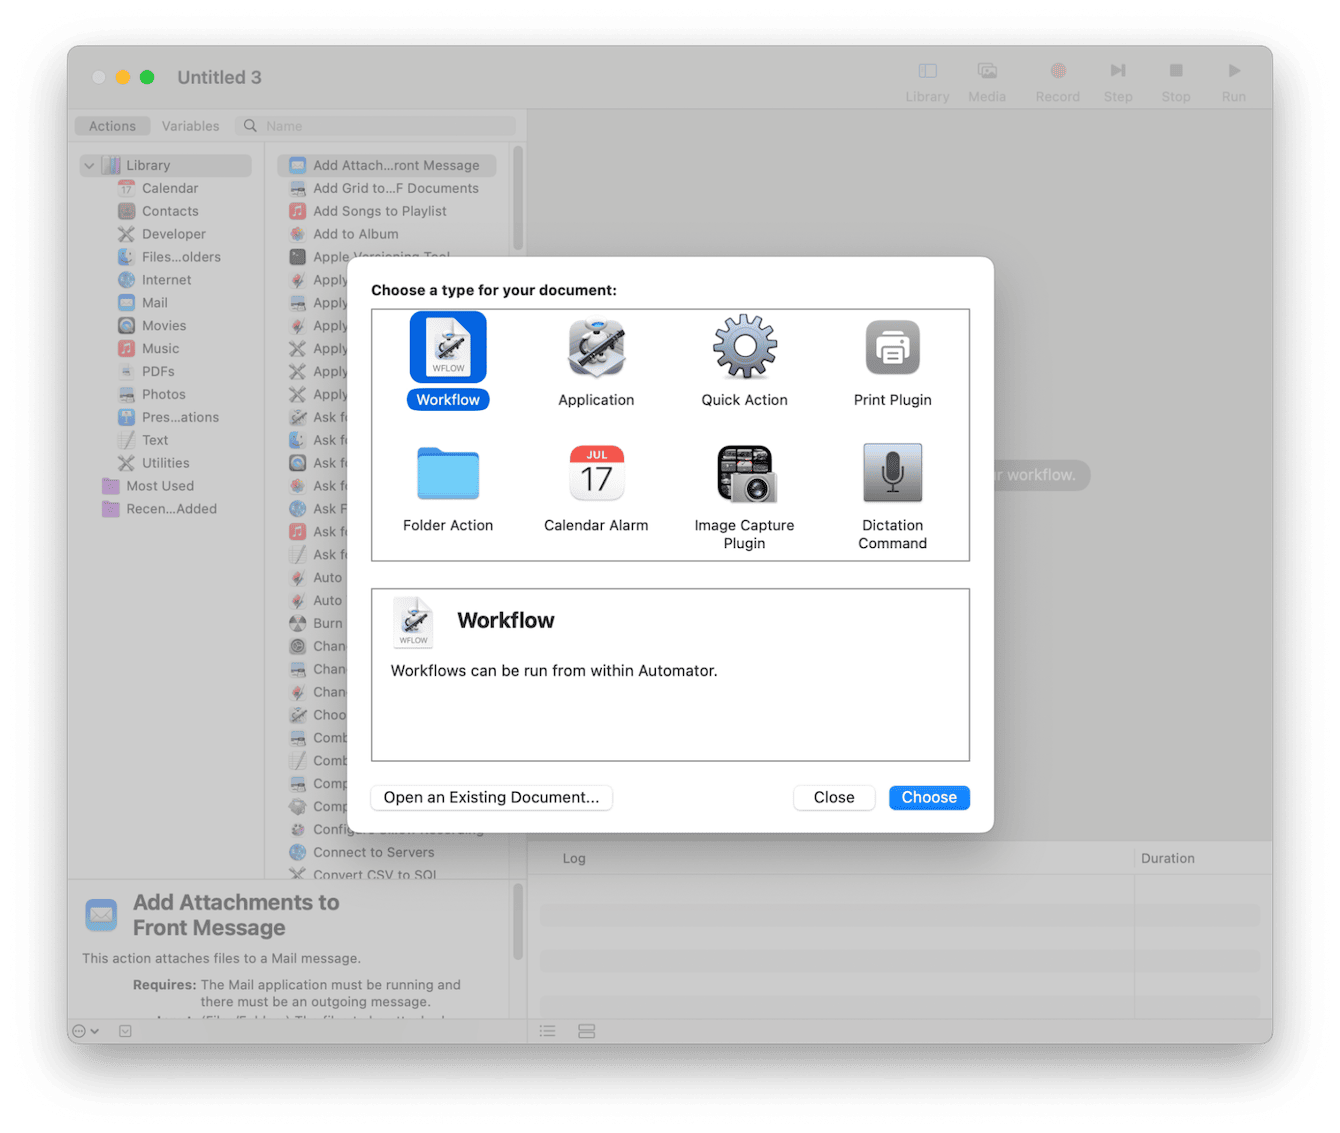
Go to your Applications folder and launch Automator.
-
Click New Document and in the window that opens, choose Quick Action.
-
Use the search box to search for AppleScript and when the action appears, drag it onto the window on the right.
-
Replace {your script goes here} with this line of script: tell application “Finder” to make new file at (the target of the front window) as alias.
-
Click the File menu, choose Save, and give the action a descriptive name. Click Save.
-
Quit Automator.
-
In Finder, navigate to the folder where you want to create the text file.
-
Click the Finder menu and choose Services > [name of your Quick Action]
-
A new txt file with the name ‘untitled’ will be created in the folder. You can open it in TextEdit, or any other application you choose, or rename it in Finder.

How to create a txt file in Shortcuts
-
Go to your Applications folder and double-click Shortcuts to open it.
-
Click File > New Shortcut or click Command-N.
-
Click Shortcut Name and give the shortcut a name.
-
In the search box, type Text (if you can’t see the search box at the top of the right-hand pane, click the rectangle with a ‘+’ in it).
-
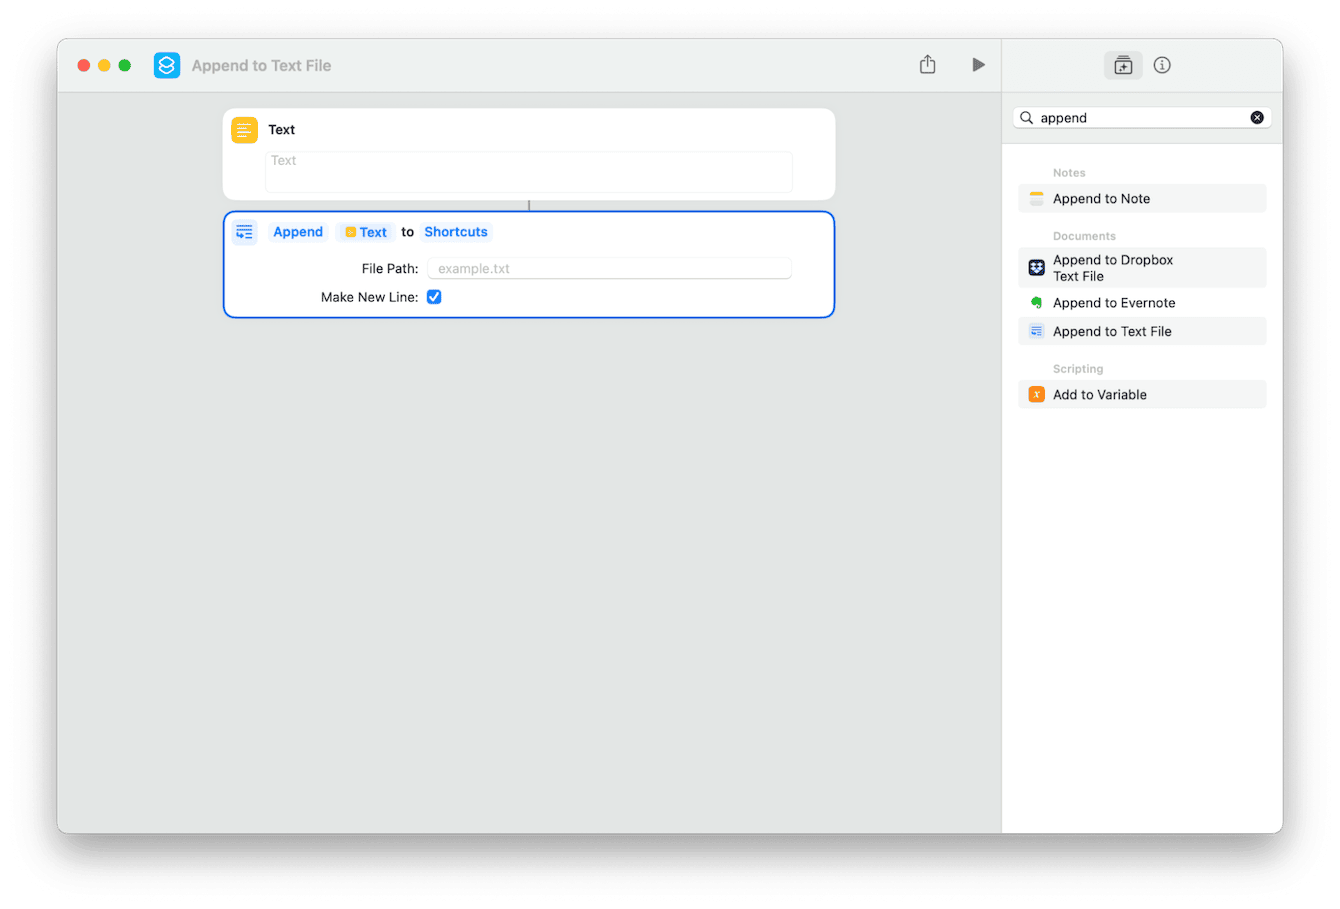
Drag ‘Text’ onto the main window.
-
If there is text you know you always want to be in the file, type it in the window of the text action. If not, leave it blank.
-
Search for append.
-
Drag Append to Text File onto the main window under the Text action. Shortcuts will link the two automatically.
-
If you know you will want to store the new text file in the same folder every time, click Shortcuts at the top of the action, navigate to the folder, and choose Open.
-
If you think you will want to save the file in a different location, Control-click on Shortcuts and choose Ask each time.
-
Type a name for the file in the File path box.
-
Click the ‘i’ above the right-hand sidebar.
-
Choose Details and check the box next to the method you want to use to activate the shortcut. You can also click Add Keyboard Shortcut to create a keyboard shortcut to create a new text file.
-
Quit Shortcuts.
-
You can now use the method you selected in step 13 to create the text file.

How to quickly remove junk and unneeded files on your Mac
If you create lots of files using automated methods, you’ll quickly end up with lots of files taking up space. But it’s not just those files that will be taking up room on your startup disk. Junk files like old cache and settings files, temporary files that were supposed to be deleted automatically but never were, and leftover files from apps that were not uninstalled properly to name but three, can consume several gigabytes of space. They can also slow your Mac down by conflicting with other files. Keeping on top of junk files manually is incredibly difficult, but you can do it very easily using CleanMyMac’s Smart Scan module. It scans your Mac looking for junk files, along with malware and opportunities to optimize your Mac, and then presents its results to you. You can then decide to follow its recommendations with one click or decide for yourself what to remove and what to keep. You can download CleanMyMac for free here.

Txt files are no longer as widely used as they once were, but they remain useful for all kinds of things. Follow the steps above to create a txt file on your Mac manually or use one of the automated methods in Automator or Shortcuts.

