How to create a zip file on your Mac
We are all very used to sharing files from our Macs to other devices or with friends and family members in all kinds of ways. Where in the past, email was the main way of sending and receiving files, now there are lots of options from cloud storage to messaging apps, social media, and tools like Apple’s AirDrop. Most of the time, when we need to share files, it’s just a case of choosing the file we want to share and then using the Share button to pick a method and a recipient. However, there may be occasions when you need to share lots of files at once. Those files may be quite large together, and so take a while to upload and download. They may also contain sensitive data and so should, ideally, be secured in transit. In both those cases, the answer is to compress the files in an archive. And most commonly, that means a zip file. In this article, we’ll show you how to create a zip file on Mac.
What is a zip file?
A zip file, also known as a zip archive, is a collection of files that have been ‘zipped up’. That is, they’ve been put together in a folder, and that folder has been compressed and turned into a single file. The zip file can then be encrypted with a password to keep it secure. Once the zip file has been created, you can upload it to an FTP server or cloud storage service, email it, or send it as an attachment to a message. It will remain zipped in transit, and when the recipient receives or downloads it, they can then unzip it and access the files inside.
Why zip a file on Mac?
There are a number of reasons you might want to create a zip file on your Mac:
-
You want to transfer lots of files that are quite large.
-
You want to password-protect the files you’re sending.
-
The service you are using to transport the files doesn’t allow regular folders to be uploaded or downloaded.
How to create a zip file on your Mac
The easiest way to create a zip file is to use the built-in Archive Utility. Here’s how to compress file on Mac:
-
Open a new Finder window.
-
Select the files you want to include in the zip file.
-
Right-click or Control-click the selected files.
-
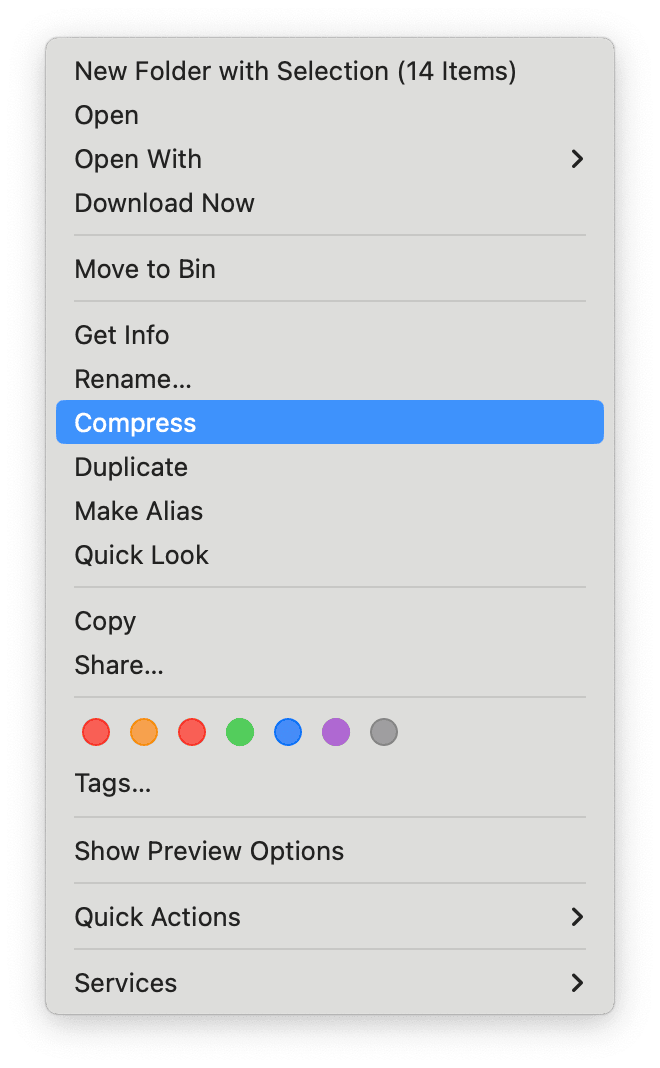
Choose Compress from the contextual menu.

Archive Utility will create a zip file called ‘Archive’ and save it in the same folder as the files you selected. You can then rename the zip file by clicking its name, pressing Return, and typing a new name, or by selecting it, pressing Command-I, and typing a new name in the Get Info window.
You can also create a zip file from a folder of files by launching Archive Utility and doing it from there.
-
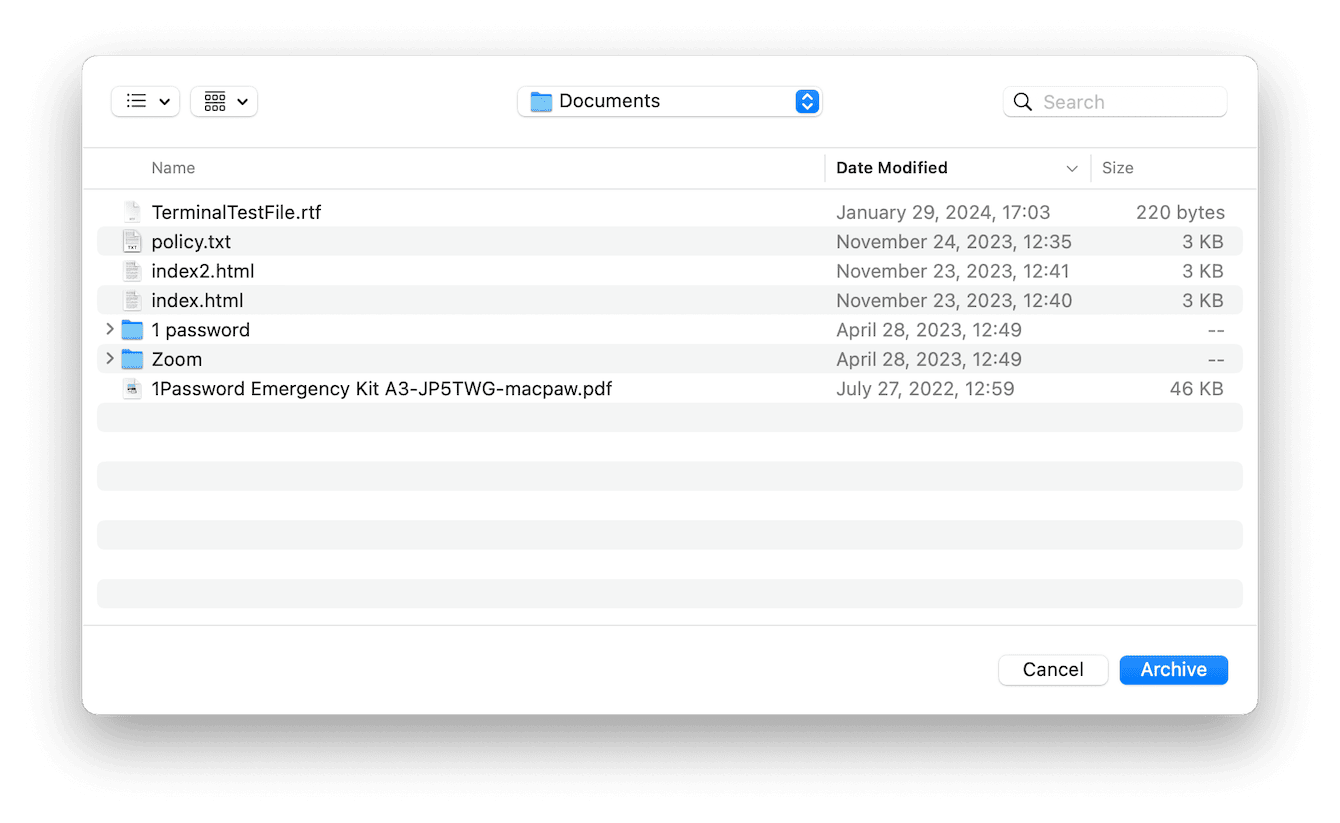
Go to Applications > Utilities and open Archive Utility.
-
Choose File > Create Archive or press Command-K.
-
Choose the folder you want to create a zip file from.
-
Click Archive.

Again, the zip file will be given the name ‘Archive’ so you will need to change it in Finder.
Sadly, Archive Utility doesn’t allow you to encrypt a zip file and protect it with a password. To do that, you will need to use a third-party archiving tool. There are several available, and most are very reasonably priced. In addition to allowing you to encrypt and password-protect archives, most also have additional features, such as the ability to drag and drop files onto a window to add them to an archive or preview the contents of a zip file without extracting it first.
How to identify large and old files on your Mac
One of the features of zip files is that they tend to be quite large. That’s because the archive they contain usually has lots of files in it. And one of the reasons for creating zip files is to allow large files to be sent more easily. Even though they are compressed, zip files can only reduce the overall size of files by a limited amount.
Another thing with zip files is that people often keep them on their Mac for a long time. Once you’ve created a zip file and sent it, there’s no reason to keep it on your Mac. After all, the files inside are just duplicates of files you already have. However, many people keep zip files just in case they need them. Or they just don’t get around to putting them in the Trash. That means they can end up taking up lots of space on your Mac.
One way to free up that space is to scan your Mac for large and old files. That will show up zip archives that have been on your Mac for a long time and that you probably don’t need. The easiest way to do that is to use CleanMyMac’s Large & Old Files module. It scans your Mac, looking for large and old files, and then presents them to you. You can then filter the results by file type – so you could choose to display only zip archives – and quickly delete the ones you no longer need. You can download CleanMyMac for free here and try it for yourself.

Zip archives are a very useful way of packaging up files so you can store them safely, transfer them to someone else, password-protect them, or even make them available on a website so others can download them. Creating them is very easy, too. Follow the steps above to create a zip file on your Mac.

