How to delete pics on Mac
Attempting to organize the files on your computer is no small feat. If you’re anything like me it takes hours to find the motivation to get started. But the truth is digital clutter is not only a waste of storage space, but it can also slow down your computer.
The most common culprit of digital clutter is your photo library. Think about how many pictures you take to get the perfect angle. Or catch the perfect lighting. But don’t worry you’ve found the right article. Keep reading to find out the best ways to both manually and automatically delete photos from your Mac.
How to remove duplicate photos on Mac
Duplicate photos happen all the time. And that can be caused by a number of things. But whatever the reason, cleaning them up can be a major headache.
Thankfully, you can use CleanMyMac to scan your Mac and quickly get rid of those duplicate pictures. Once you start your free CleanMyMac trial, this is all you have to do:
-
Open CleanMyMac.
-
Go to My Clutter from the sidebar and click Scan. Note that your home folder is selected by default, but you can choose another location for the scan.
-
When the scan is complete, click Review All Files > Duplicates.
-
You can now review all groups of duplicates, select pics for removal, and click Remove.

It’s important to keep in mind that CleanMyMac scans for all duplicate and similar files, not just photos. So, if you’re scanning any folder other than the Pictures Folder, it’s more than likely that the app will also find other file types, like music, archives, and folders.
How to remove multiple photos on Mac
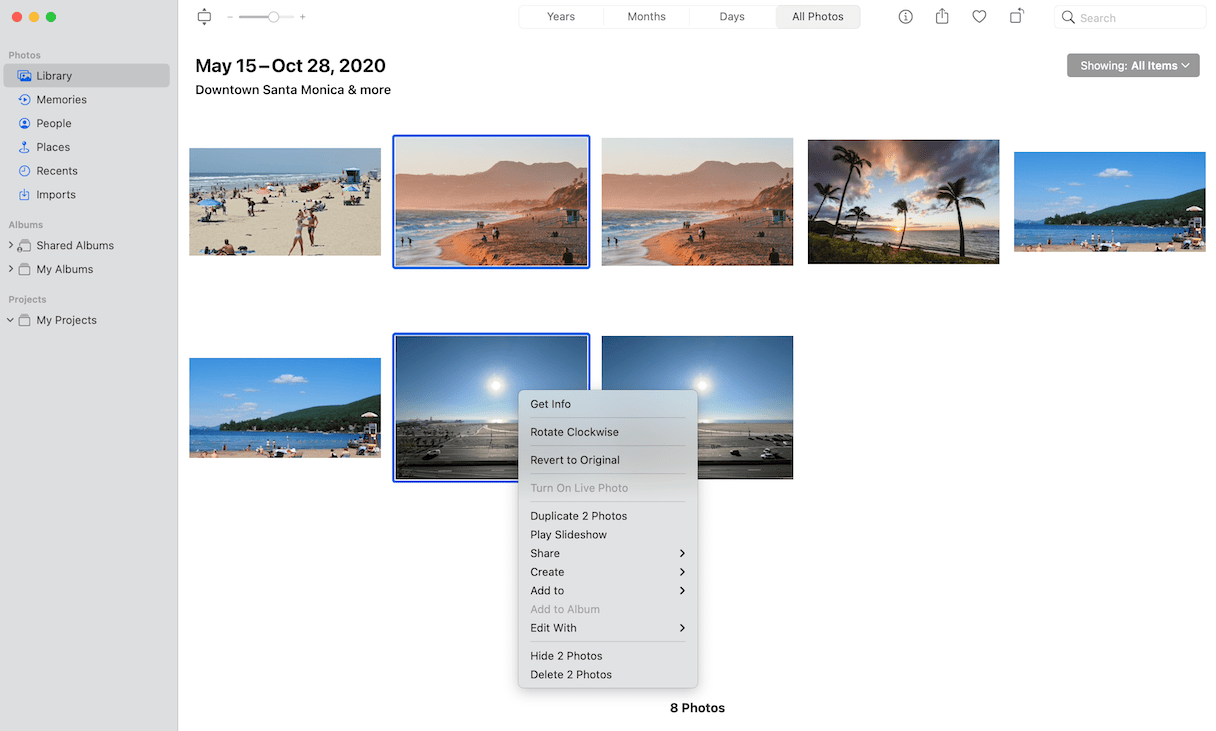
The process for deleting multiple photos at one time is the same whether you’re doing it in Finder, iPhoto or the Photos app. Before we get into the steps for removing multiple photos, it’s important to know how to select multiple files. So, assuming you’re totally new to macOS, or just need a quick refresher, there are two ways to do this:
-
Holding down the Shift key. When you click on a file, hold Shift, and then click on another file, every file between those two are selected.
-
Holding down the Command key. Clicking on a file, hold Command, and then click on another file will only select those two files.
Again, these steps work whether you’re in Finder or an app like iPhoto or Photos.
-
Find the photos you want to delete.
-
Use one of the methods above to select the pictures.
-
Right-click or hold down Control and click on one of the files.
-
Click Move to Trash.

As that last step promises, your files are just moved to the Trash now. Which means even though your folders are more organized now, the files are still taking up space on your hard drive. To free up that space, right-click or hold Control and click on the Trash icon in your dock. Then, click Empty Trash.
How to remove all photos on Mac
If you don’t want to waste any time manually going through your pictures, and would rather just delete them all, you can use Smart Folders to help. But, be advised that anytime you mass remove images like this, you might also get rid of pictures and icons used by apps you have installed. Which in turn, may cause them to not work right. So proceed with caution:
-
Open Finder.
-
Click File > New Smart Folder.
-
Select “This Mac”.
-
Click the + button.
-
Set the drop-down menus to “Kind” and “Image”.
-
Select all the photos and drag them to the Trash icon in your dock.
How to delete photos from Mac, but not iCloud
Now, if you want to delete pictures from your Mac only. But, you still want them to live on iCloud, don’t worry. Before you start removing pictures, just follow these steps:
-
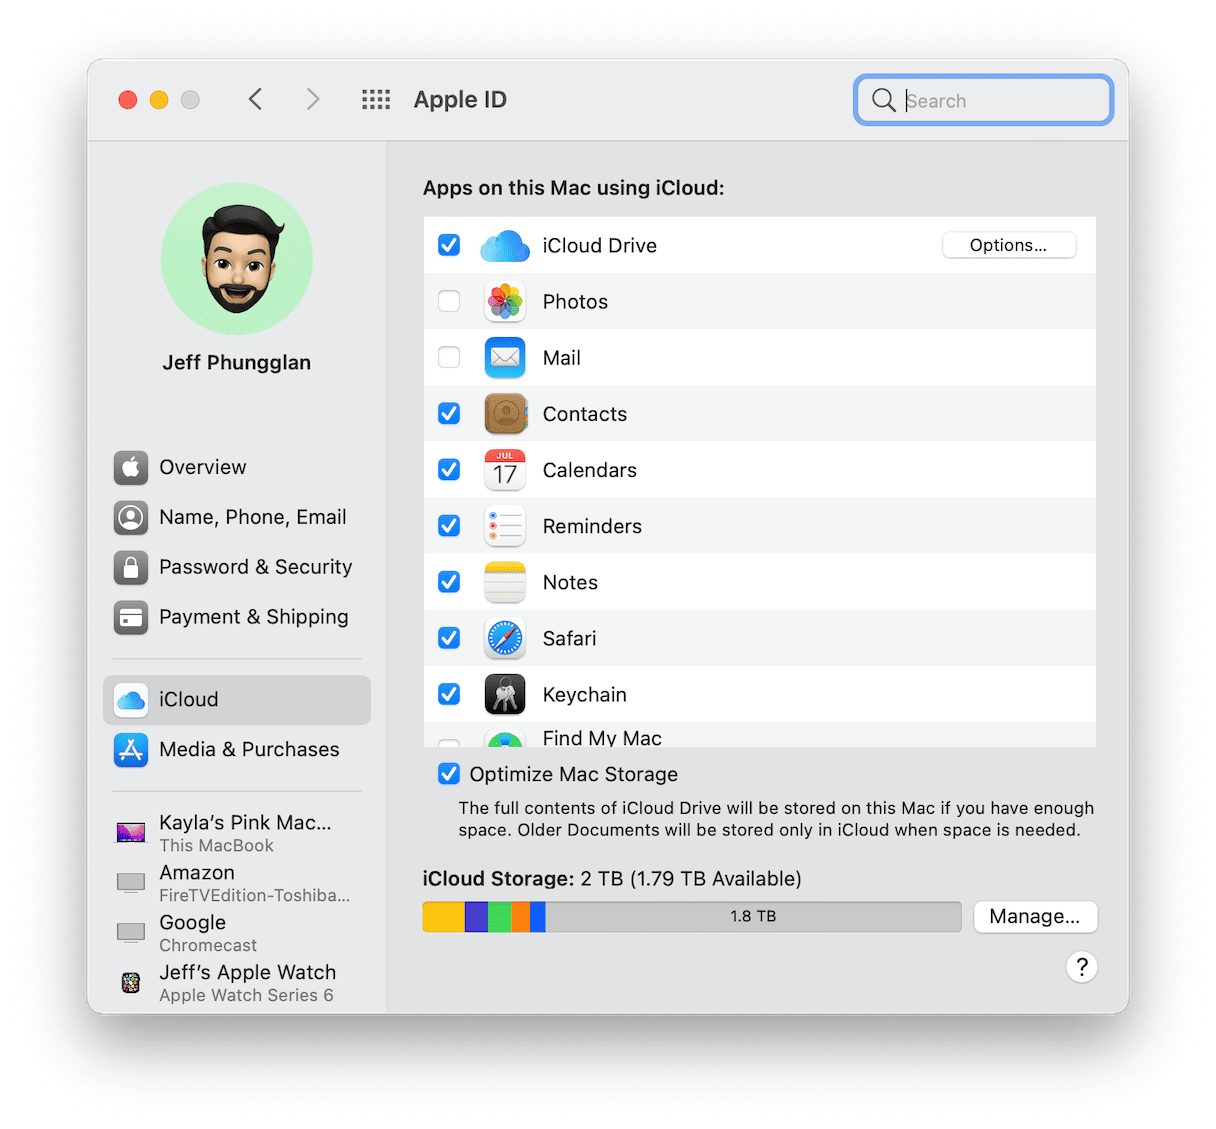
Open System Preferences.
-
Click Apple ID > iCloud.
-
Untick Photos.

And that’s it. The pictures on your computer only live on your hard drive now. So, whichever images you delete will only be removed from your Mac and not iCloud.
Whether you decide to manually remove pictures or let CleanMyMac do the job for you, deleting photos on your Mac is a great place to start getting your digital life organized. And hopefully, after reading this article you feel better prepared.

