How to delete saved passwords on Mac
There could be a few understandable reasons you may want to know how to view saved passwords on a Mac. From forgetting your many password combinations to increasing your data privacy, whatever your reason, we've got all the tips you need.
Where are passwords stored on Mac?
Whenever you first log into a website, network, app, or server, create a new account, or update an old password, your Mac will ask to remember or save your password using Keychain Access, a password management app from Apple.
Keychains can contain several types of data, including:
-
Passwords
-
Wireless networks
-
Certificates
-
Private keys
-
Secure notes
Keychain is a handy tool if, like me, you've got a thousand different passwords that you can't remember.
But if you have a shared device, or maybe you're selling your Mac or lending it to a colleague, then you might want to know how to view saved passwords on a Mac to see what information could be at risk.
Our private information is constantly at threat; it's always better to be proactive when it comes to securing your data.
Keychain is great for saving you the hassle of entering credentials every time you log in to an app or website. But keeping all of your data consolidated in one place leaves many Mac users uncomfortable, and like me, they prefer to know where and how to delete their saved passwords.
How to delete saved passwords on Mac
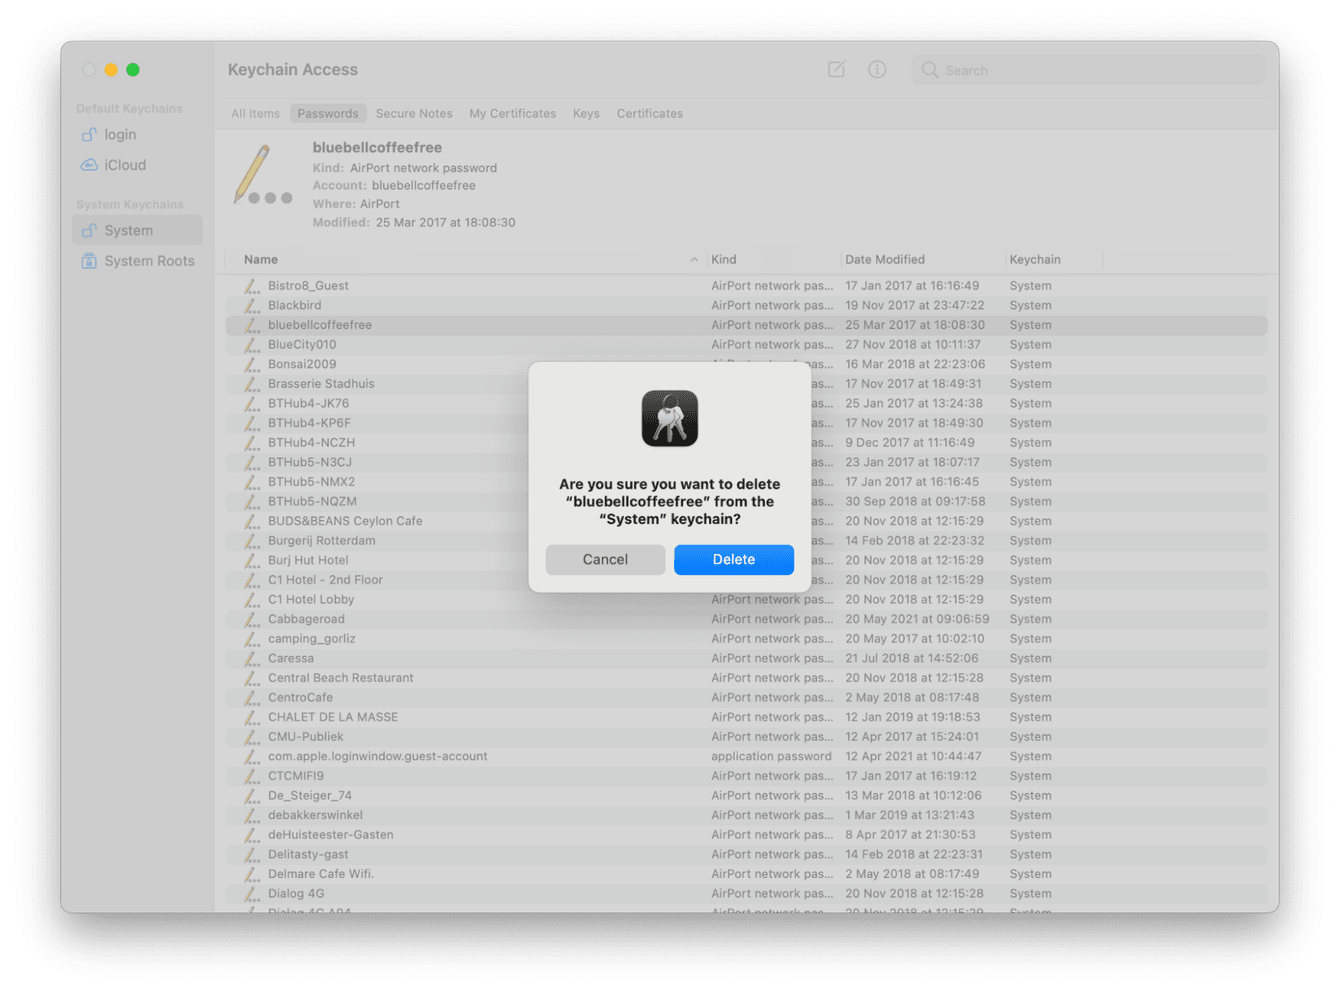
Thankfully, it's not complicated, but you will need system admin access to make and save your keychain changes. Here's how to delete your saved passwords on your Mac:
-
Open the Keychain Access app.
-
Select Passwords from the top and scroll through to find the password you want to remove.
-
Once selected, right-click and press Delete.
-
You might be prompted to enter your system password.
To delete multiple passwords:
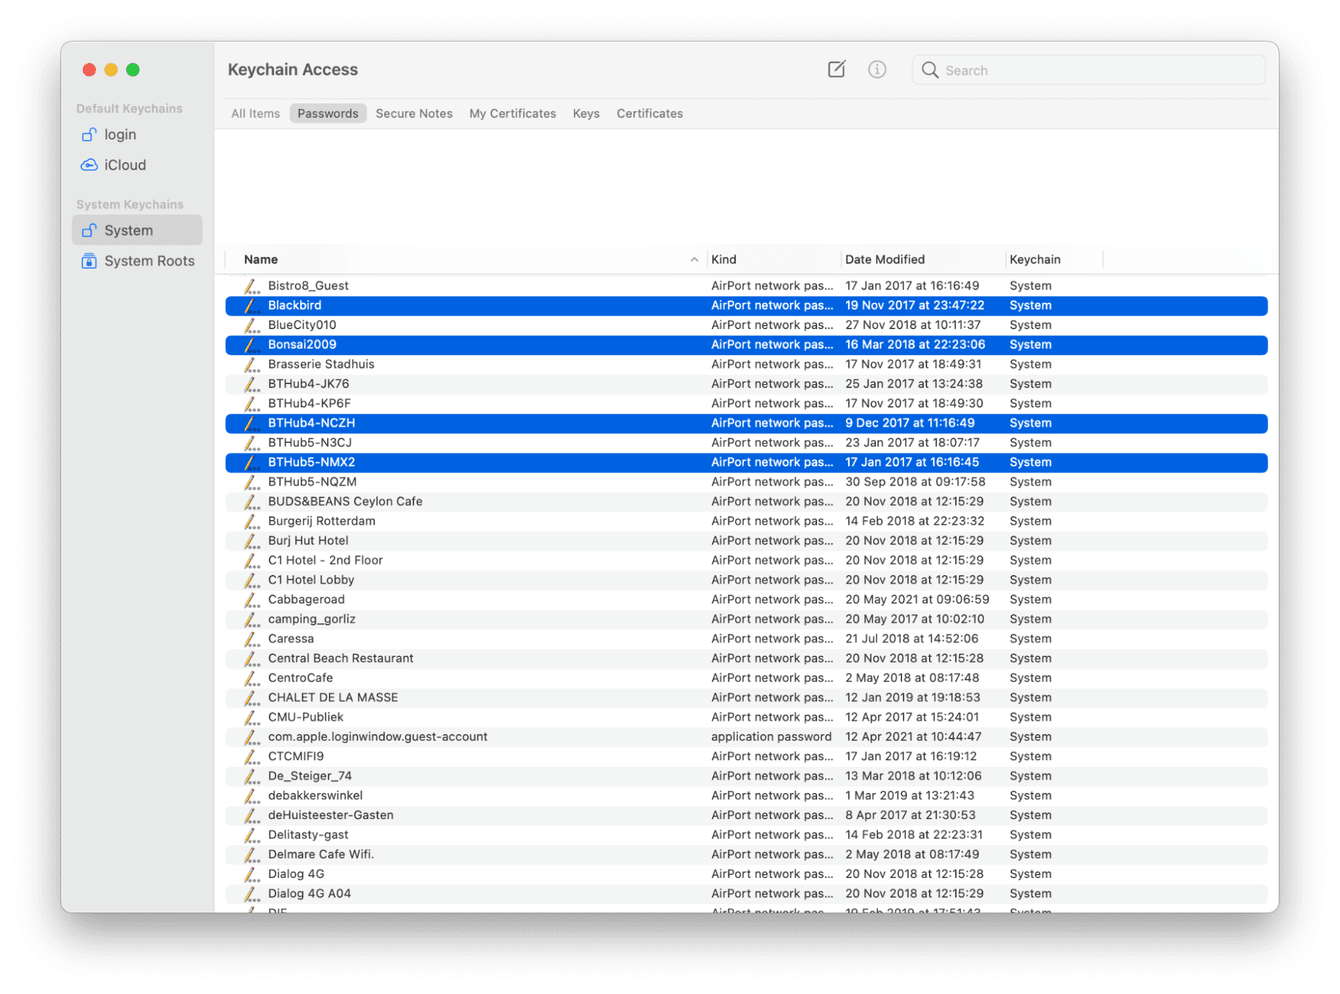
In the Keychain Access app, press and hold down Command while selecting multiple passwords, then right-click and press Delete.
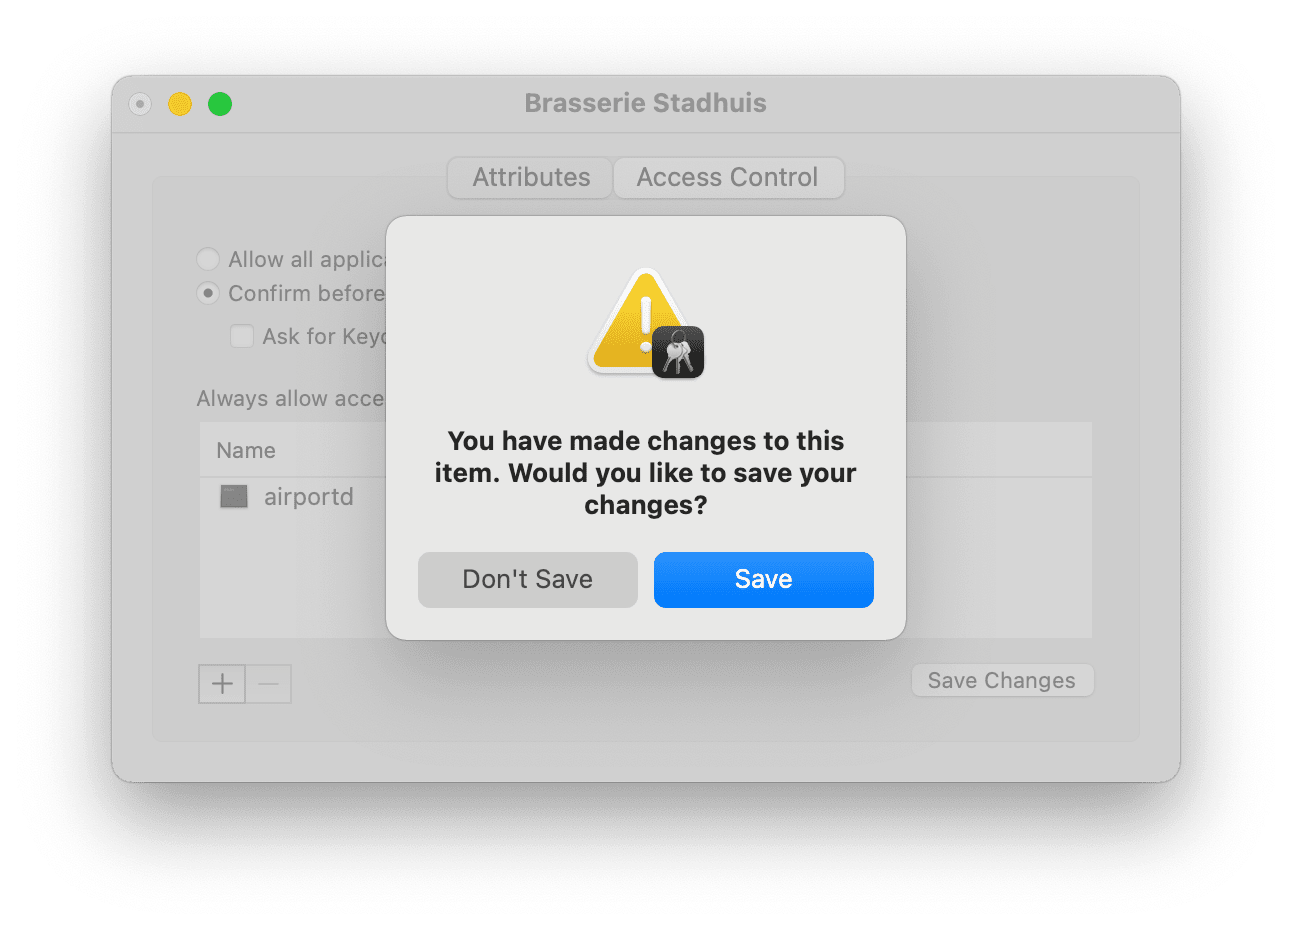
Here's how to delete specific details from a saved password:
-
In the Keychain Access app, locate the password you want to modify.
-
Double-click until the pop-up window appears.
-
Here you can change details or the password itself.
-
You might be prompted for your system password to modify.
-
Select Save Changes to update.
If you couldn't find the password you were looking for, it could be saved in another password manager like Safari or Chrome. I'll show you how to delete those, too, in just a moment.
Other ways to manage your privacy on Mac
If seeing all of that saved data in your Keychain made you feel a bit vulnerable, you might want to consider upping your privacy measures. I like to use CleanMyMac to handle my privacy matters.
They have a great Privacy module that can remove your browsing history and traces of your offline and online activity in just a matter of clicks. Here's how you can quickly bump up your privacy measures:

-
Launch the app — download the free version here.
-
Select Privacy from the sidebar and press Scan.
-
Select items to manage, from application permissions to browser cookies, passwords, and history.
-
Once selected, press Remove.
This is my favorite way to manage my privacy items because everything is all in one place, no need to head over into my browsers; I can do it all from here. Easy!
How to delete passwords in your browser
If you'd rather manage your passwords individually in your browsers, that's also easy to do; let's take a look.
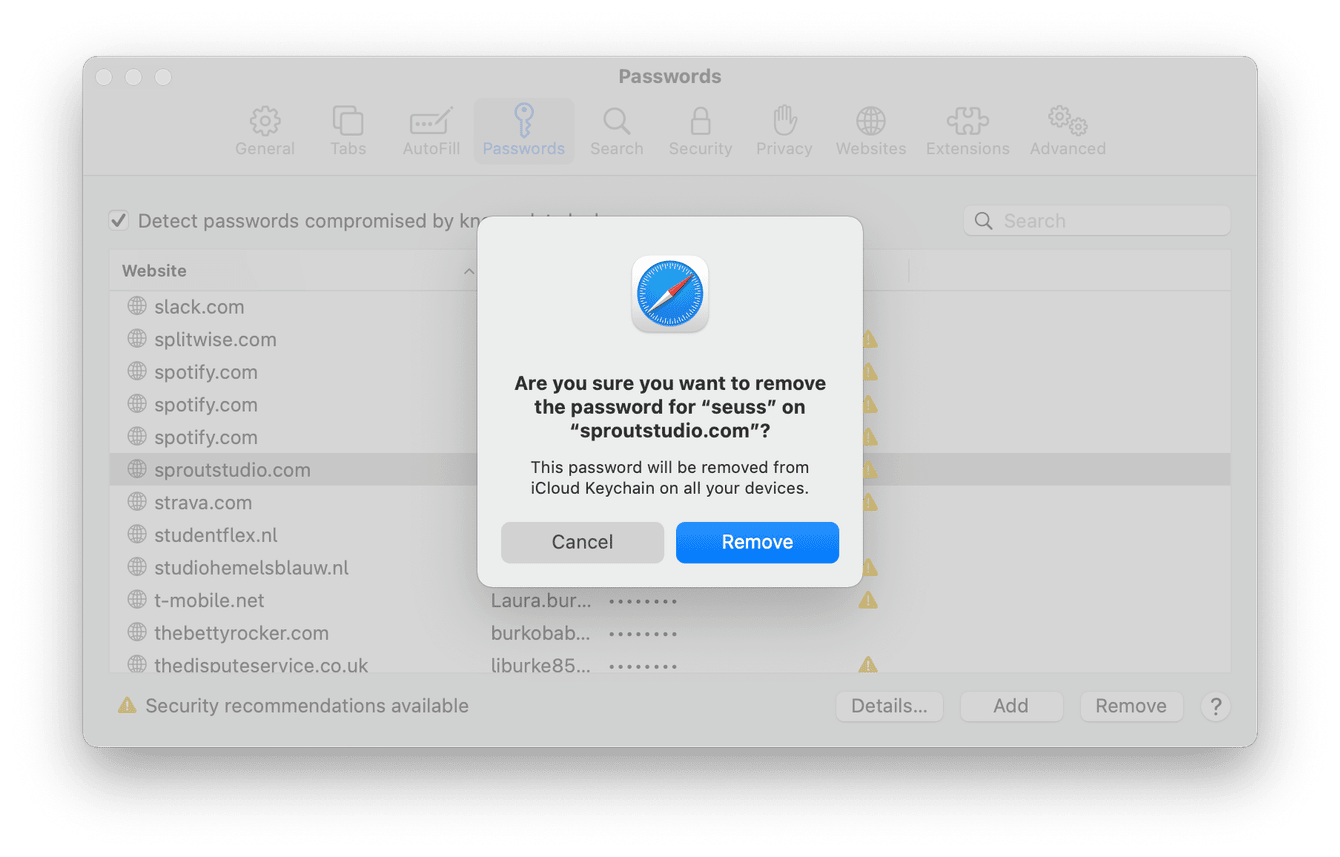
Clear passwords in Safari
-
Open Safari and select the Safari menu > Preferences > Passwords.
-
You might be prompted to enter your system password.
-
Select the passwords you wish to delete and press Remove.
Delete Chrome passwords
-
Open Chrome and enter this line into the address bar: chrome://settings/autofill
-
Select passwords.
-
Locate the password you want to delete, press the three dots, and select Delete.
Now you know how to view and delete passwords in your browser, let's take a look at how to delete a Mac keychain completely.
How to fully disable Keychain on Mac
Earlier in the article, I mentioned that you might want to delete passwords if you share your Mac or device;. However, it's not possible to fully disable the Keychain, there are a few steps you can follow to reduce keychain privacy risks.
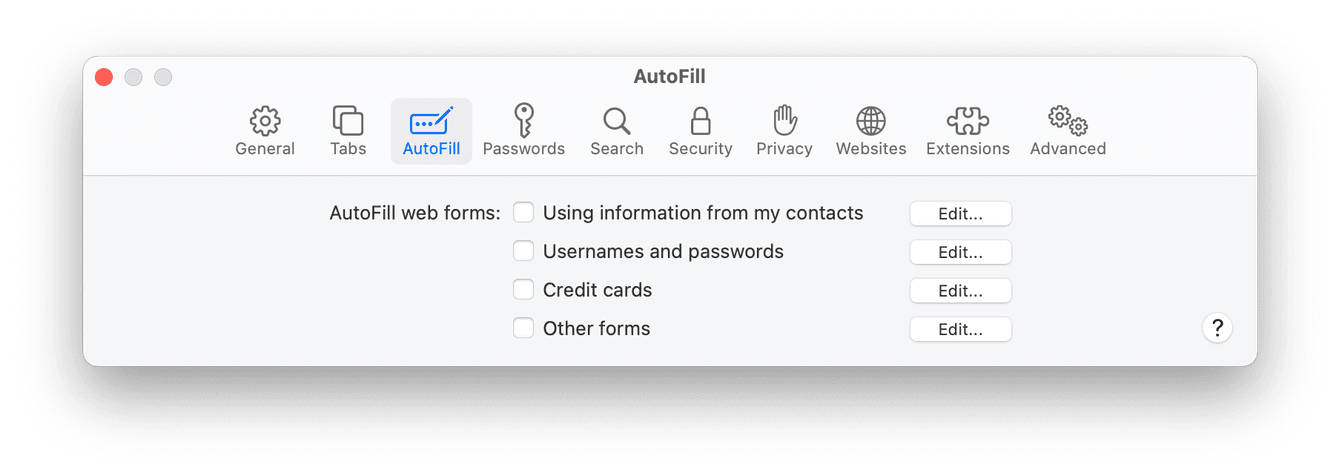
The first step is to prevent the automatic storage of web-based account logins; here's how on Safari:
-
Launch Safari, select the Safari Menu > Preferences > Autofill.
-
Uncheck all the webforms.
Here's how on Chrome:
-
Launch Chrome, go to chrome://settings/autofill
-
Select Passwords and toggle off “Offer to save passwords.”
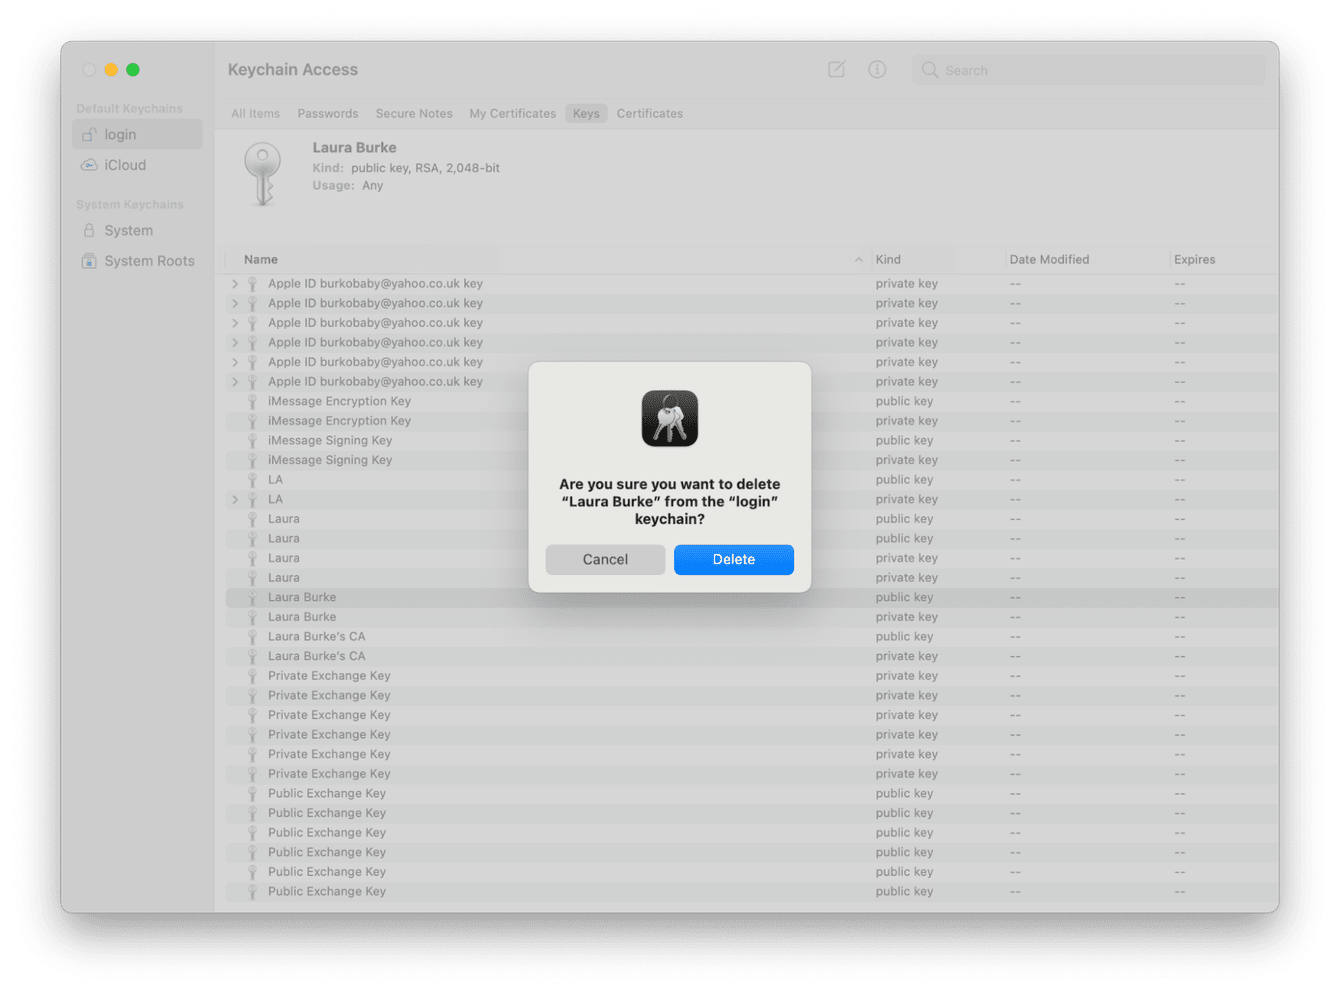
The second step is to remove all your saved logins from Keychain Access; here's how:
-
Launch keychain and select Keys from the top, and then log in from the sidebar.
-
Select the login item, double click, and press Delete Key.
This will successfully remove all your passwords and data saved in the chain.
If privacy concerns are your main reason for wanting to remove or disable Keychain data, remember to practice safe internet browsing to protect your data; here are a few extra tips:
-
Only download things from trusted sources.
-
Keep an eye out for any strange browser behavior, like random extensions or plugins.
-
Avoid clicking pop-ups.
-
Look out for a sudden and extremely slow Mac.
Now we've reached the end, not only do you know how to view and delete saved passwords on a Mac, but also how to delete a Mac keychain completely. Check back soon for more easy-to-follow tips and tricks.

