How to download photos from iCloud to Mac
If you're unsure about how to get photos from iCloud to your Mac or iPhone, you've arrived at the right place. In this easy-to-follow guide, we'll supply you with all the tips you need to access, view, and download your iCloud photos.
Apple's cloud-based storage service, iCloud, was originally launched back in 2011, and over the years, it has grown into a global phenomenon loved, trusted, and heavily relied upon by Apple users worldwide.
iCloud securely hosts your photos, videos, music, documents, and more, allowing you to sync, access, and back up your data across multiple devices.
Having your data stored in a cloud-based service like iCloud is a great way to save space on your Mac or iPhone, but sometimes, you need to retrieve your photos and videos.
How to download photos from iCloud to your Mac
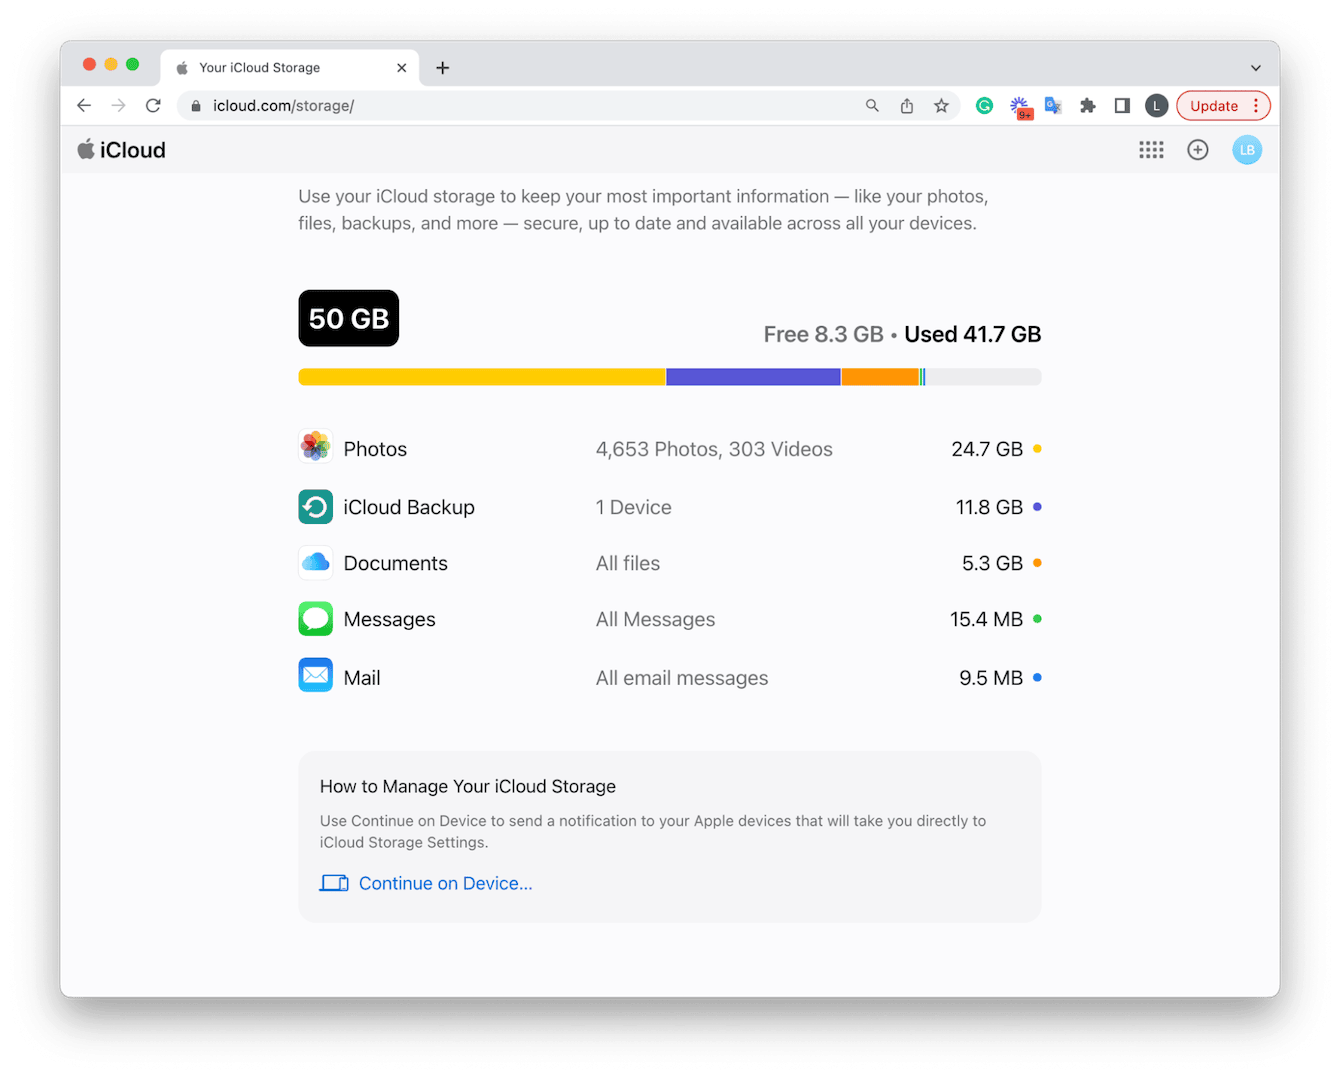
Before we get started on the retrieval tips, it's worth first checking in iCloud how much space your photos take up. That way, you can ensure you have enough room for them on your Mac or iPhone; here's how:

-
Head to your favorite browser and go to icloud.com
-
Enter your login details.
-
Select your username, top right, and click on your photo/initials top right > iCloud Settings > Your iCloud Storage.
-
Here, you can view just how much space your photos are taking up.
Now that you know exactly how much space all your iCloud photos are consuming, you can check your Mac's available storage space; here's how:

-
Apple menu > System Settings > General > Storage.
-
Wait for the screen to load to view your Mac's available storage space.
If you don't have enough space, it's time for a clean-up; here are a few tips:
-
Remove old apps
-
Clear your downloads folder
-
Tidy up your desktop
Or check out this helpful article called 9 ways to free up disk space on Mac.
So, let's take a look at the steps needed if you want to know how to download all photos from iCloud or get just a selected few:

-
Open a browser on your Mac and go to icloud.com
-
Sign in and select Photos from the dashboard.
-
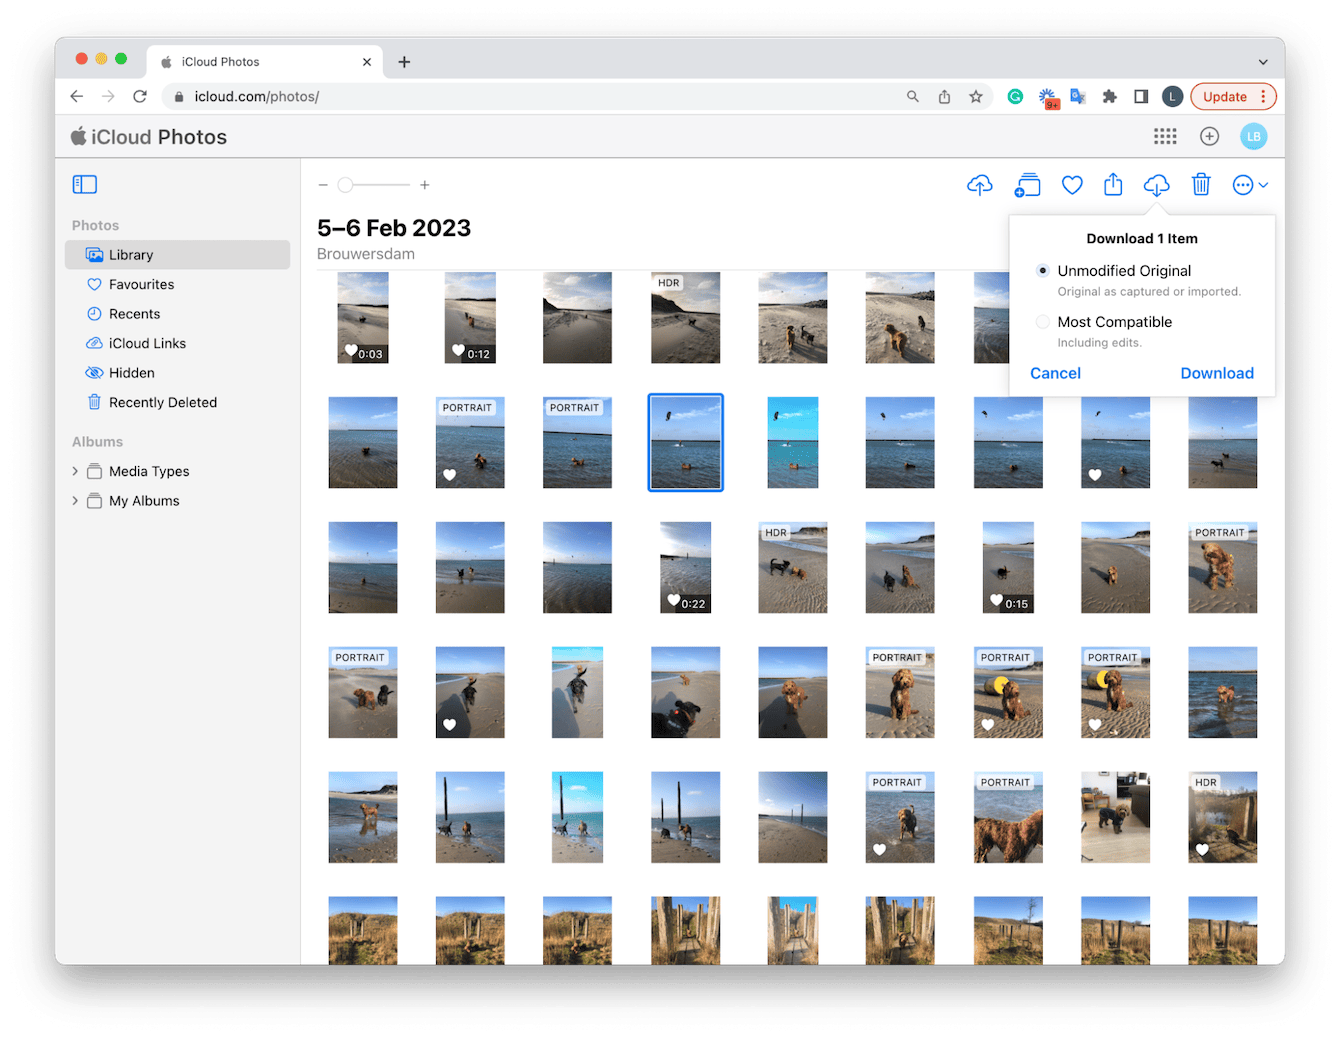
Click on an image or video to select it. Select multiple files by holding the Command key and selecting more images.
-
You can select all files by pressing the Command - A keys.
-
With the images that you want to download selected, press and hold the download button top right. Choose between the Unmodified Original or Most Compatible, then click Download.
As you can see, it's fairly easy to download photos from iCloud, but don't forget that downloaded files will take up valuable space on your MacBook. Jump to the next section for a great tip on how to quickly remove unnecessary pictures.
How to remove unnecessary pictures and free up space
It's one thing to know how to retrieve photos from iCloud, but it's another to know how to remove them quickly to free up storage space.
If you no longer need the videos or images you downloaded from iCloud, it's a good idea to remove them to keep your Mac optimized.
One of the quickest and smartest ways to do this is by using the Cloud Cleanup feature from CleanMyMac. Once you connect your iCloud account, you can use Cloud Cleanup to scan it and reveal the largest space eaters.
Here's how to manage iCloud storage with ease:
- Get your free CleanMyMac trial — test it for 7 days at no cost.
- Click Cloud Cleanup and connect your iCloud.
- Run a scan and review findings.
- Remove what you no longer need.

Besides, check out the My Clutter feature. It lets you immediately perform a thorough system scan, giving you an instant file overview, so you can sort through your images and videos with absolute ease — it even has sorting filters that let you search by size, last opened, and kind. It also finds duplicates and similar images.
Here's how to use it:
-
Click My Clutter from the sidebar and run another scan.
- Click Review All Files.
-
Sort through your images, videos, and other files.
-
Select unneeded stuff and click Remove.

You just saved space on your Mac and helped to boost your device's performance — nice!
Now, let's head to the next section and discuss downloading pics to your phone.
How to get photos back from iCloud on your phone
Before you retrieve photos on your phone, it's a good idea to quickly check that you have iCloud set up correctly. When you connect to your Apple ID on your iPhone or iPad, you can seamlessly and automatically sync photos across multiple devices. So photos you sync on your iPhone will also be available on your iPad if both devices are logged in to your Apple ID.
Here's how to set up automatic syncing:

-
On your phone, open Settings and select your name from the top.
-
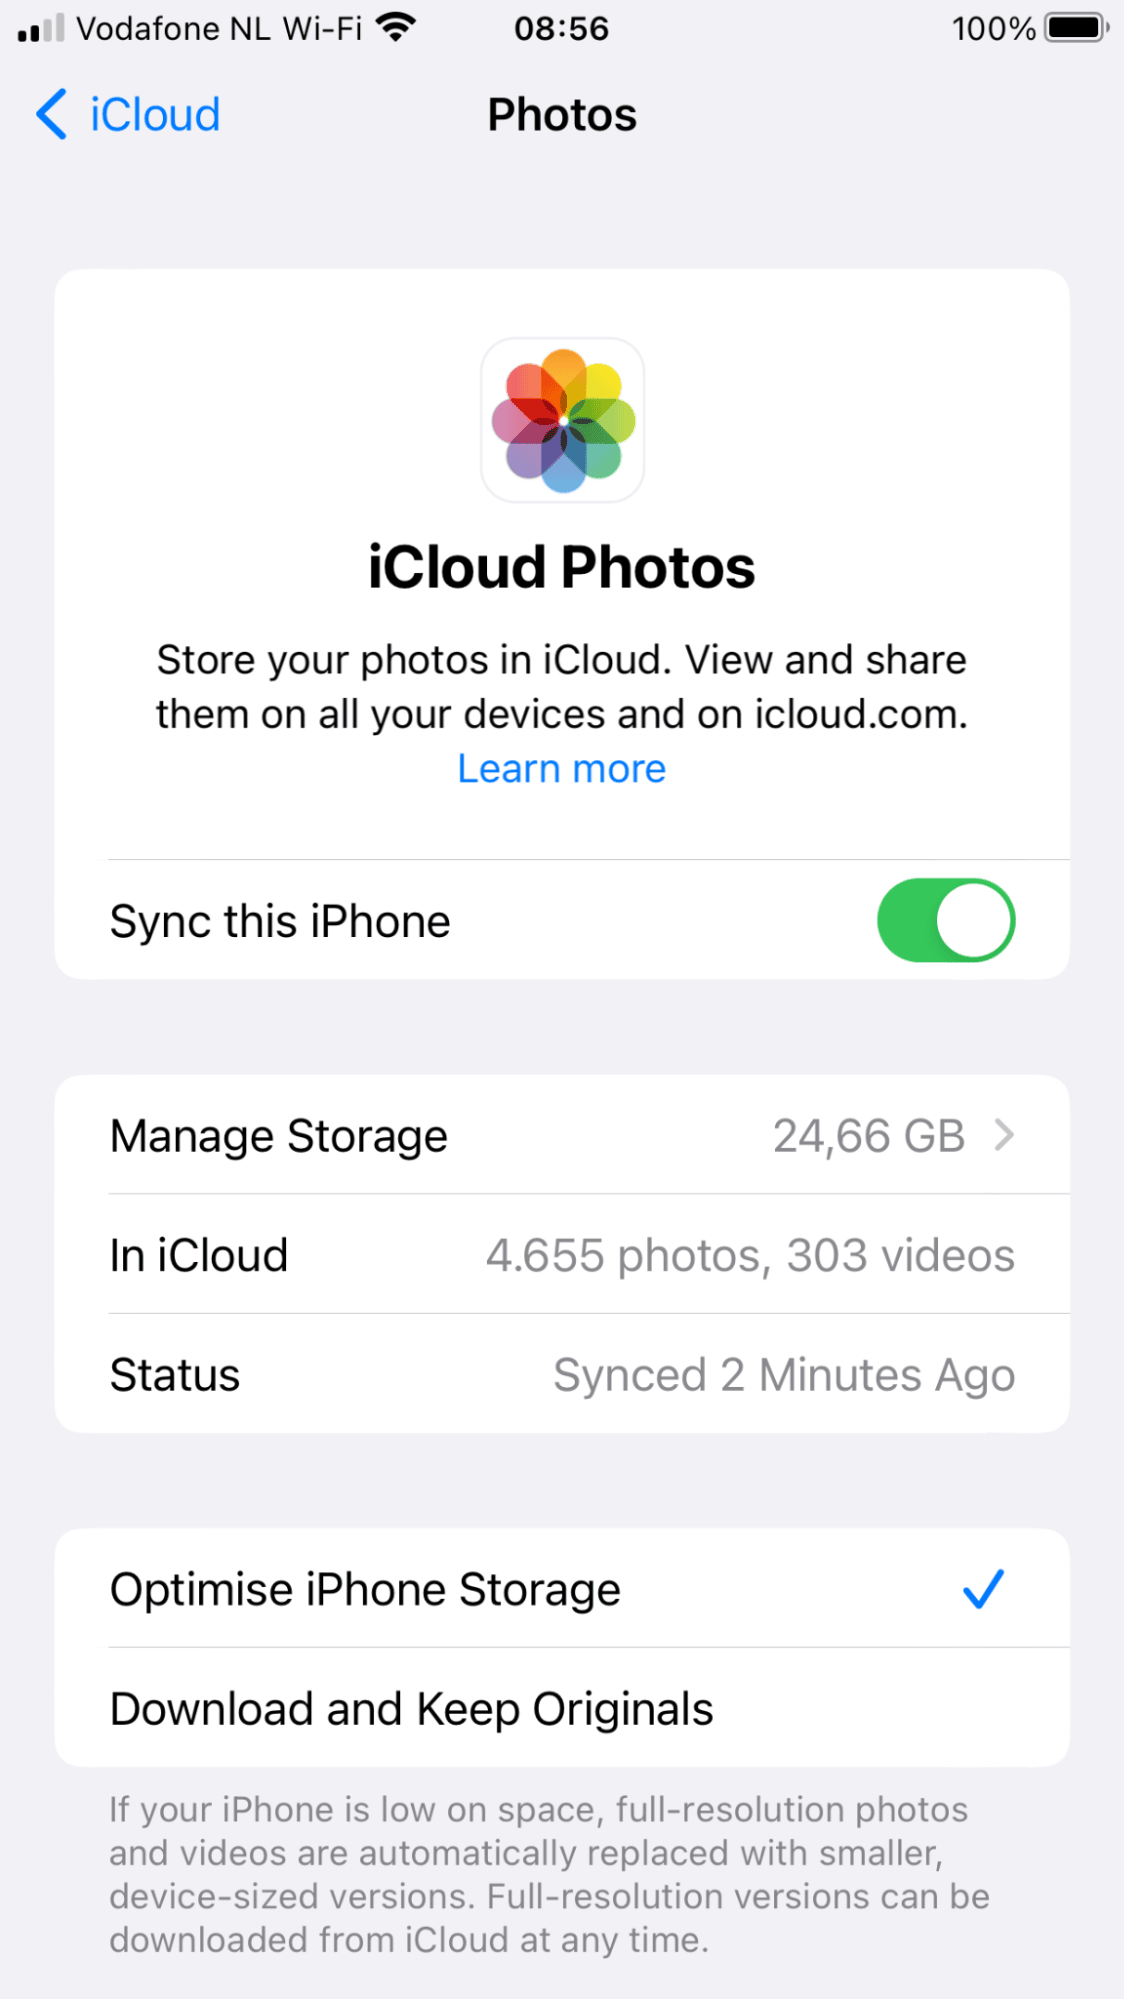
Tap iCloud > Photos.
-
Toggle on Sync this iPhone.
-
Now all the pictures that are stored in iCloud that aren't on your iPhone will download to your camera roll, while images from your phone not yet in the iCloud will upload.
OK, so now that you know how to set up automatic syncing, it's time to look at how to get pictures from iCloud.
How to download from iCloud to iPhone

-
On your iPhone, open the Safari browser and go to icloud.com
-
Press Sign in and enter your Apple ID user credentials.
-
Select Photos from the dashboard.
-
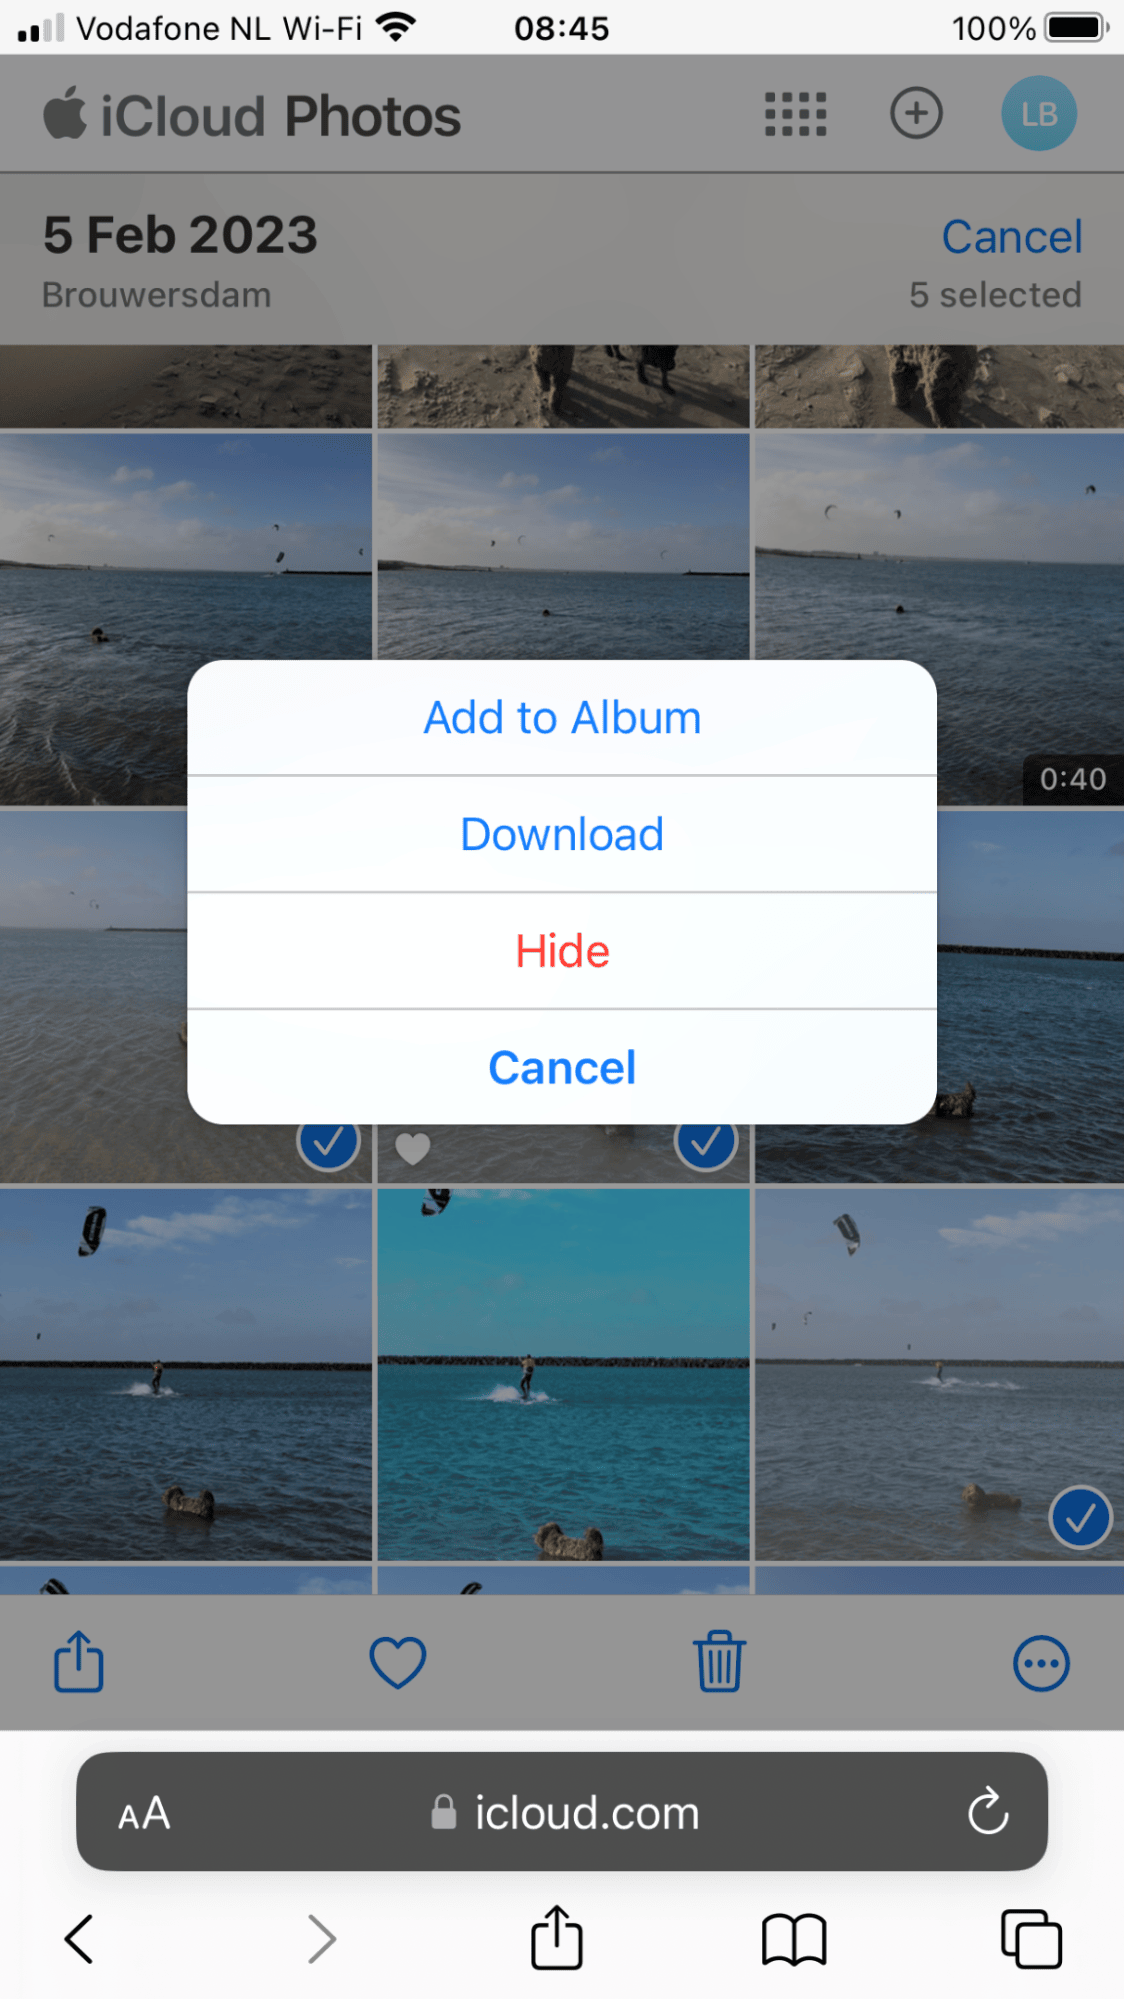
Press Select top right and choose the photos you want to download.
-
Press the more button (three dots) and tap Download.
Having issues downloading photos from your iCloud on your phone? Here are a few handy tips.
-
Check if your internet connection is stable.
-
Disable low power mode on your iPhone.
-
Sign out of iCloud and back in.
-
Restart your iPhone
-
Make sure that you have enough storage space.
Thanks to these useful tips, you know how to download photos from iCloud to your Mac and your iPhone. Don't forget that once you no longer need the photos you downloaded, it is better to remove them to save space on your device.

