How to edit photos on Mac
There are so many ways how to edit photos on Mac, do you know them all? If you're looking to enhance your image quality, crop the perfect shot, or fix color imperfections, you've landed in the right spot.
No need to spend hours researching the best methods and tools; we've done all the work for you. So, sit back and uncover the photo editing tips you've been searching for.
Reasons for editing photos on Mac
Editing photos is pretty much standard practice these days, and it's so easy to do; you don't need to be a Photoshop master. Let's take a quick look at some of the most common reasons to fine-tune your pics on a Mac:
- Improve the overall quality of your images.
- Fix imperfections in your photos.
- Add personal, creative touches from filters to text.
Editing is all about creative expression, creating the image you see in your mind's eye. So, let's take a look at how you can achieve your creative photo dreams.
How to edit pictures on Mac
Utilize your Photos app
You might not realize it, but your built-in Photos app also offers some editing options, including color enhancement, retouching, definition, noise reduction, and more; let's take a look at how you can access the editing panel.
- Open the Photos app and select the image you want to edit from your Library.
- Select Edit top right.
- Browse through the editing options.
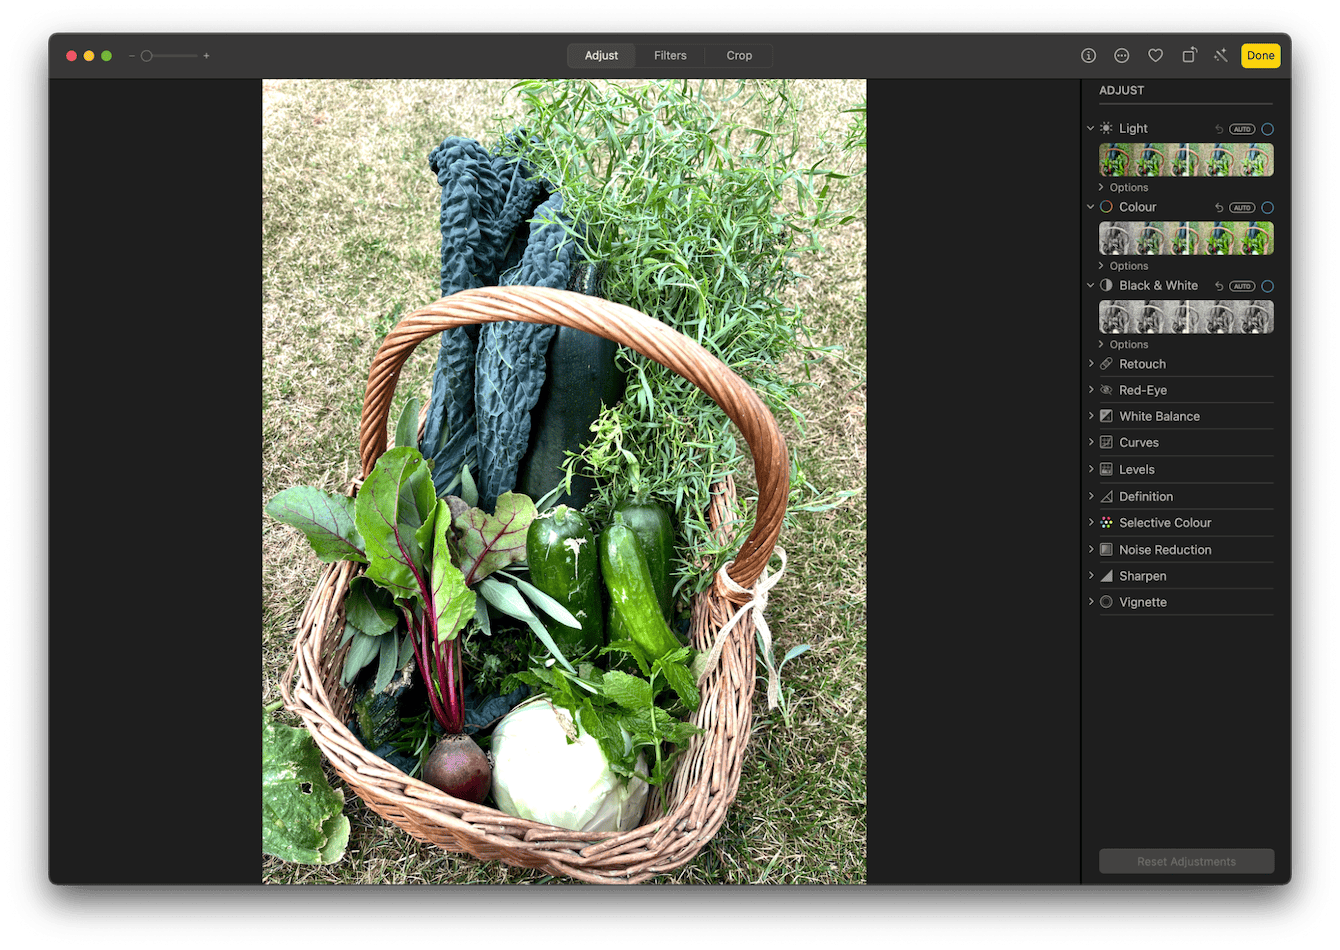
Now that you know how to open it, we'll show you a few basic editing techniques.
1. Retouch image imperfections in the Photos app:
If your image has blemishes of little objects you want to remove, it's possible with the Retouch feature; here's how:
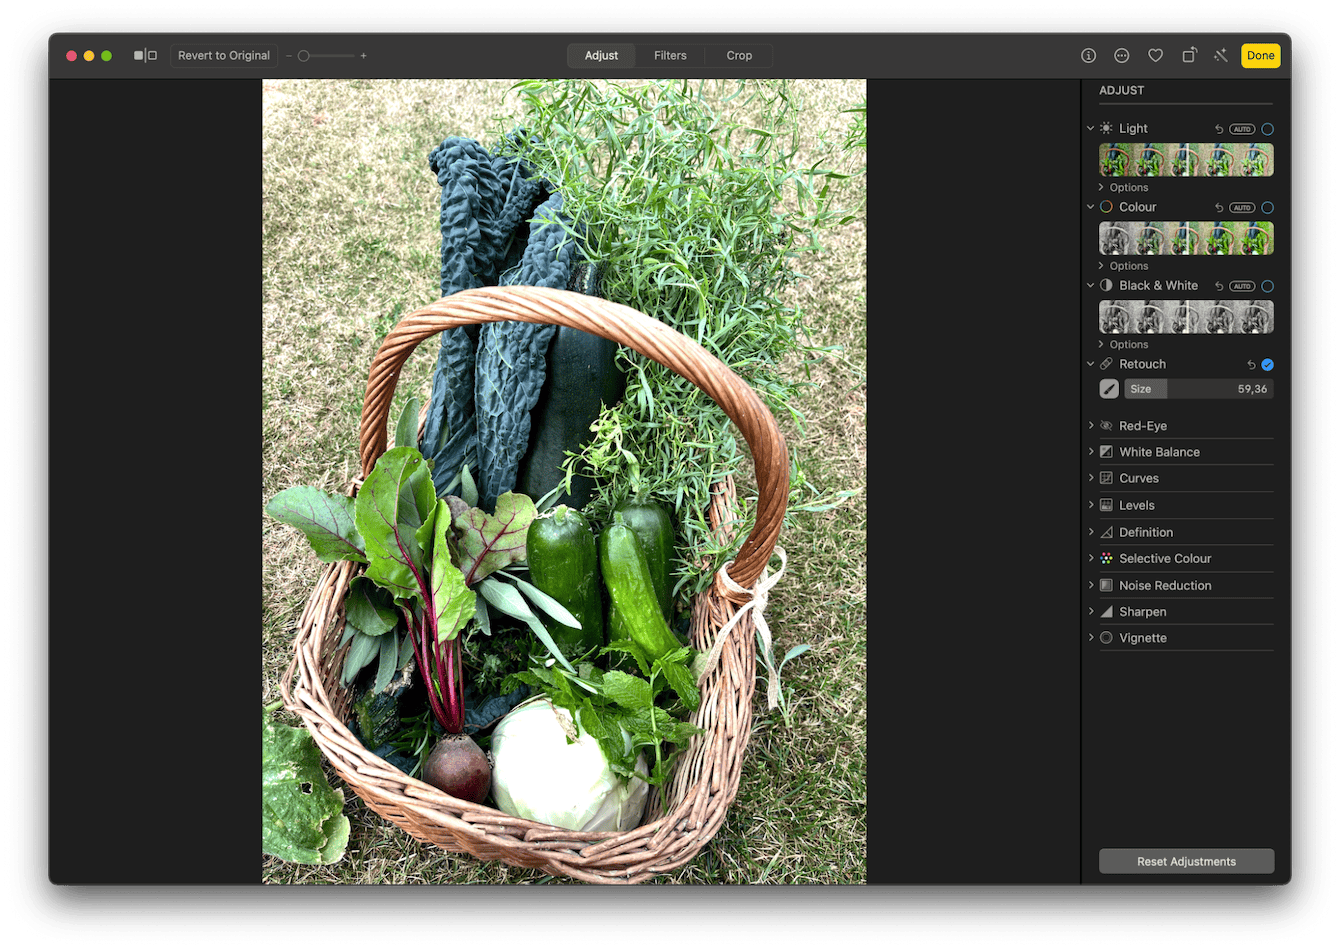
- With the editing panel open, select Retouch.
- Select the size of the brush.
- Select the area on your image that you want to retouch and apply changes.
2. Remove image noise in the Photos app
If your image quality feels a bit grainy, you can reduce that using the Noise reduction feature:
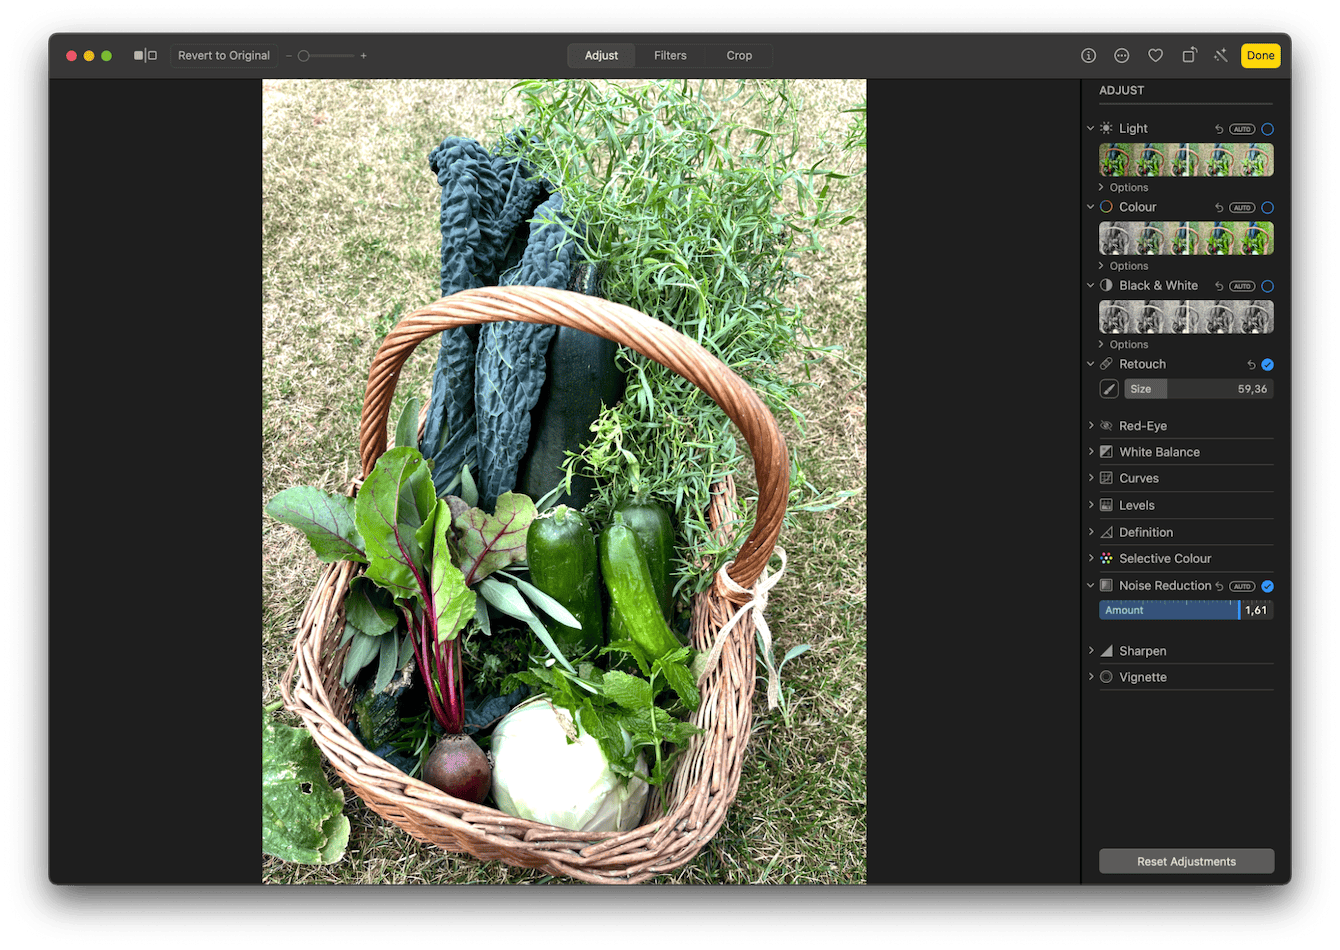
- Again, in the editing panel, select Noise Reduction.
- Increase the reduction rate to improve the sharpness of your image.
- Again, apply your changes.
3. Utilize color improvements in the Photos app
Photos allow you to quickly improve the image's overall color and light or switch to black and white:
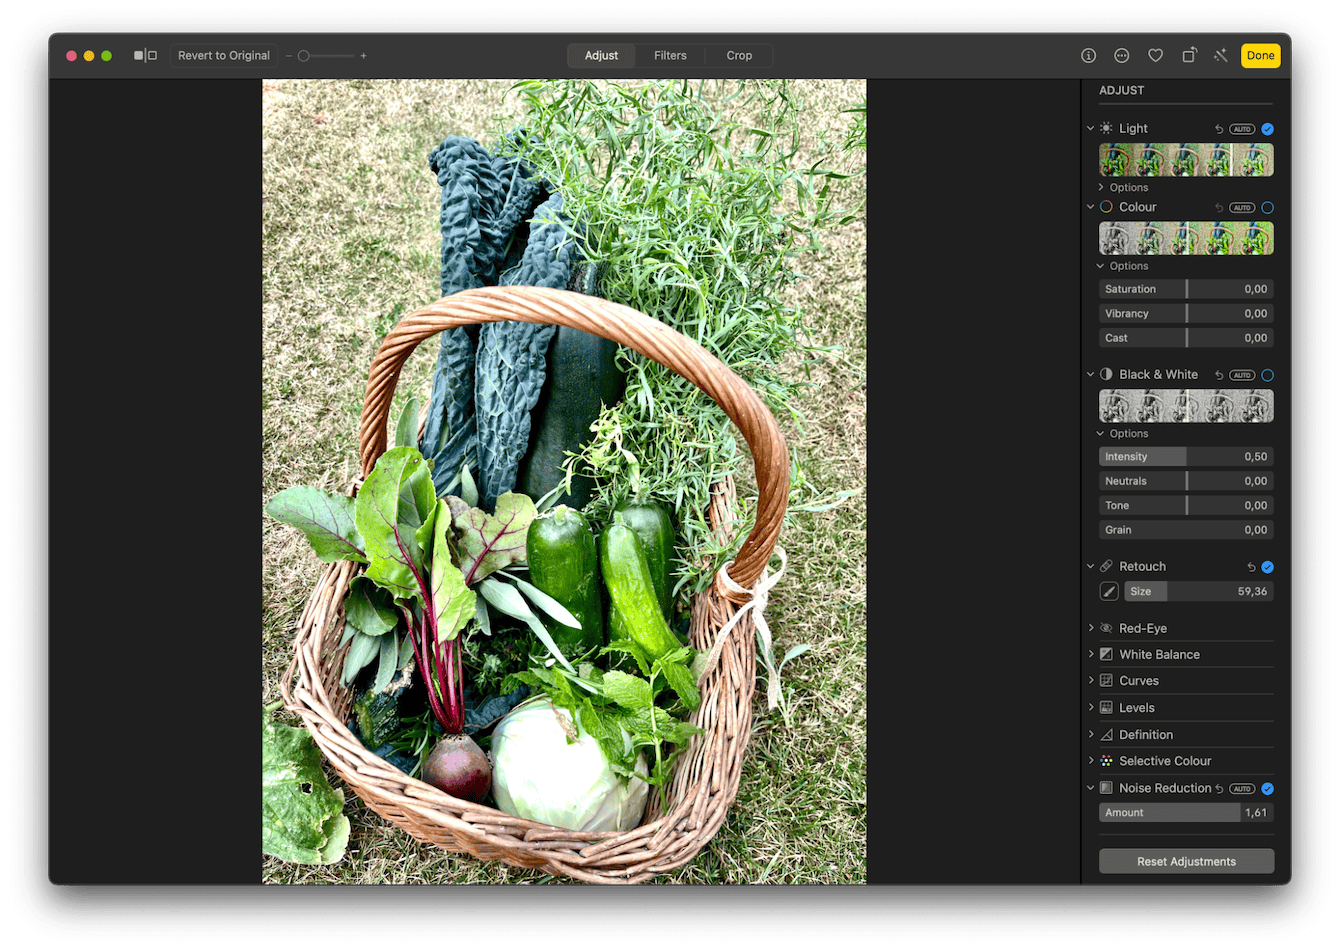
- At the top of the editing panel, select either light, color, or Black & White, depending on the effect you want to create.
- Select from the preset recommendations by sliding the bars left and right.
Edit with the Preview app
When it comes to knowing how to edit photos on a Mac, Apple's native Preview app is another great option. It's less creative than the Photos app, but it offers some basic editing options that allow you to crop, resize, adjust lighting, and apply text. It's a great starting place for beginners. Here's a look at how to open the editing tools panel.
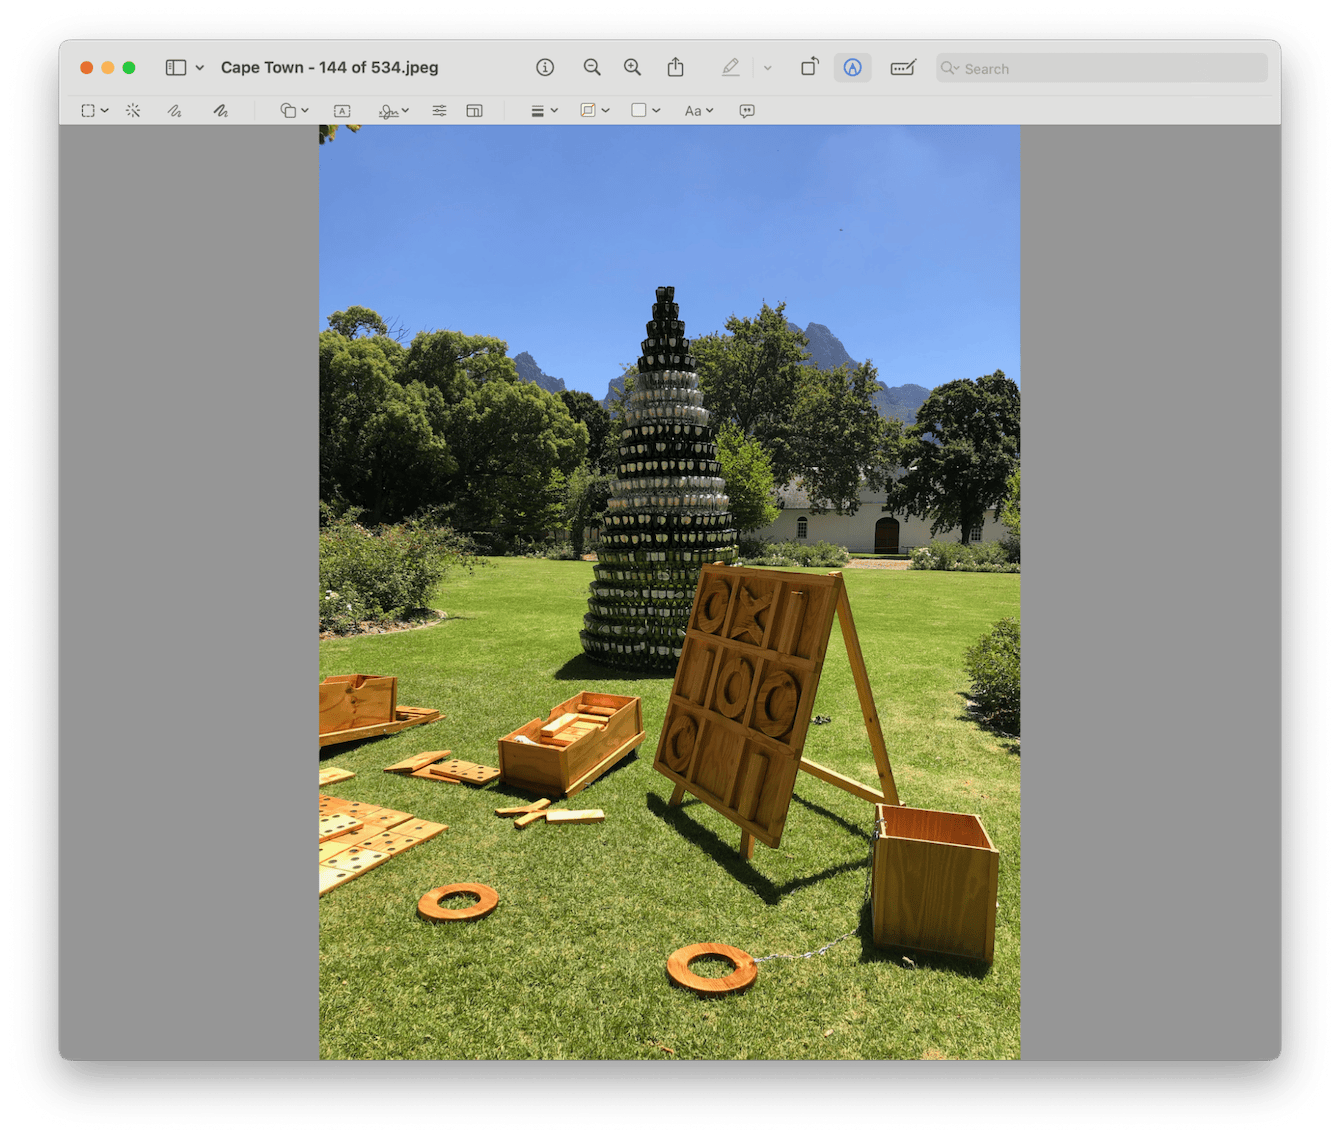
- Open the photo you want to edit in Photos.
- Select the pen tool from the top of the window pane.
- Here, you'll be able to access the following tools
- Color adjust
- Crop and size adjust
- Text options
- Shapes and more
Crop your image in Preview
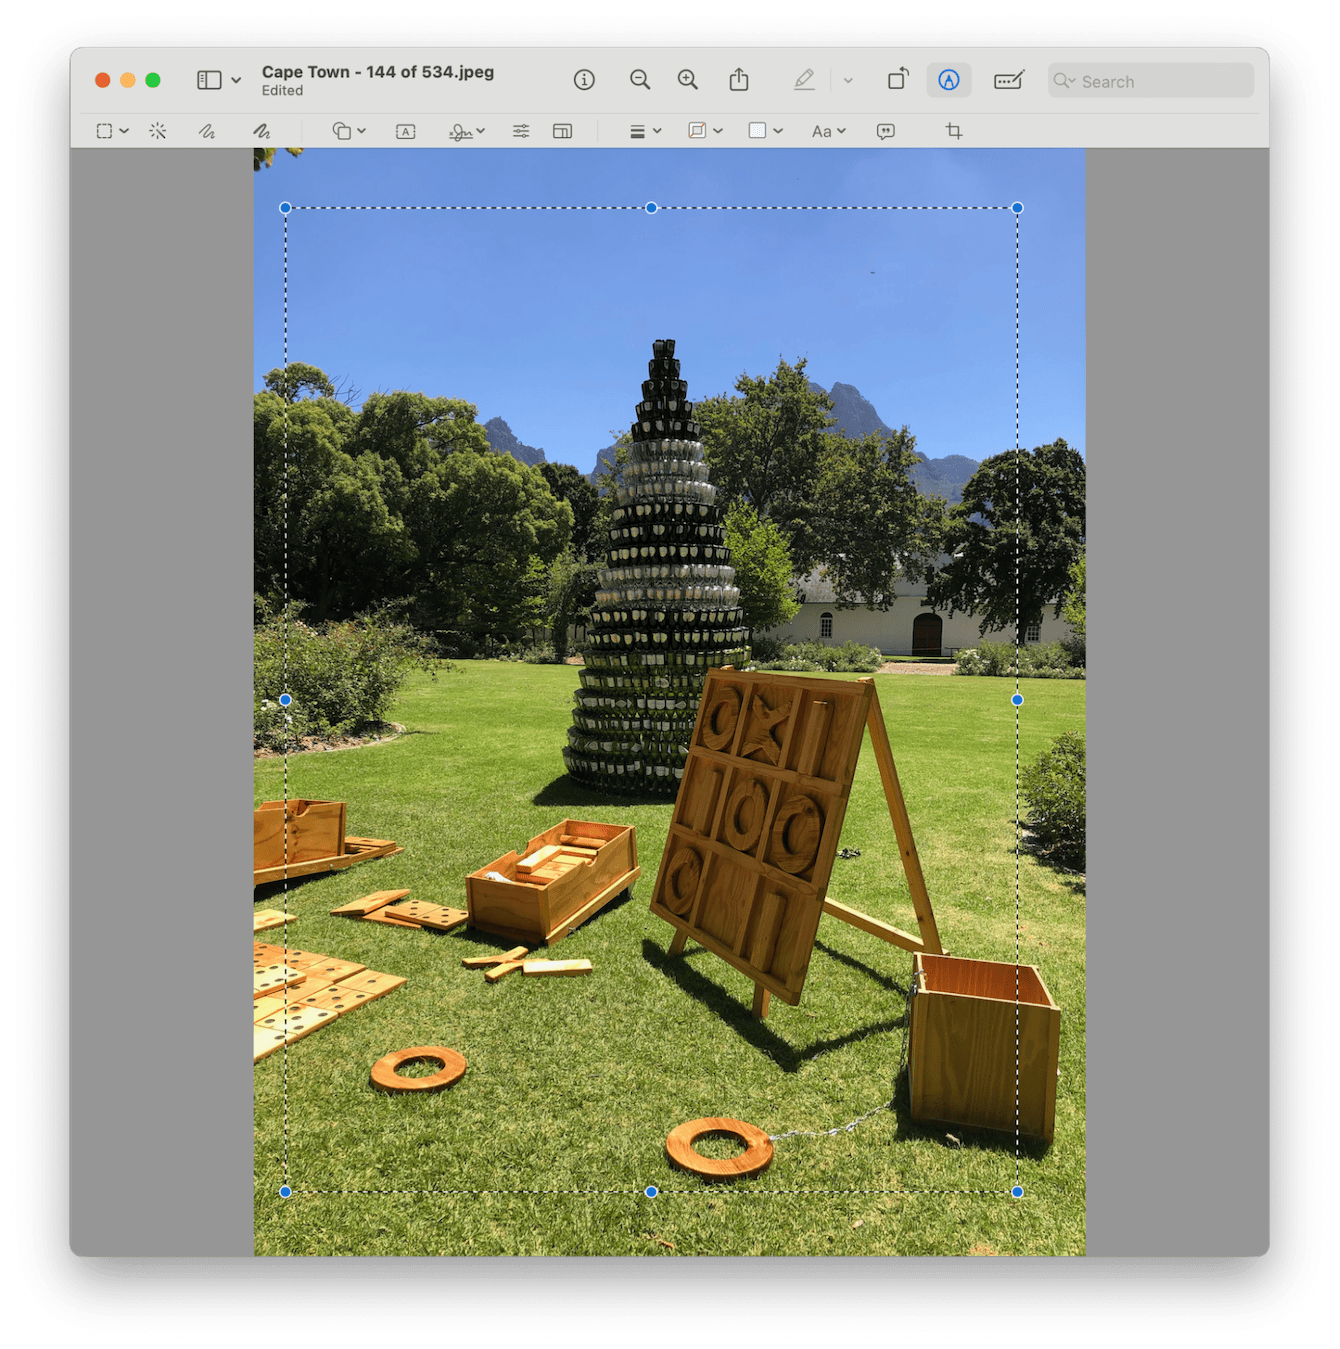
- With the editing tools open, drag a square over the image with your cursor.
- When you're happy with the selection, click the crop icon, which will appear to the right of your editing tools.
Fine-tune your image in Preview:
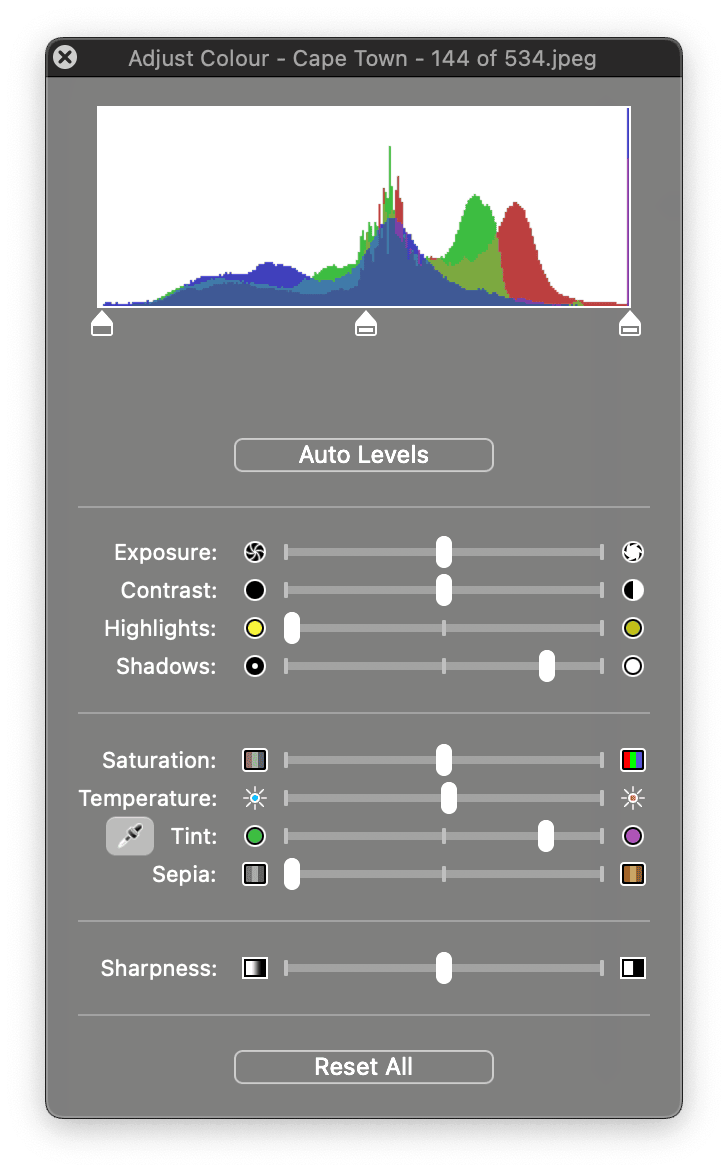
- Now that you've cropped your image, select the adjust tool from the editing panel.
- Here, you can slide the bars across to achieve the desired effect, from exposure, brightness, saturation, and sharpness.
With all these photo edits, make sure you don't start to accumulate tons of duplicates; these will quickly fill up your Library and consume unnecessary space on your Mac.
You might think searching for duplicate images on your Mac is a complex process, but if you use a tool like CleanMyMac, it comes with a powerful My Clutter tool that quickly locates all your duplicates and similars; here's how to use it:

- Open the app (free download here) and click My Clutter > Scan.
- Once complete, review the Duplicates and Similar Images found.
- Select what you no longer need and click Remove.
Let's get back to how to edit images on Mac.
Batch resize in Preview
If you want to resize multiple photos at once, it's possible in Preview; here's how:
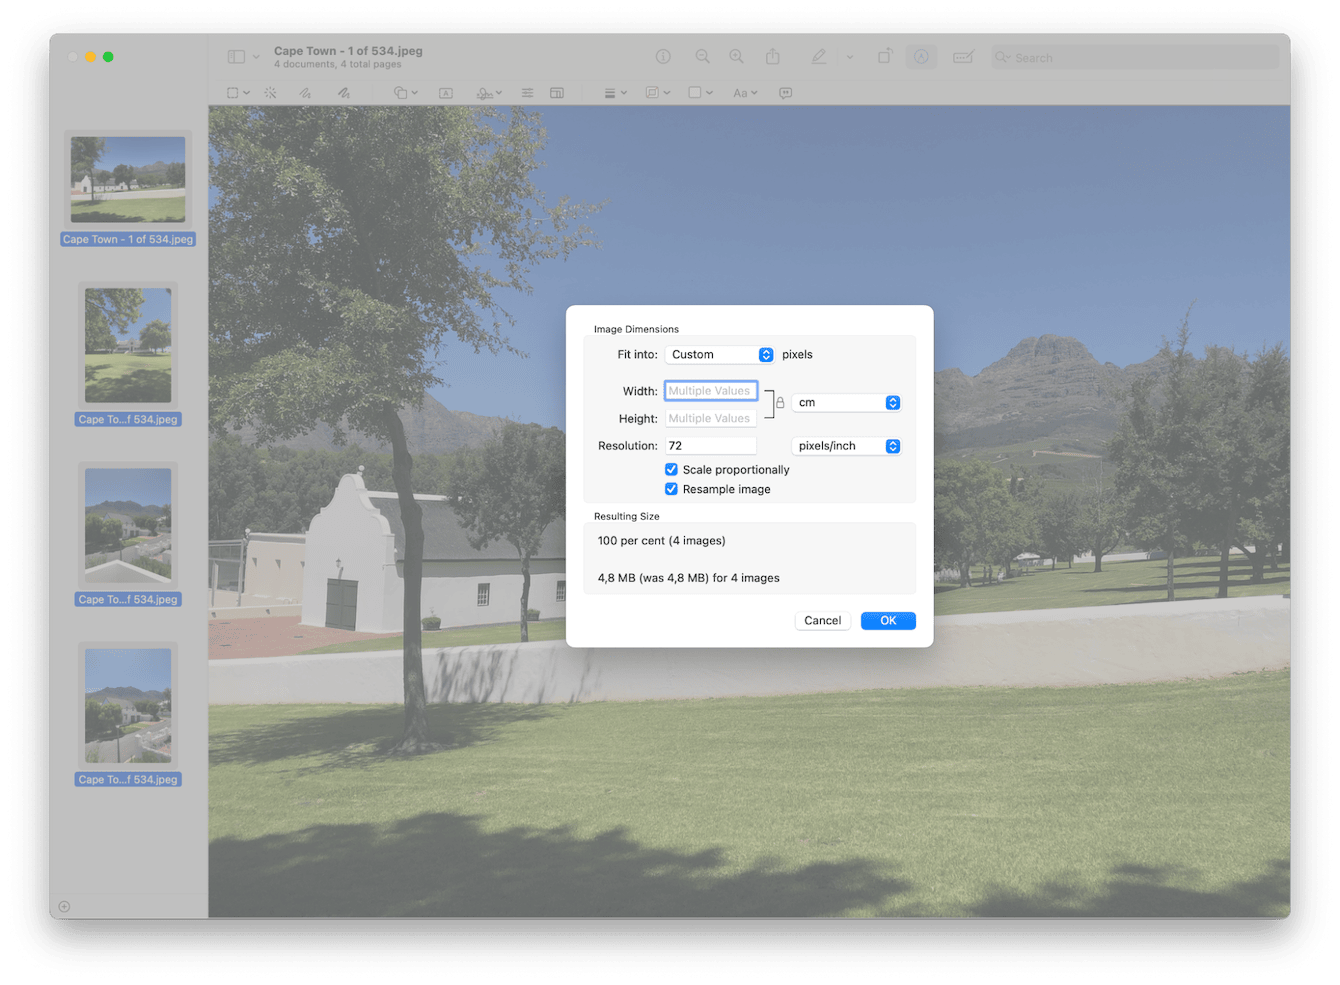
- Select all the images on your Mac you want to open, right-click, and choose open with Preview.
- Now, in Preview, press Command - A to select all the images.
- Click the pen icon to open the editing tools.
- Click the adjust size icon and enter your desired dimensions.
- Click OK to resize all images at the same time.
Edit with third-party tools
If you're looking for more creative editing features, Preview and Photos are both somewhat limited, so you might want to consider a third-party tool instead. And that can feel like a daunting avenue, as there are so many out there.
Here's a quick mini-review of two favorite options.
Canva
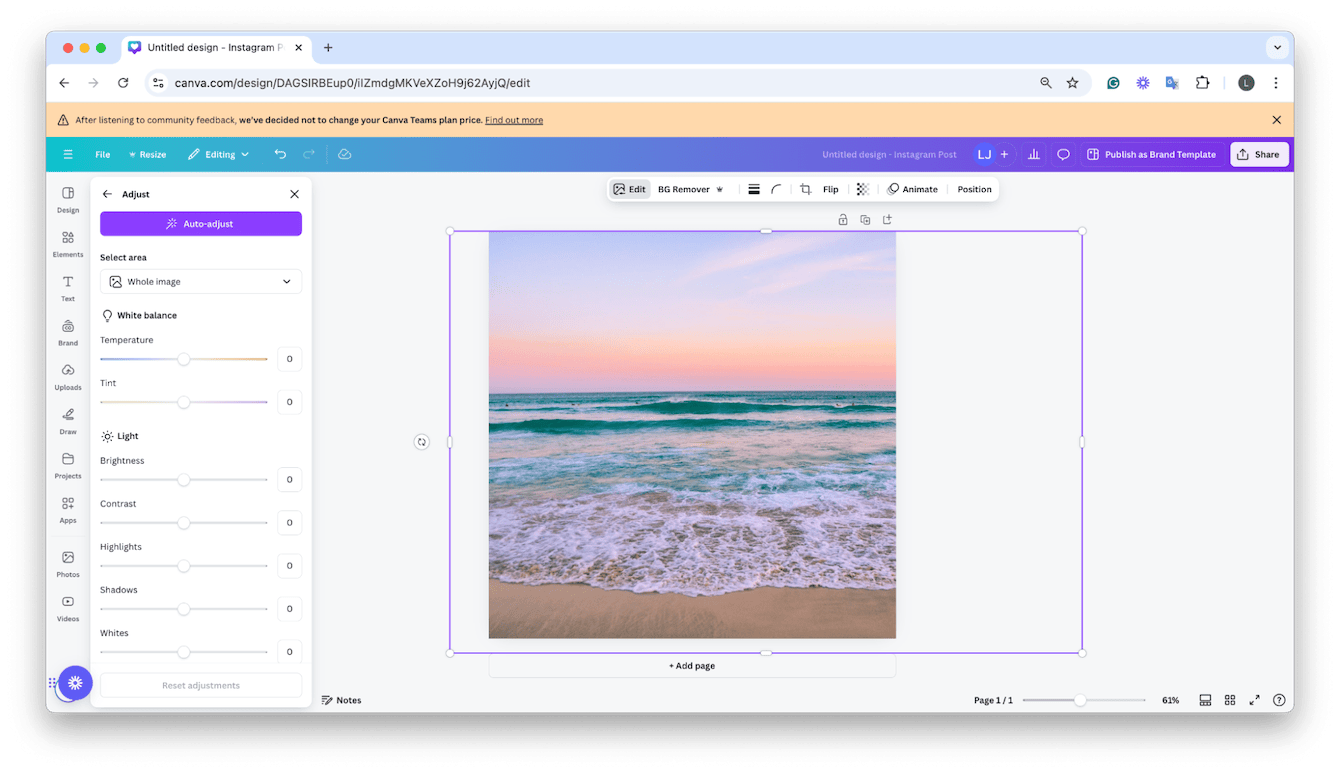
Canva is powerful; it's a graphic design tool that comes with thousands of editable templates and awesome photo editing tools, including some new AI-powered features. It's a great option for beginners, easy to use and with simple controls.
- Free Plan: Offers basic features, including photo editing and access to templates.
Adobe Lightroom
There are not many people who haven't heard of this app; it's a powerhouse in the world of photo editing. If you're a little more advanced in your editing skills, it doesn't get much better. With hundreds of advanced editing features, the sky is really the limit.
- Adobe Lightroom Plan: Starts at $9.99/month
We've looked at how to edit photos on MacBook, and we hope there are some useful tips here for you. Happy editing.

