What to do if the erase process has failed on Mac
If you're seeing the dreaded "Erase process has failed" message on your Mac, it can be both confusing and frustrating, especially when you're trying to reset, reformat, or troubleshoot your device.
Whether you're working with an older MacBook or one powered by the latest Apple silicon chip, encountering this error can quickly halt your plans. In this guide, we'll cover everything from what the error means to why it occurs and how you can fix it.
From using Terminal commands to checking for system updates, we've got you covered with practical solutions to get your Mac back on track.
So, let's dive in and tackle this issue together.
Why do you see the "Erase process has failed. Click Done to continue." error?
There can be several possible reasons Disk Utility won't erase the hard drive on your Mac; let's take a glance at the most common causes:
-
Outdated Mac software
-
User permission limitations
-
Corrupt hard drive
-
Disk Utility issues
If you're not sure where to start or what's causing your particular issue, don't worry; simply work through the troubleshooting steps outlined below.
How to fix the "Erase process has failed" error message
Before we start with the fixes, here's a gentle reminder to back up your data first, just as a safeguard to protect any accidentally erased content. Time Machine is the perfect tool for the job; if you need guidance on how to set this up, read Apple's official help article here. Now, let's dive in.
1. Check your macOS software
When you're stuck wondering why can't I erase my Mac? The first thing to check is your macOS. If it's outdated, this could be why you're running into issues; here's how to check:
- Open System Settings (from the main Apple menu).
- Select General > Software Update.
- Install any readily available updates.

Once your Mac reloads, test the process once again.
2. Run maintenance items
Another quick way to solve the disk error is to run some basic system maintenance tasks to try and fix internal issues that could be causing the error message.
You can use a trusted tool like CleanMyMac to rotate system logs, remove temporary items, and repair disk permissions. This Apple notarized app comes with a 7-day free trial. Here's how to get started:
-
Open CleanMyMac and find Maintenance in the sidebar.
-
Click View All Tasks and then select the following tasks:
- Run Maintenance Scripts
- Repair Disk Permissions
-
Click Run.

Restart your Mac and test the process once again. If it's still not working, head to the next tip.
3. Utilize Terminal
You can also try to erase your Mac's disk through Terminal; again, make sure you've backed up any data before you proceed with these steps.
-
Open Finder and go to Applications > Utilities, then open Terminal.
-
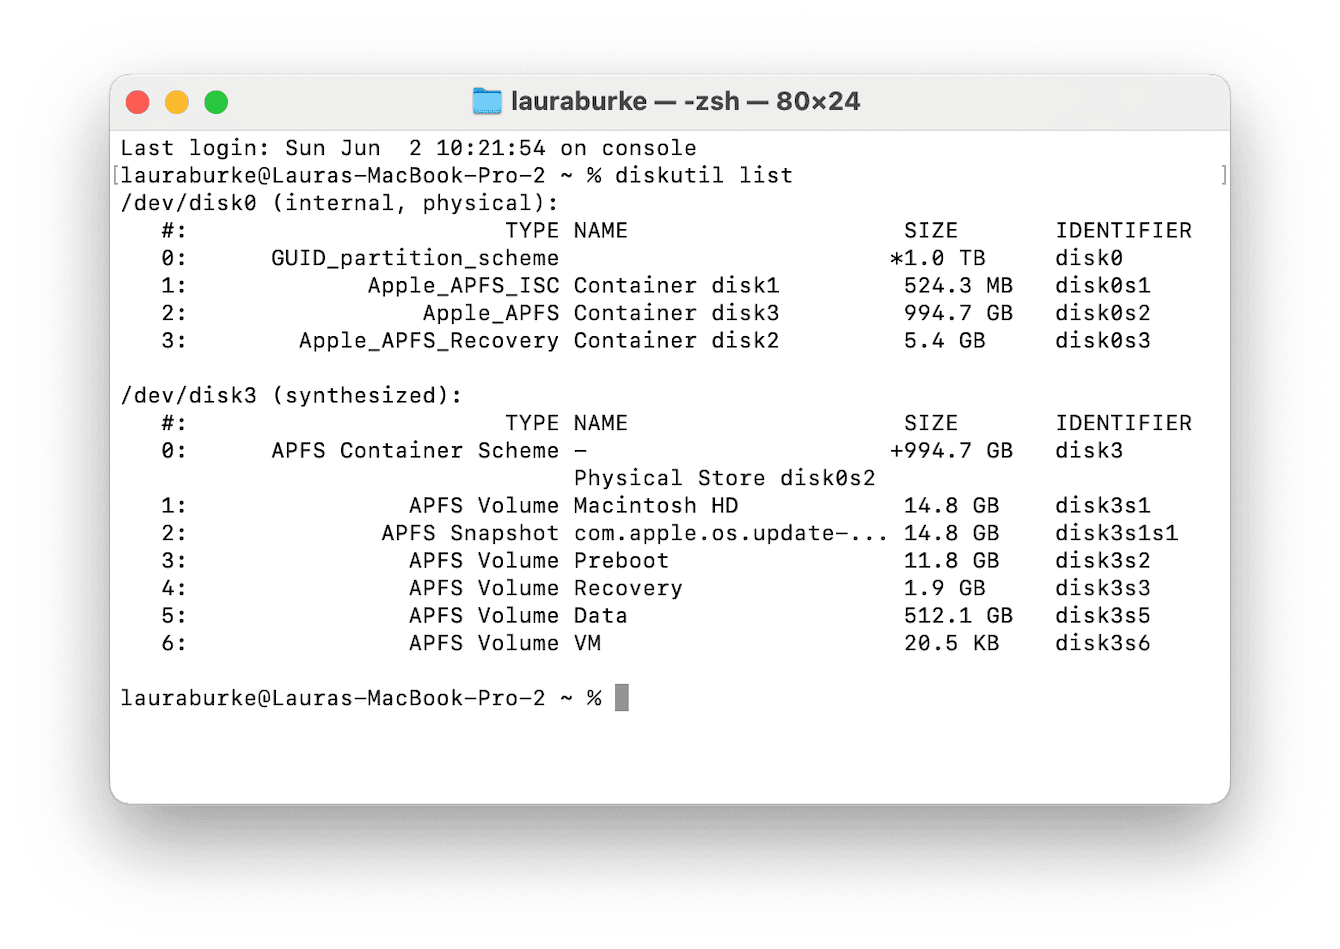
In Terminal, type:
diskutil list -
Press Return to see a full list of your disks and their identifiers.
-
Locate the disk you want to erase, then enter the following command:
diskutil eraseDisk <Your Disk Name Here> — replace <Your Disk Name Here> with the name of the disk you are trying to erase. -
Press Return.

Once the command runs, you'll need to wait and follow any further instructions to complete the process.
4. Check your user settings
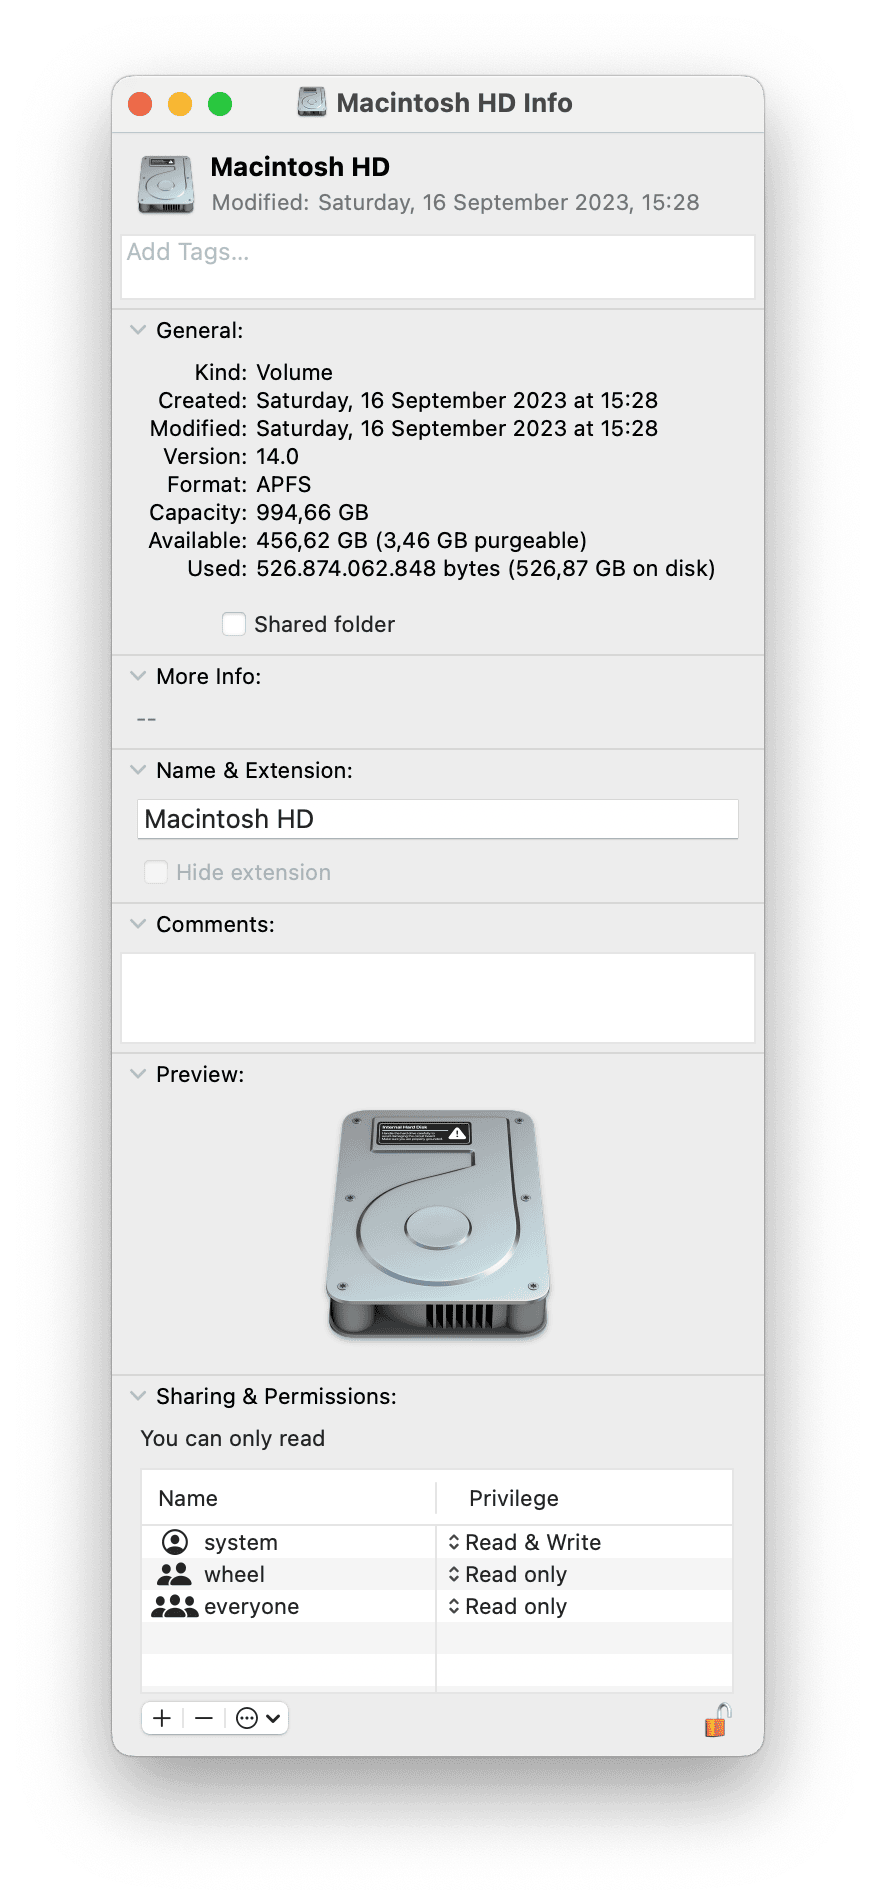
Often, users encounter issues when they don't have the right or privilege to erase a disk or external device. It's worth checking your user privileges to solve this issue quickly; here's how:
- Open the Finder and right-click your Drive or external Disk.
- Click Get Info.
- Under Sharing & Permissions, take a look to see what privilege you have.
- If you have Read only, that's why you're having issues. To change this, click the Lock icon and enter your credentials.
- Change to Read & Write.

5. Try First Aid
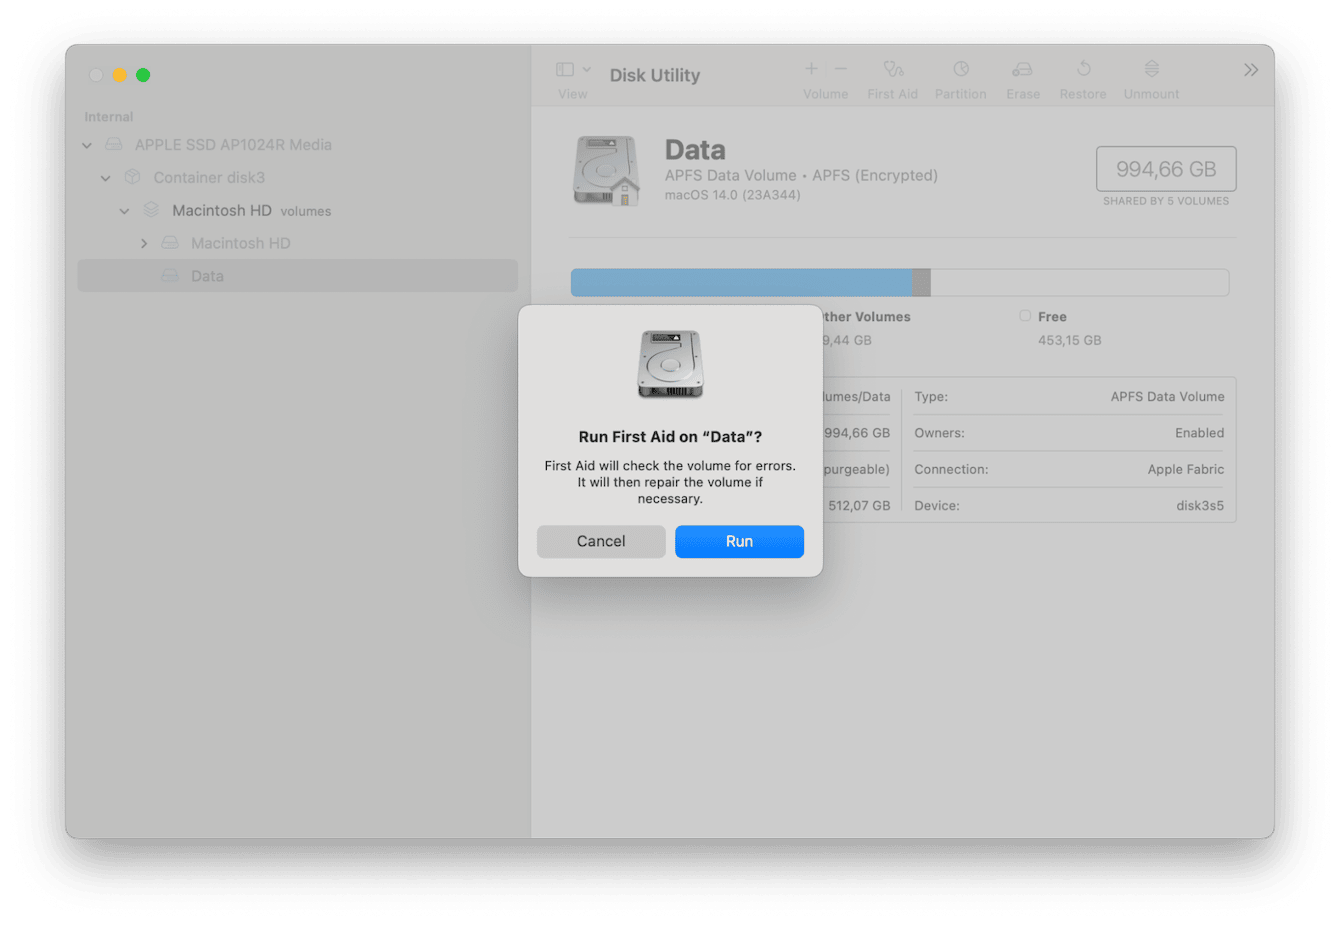
If you're attempting to erase an external disk, you can also try to run first aid to fix any issues via Disk Utility. Here's how:
-
Go to Finder > Applications > Utilities> Disk Utility.
-
Locate the external disk in the list.
-
Click First Aid from the top toolbar.
-
Click Run.

Depending on the size of the disk, this might take a few minutes; once the process is finished, try erasing it again.
6. Erase a volume
If the disk you're trying to erase has more than one volume, instead of erasing the entire disk in one go, you could try erasing it one volume at a time; here's how:
-
Open Disk Utility once again from your Utilities folder.
-
Locate the disk, and next to its name, select the arrow to reveal the volumes.
-
Select a single volume and click Erase. Repeat until all volumes are deleted.

7. Utilize recovery mode
If you're still plagued with Erase process has failed messages, you could lastly try to boot your Mac into recovery mode to erase your startup disk completely, then use Internet Recovery to reinstall your macOS.
This can be a lengthy process, and the method in which you do this will depend on the Mac model you're operating. Apple has a full and comprehensive guide here.
Before we finish, let's answer a few user questions.
FAQs: Erase process has failed on Mac
Why can't I can't erase disk in recovery mode?
If you run into issues in recovery mode, you'll need to reach out to Apple for further support; this signals that something else is at play.
Could my external drive be damaged?
If the drive or disk you're trying to erase has undergone physical damage, then yes, this could be a reason why you're having trouble running certain tasks like erasing it. Again, you'll need to reach out to an approved repair center for extra support.
Well, thanks for sticking around; one of these tips has hopefully helped you bypass the Disk Utility won't erase the hard drive issue.

