Solved: External hard drive is not showing up on Mac
Understandably, people panic when their Mac external hard drive is not showing up. You expect it to appear under Locations within the Finder or on your Desktop as a clickable icon once you connect it to your device.
But if you find yourself waiting around with nothing happening, try not to jump to panic stations and presume the worst; although this can indicate corruption or drive failure, it's not always the case.
In most cases, it's an easy fix, and we've got some fantastic and straightforward steps for you to try right here in this article, but first, let's start with understanding why we run into issues with unresponsive external hard drives. So let's get started.
Why is my Mac not recognizing external hard drive?
We've all heard tales of people suffering from external disk failure and losing all their precious data; for many users, it's their worst nightmare. So it's easy to understand why people find it so troubling when their Mac external hard drive is not showing up after connecting it.
But there can, in fact, be multiple reasons why we encounter this issue; let's take a look at them:
-
Your cable is faulty or damaged
-
Your USB port is dirty or damaged
-
Connection issues
-
The drive is not readable on your Mac
-
Drive corruption
In most cases, you'll need to carry out multiple troubleshooting steps to solve the issue, so we've put together a list of tried and tested tips to help you solve this frustrating issue.
Head to the section below to get started.
What to do if the external drive is not showing up on Mac
Work your way through these steps, one by one, to get your Mac external hard drive up and running — let's go.
1. Check your cable
We're starting with this step not only because it's an obvious place to start. But it's actually a really common reason why users' external hard drives won't connect.
If your cable is damaged or broken, then there's no way you'll access your external drive. Try testing a new cable.
It's also worth mentioning here that some external hard drives require additional power resources, so ensure it's plugged in correctly to rule out this issue, too.
2. Check your USB Ports
If your cable is fine, then it's time to check and clean your USB ports. If your USB ports have become damaged or clogged with dust, they'll cease to work; here are some tips.
- Test different USB ports on your Mac.
- Clean your USB ports with compressed air to remove dust and debris.
- Test your external hard drive on a different MacBook.
3. Restart your Mac
If there are no issues with your cables and ports, a temporary glitch on your macOS could be preventing your external drive from showing up on your MacBook. Restarting your Mac could completely solve the issue.

- Unplug your external device and wait for a few moments.
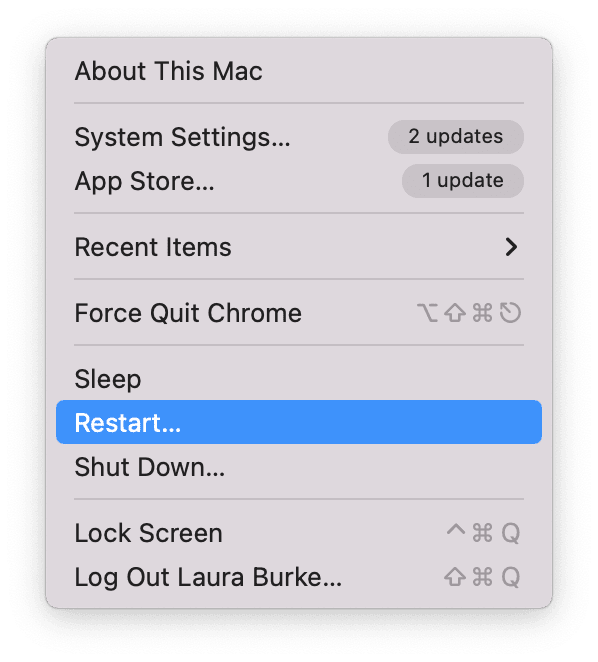
- From the main menu, select Restart.
- Once rebooted, connect your external drive again.
Is your hard drive still not showing up on Mac? Head to the next tip.
4. Adjust your Finder preferences
If it's your first time connecting your external hard drive, you might need to tweak some settings to ensure it's findable; here's how:

-
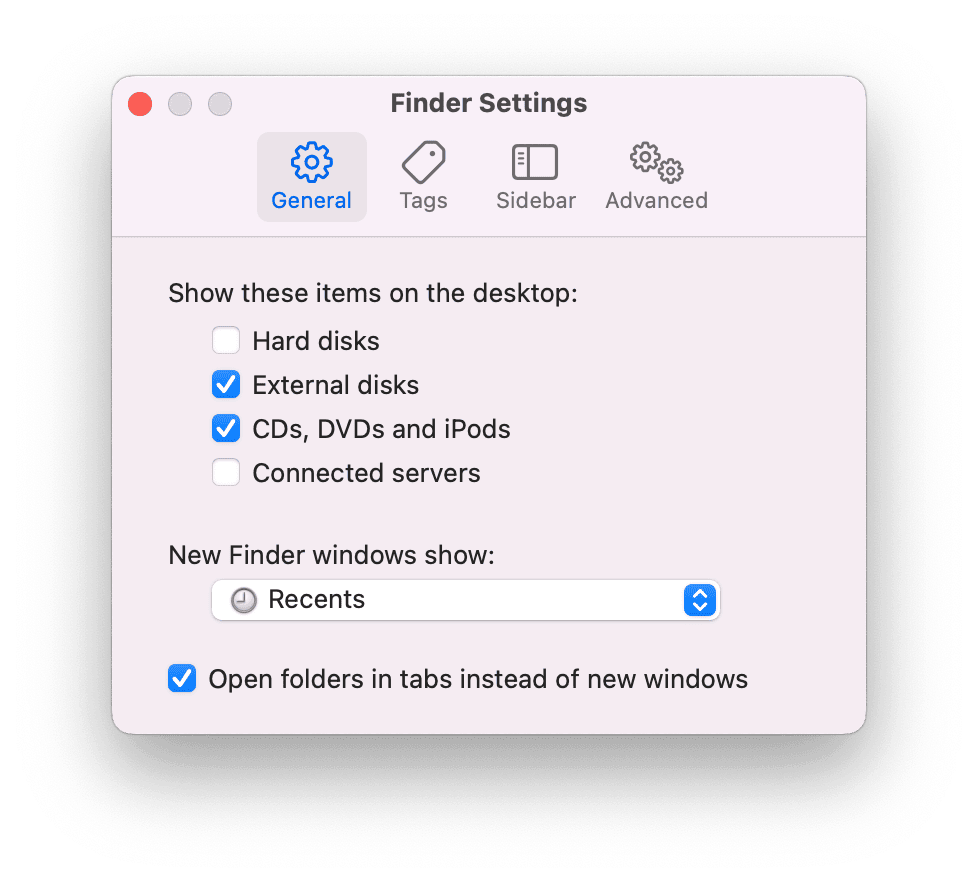
Open the Finder and select the main Finder menu > Settings.
-
Under General, ensure the External disks option is selected so they show on your Desktop when connected.
-
Now select Sidebar from the top options.
-
Under Locations, ensure the External disks option is selected.
Now, try connecting your external disk again to see if it's visible on your Desktop or within Finder.
Is the reason you are trying to connect an external hard drive because you're trying to save space or storage on your MacBook? Have you considered cleaning up your system files? This could eradicate your need for an external hard drive completely.
Let me share this quick bonus tip for saving space and improving performance.
You can clear up tons of useless and space-consuming system scrap in just a few easy clicks, thanks to the System Junk module from CleanMyMac. I'm talking broken and temporary files, space-hogging cache, unnecessary system logs, and all the little bits of digital clutter that like to build up over time. Here's how to get rid of junk files:

- Open the application or get the free download here.
- Select System Junk from the top of the sidebar.
- Click Scan.
- Once complete, now click Clean.
Congratulations, you've just recovered valuable space and improved your Mac's performance.
Now, back to external drive discovery tips.
5. Try to force connect your hard drive
When your Mac fails to recognize your external hard drive automatically, you can force it to connect; here's how:

- Make sure your device is connected to your Mac.
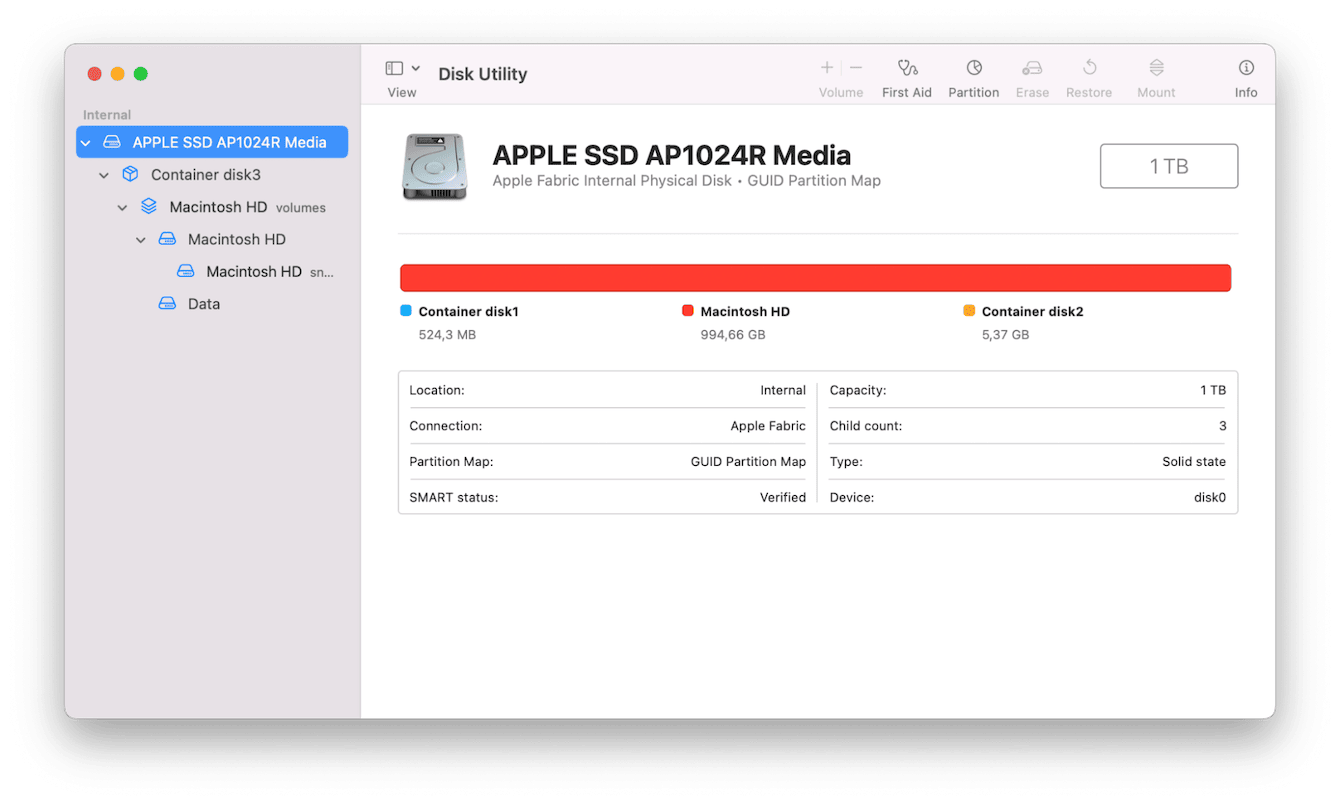
- Open Finder > Applications > Utilities > Disk Utility.
- Locate your external disk in the sidebar on the left.
- Select your hard drive and click Mount from the top options.
6. Run First Aid
If force mounting didn't work, it's time to run some First Aid on your external drive.
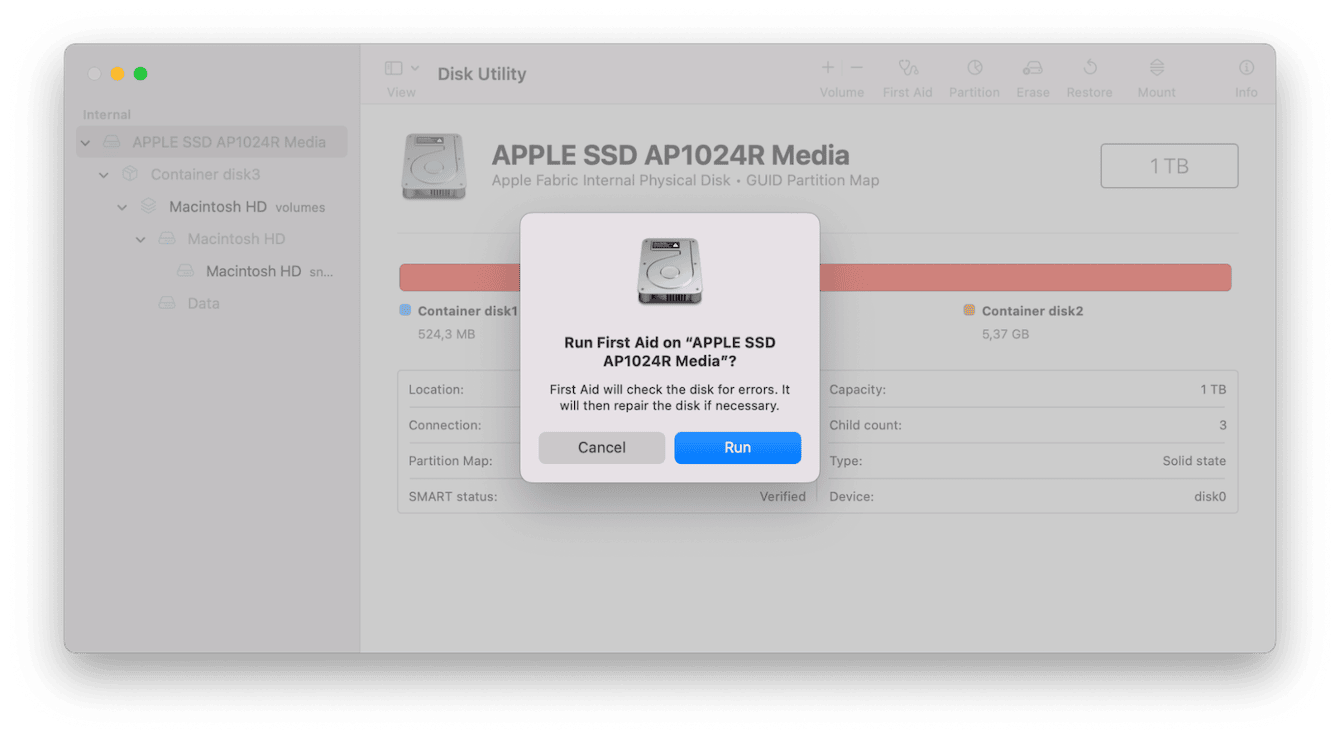
The First Aid tool from Apple is built-in to repair a wide range of issues and glitches associated with file or app corruption, startup, and external drive problems. Here's how to use it:

- Make sure your device is connected to your Mac.
- Open Disk Utility once again using the steps above.
- Select your external disk from the left sidebar, and this time, click First Aid and hit Run.
You'll now need to wait until the repairs are complete. If First Aid was able to successfully repair any issues, your drive should now mount.
7. Check compatibility
Another common reason why users run into external drive discovery issues is that the drive they are trying to connect isn't actually configured for use on a Mac.
You'll need to use Disk Utility to configure the external drive correctly; however, this process will erase all the contents on the external drive. So this might not be the desired option; if this is the case for you, it might be worth testing this external drive on a different computer, like a Windows device first, to see if you can access and save any important files to a cloud storage facility temporarily.
Now, here's how to format an external storage device for Mac:
- Connect your external disk to your MacBook.
- Open Disk Utility again ( Finder > Applications > Utilities > Disk Utility)
- Select your device from the sidebar and click Erase from the top.
- Confirm.
- Now give your external drive a new name, select APFS as the format, and click Erase.
This external drive is now formatted correctly to work on a MacBook.
8. Consider drive failure
If you've unsuccessfully worked your way through all of these tips but haven't been able to get your Mac to recognize your external hard drive, it's time to consider the worst — drive corruption.
Here's a quick look at some possible causes of drive corruption or failure:
-
Interruption when transferring files
-
Malware or virus attack
-
Physical damage, like dropping the device
-
Read/Write head crash
There are lots of third-party apps online that claim to be able to recover files; take caution if you opt for this route, read reviews and testimonials, and ensure the service is legitimate — lots of malware programs like to disguise themselves as this type of tool.
I personally would recommend seeking professional assistance from a computer service center.
It's a good reminder that backing up your data in multiple ways is a must. Cloud-based storage services can sometimes be more reliable than external hard drives.
So, we've come to an end; I really hope one of the tips above helped you to solve issues with your Mac external drive not showing up. Thanks for joining us today.

