How to free up Google storage
We'll show you how to free up Google storage on your Mac if you've exceeded or edged closer to the 15GB free storage limit.
Google provides a series of smart, collaborative productivity apps for personal and business use, formerly known as G Suite, including:
-
Email
-
Shared calendars
-
Online document creation, editing, and storage
-
Video meetings
Google Drive storage is shared between your Google Photos, Gmail, and Google Drive accounts. When you reach your storage limit of 15GB, Google will notify you.
The good news is you won't lose any stored or saved data, but the bad news is you won't be able to save anything new, and you might not stop receiving incoming Gmail emails.
So it's time to look at your options — either Upgrade to a paid account or clean up your stored data.
Check your Google Drive and free up space
If you don't want to spend money and upgrade to a paid account, then knowing how to clean up Google Drive is important. For those who need a quick reminder, here's how to check your current storage status:
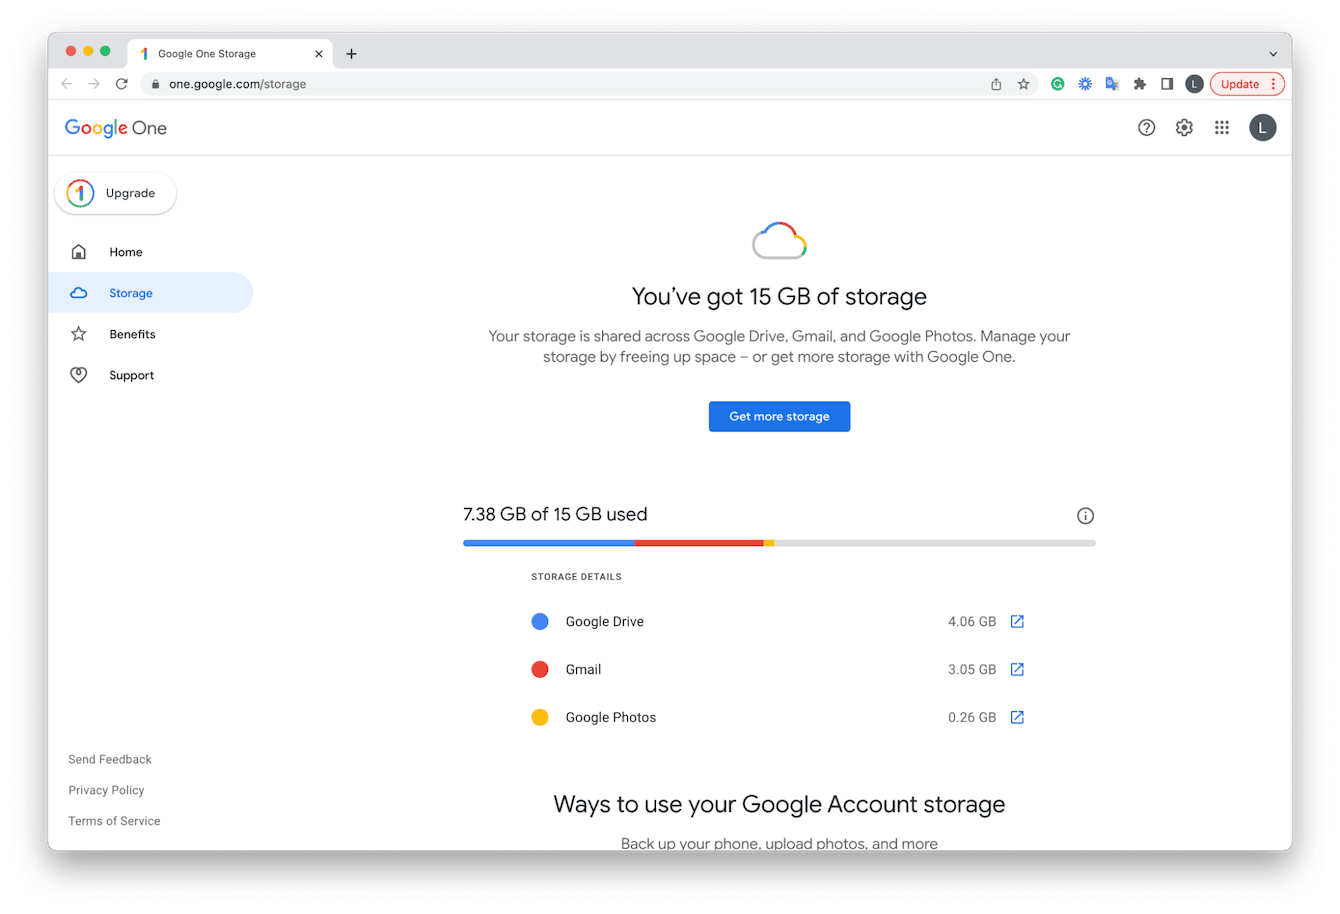
- Open your browser and visit https://one.google.com/storage.
- You might need to sign in.
- Then see your storage overview and breakdown across your Google applications.
In the next section, I'll show you how to quickly free up space so your productivity isn't impacted — let's get to it.
How to free up storage on Google Drive
1. Check Google Drive storage
Not sure what's hogging your storage space? It's easy to check. Here's how:
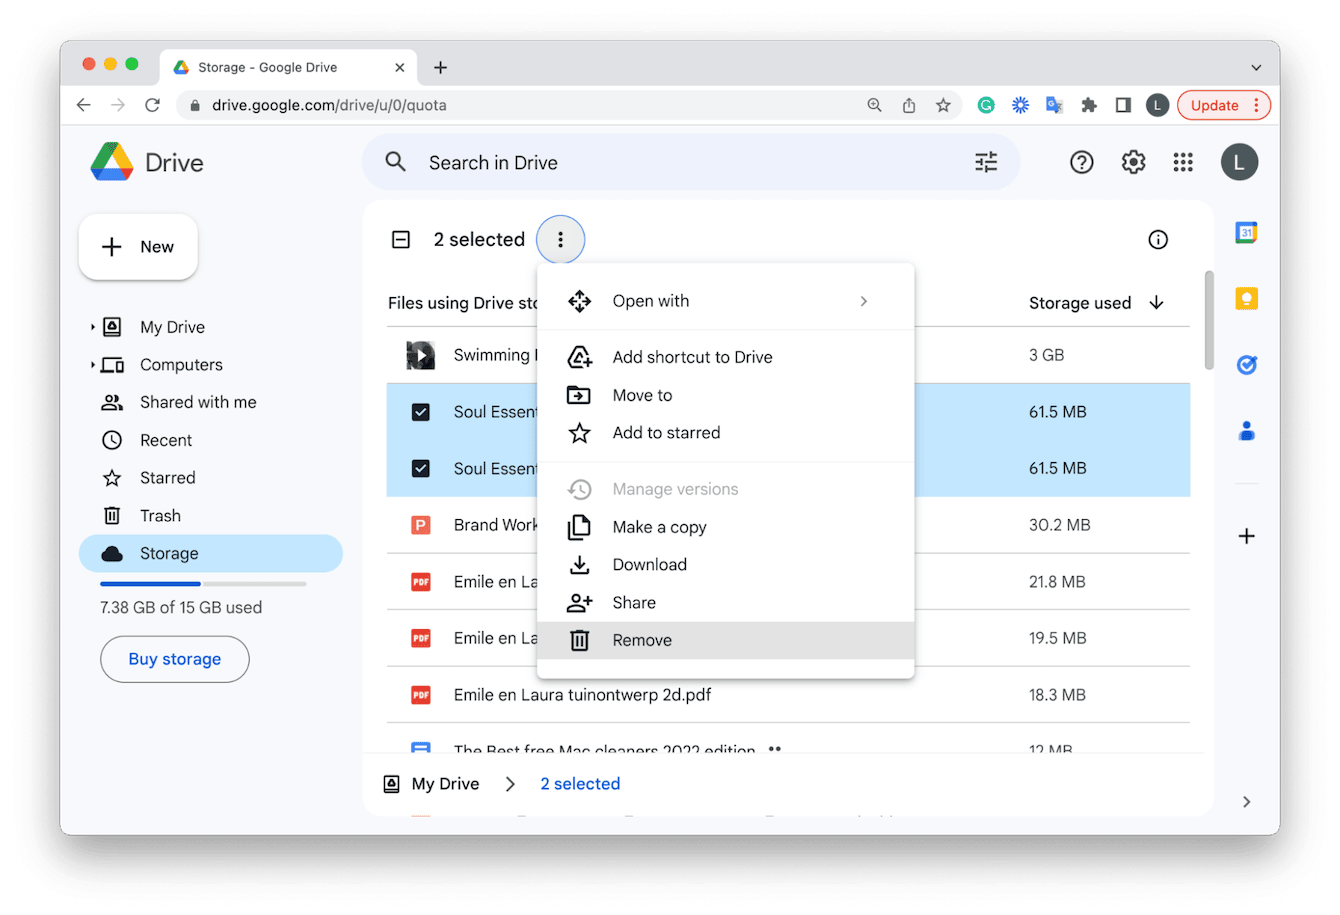
- Sign into your Google Drive and select Storage from the sidebar.
- Google will display your files sorted by largest first.
- Select which files you no longer want and then click the three-dot more menu.
- Click Remove.
- Select Trash from the sidebar menu and click Empty Trash.
Did you know that there is a smarter and easier way to clear up Google Drive? You can use CleanMyMac and its newest Cloud Cleanup feature to do it with a few clicks. Once you connect your Google Drive account, all it takes is one scan to quickly remove what’s no longer needed without having to log into your Google account every time.
Here’s how it works:
-
Open CleanMyMac — get your free trial here (use it for 7 days at zero cost).
-
Click Cloud Cleanup and connect your Google Drive storage.
-
Run a scan, select unneeded files, and click Review and Remove.

-
Make sure you've selected correct files and click Remove. Easy!✅


2. Reduce photo and video size
If you use Google Photos, another way to free up space is by reducing the quality of images and videos stored. Here's how:
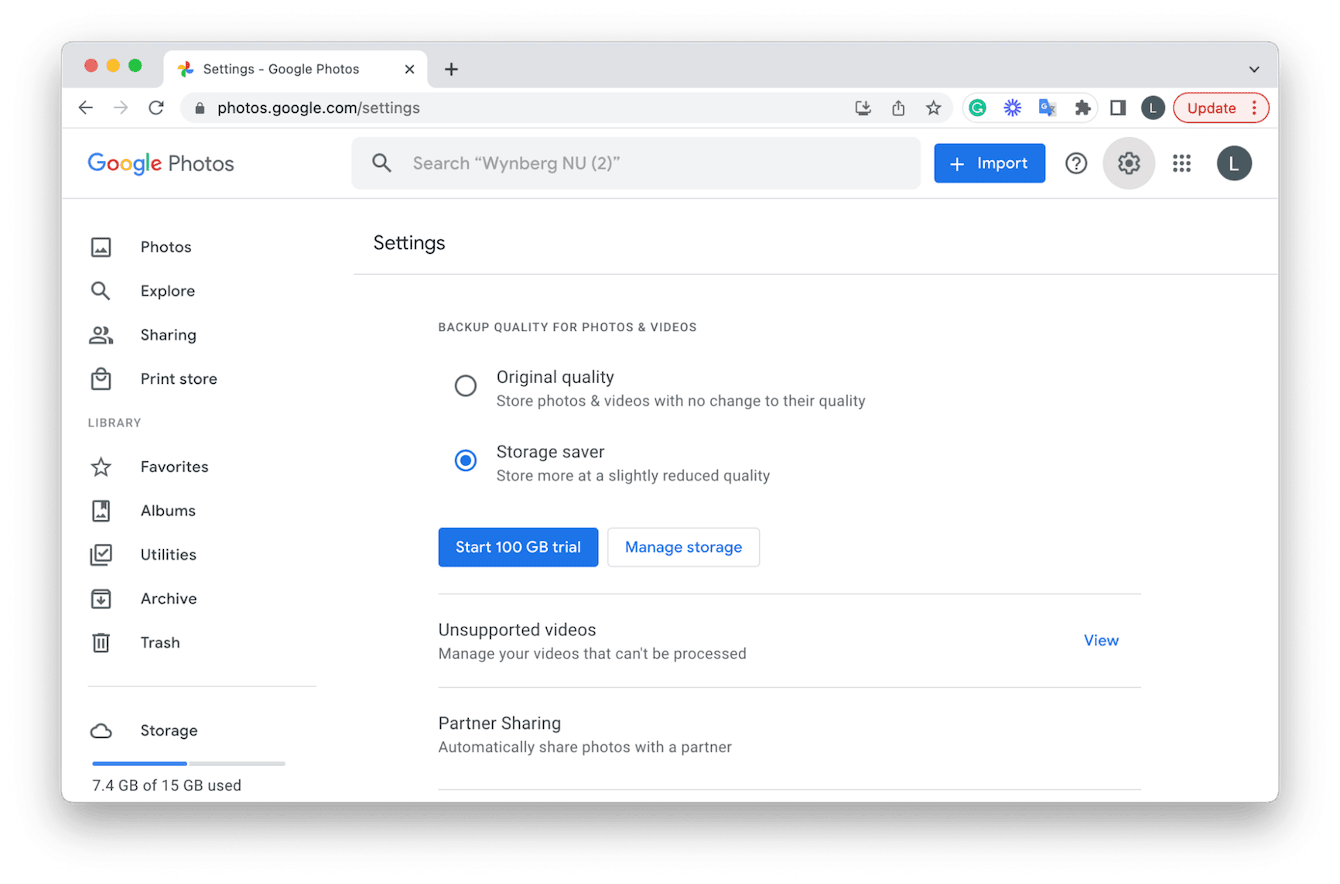
- Log in to your Google Photos account.
- Select the Settings gear icon top right.
- Select Storage Saver.
3. Convert file formats
Another option to clean up Google Drive is to consider converting your file types when uploading.
When you create and save files in native Google apps, such as Sheets and Slides, they take up way less space than if, for example, you were to upload a Microsoft Office PowerPoint Presentation to your Google Drive.
You can adjust your settings so that uploaded files are automatically converted into native Google file formats. Here's how:
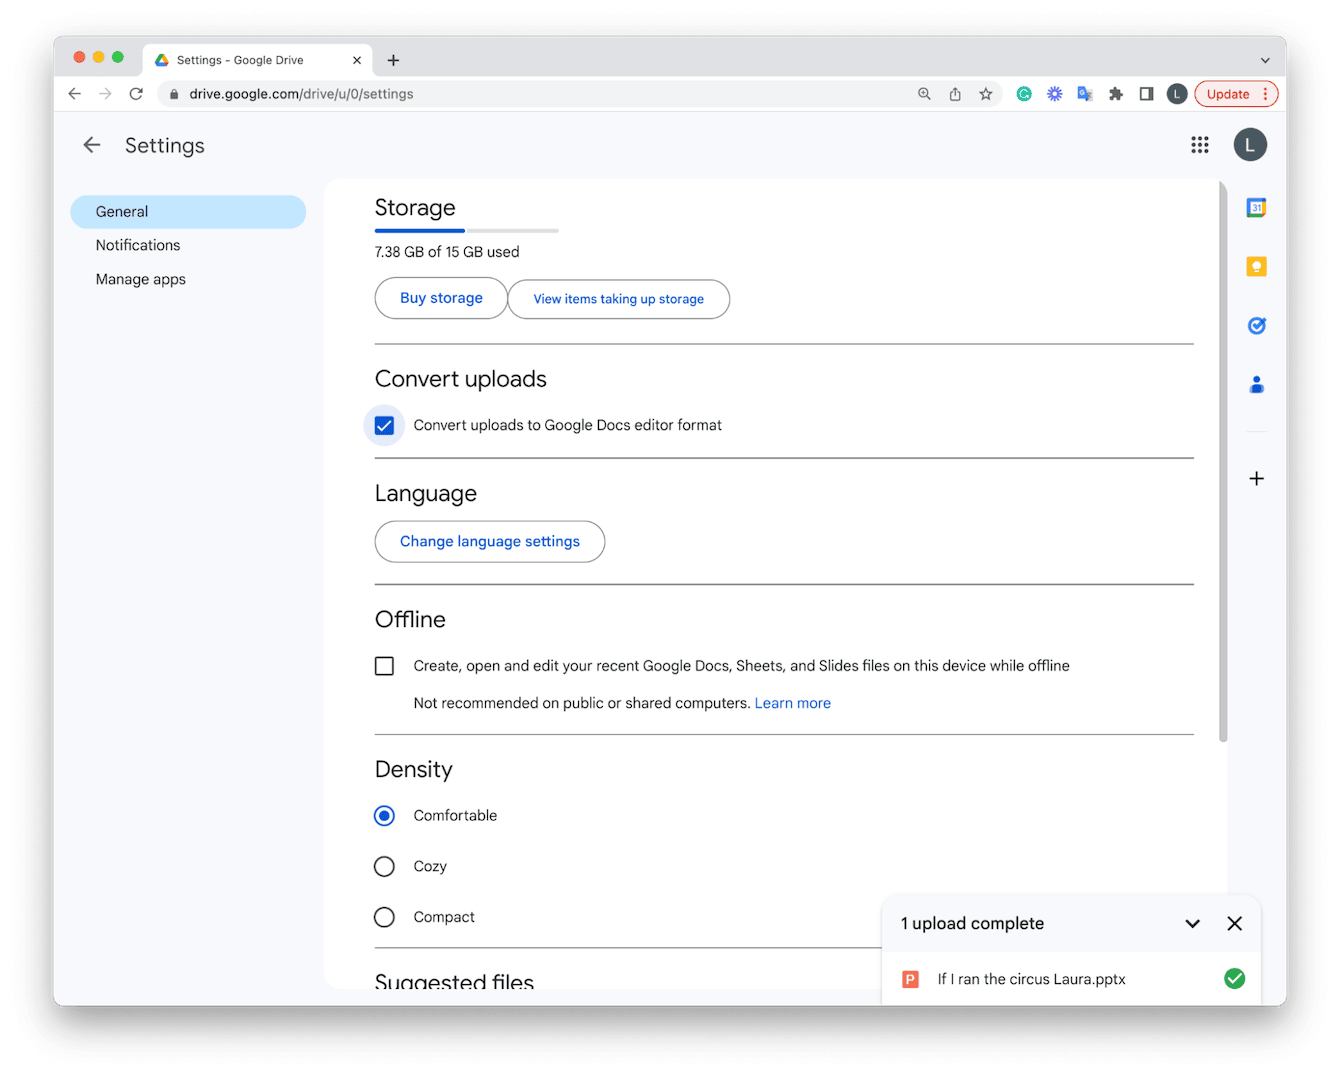
- Log into your Google Drive account.
- Click the Settings gear icon on the top right and choose Settings.
- Under Convert Uploads, select the box that says Convert Uploads to Google editor Format.
4. Use an external storage device
Files, like videos, images, and large presentations, can quickly consume space. If you don't want to delete anything, you could consider moving items from your Google Drive to an external storage device. Here's how:
- Connect your external device.
- Open Finder and select it from the sidebar.
- Keeping the Finder window open, log into your Google Drive account in your chosen browser.
- Drag and drop files into your storage device in the open Finder window.
How to free up space on Mac
If you've been transferring files to your Mac to save storage space on your Google Drive, be sure you take some regular MacBook cleanup action, too. Otherwise, your device will start to slow, and performance will dip as storage reaches capacity. Here are a few helpful tips to help you stay on top of your Mac storage.
1. Regularly check your storage capacity
Here's how to double-check your Mac's hard drive capacity:

- Select the main Apple menu > System Settings > General > Storage.
2. Remove system junk
Over time, old system cache, useless language files, and system and user logs will clog your Mac down if you let them build up. It can be time-consuming to remove it all manually. That's why using a dedicated tool is smarter and more efficient.
I personally like to use the System Junk tool (found within the Cleanup feature) from CleanMyMac. It's a powerful tool designed to keep your Mac optimized, clutter-free, and running smoothly. If you're yet to test this tool, get your free trial here.

Here's how to eradicate gigabytes of clutter:
- Open the app and click Cleanup from the sidebar.
- Click Scan, and once complete, click Clean.

3. Tidy up your files
Just like in your Google Drive, large files consume space on your Mac, too. Make sure you regularly remove unneeded items. Here are a few hiding places to check for forgotten files:
-
Desktop
-
Downloads folder
-
Documents
The app I mentioned in step two above has a really clever My Clutter feature designed to tackle this manual task in a few clicks.
It performs a deep system scan and categorizes every single file and folder on your Mac in one place, letting you sort by file type, size, and last opened date — smart, right? But that's not all it has to offer: the same feature can locate duplicates and similar images so that you can reclaim even more space.
Here's how to use it:

-
Open CleanMyMac and click My Clutter from the sidebar.
-
Run a scan and click Review All Files.
-
Select the files you no longer want and click Remove.
How to free up Gmail storage
Another great tip for how to free up space on Google Drive is to remove large Gmail email attachments. Here's how:
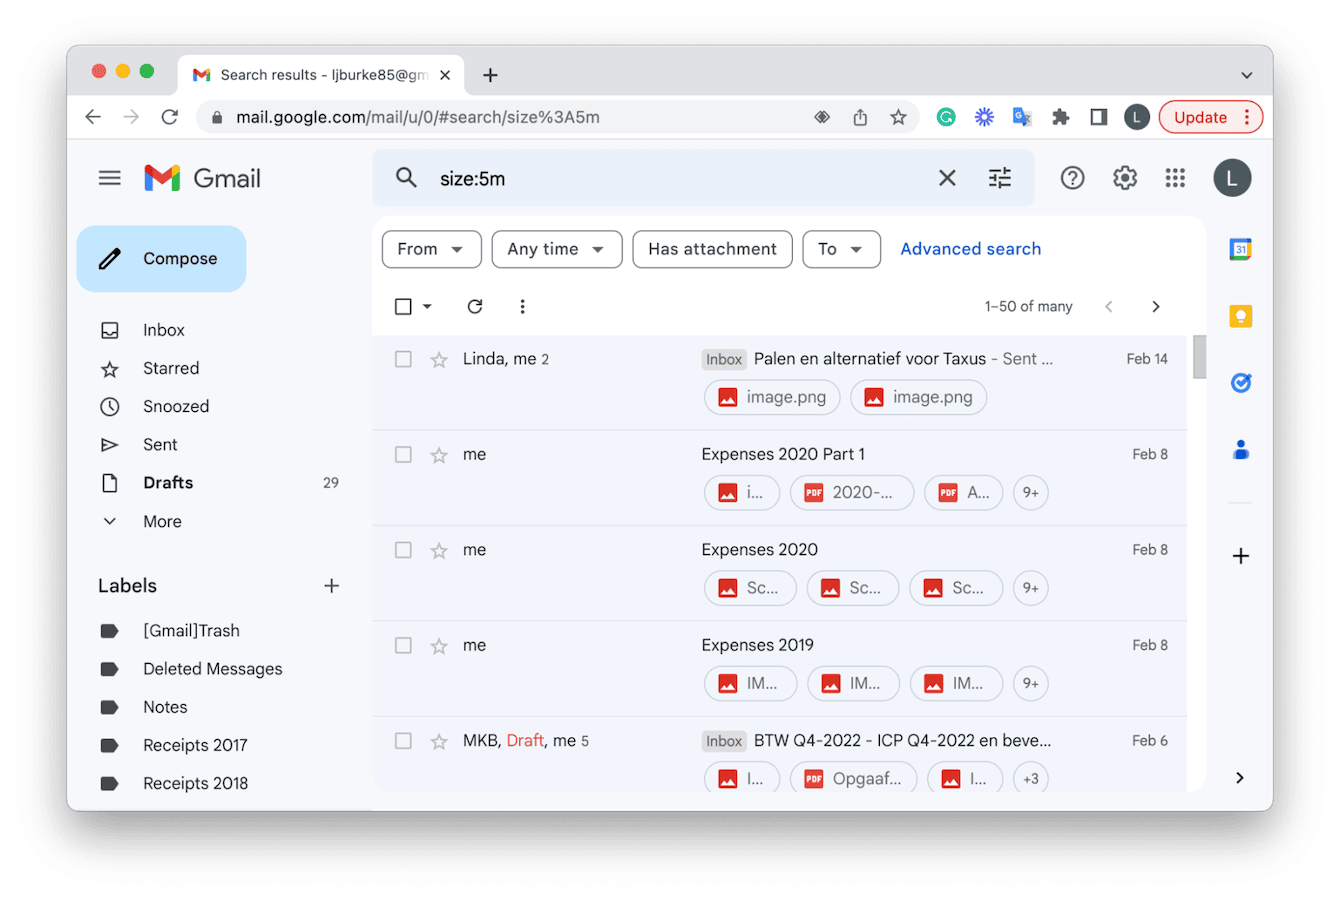
- Sign in to your Gmail account.
- In the top search bar, type in:
size:5m - This will display all emails with attachments of 5MB; you can also increase the number.
- Select all the items you want to remove and click the Trash bin icon.
- Now click the Trash folder in the sidebar, select all, and click Delete Forever.
So, thanks to these smart tips, you know exactly how to conduct a Google Drive cleanup and how to tidy your Mac storage, too.