How to back up MacBook without Time Machine
Googling how to back up a Mac to an external hard drive without a Time Machine? Well, look no further, you've landed in the right place.
Backups are essential for Mac users who want to keep their data safe and sound, and the Time Machine is not the only option. Today you'll learn the best ways to back up your Mac with and without Time Machine. Let's go!
Why backup your Mac?
There's nothing like learning the hard way how important backups are. Your Mac could get damaged, stolen, or infected with malware, or your macOS can accidentally crash. If something goes wrong with your Mac, and you haven't done any recent backups, you could face the devastating loss of unrecoverable work, files, images, and other dear-to-your-heart data. And here's why backing up to an external drive should be a priority and a part of your regular Mac maintenance routine. There is no better way to secure your files and save some valuable space.
There are plenty of different ways you can back up your Mac. Take a look at some of the top options out there:
- Time Machine
- Third-party software
- Cloud storage: iCloud, OneDrive, Dropbox, or Google Drive
Let's dive deeper into each option to help you choose what works for you.
How to backup Mac to TIme Machine
If you've been wondering how to use Time Machine, look no further. When it comes to backup options, Time Machine is the most obvious one. It's Apple's easy-to-use, built-in software that is ready to back up your data right away. All you need is an external hard drive.
How to set up Time Machine on Mac:

-
Connect your external drive.
-
Select the Apple Menu > System Settings > General > Time Machine.
-
Press + > Set Up Disk. Choose your external drive from the list, then press Use Drive.
-
Backup will then start automatically.
Time Machine works every time your Mac is turned on and the external drive is connected. Using Time Machine allows:
-
Hourly backups for the past 24 hours.
-
Daily backups for the preceding month.
-
Weekly backups for all last months.
When your drive is full, Time Machine automatically makes more room by deleting the oldest backups.
Why Time Machine backup might not be the best option
For years, Apple's native Time Machine backup software was the first port of call for users looking to secure their data against hard drive failure.
With Time Machine, you can protect your files free of charge, automatically, and with relative ease. But while Time Machine gets the job done, its reliance on local storage, for many Mac users, isn't enough leaving some of you wondering... "How to back up your Mac without Time Machine?"
Here's an overview of some of the Time Machine pros and cons:
Pros:
-
No monthly costs
-
Local backup
-
Versioning options
-
File previews
Cons:
-
Time Machine can be slow
-
Utterly reliant on external drives
-
Drives can be damaged, lost, or stolen
-
Malware infections can pass to external drives
-
Overcomplicated setup
Luckily, Time Machine isn't your only option. Jump to the next step to learn how to back up a Mac without a Time Machine.
How to back up Mac to an external hard drive
For those who like the idea of local backup but not with Time Machine, we have good news for you: there's another way!
We'll get to the manual backup in just a moment, but first, before you conduct any kind of backup, give your Mac a quick cleanup. There's no point in backing up all your system junk and clutter too.
Take some time to clear away all of your built-up cache files, temporary or broken files, your Downloads folder, and empty your Trash.
If you want to save time, we recommend using CleanMyMac. This app has a really awesome Cleanup feature that not only clears your system junk but also optimizes your Mac all at once. Here's how it works:

- Launch the app — get your free trial here.
- From the left sidebar, select Cleanup
- Press Scan, then once complete, press Clean.
Now your Mac is nice and clean, let's take a look at manually backing up your data.
How to prepare an external drive for Mac backup
Prior to backing up anything to your external drive, there's a little prep that needs to be done.
First, check how much storage your external drive has to make sure there is enough space for backups. Second, if you never formatted your external disk, it needs to be done. To do that, we are going to use Disk Utility:
- Connect your external hard drive, then open Applications > Disk Utility.
- Select your external drive, and click Erase.
- Choose the needed format and click Erase.

Voila! Your external drive is all set and ready for a backup. Here's how to back up your data manually:
-
Plug your chosen external hard drive in; once loaded, open it.
-
Create a new folder inside and give it a name.
-
Locate your Mac startup disk in Finder or on your desktop and open it. Press Users, then select all the folders and data you want to back up, drag this into your newly created folder on your external drive and wait for the copy to finish.
That's it! This can take a while if you're copying over lots of files. Don't forget to eject your external hard drive safely (failing to do so can corrupt files and folders.) Here's how:
-
Select your external drive either via Finder or via your Desktop.
-
Right-click and select Eject.
Tip: If you have an old Time Machine backup, you may need to restore your files before moving to another backup method. Here's a guide on how to do it.
How to back up Mac to a cloud storage
If you pay an Apple monthly subscription for iCloud storage, then iCloud is an excellent option to backup your Mac.
iCloud doesn't store all of your system data like Time Machine. Instead, it syncs things like:
-
Photos
-
Mail
-
Contacts
-
Calendars
You can customize and select what you want to backup. To see the complete list, head over to System Settings > Apple Account > iCloud.
Here's how to back up your Mac using iCloud:
-
Select System Settings > Apple Account > iCloud.
-
Click Drive and enable it.
-
Click Done and hit See All next to Save to iCloud.
- Turn on those apps you need backed up to iCloud Drive.
View iCloud backup data by following instructions below:

-
Open a new Finder Window.
-
Select iCloud Drive from the sidebar.
-
Drag & drop any files from your Mac to make them accessible from any of your devices.
iCloud does come with 5GB of free cloud storage. But trust me, that will not last long. So, you will need to either pay for a higher-tier plan or declutter your cloud storage, so there's enough space for a backup. We suggest removing large files you no longer need, and the easiest way to do it is to use CleanMyMac and its Cloud Cleanup feature. Here's how it works:
- Open CleanMyMac — get your free trial here.
- Click Cloud Cleanup and connect your cloud account.
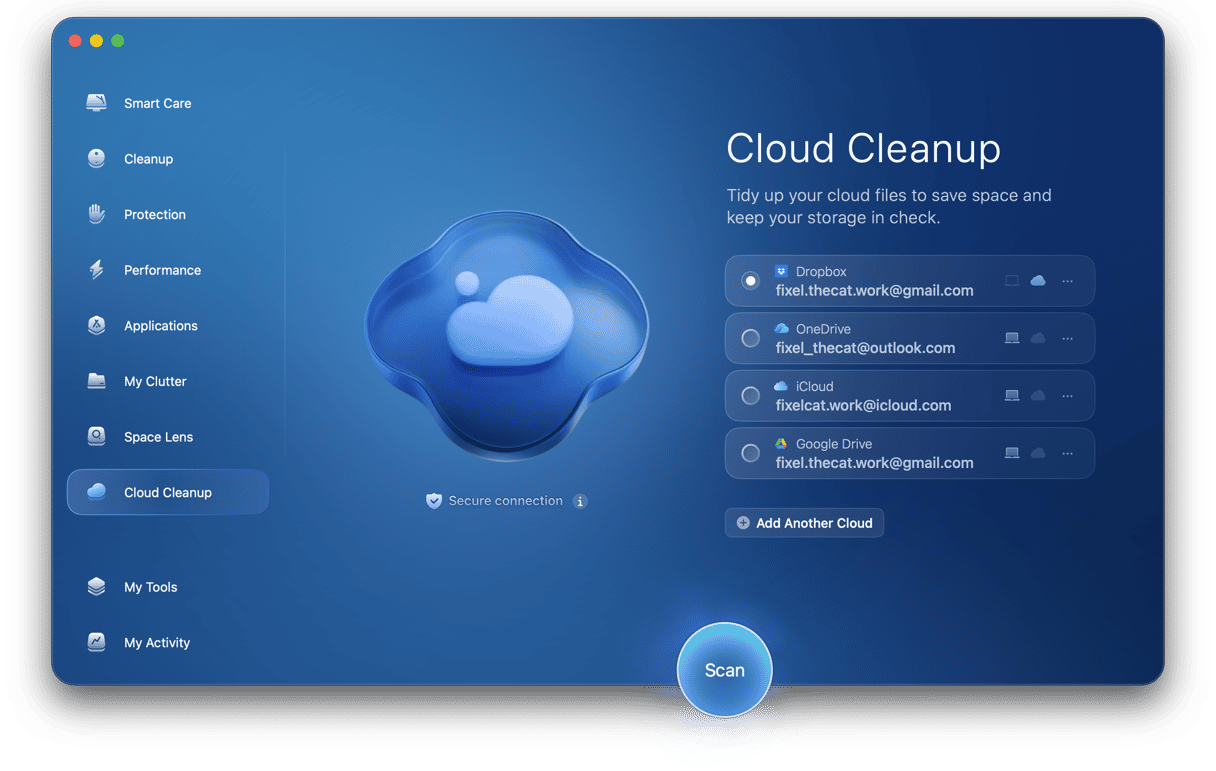
- Once ready, click Scan and review your files.
- Delete the stuff you no longer need.


If you're not into iCloud, there are third-party tools allowing to back up your MacBook to cloud. Here are our top three favorites.
1. EaseUS Todo Backup
EaseUS Todo Backup for Mac is a reliable data backup and disaster recovery tool, combining macOS clone with file sync functions, data backup, and archive.

Let's look at some of the benefits:
-
Free trial available
-
30-day money-back guarantee
-
Tech support
-
Over 530 million users worldwide
For anyone looking for Time Machine alternatives, this is a great option.
2. SuperDuper
SuperDuper for Mac is considered a user-friendly backup and recovery tool. Even non-technical Mac users would find it easy to use with its clean and intuitive interface.
SuperDuper benefits:
-
Free trial available
-
Wide range of features
-
Hard drive clone
3. ChronoSync
ChronoSync is an all-in-one solution for backups, file syncs, cloud storage, and bootable backups. A comprehensive and reliable choice. Let's take a closer look:

-
Free trial available
-
File and folder synchronization​
-
Quick recovery
-
Backup to external or network Volumes
Knowing how to back up your Mac to an external hard drive without a Time Machine not only gives you options but empowers you to make the right choice.
No matter which option you choose, manual or third-party tools, backups are vital against data loss. So make them regular, and don't forget to clean up your Mac first.
Happy backing up, and stay tuned!