How to downgrade from macOS Tahoe guide
I wasn't expecting to downgrade macOS Tahoe after first updating. I was excited for the new Liquid Glass look, the extra privacy features, and the better Apple Silicon optimizations. But after a week, a few too many app crashes, slow animations on my MacBook Pro, and one stubborn Wi-Fi dropout issue, I found myself researching how to roll back.
It's not complicated to revert, but it is unforgiving if you miss a step. So I've put this easy-to-follow guide together to save you time and any unnecessary headaches.
macOS downgrade tutorial: Downgrade essentials
The first step to downgrading your macOS is to properly prepare your machine. If it's the first time you're doing this, then it's important to know that this isn't a simple rollback.
Downgrading actually wipes your current system volume, so you'll lose everything on it unless you back it up first. That includes downloads, documents, app settings, the lot. Here's the checklist I followed.
1. Free up space
I always start with a cleanup first, not just to save time, but because having extra free space makes the whole downgrade process smoother. You'll find that installers run faster, temporary files have room to unpack, and your backup drive won't get clogged with stuff you'll never use again.
By clearing out old caches, logs, and forgotten downloads, you're not only making your backup smaller, you're also giving your restored macOS room to breathe from day one.
I've been using CleanMyMac for years; it's my go-to for this kind of task, which can help prepare your device for the macOS Tahoe downgrade. I always start with the Cleanup feature to get rid of junk files, old caches, and clutter that would otherwise bloat the backup. Here's how:
-
Open CleanMyMac (get your free trial here).
-
Click Cleanup > Scan > Review All Junk.

- Select items and click Clean Up.


Now that your Mac is clean, it's time for the backup.
2. Back up your current data
This is the step you absolutely cannot skip. Downgrading will erase your Mac's system volume entirely, which means every document, photo, app, and setting will be gone unless it's backed up somewhere safe.
-
Time Machine, which is the option I highly recommend, creates a full snapshot of your system, so you can restore your Mac exactly as it was, apps, files, and all. Just connect your backup drive, open Time Machine, and run a fresh backup before you start.
-
iCloud is great for documents, photos, and app data, but it's not a full system backup. If you use it, double-check that everything is synced by logging in to icloud.com and confirming your most recent files are there.

With all of these important essentials covered, it's time to move on to the actual steps on how to downgrade macOS.
How to downgrade macOS Tahoe using Time Machine
If you used Time Machine as your backup method, which I do recommend, then the downgrade process is actually really simple. It restores your Mac exactly as it was at the time of that backup, apps, files, and settings included.

Here's how:
-
Shut down your Mac from the main Mac menu.
-
Boot into macOS Recovery:
-
On Intel Macs, hold Command - R while turning it on.
-
On Apple Silicon, hold the power button and wait for the loading startup options > Options > Continue.
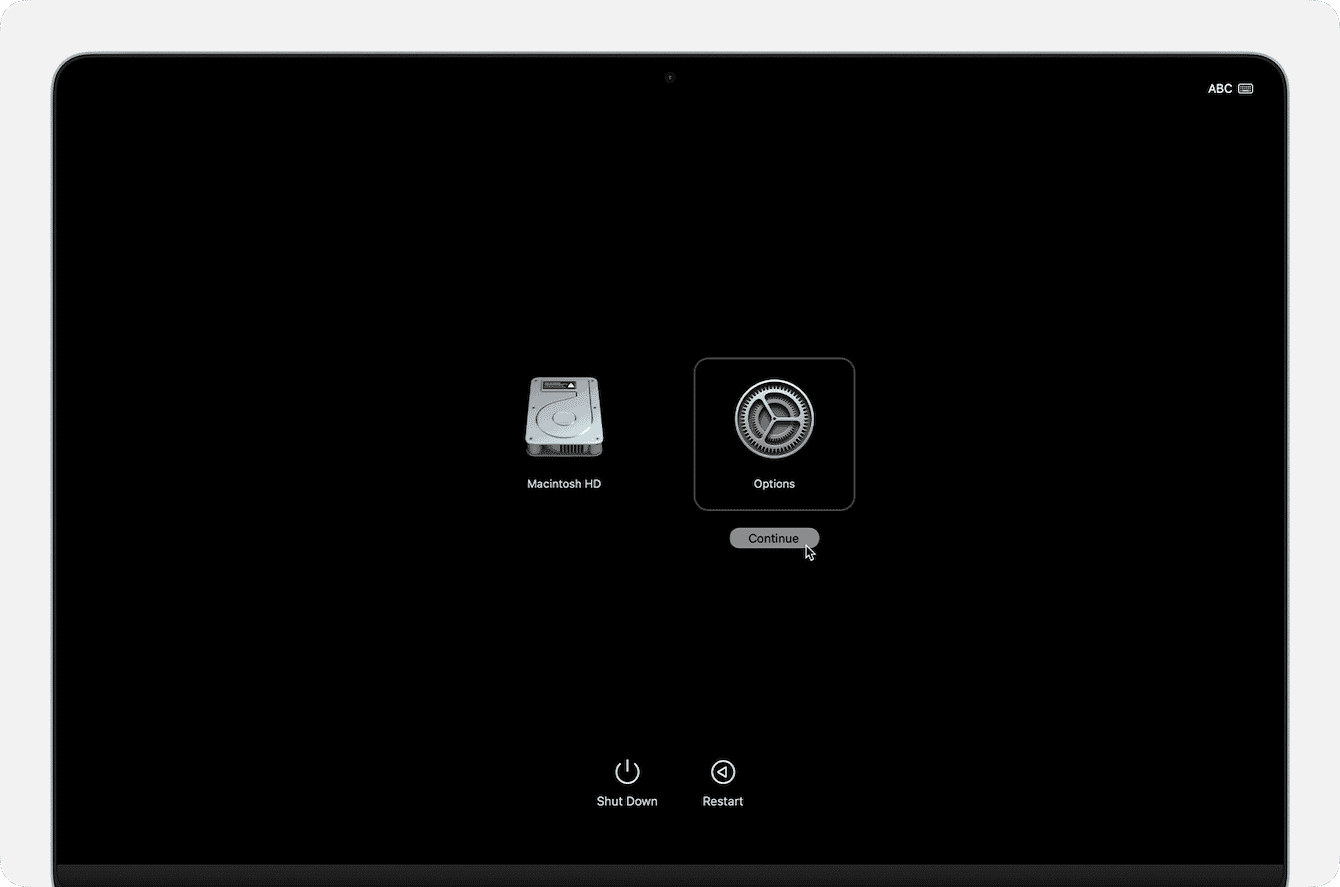
- In macOS Recovery, choose Restore from Time Machine.
- Select your Time Machine backup disk and select the backup you just created.
- Click Restore, follow any on-screen steps, and wait.

Downgrade macOS Tahoe in recovery mode
If you don't have a Time Machine backup or a bootable installer, Internet Recovery can reinstall macOS directly from Apple's servers (the version that originally shipped with your Mac or the closest available that still runs on it). Here's how:
-
Boot into Internet Recovery:
-
On Intel Macs: hold Option - Command - R at startup.
-
On Apple Silicon: hold the power button, pick Options, then select Reinstall macOS.
-
In macOS Recovery, open Disk Utility and erase your system volume.
-
Choose Reinstall macOS and follow the prompts.
Once macOS is installed, you can update to your target version by downloading that installer from Apple's support page and running it normally.
This method is slower, it absolutely requires a stable internet connection, and you can't pick a downloaded installer; you'll still need to install your desired macOS afterward if it's not the one Internet Recovery installs.
Troubleshooting: Restore previous macOS version
I've hit a few snags downgrading from Tahoe, especially when the Recovery installer failed or the Mac refused to erase the system volume.
1. Make sure the disk is completely erased
If you've already tried reinstalling an older macOS version and got an error like "You cannot install to this disk" or the installer refuses to start, it usually means there are still macOS Tahoe system files or partitions left on the drive. In this case, you would need to erase the disk fully in macOS Recovery so the installer can create a fresh, compatible system volume. This isn't the same as just deleting "Macintosh HD"; you have to erase the entire internal drive, system, and data volumes together.
2. Maintenance tasks
A downgrade can still fail if the system has broken permissions, outdated indexes, or corrupted caches left over from macOS Tahoe. These can trip up the installer and cause unexpected errors mid-process. Use the Performance feature from CleanMyMac to run some basic maintenance tasks; here's how:
-
Open the app, select Performance > Scan.
-
Click View All Tasks.
-
Select items and click Run.

3. Check Wi-Fi
If you're using Internet Recovery to downgrade, you need to make sure your connection is stable; it's usually the most common cause of downgrade failures; here's a checklist:
-
Use a wired Ethernet connection if possible.
-
Sit near the router and temporarily disconnect other devices to keep the bandwidth steady.
If you were plagued with macOS Tahoe update issues, this guide will help you downgrade like a pro.