How to free up space on a Mac
These days, you can buy a Mac with 8TB SSD storage. But let's face it; only a few of us invest in such computers. For most Mac users, 256GB or 512GB is a common choice, and this space is finite. Unfortunately, there's no way to expand it, and, over time, your Mac will inevitably get clogged up.
To avoid it, as well as the inability to perform simple tasks, it's recommended to declutter your Mac from time to time. Keep on reading, and we'll show you how to check what's weighing your Mac down and share 10 great, easy-to-follow tricks for freeing up space and optimizing your device for smooth performance. So, let's dive in.
How to check and manage storage on a Mac
We know you're eager to get to the juicy tips on how to clear disk space on Mac, but before we do, you first need to know how to check your available storage and identify what is consuming all the space on your Mac — then you can use the tips most relevant to you to free up space.
So, here's a quick reminder of how to check your storage space:
- From the main Apple menu, go to System Settings > General > Storage tab.
- Alternatively, click Apple Menu > About This Mac > More Info > Storage Settings.
The colorful graph gives you an overview of your used and available storage space. Simply move your pointer across the different colors to see how much space each category uses. The light gray color indicates free, available storage space.

How much free space should I have?
Good question. MacBooks start showing signs of slow performance when around 85% of your storage space is in use. Experts recommend a minimum of 10% of the overall storage free to allow your Mac to run correctly, but the more you can free up, the better it is in general for your Mac's performance.
Before you clear disk space on your Mac, now might be a good time to back up your data, just in case you remove something accidentally. Then, when you're ready to start, head below for some useful tips.
How to free up storage space on Mac
1. Utilize Apple's built-in tools
Top of the how to clear storage on Mac list is to enable and utilize Apple's built-in storage management recommendations. Now, this will not solve all your storage troubles, but it's a great place to start, and when it comes to storage space, every little bit helps.
How to access Apple's storage management tool:
- Once again, check storage from the main Apple menu following the steps outlined above.
- Under the storage overview — a colored bar with a breakdown of categories of what's occupying your disk space — take a look at the Recommendations section.
- Here, you can enable various options to optimize your storage:
- Store in iCloud: When enabled, this will store your files, videos, messages, and photos currently saved on your Desktop and Documents folder to your iCloud Drive.
- Optimize Storage: When enabled, this will automatically remove watched Apple TV movies and shows. And only keep recent email attachments.
- Empty Bin Automatically: When enabled, this will automatically delete any items stored in your Trash bin for more than 30 days.
Tip: If you store your files in iCloud, declutter your iCloud Drive from time to time. You can either do it manually by going to System Settings > Apple Account > iCloud or let CleanMyMac do it. It comes with Cloud Cleanup feature that lets you scan your connected cloud account and remove or unsync files you no longer need within minutes. Get started with a free CleanMyMac trial — check out how Cloud Cleanup and other tools work for 7 days at no cost.
2. Check your Downloads folder
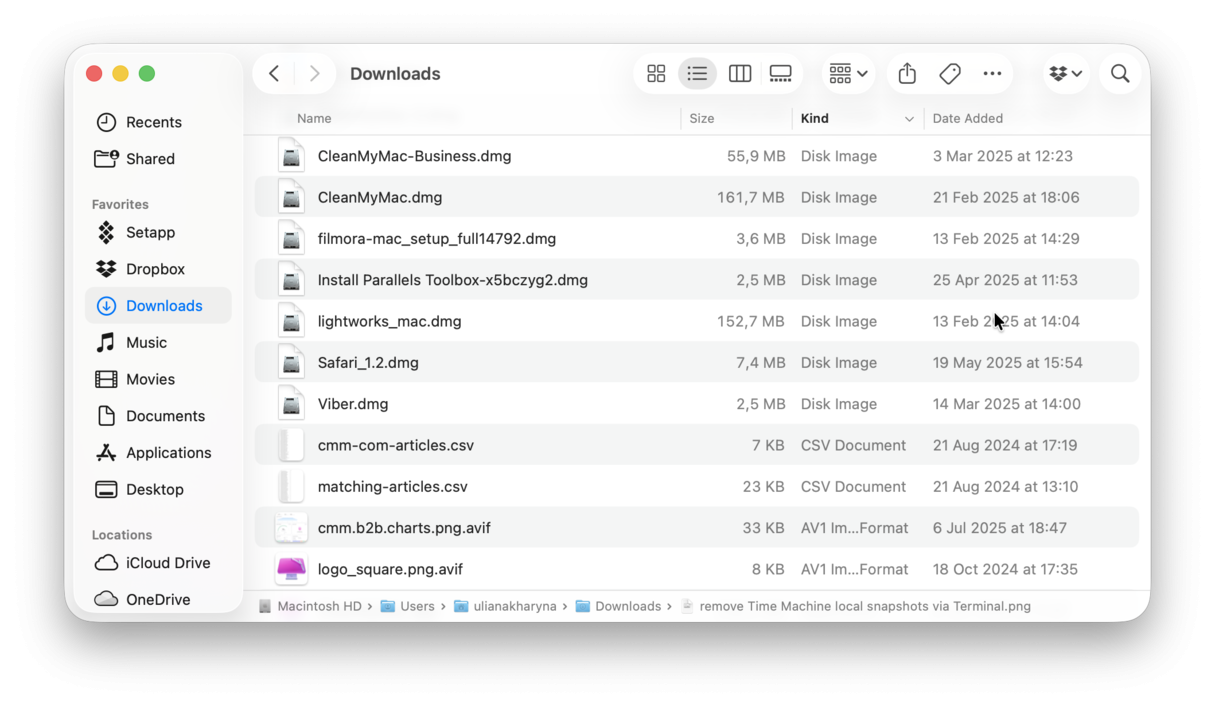
Has your Downloads folder become a dumping ground for random folders or a forgotten large files graveyard? Out of sight, out of mind, right? When people ask how to clear up space on Mac, they don't always automatically think of checking their Downloads folder. But it's surprising what you can find — hoards of useless DMG files, ZIP archives, and unnecessary large files. Take some time to sort through yours. Here's how:
- Open Finder > Downloads.
- Sort by Size to see all the files, starting with the largest files at the top.
- Select the items you no longer require and send them to your Trash or Bin. As always, empty Trash when you're finished.
3. Remove all your system junk
You can quickly free up space on your Mac by removing all your bloated system junk. Think of cache files, system logs, temporary files, unused folders, or broken items and apps. This stuff easily builds up and consumes tons of gigabytes of precious storage space.
The problem with removing system junk manually is that this kind of clutter isn't located all in one simple place — it takes some detective work to hunt it all down, and many Mac users just don't have the time or patience to do it.
Thankfully, there are some great purpose-built, third-party tools like CleanMyMac — an Apple notarized application. It's been in the market for more than 15 years and has been downloaded more than 29 million times.
Its powerful Cleanup module can perform an instant, in-depth system scan, unearthing all your clutter from all the hard-to-reach places in just a few clicks of your mouse. The results are instant — not only will you reclaim a severe amount of space, but you will also optimize your Mac and boost its performance all in one go. Here's how to get rid of junk files and reclaim more space:
- Start your free CleanMyMac trial — get access to 25+ tools to clean, protect, and optimize your Mac.
- From the sidebar, click Cleanup.
- Click Scan, wait for a moment, and when complete you’ll see the amount of junk found.
- You can Review the junk or simply tap Clean.
- Done.

On average, users reclaim 22 GB of space at first scan. And monthly, CleanMyMac clears out more than 35M GB of clutter! Impressive, isn't it?
4. Consider external storage
If you have a large photo or video library on your Mac, moving these media files to an external storage device is another relatively simple way to free up space on a Mac. Here's how:
- Make sure the external device has enough space and is correctly connected to your MacBook.
- Ensure the Photos app is completely closed.
- Open Finder, and from the top menu, select Go > Home > Pictures — by default, your Photos library is stored here.
- Now, drag your Photos library to your external storage device while pressing the Command key. This will ensure your files are moved, not copied.
- Once the transfer is complete, open the Photos library on your external device to view it. If, for some reason, the Photo Library still remains on your Mac, drag it to your Trash, then empty it.
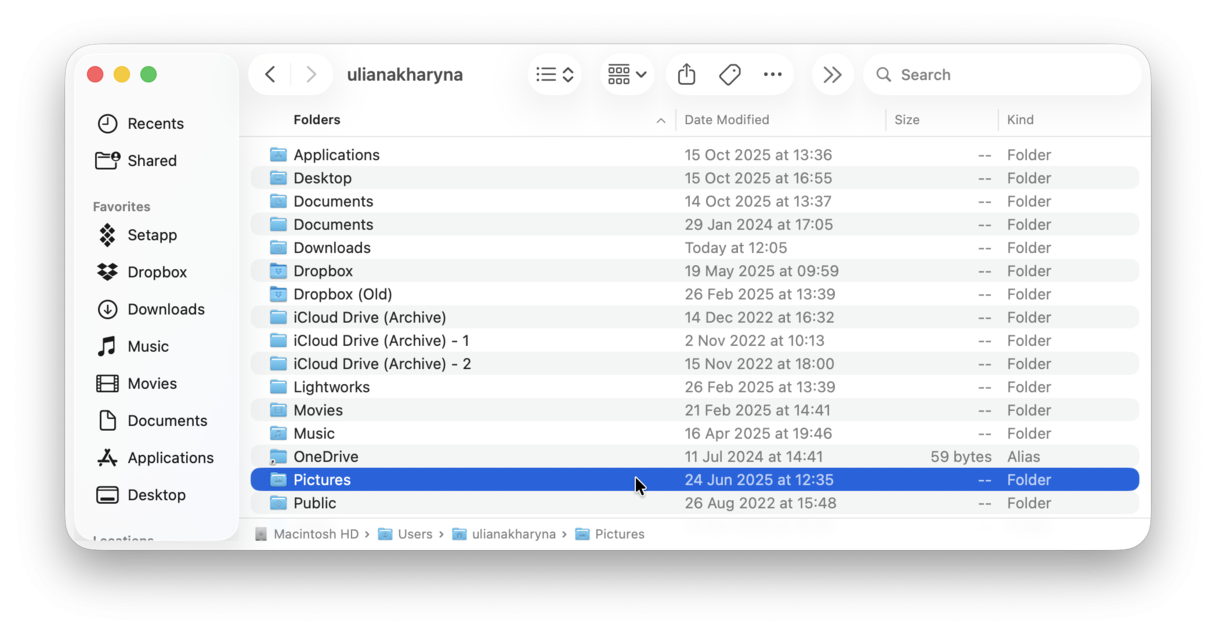
It's also worth mentioning here that if you use iCloud Photos, you will need to indicate this new location as the new system Photo library. Check out this article from Apple on how to do that.
Tip: Using a Mac cleaner app is the easiest and safest way to free up space on Mac. We believe that CleanMyMac is the most effective, one-click solution to all your space-related issues, but it is not the only one out there. Check out this article to learn about other Mac cleaners.
5. Remove unused applications
Another simple way to clear up space on a Mac is by uninstalling any applications you no longer use. Here's one of the quickest ways to remove apps manually, including all of their temporary files, hidden leftover files, and folders:
- Open a Finder window and find Applications in the sidebar.
- Locate here the app you want to remove and drag it to your Trash or Bin.
- Finally, empty your Trash.
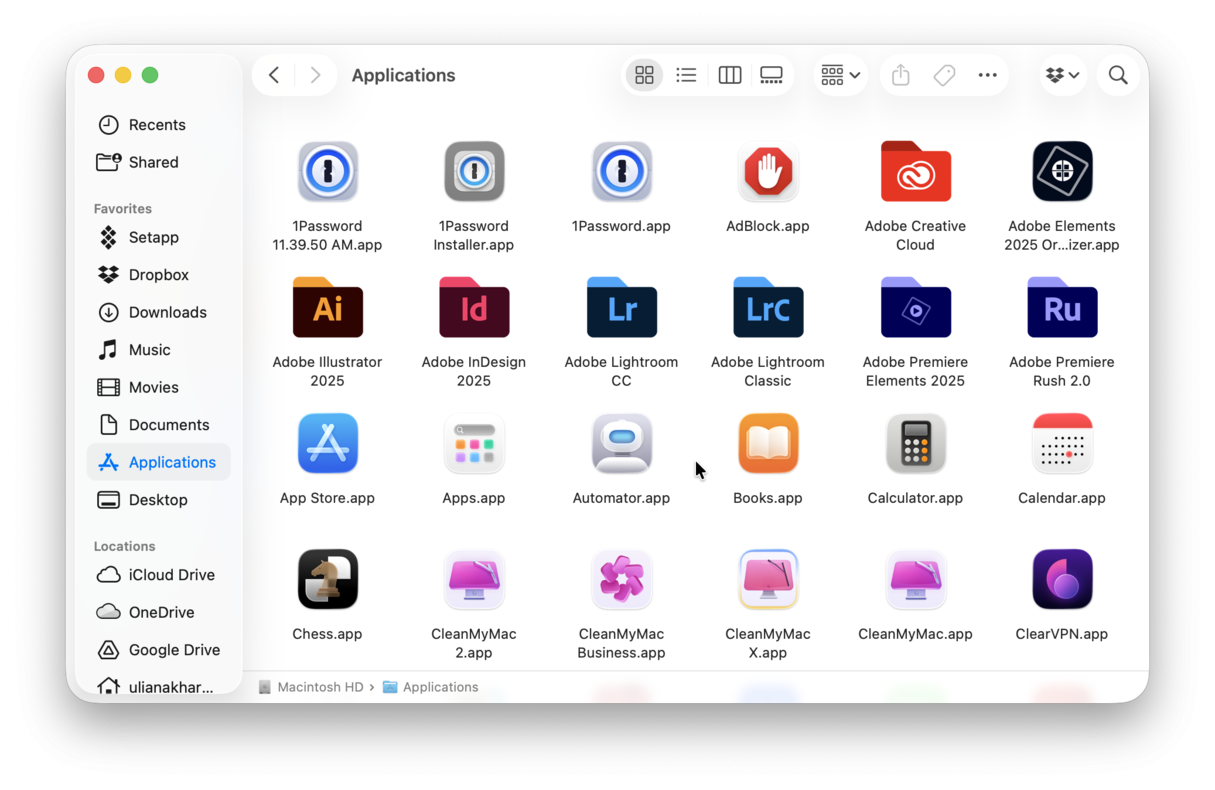
Many people think once you've deleted an app, it's gone, but that is not the case. This method doesn't ensure all traces of the app have left your device — hidden app leftovers will still be lingering on your Mac, and it is precisely this kind of digital waste that takes up space. How to search app leftovers and remove them, freeing up a few gigabytes of space:
- In a new Finder window from the top menu, select Go while holding down the Option key.
- Select Library from the list.
- Locate the search bar top right and input the name of the application you just deleted. To ensure your device searches in the correct location, select the Library folder.
- Locate all the related files and move them to your Trash, emptying it afterward.
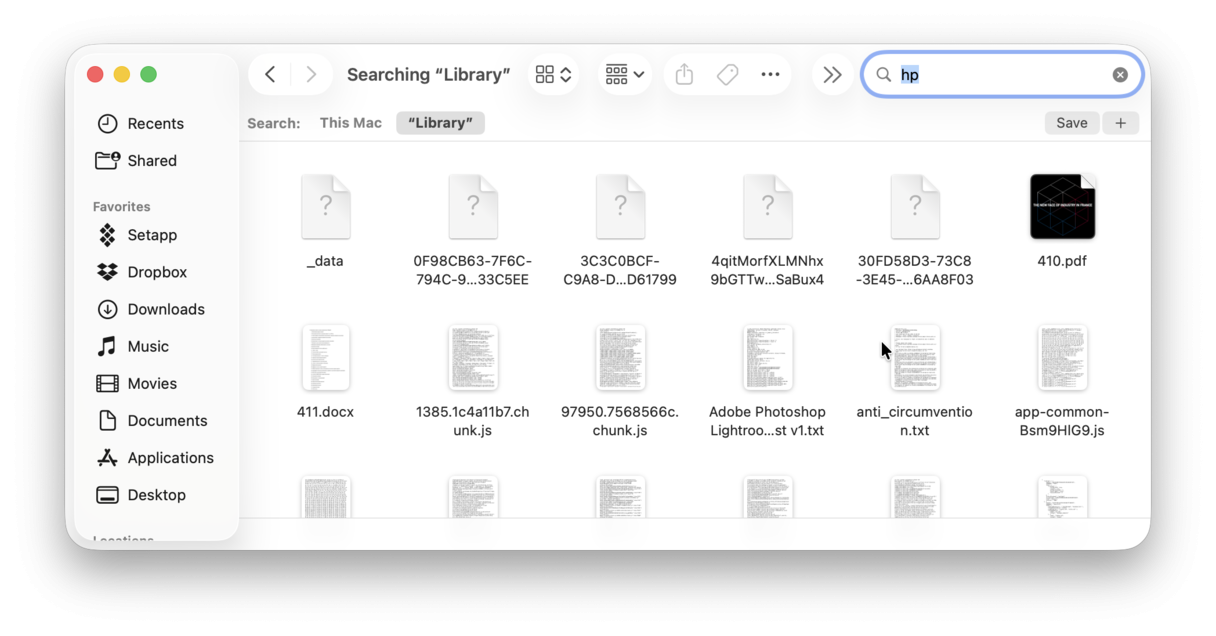
This will ensure every single app leftover is removed from your device, saving substantial disk space.
6. Remove large and old files
If you've been using your Mac for a long time, chances are you have many large and old files. You can hunt down these files manually by going to each folder on your Mac and using the Size and Date Added filters. If you decide to go this way, send such files to the Trash, and don't forget to empty them.
If you're looking for a faster way to delete large and old files, there is one — you could use the CleanMyMac app that we mentioned in tip 3 to find and remove these files. It has a smart My Clutter feature, which could do this for you in no time. The average user removes 1.34 GB of Duplicates and 154 MB of Similar Images. Why not check how much unneeded stuff you can clean up?
Here's how to use it:
- Open the app and select My Clutter.
- Click Scan.
- Once complete, click Review All Files.
- In the Large & Old Files section choose files for removal and click Remove.

Get your free CleanMyMac trial — test the market leader for 7 days free.
-
Helps remove around 47 GB of junk per year (on average for a user)
-
Rated 4.6 on Trustpilot
- The winner of iF Design Award and the Red Dot Award
Well, there you go. That's another simple tip if you wonder how to free disk space on a Mac, but don't worry—we're not finished yet. Here are some other great tips.
7. Delete your old iPhone and iPad backups
Another straightforward way to answer how to make space on Mac is by removing old, unnecessary iPhone and iPad backups. These files notoriously consume significant disk space, as they include weighty items like movies, music, and images. Luckily, it's simple to remove them; let's take a look. How to locate and delete old iOS device backups:
- Select the main Apple menu (little Apple icon in the menu bar) > System Settings > General > Storage.
- Under the Recommendations section, locate iOS Files in the list.
- Select the small information icon to the right to see a list of all your device backups stored on your Mac.
- Select all the backup files and click Delete.
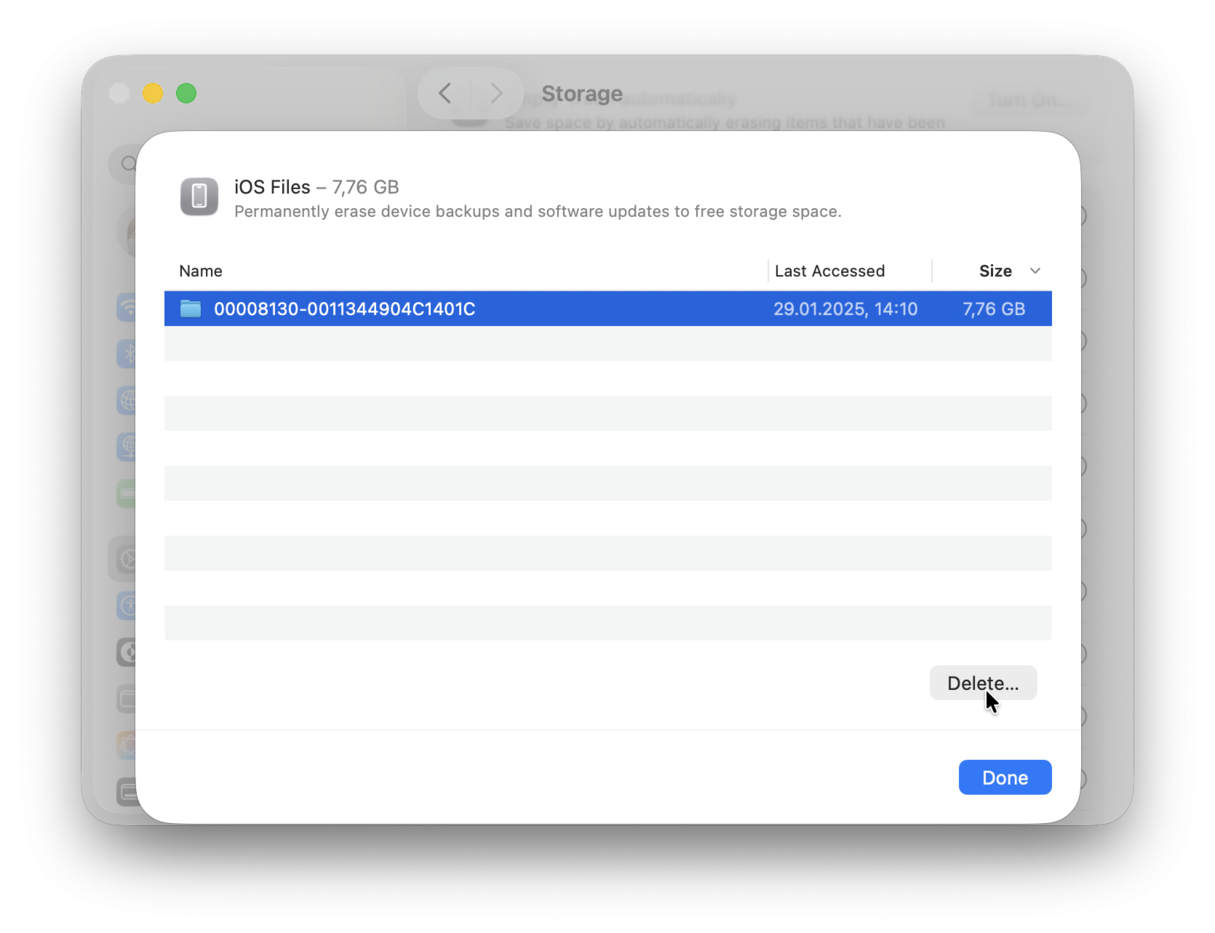
If you'd rather see what's stored in these folders before you remove them, here's another method that allows you to review the content first.
- Open Finder, and from the top menu, select Go > Go To Folder.
- Type in the below text:
~/Library/Application Support/MobileSync/Backup - Review content before sending items to your Trash or Bin.
8. Review the contents of your Desktop
If you use Stacks, you might be alarmed to discover what kind of clutter has accumulated in those nice tidy piles. Here's how to check:
- Right-click anywhere on your Desktop and click Use Stacks.
- Once your Desktop contents have been revealed, take time to sort through your files and folders, moving any items you no longer need to your Trash or Bin. Empty it afterward.
- Enable Stacks again by repeating step 1.
9. Find and delete duplicate files
One more tip for how to free up storage on Mac is to locate all your duplicate files and folders.
It's possible that over time, you've unintentionally created copies of documents or downloaded the same file more than once and simply forgotten about it.
This can be a tricky process, which does require some patience, but unnecessary duplicates will take up valuable space, so it's worth taking the time to locate and remove them.
Let's start with the easy bit, removing duplicate video and music files:
-
Open the Music app.
-
From the main menu, select File > Library.
-
Now, click the Option key and press Show Exact Duplicate Items.
If you have duplicates, you'll see them in a list, and you can simply delete any you find.
Unfortunately, for all other file types, it's not that simple; it's a bit of a time-consuming process, but let's take a look:
- Open Finder, and from the top menu, click File > New Smart Folder.
- From the top right corner, click the "+" icon.
- From the first dropdown box, select Kind. Then in the next one, select your file type. For this example, we are using PDF.
- Now, select List View and sort your items by name — this way, you can easily see duplicate files.
- When you find duplicates, simply send them to your Trash or Bin.
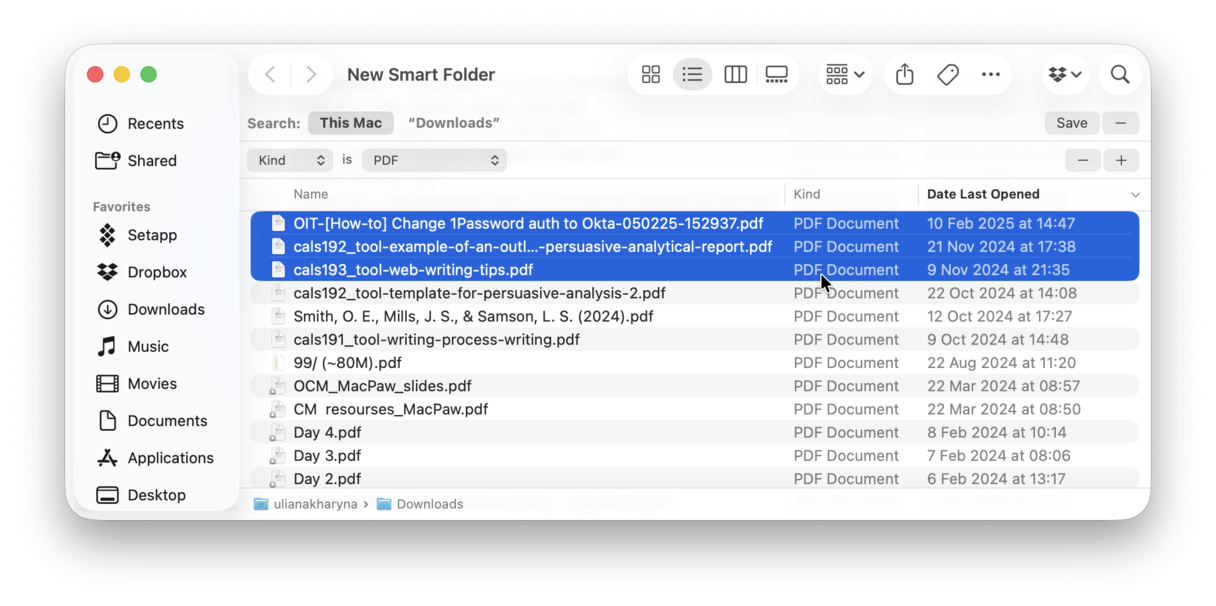
You'll need to repeat this process multiple times, depending on the various different file types you want to search for. It's a bit long-winded, but as you can see from the image above, it's worth it.
When deleting duplicates using this method, it's also worth checking the Date Created column to ensure they are true duplicates.
10. Remove unnecessary language files
The apps we download and install come with varying extra language files, many of which most of us would never use. A good example of this is Spotify coming with over 50 language files. These files consume valuable disk space, so if you're not planning on using them, it's a good idea to remove them. How to locate and remove unnecessary application language files:
- Open Finder > Applications and select an app. In this example, we'll use Spotify.
- Right-click and select from the list Show Package Contents.
- Now, press Contents > Resources folder.
- Language files end with the ".lproj" extension, and the two letters at the start represent the language, for example:
en — English
es — Spanish
de — German - Send any unrequired language files to your Trash or Bin. As always, ensure you empty Trash afterward and repeat this process for all your apps.
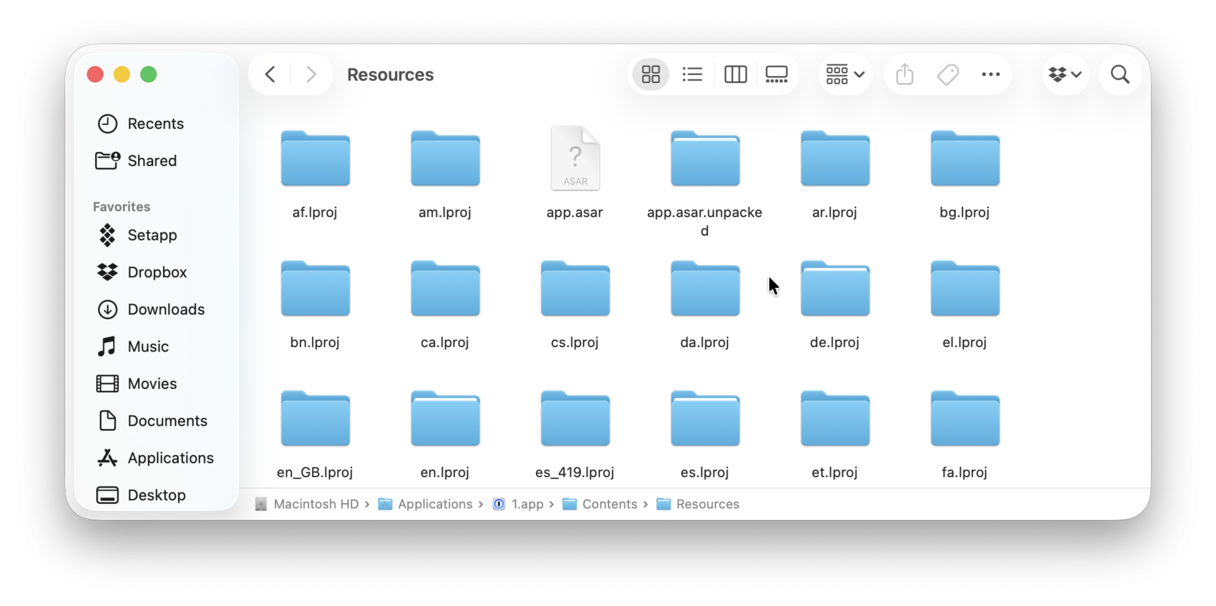
Note: Hunting down all of the unnecessary language files may require too much effort since you will have to check Package Contents for all apps. If you do not want to do it manually, you can use CleanMyMac's Cleanup module we described above — among all the various types of system junk it detects, CleanMyMac also removes language files you do not need.
Now that you've freed up space on Mac, did you know that you can also erase that free space? Check out this article to learn how.
Well, we've reached the end. Now, you know exactly how to free up disk space on a Mac. Without all the extra weight from temporary files, system junk, cache files, useless language resources, and large and old files, your Mac should feel lighter and perform way better. Be sure to check back soon for more tricks, tips, and how-to guides for all things Mac.
Frequently Asked Questions
1. What are the most common space eaters on Mac?
Usually, these are system junk files (including user cache), unused applications, and old iOS backups. You'd be surprised to find out that they can occupy up to 30 GB of space — sometimes even more.
2. How to quickly reclaim space on Mac?
The fastest way to free up space on Mac is to clear out the Downloads folder, delete apps you do not need or use, and move unnecessary files to external storage.
3. How to safely free up space on Mac?
The key here is to double-check everything you send to Trash or Bin, especially if you remove files from the Library and delete other system data.

