

Here’s how to run a security check on your Mac
There's no single "security check" button on a Mac. A proper check has two parts: making sure the protection built into macOS is switched on, and scanning your Mac for malware. Below is a checklist for both.
Everything you need to know about Mac security
Contrary to common belief, Macs are vulnerable to malware and viruses. Apple builds three layers of malware protection into macOS: Gatekeeper, and notarization stop known malware from opening, Gatekeeper, notarization and XProtect block it from running, and XProtect removes infections it recognizes. These protections only help while they're switched on and macOS is up to date, so that's the first thing a security check confirms.
Keep on reading for some smart tips on how to up your security game, but first, let's start with the basics of running a security check.
How to run a security check on Mac
Step 1: Check that your Mac's built-in protection is on
Open System Settings from the Apple menu and go through these settings. On a work Mac, some of them are managed by your IT team, so ask them before changing anything.
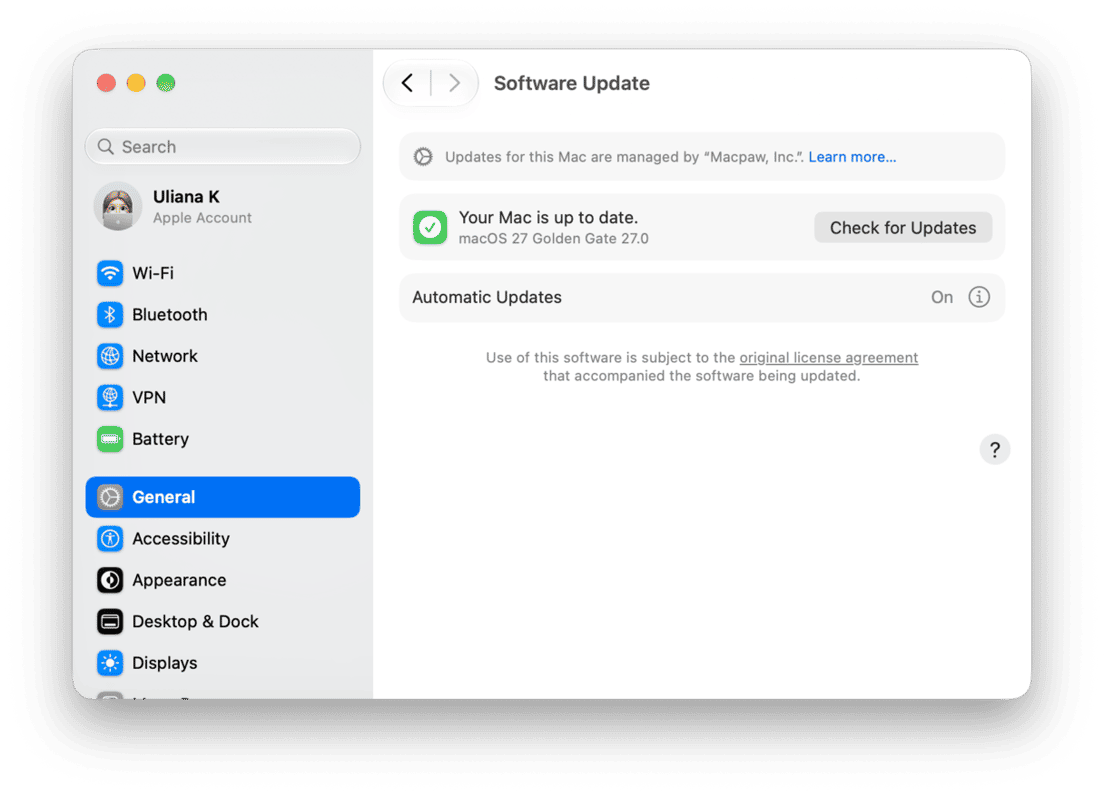
- Software updates (System Settings > General > Software Update): install all the latest updates available and click an i next to Automatic Updates to enable timely updates of security responses and system files.
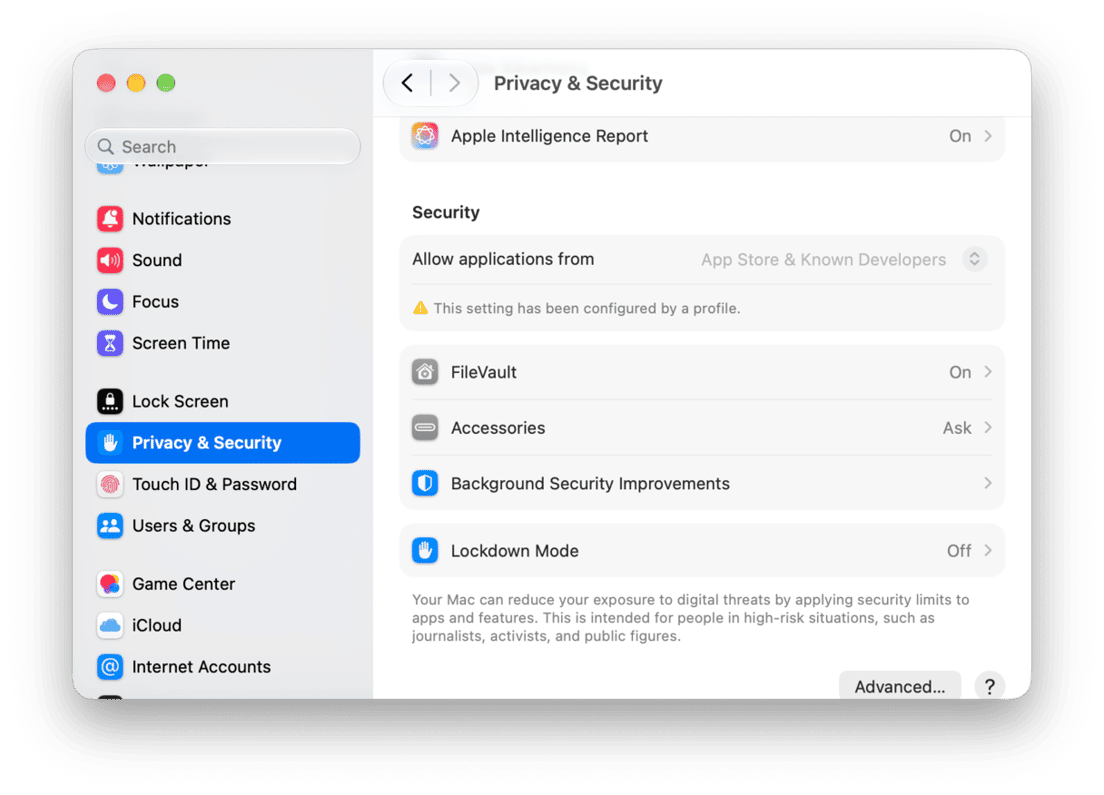
- Gatekeeper (System Settings > Privacy & Security): scroll down to Security and choose between App Store or App Store and identified developers under Allow apps downloaded from.
- FileVault (System Settings > Privacy & Security): scroll down and enable FileVault if it is off to encrypt your drive. Our guide to protecting your Mac explains the setup.
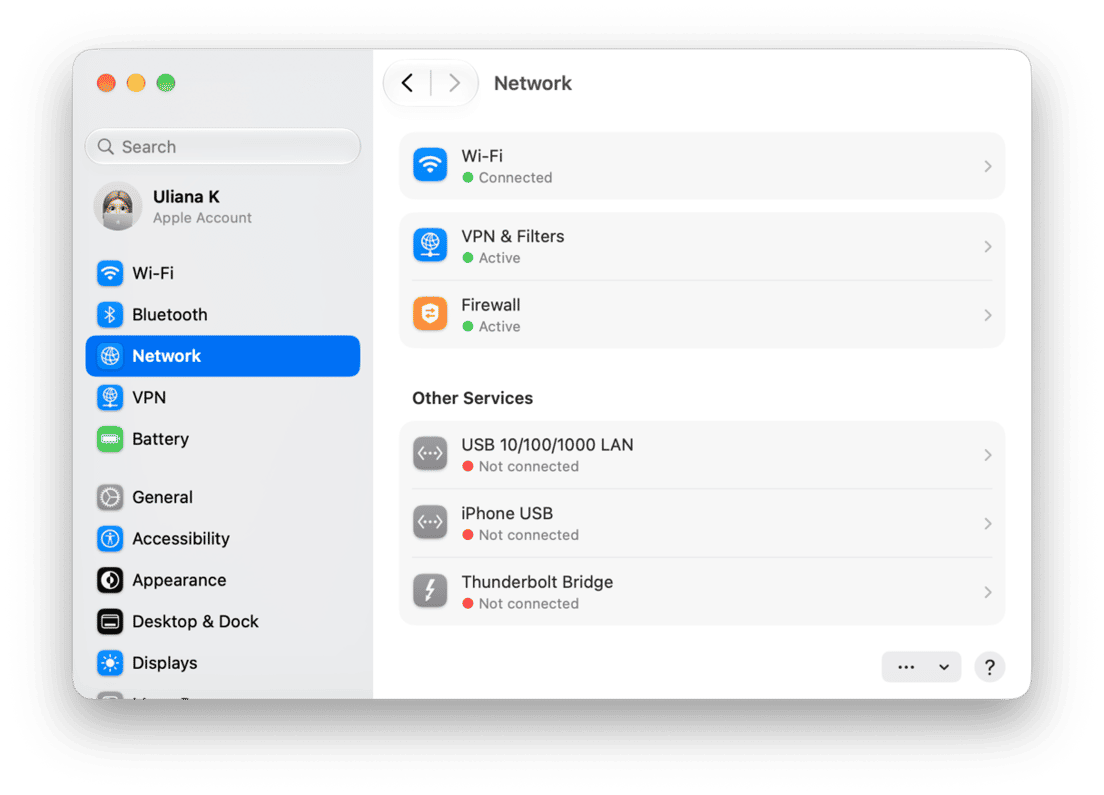
- Firewall (System Settings > Network > Firewall): make sure it is enabled.
- App permissions (System Settings > Privacy & Security): check Full Disk Access, Screen & System Audio Recording, Device Control and Data Access (Accessibility in macOS versions older than Golden Gate), Input Monitoring, Microphone, and Camera. Revoke permissions for any apps you do not recognize — apps listed there can control your Mac, read your files, see your screen, and see and hear you.
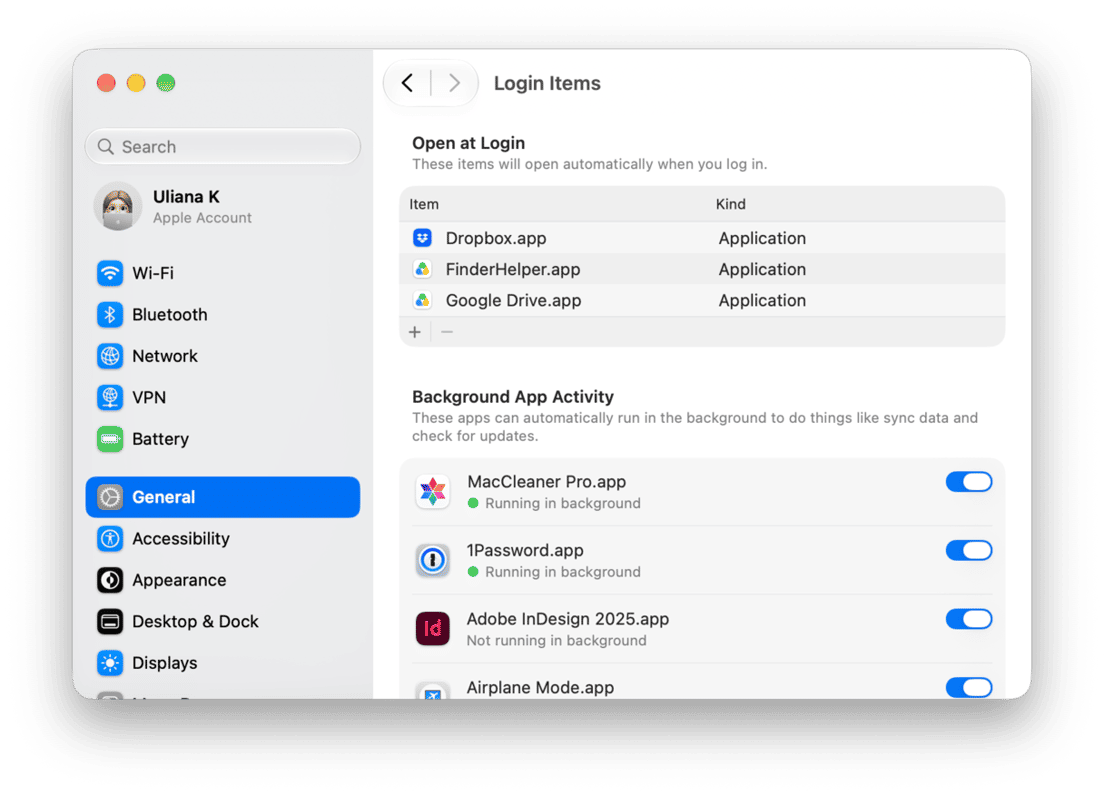
- Login and background items (System Settings > General > Login Items & Extensions). Remove and disable anything you do not allow enabling. Also, check Device Management for configuration profiles you did not install.
- Sharing (System Settings > General > Sharing): check Screen Sharing, Remote Management, Remote Login, and File Sharing. Disable anything you did not turn on.
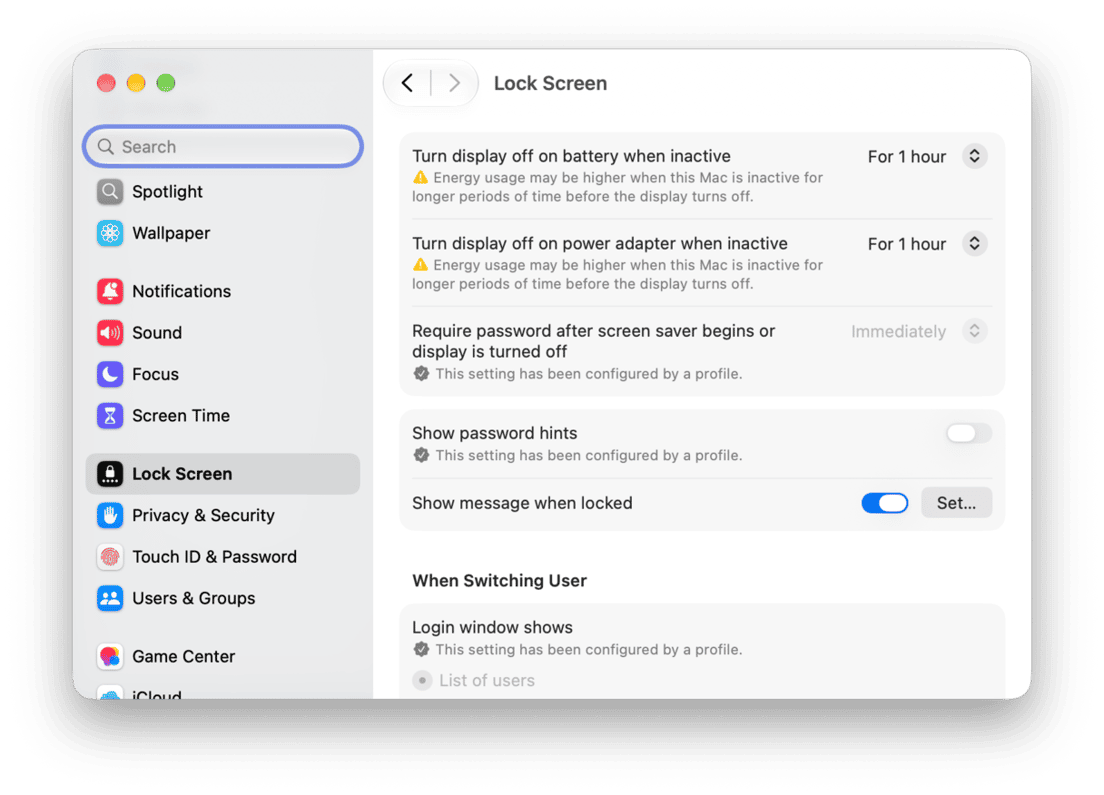
- Screen lock (System Settings > Lock Screen): set Require password after screen saver begins or display is turned off to Immediately or a short delay.
- System Integrity Protection: should be on by default. To confirm, you will need to run the following command in Terminal (open it from Applications > Utilities): csrutil status. You should see that it is on. If it is off, but you did not disable it, contact Apple Support.


Step 2: Scan your Mac for malware
XProtect checks apps when they're first opened or changed, and it also checks for infections in the background on its own. Apple doesn't document a way to start an XProtect scan yourself, so for a scan on demand you need a third-party app.
When it comes to choosing security software for my Mac, I personally use CleanMyMac; its Protection feature scans your Mac for malware and neutralizes the threats it finds.
Here's how you can run a security check with ease:
- Open CleanMyMac. No app yet? Get your free CleanMyMac trial — all features are free for 7 days.
- Select Protection from the sidebar.
- Click Scan. If any threats are found, follow the steps on the screen to remove them.

It's really that simple!
If you're not 100% sure you want to use a third-party antivirus application, then you must regularly perform manual checks to give your Mac a fighting chance against malicious threats.
How to tell that your Mac is infected?
First, it's essential to know the signs of infection; here are the top five signs your Mac could be infected.
-
Your Mac becomes abnormally slow — potential mining for cryptocurrency threat.
-
You start receiving security alerts without running scans — potential scareware.
-
Strange new extensions on your browser — potential browser hijacker.
-
You're overwhelmed with pop-ups, even when you're offline — potential adware.
-
Sudden loss of access to personal files — potential Trojan horse.
So now you know what you're looking for, it's time to learn how to perform a manual security scan.
Mac security tips
1. Remove installers you don't need from Downloads
.dmg files are well-known sources of malware and viruses, so instead of letting your downloaded files hang around on your Mac, take the time to remove installers you no longer need from your Downloads folder to help keep unwanted threats at bay; here's how:
-
Open a new Finder window.
-
Select Downloads from the sidebar.
-
Select the installers (.dmg and .pkg files) you no longer need and send them to the Trash.
-
Empty your Trash afterwards.

Don’t forget to make a copy of the important documents and files before removing all your downloads.
2. Check your browser extensions
If you download items outside of the App Store, check your browser extensions regularly, and remove any unknown extensions.
Here's how to check on Chrome:
-
Open Chrome and copy and paste this line in the address bar: chrome://extensions/
-
Press Remove on any extensions you don't remember installing.
Here's how to check on Safari:
-
Open a new Safari window and select the main Safari menu.
-
Choose Settings > Extensions.
-
Click Uninstall on any extensions you don't recognize.
-
You'll be asked to open the Finder. Do it and remove the extensions from the folder that opens.

3. Check for suspicious apps
Open Finder, then from the sidebar select Applications, check the folder for apps you don't remember installing, look up anything unfamiliar, and send the suspicious ones to the Trash. Don’t forget to empty the Trash afterward.
Although these tips are helpful, there's still more you can do to improve the security of your Mac.
4. Trusted downloads only
This might sound obvious, but this has to be top of my list. Avoid installing malware and viruses on your Mac by only downloading applications and software from the App Store or trusted sources.
Be just as careful with instructions to paste a command into Terminal. A website, pop-up, or message that asks you to do this, often dressed up as a fix or a verification step, is a common way stealers get onto Macs. Never paste a command you don't understand.
5. Clear your browsing history
Your browsing history holds lots of private information about you, which could be attractive to hackers. Be sure to protect your privacy by removing your online and offline traces. You could use the app I mentioned earlier in the article, CleanMyMac, to do this for you. Once again, use the Protection feature. It can also remove privacy items such as your browsing data.

6. Be vigilant
Keep an eye out for any sudden, erratic changes or unusual behavior on your Mac. Malware is constantly evolving and getting smarter; watch what you click on, be cautious of pop-ups, and invest in antivirus software.
By the way, have you heard of the Apple Security Alert scam? It's usually not malware on your Mac but a scam web page or browser notification that says your Mac has a security problem. Apple lists misleading pop-ups like these among common scams: don't call the number they show. If these alerts keep appearing, read how to get rid of them here.
So, if anyone asks you how do I run a security check on my Mac? Now you know! Stay safe, people.