How to speed up a slow Mac after a macOS Tahoe update
When I updated my Mac to macOS Tahoe, I was excited to try out the new features. But within a day, I noticed something frustrating — my Mac felt slower, the fan ran louder than usual, and even simple tasks like opening a new tab in Safari felt laggy.
If this sounds familiar, don’t worry. After browsing Reddit threads and Apple community forums, I realized a lot of users were experiencing the same slowdown after upgrading to Tahoe. Luckily, most of these issues aren’t permanent. With a few tweaks, you can get your Mac back up to speed. Here’s what worked for me.
macOS Tahoe laggy: Why?
Before jumping into fixes, it helps to know why Mac’s slow after Tahoe update. From my own experience, here are some of the most common reasons:
-
Background reindexing: Right after the update, macOS quietly reindexes all of your files so Spotlight search and Photos can work properly. This process can take hours or even days, depending on how much data you have. During that time, your Mac’s CPU and memory usage will spike, which makes everything else feel sluggish.
-
Outdated or incompatible apps: Some apps I used hadn’t been updated for Tahoe yet, and they slowed down or froze.
-
Low storage space: Updates take up a lot of space, and I realized my Mac had less than 10 GB free, which seriously affected performance.
-
General settling-in period: From what I’ve seen, the new macOS just needs some time to “settle” after a big update.
How to boost macOS Tahoe performance
Once I figured out the reasons, I started testing fixes one by one. Let’s see what helped the most.
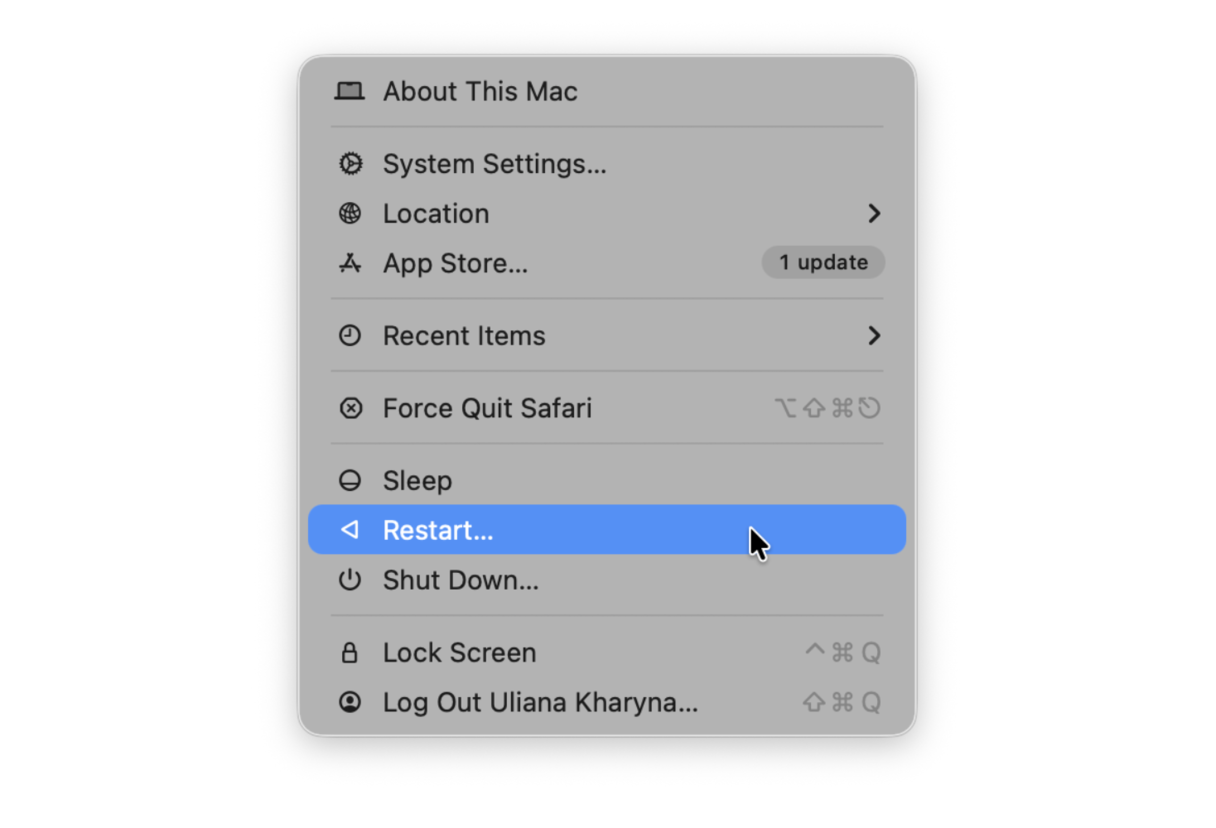
1. Restart your Mac
It sounds simple, but restarting really helps. When you restart, macOS clears temporary files and shuts down background processes that may be eating up resources after the update. The first time I did this, my Mac already felt a little faster.
Here’s how I do it:
-
Click the Apple menu in the top-left corner.
-
Choose Restart.
-
Save anything you’re working on because your Mac will close all apps before rebooting.

Sometimes, this super quick step is all it takes to improve macOS Tahoe performance.
2. Free up space
I found that macOS Tahoe needs more breathing room than I expected. Here's the magic number I noticed that Apple doesn't always shout about: your Mac performs best with 15-20% of your storage drive free. For my 256GB MacBook, that means keeping 40-50GB available.
Before I start manually searching for unneeded files, I've found there's an easier way. CleanMyMac knows exactly where all the digital junk is hiding and can clear it out in minutes, not hours. And the best part — you can try it free, for 7 days.
Here’s how it works:
-
Open CleanMyMac (get your free trial here).
-
Click Scan.
-
Click Run to perform a set of optimization tasks.

Once you’ve run Smart Care, I recommend checking out the My Clutter tool. When I tried it, I was shocked to see it uncovered almost 45 GB of space wasted on duplicate files and old downloads.

If you are wondering whether you can free up space manually, it is also possible, though it would require some time and effort. One way to do it is to use the built-in Optimize Storage feature. Here's how it works:
- Go to System Settings > General > Storage.
- Wait for the colored graph to load to see top space consumers.
- Now, check the recommendations under the colored bar and enable those that work best for you.
- Next, click i next to each category below recommendations and delete files you no longer need.

This way, you can quickly reclaim a few GBs of space, but if you want a more thorough and deeper system cleanup, using a Mac cleaner like CleanMyMac is a better idea. Not only is it faster, but it also removes numerous safe-to-delete system files that are usually hard to access. The Optimize Storage feature, on the other hand, only allows you to get rid of apps and files you yourself downloaded or created on your Mac.
3. Manage startup and background apps
I didn’t realize how many apps were opening automatically every time I logged in. Some of them I hadn’t used for months. Cutting down these apps made my Mac start up quicker and use less memory.
Here’s what helped:
-
Open System Settings > General > Login Items & Extensions and turn off the apps you don’t need at startup.

-
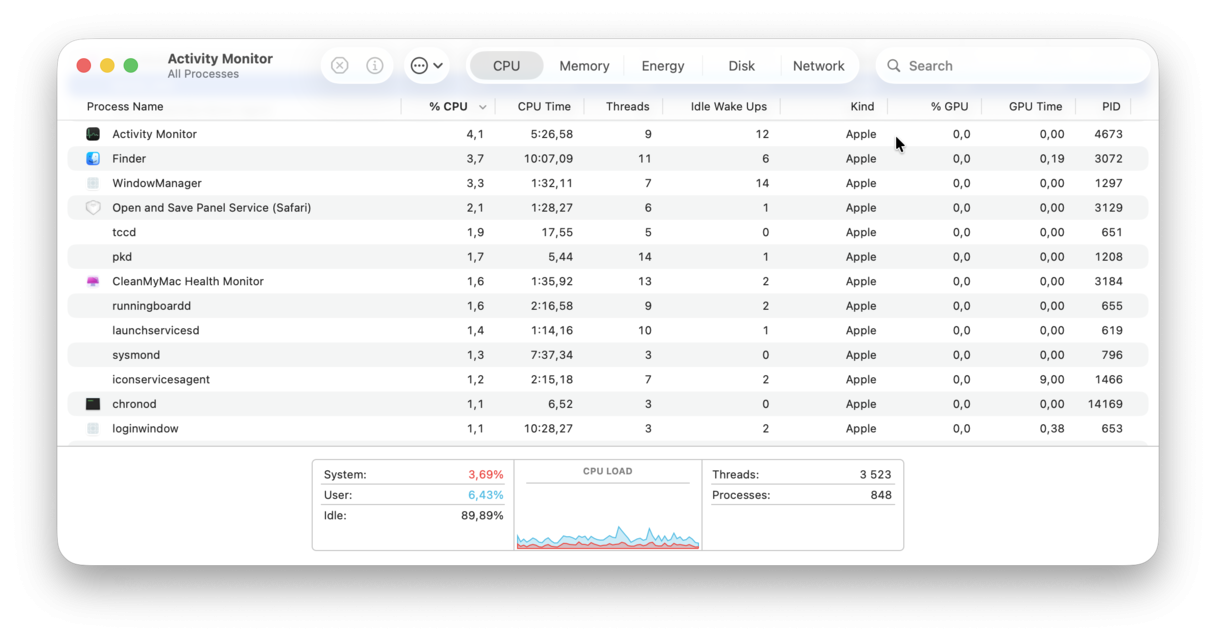
Use Activity Monitor (just search for it with Spotlight) to check which apps are hogging CPU or memory, and quit them if they’re unnecessary.

4. Turn off fancy effects
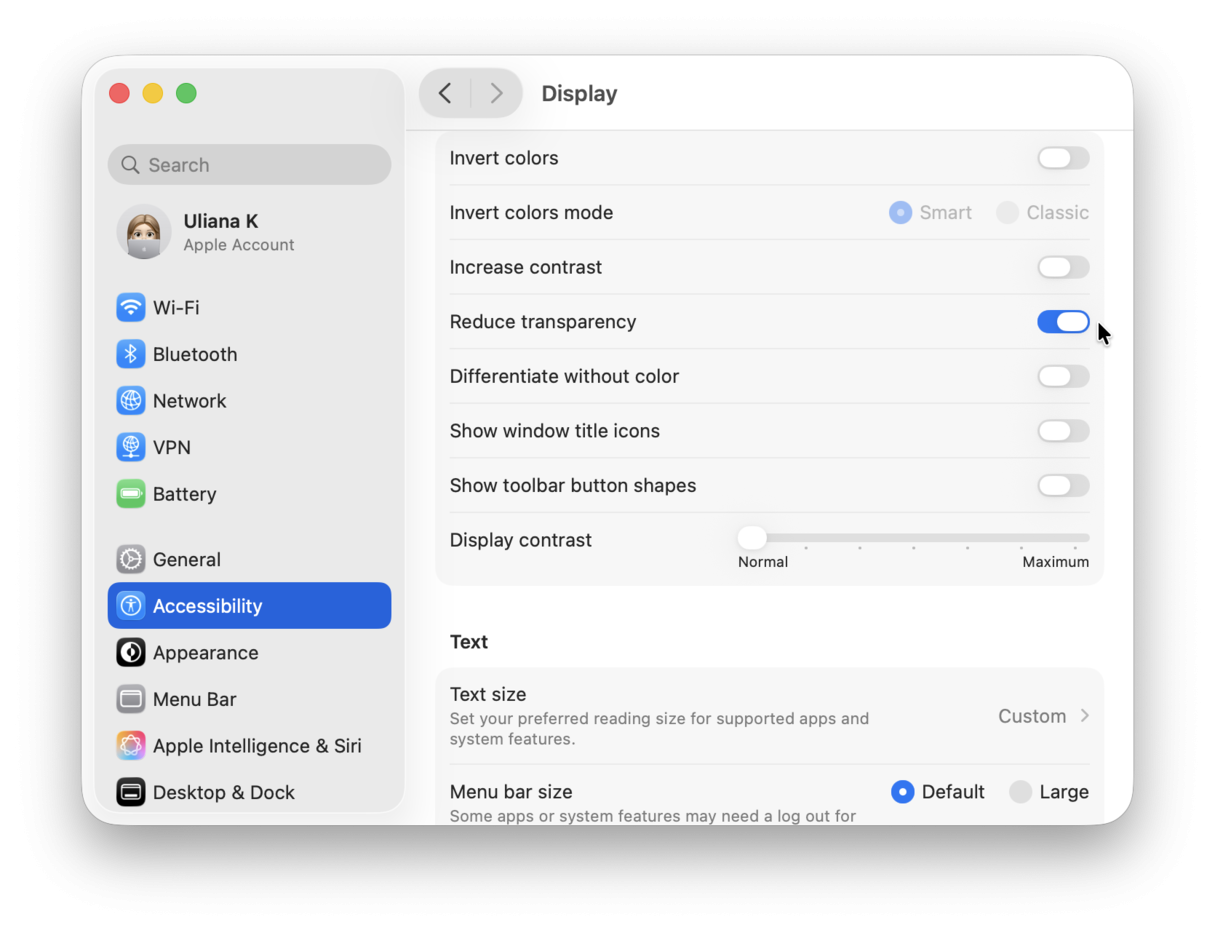
I love the smooth animations in the latest macOS, but they do use extra resources. Once I reduced them, my Mac felt more responsive.
-
Go to System Settings > Accessibility > Display.
-
Turn on Reduce transparency.
- Now, go to System Settings > Accessibility > Motion and enable Reduce motion.

5. Reset your Mac’s settings
Sometimes, performance issues come from small glitches in system settings. Resetting SMC (System Management Controller) and NVRAM (Non-Volatile Random Access Memory) can fix things like laggy performance, fan issues, or battery problems.
Here’s how:
-
On Apple Silicon Macs (M1/M2): Just shut down completely, wait about 30 seconds, and restart — the reset happens automatically.
-
On Intel Macs: Shut down, then hold Option+Command+P+R for about 20 seconds while powering back on.
After I did this, my fan calmed down and performance improved.
6. Run First Aid
It may be that Mac sluggishness is due to a problem with your MacBook's drive, and an upgrade to macOS Tahoe that placed more demands on the hardware just made it more notable. But how do you fix it? Use a built-in Disk Utility tool that can repair minor glitches. Just open it from the Applications > Utilities folder, select your startup disk from the sidebar, and click Run First Aid > Run.
If it did not help, try booting into recovery mode and trying again. Still no luck? Jump to the next fix.
7. Check your Mac for malware
Malware is another common cause of Mac going slow. It runs silently in the background and eats up resources, affecting the performance and speed of your device.
The easiest way to scan your Mac for malware is to use CleanMyMac again. It comes with a smart Protection feature that can detect and remove all kinds of Mac-specific threats: adware, viruses, Trojans, browser hijackers, and the like. Here's how to use it:
- Open CleanMyMac — get your free trial here.
- Click Protection and run a scan.
- Click Remove if any malware has been found.

8. Test a new profile
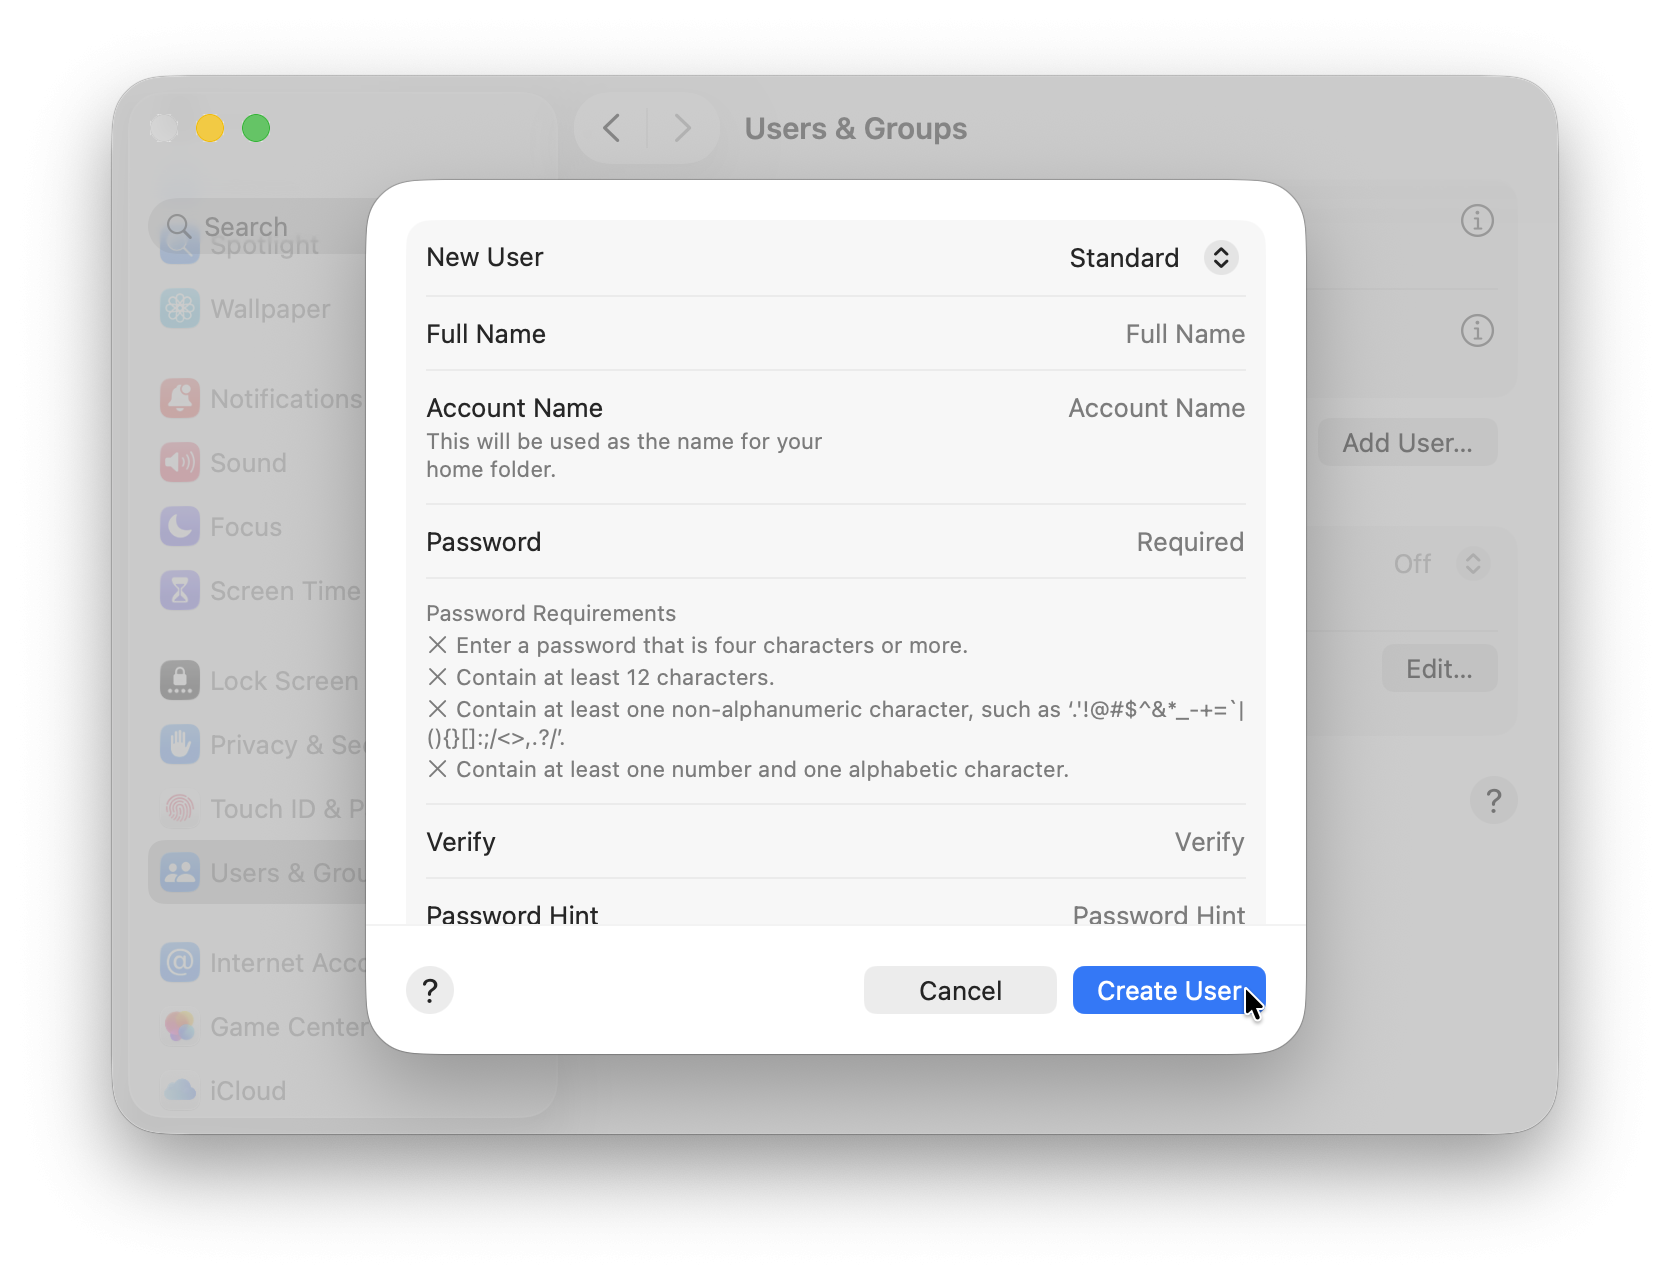
Did you know that the issue can be profile-specific? To rule it out, create a new user profile and test your Mac booting from it. Here's what to do:
- Go to System Settings > Users & Groups.
- Click Add User, enter your admin password, fill out all the fields, and click Create User.
- Now, log out of your current user and log in to a new one.
- Test your Mac.

It may be that your Mac feels snappier when you log in to a new user account. It makes perfect sense because this account is not cluttered with apps and files. So, if that is the case, return to the previous steps and clean up the old account.
9. Go back to an older macOS version
I didn’t need to do this myself, but if macOS Tahoe still feels too slow after trying everything else, you can always roll back to your previous version. Just make sure you back up your files first.
-
Back up your data: Use Time Machine or another backup solution so you don’t lose anything important.

-
Download the older macOS installer: You can do it directly from Apple’s official support site.
-
Create a bootable USB installer: Use a tool like Disk Utility or Terminal to make a bootable drive with the older macOS version.
-
Erase your Mac’s drive: Restart your Mac into recovery mode, then open Disk Utility and erase your current macOS installation.

-
Reinstall the older macOS: Plug in your bootable installer, restart while holding Option, and choose the installer to start the downgrade process.
-
Restore your files: Once the older macOS is installed, you can bring your data back from your Time Machine backup.
It takes a bit of effort, but if your Mac really doesn’t play well with Tahoe, this can make it feel smooth again.
I hope these fixes will help your Mac feel much faster. For me, freeing up space and disabling startup apps worked best. If your Mac feels slow after the macOS Tahoe update, don’t panic. Usually, it just needs some cleanup and optimization.

