How to fix 'Not enough space to install macOS Tahoe' issue
I haven’t been this excited about a macOS update in a long time. macOS Tahoe sparked a storm of reactions and has already been called the update of the decade. Apple Intelligence, unprecedented Spotlight features, mesmerizing Liquid Glass design — I rushed to update the second it dropped.
But halfway through, my installation just froze because of storage issues. Apple says you need around 35 GB of free space — but it turns out the real number is actually higher.
So, how big is macOS Tahoe, and how much space does Tahoe need? Let me walk you through it. We'll cover storage requirements, how to check your available space, and how to free up room quickly — without deleting half of your digital life.
macOS Tahoe storage requirements
First things first, how much space does macOS Tahoe take?
The size of the macOS Tahoe installer varies depending on your Mac model and macOS version. It is typically over 10 GB.
When I tried installing the update on my Mac, even with 40 GB free, it still wasn’t enough. Turns out, macOS Tahoe size isn't just about the installer itself.
The full installation requires:
-
Installer size: 14 GB (download)
-
Temporary installation space: 20–25 GB free
-
Post-installation buffer: at least 10 GB for smooth performance after the upgrade
I also checked out the Apple Support Community, and some users pointed out that system data and macOS itself can take up more than 58 GB.
So realistically, you need around 50 to 60 GB free to make sure everything goes smoothly.
How to check available space for macOS Tahoe
Next, find out how much storage is available on your Mac.
-
Click Apple menu > System Settings > General > Storage.
-
Wait a second till the system calculates the data.
-
Analyze the categories listed and check how much space is available on your Mac.

Tip: macOS storage bar is a handy way to get a quick snapshot of your storage situation. But it doesn’t really show you what’s taking up space in a useful way. I’ve been testing CleanMyMac lately, and it gives a visual breakdown of your entire drive — almost like a live map. It instantly shows what’s taking up the most room, making it way easier to clean it up. You can start with a free trial, just like I did — seven days was more than enough to test out all the tools.
If there’s not enough disk space for macOS Tahoe, don’t worry. By following my tips, you can free up tons of GB.
Easy solution: freeing space with disk cleanup tools
Personally, I find manual cleanup way too time-consuming, so using an all-in-one Mac cleanup tool has been a game-changer for me. I tried CleanMyMac and used its Cleanup feature — it cleared out tons of outdated caches, broken login items, and leftover app files I didn’t even know existed. It quickly finds any hidden system clutter without touching any essential system files. So there you have it: speed, simplicity, and peace of mind.
Here’s what to do:
-
Open and select Cleanup > Scan.
-
Click Clean.

Optimize storage with Apple’s recommendations
Under the storage bar, you’ll find a section with Apple’s suggested actions to free up disk space. It includes options like storing files and photos on iCloud, removing Apple TV movies and TV shows you’ve already watched, and automatically erasing items that have been in the Trash for more than 30 days. Just follow these steps:
-
Go to Apple menu > System Preferences > General in the sidebar.
-
Click Storage.
-
Review the recommendations and decide how to optimize storage on your Mac.
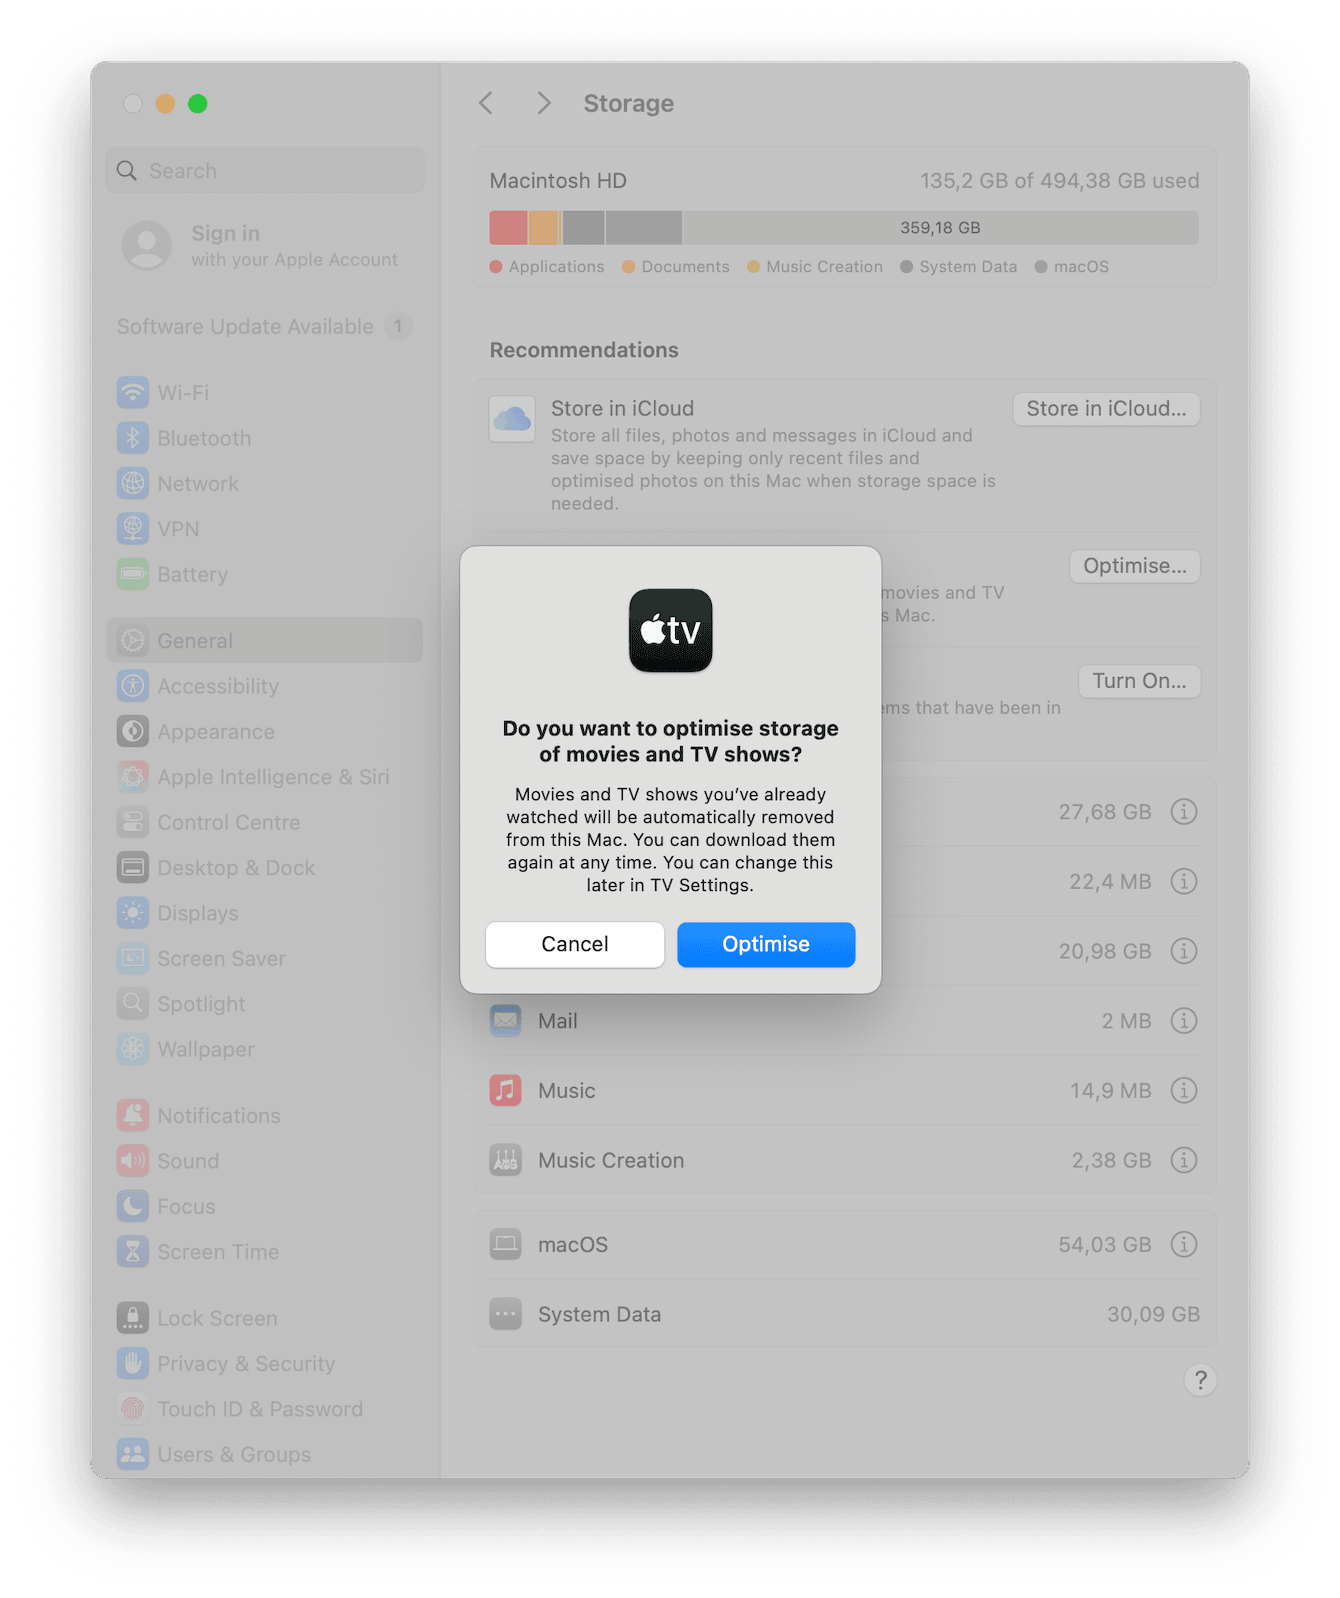
I checked it out and spotted a few old movies taking up a surprising amount of space. Deleted them instantly without regret.
Delete large and duplicate files
Chances are, a bunch of duplicate or oversized files are living on your Mac rent-free. Maybe you downloaded something twice or just forgot to clear out old files.
CleanMyMac comes with a useful feature called My Clutter. It lists all files by size, type, or even last accessed, making it way easier to clean up huge or duplicate items in minutes.
Here's how it works:
-
Start your free CleanMyMac trial and launch the app.
-
Click My Clutter > Scan.
-
Click Review All Files.

I cleaned 278 MB of duplicate files in one minute. Manually tracking those down would have taken me hours.
Also, what I really like about this tool is that I can take my time reviewing all of the files, so I don’t accidentally delete anything important or sensitive.
Remove old iOS backups
If your disk space is running low, it’s worth checking out your old iOS backups. These files can take up a lot of your Mac’s storage, and they are practically needless. For example, I was unknowingly storing backups for an iPhone I no longer own, wasting valuable space. Here’s how to check if you've got any iPhone or iPad backups:
-
Go to the Apple menu.
-
Choose About This Mac, More Info > Storage Settings.

-
If you see a category labeled as iOS Files, you've got some backups you can move or delete. You should see a list of iOS backups in the main window.
-
Select the backup you want to delete.
-
Click Delete and confirm.
Another way to remove unnecessary iOS files is to use the Finder or the Apple Devices app.
-
Open the Finder or the Apple Devices app.
-
Connect your device using a USB cable.
-
Click your device if it is not selected automatically.
-
If necessary, trust your device.
-
Under the General tab, click Manage Backups to see a list of your backups. Right-click on the backup you want, then choose Delete.
-
Click OK to return to the Finder or the Apple Devices app after you’ve finished.
-
Click Manage Backups > Delete Backup.
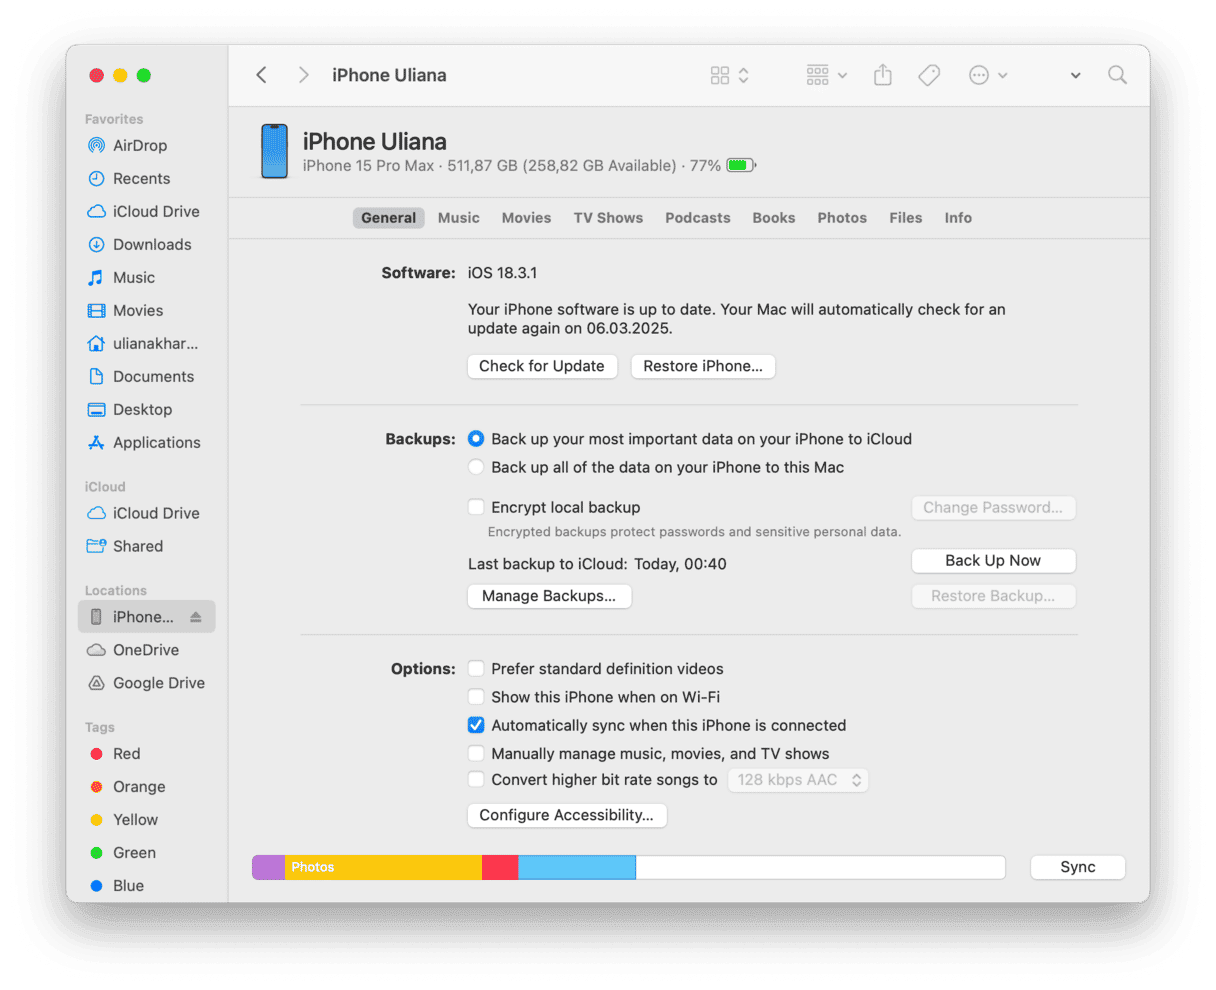
You can also find backups stored on your Mac manually:
- In the Finder, select Go > Go to Folder.
- Copy and paste ~/Library/Application Support/MobileSync/Backup/ in the pathname window and press Return.
- Select unnecessary backups and send them to Trash.
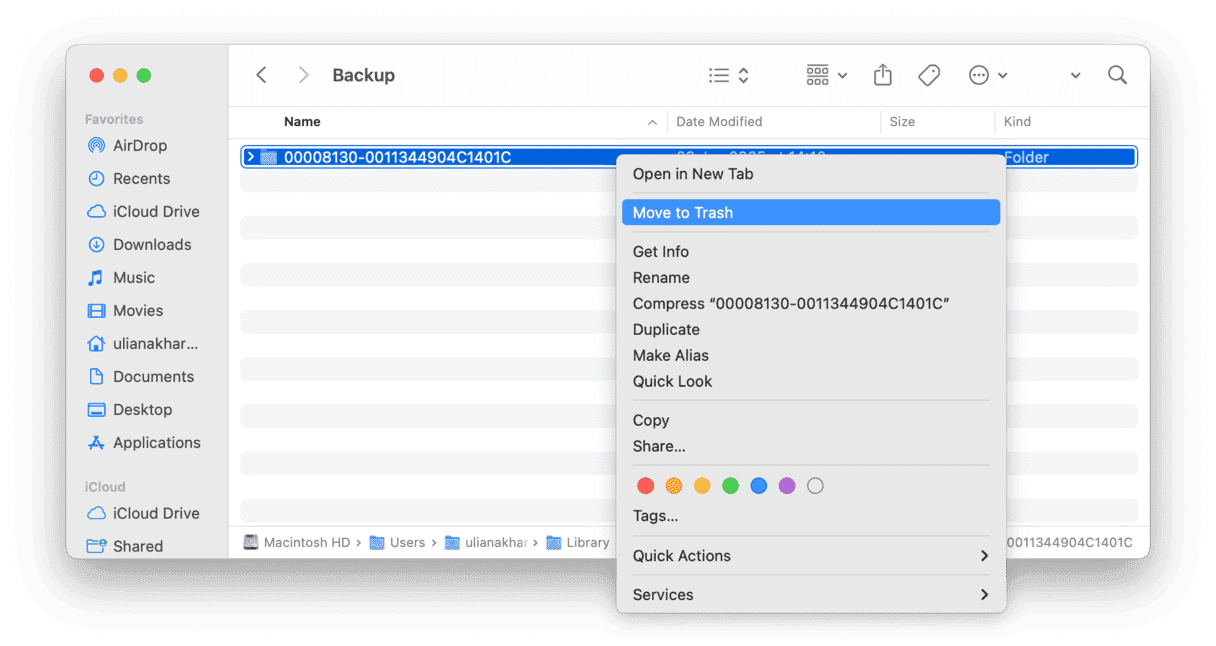
Uninstall unused applications
Over time, my Mac got crowded with apps I barely use anymore. If you want to free up serious storage, don’t skip this step. You could reclaim up to 30 GB or more.
For most basic apps, you can simply drag the app icon to the trash. Personally, I prefer deleting apps from Launchpad — it’s pretty easy and a bit more fun.
-
Open Launchpad from your Dock.
-
Press the Command key and hold any app icon until it starts to jiggle.
-
Click the Delete button [X] next to the app you want to delete, then click Delete to confirm.
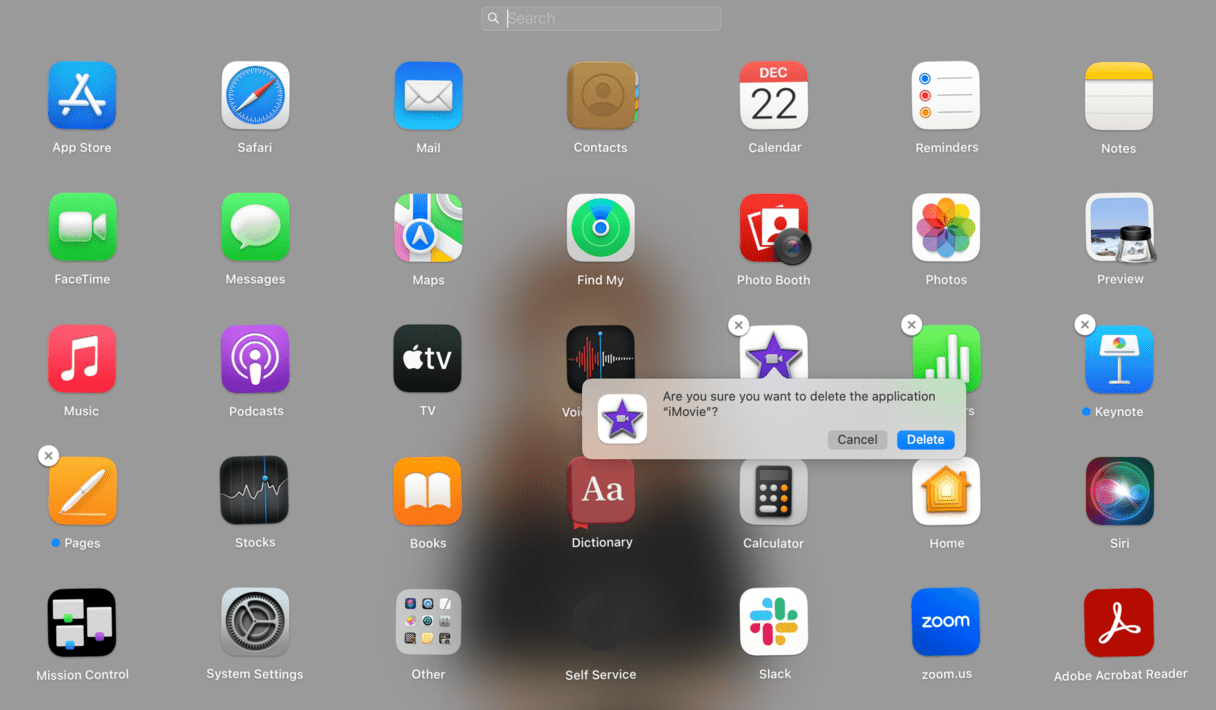
But it only works for apps downloaded from the App Store, so you can delete other apps using the Finder instead.
Manage local snapshots
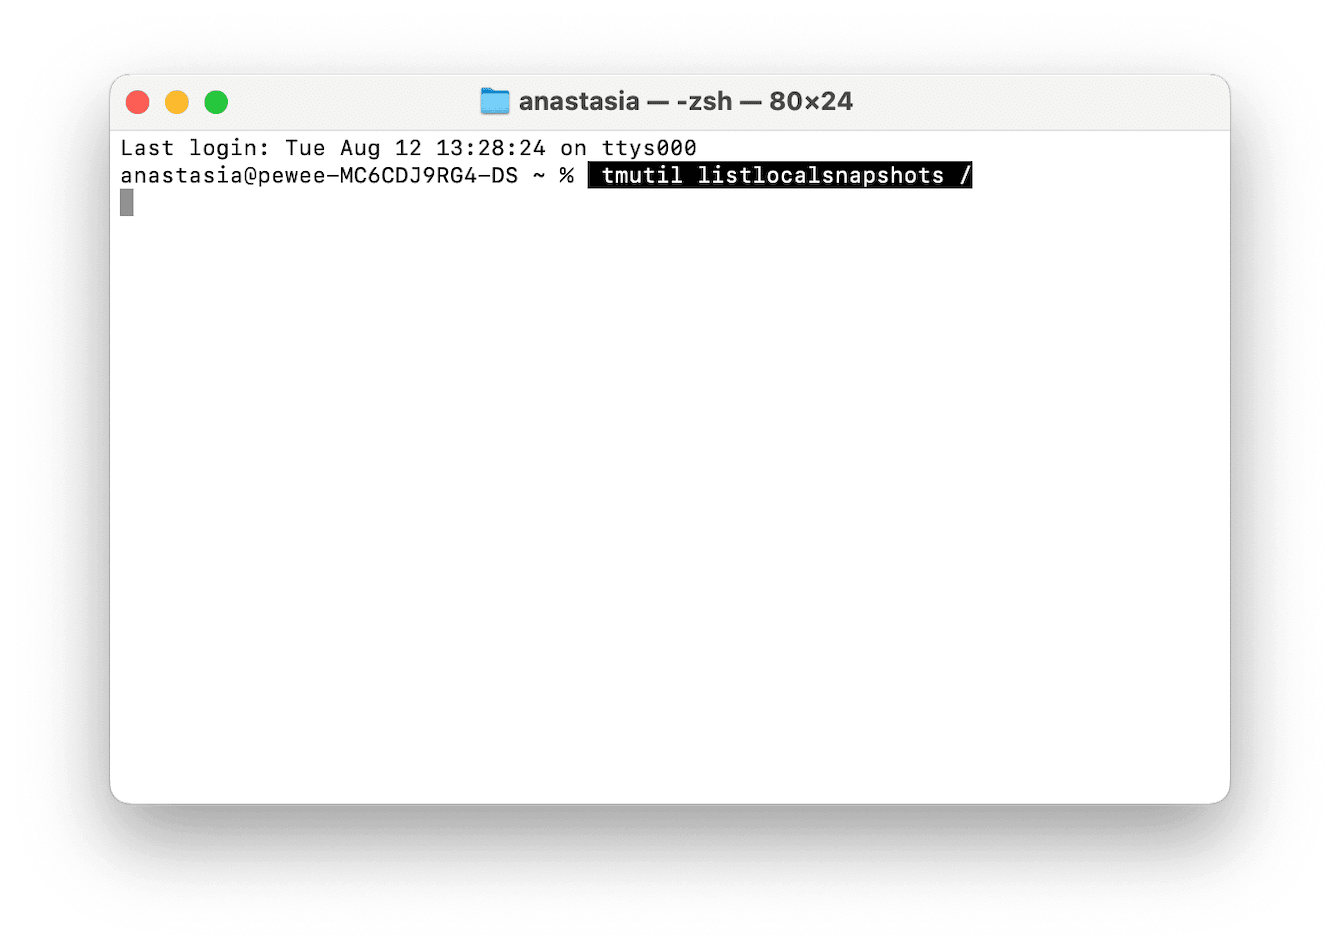
If you use Time Machine, macOS stores local snapshots even if you have an external drive. They pile up quietly, so here’s what I did:
-
Open Terminal and type: tmutil listlocalsnapshots /
-
Delete each one with: sudo tmutil deletelocalsnapshots [snapshotname]
Upgrade your storage hardware
You can upgrade your Mac’s storage, but it depends largely on your Mac model and its age.
First, identify your Mac model and check if it supports internal SSD or hard drive upgrades.
-
For compatible older Macs, you can purchase a replacement SSD and follow online guides to install it yourself.
For some newer Macs like the M4 Mac mini, you can use third-party upgrade kits for internal SSD replacement. -
For most recent MacBooks, using a fast external SSD or cloud storage is your best bet.
Upgrading storage this way can give you some extra storage without the cost and effort of buying a brand new Mac.
So, now you know exactly how to prep your Mac and make some room for macOS Tahoe. These quick fixes should help you make the installation process quick and painless.

