How to organize photos on iPhone?
Knowing how to organize photos on an iPhone comes in pretty handy if you're trying to save space. Photos and videos consume vast amounts of storage.
Some research across the forums and Apple fan pages suggests that the average iPhone user has around 2,400 snaps in their media libraries.
With so many memories, how do you keep them all tidy and organized? Well, we have some great tips and tricks for you in this article, so let's start.
Best way to organize photos on your iPhone
Lots of users dread sorting through their photos, and let's face it, if you've got 2,000 plus photos, it's not going to be a quick task. Before we dive into the solutions, let's consider the benefits:
- Frees up iPhone storage space
- Find your photos quicker
- Easier to share images
- Create collections and memories
- Relieve the media overwhelm
Actually, the list could go on; there are just so many benefits and reasons to know how to organize iPhone photos, so let's take a look.
How to manage photos on iPhone
1. Organize similar photos with AI cleaner app
Once you start to get your photos into some organized structure, it's important to regularly do some maintenance to ensure they stay that way. Think about removing duplicates or similar-looking snaps.
If you're thinking this is no easy task, don't worry; we've got a great solution. Utilize a tool like CleanMy®Phone; here's how:
Get rid of similar-styled photos
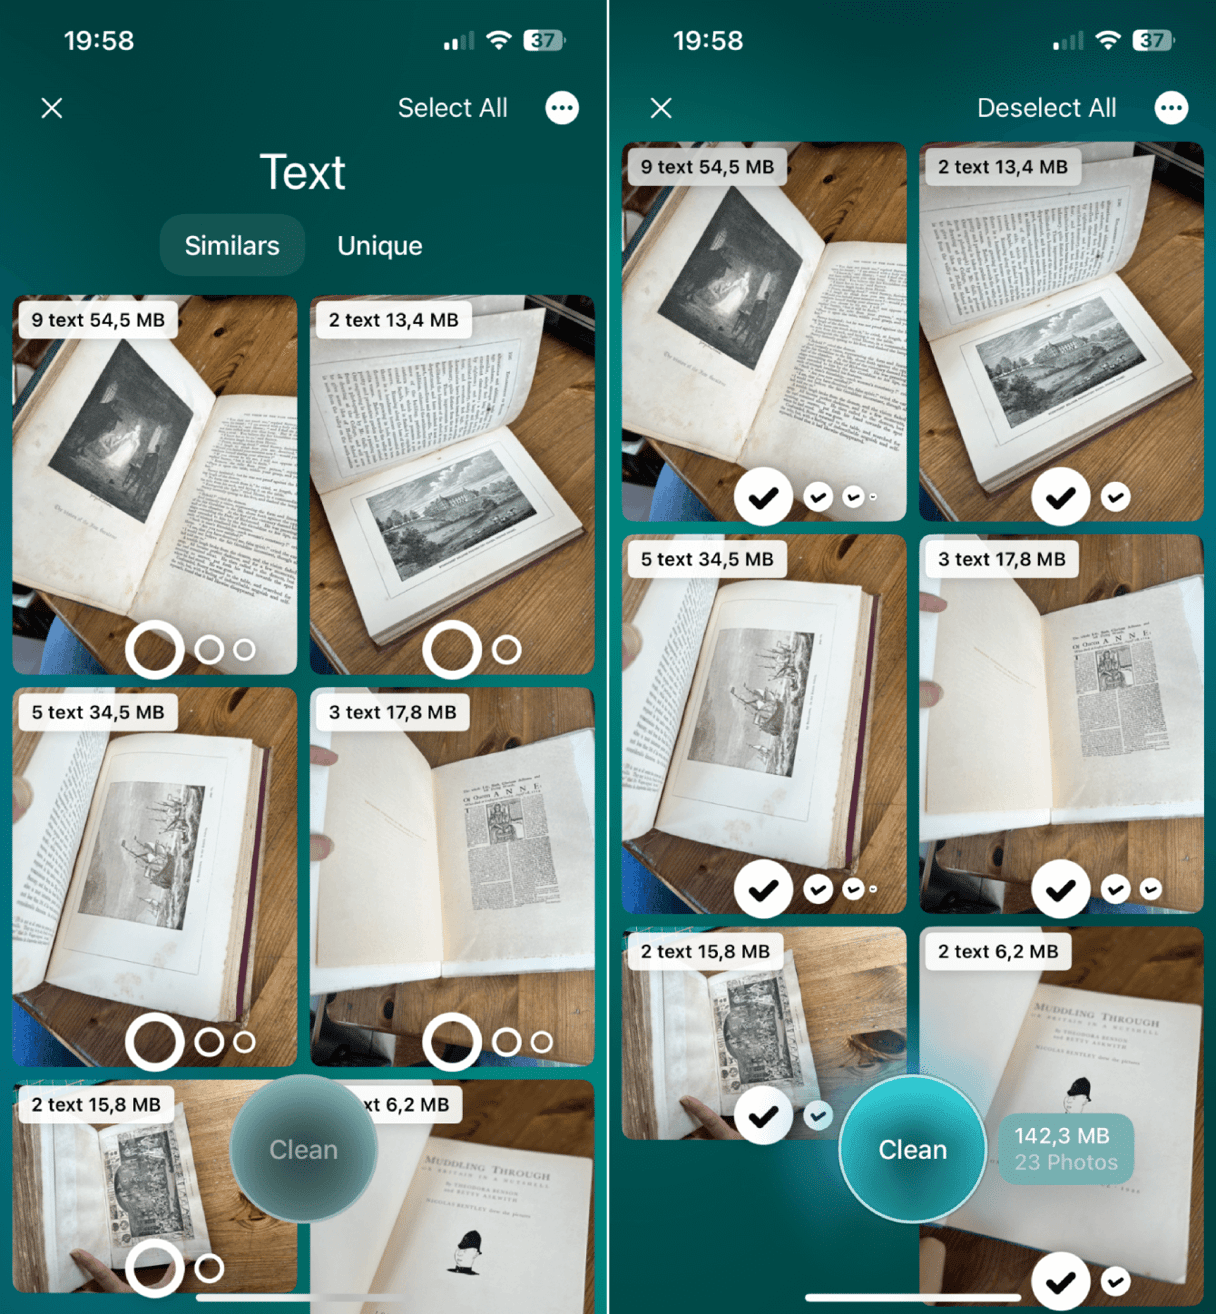
- In the app, now press Organize > Scan.
- Take time again to review the smart categories and select images to remove.
- Press Clean.
So now you know how to organize photos on an iPhone without duplicates.
2. Create photo albums
If you haven't already, now is the time. Creating albums is one of the easiest ways to start organizing your pictures. The possibilities are endless; you can create albums by event, theme, or place. Think of special holidays, weddings, parties, or even pets.
There are a couple of ways you can make an album; let's take a look.
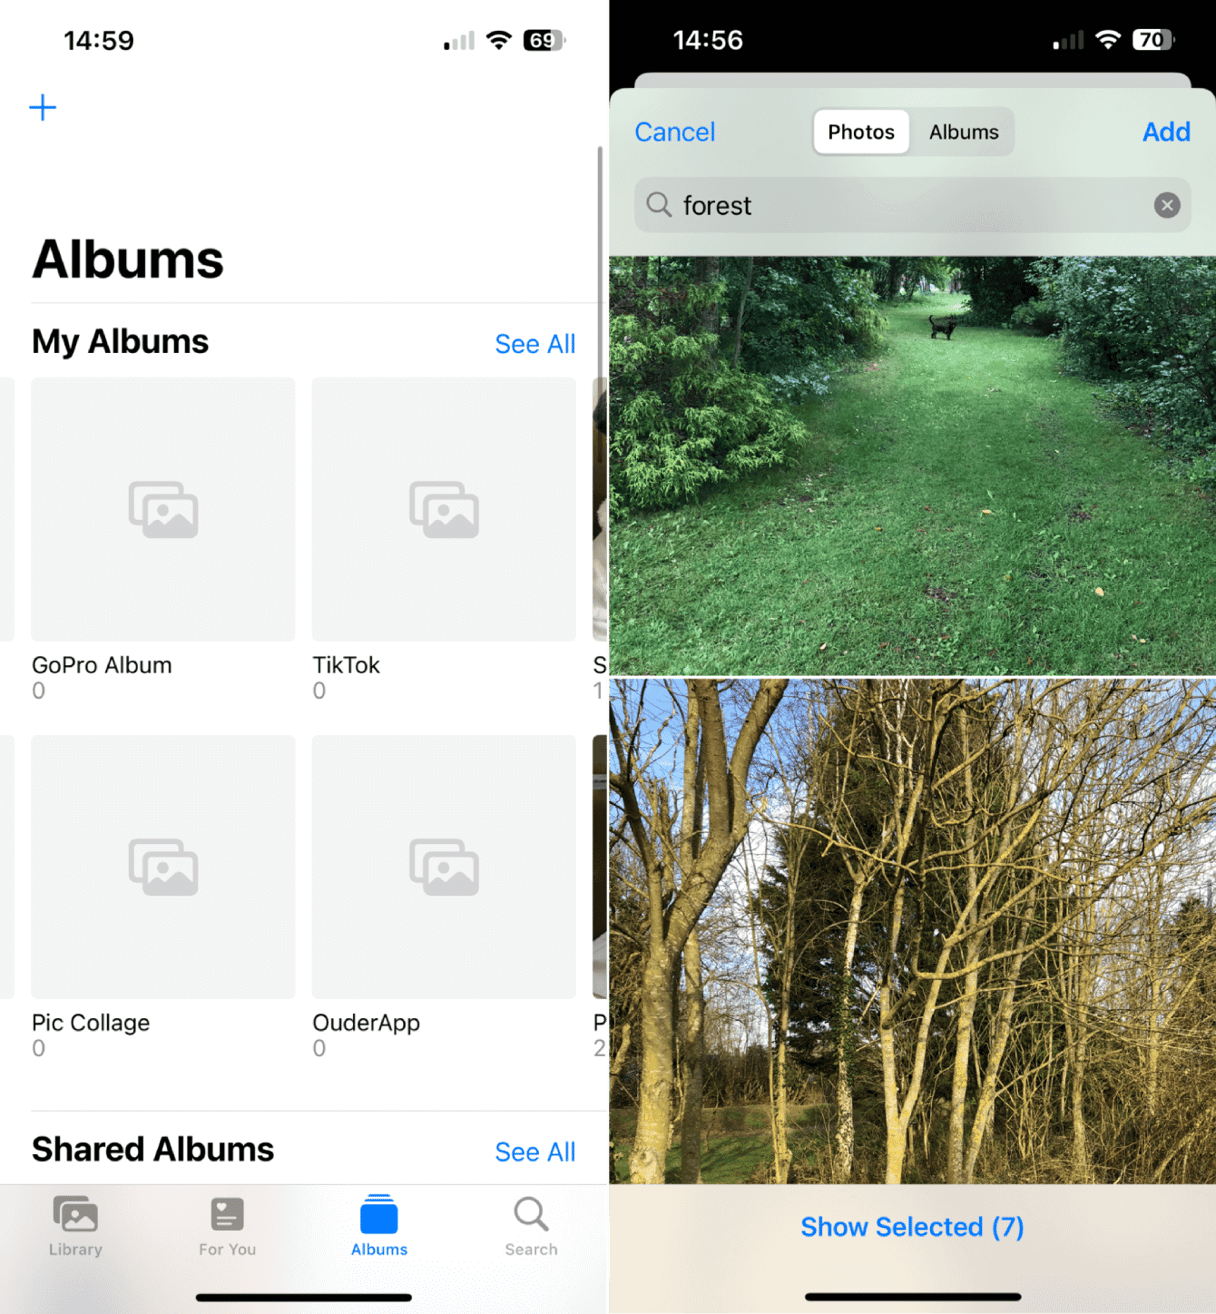
- Open the Photos app > Albums.
- Press the + icon on the top left > New Album.
- Name your Album and press Save.
- Next, in the search bar, you can get creative and search by date, place, and theme.
- Start selecting photos, and when you're finished, press Add.
Alternatively, you can also create an album by selecting the photos first; here's how:
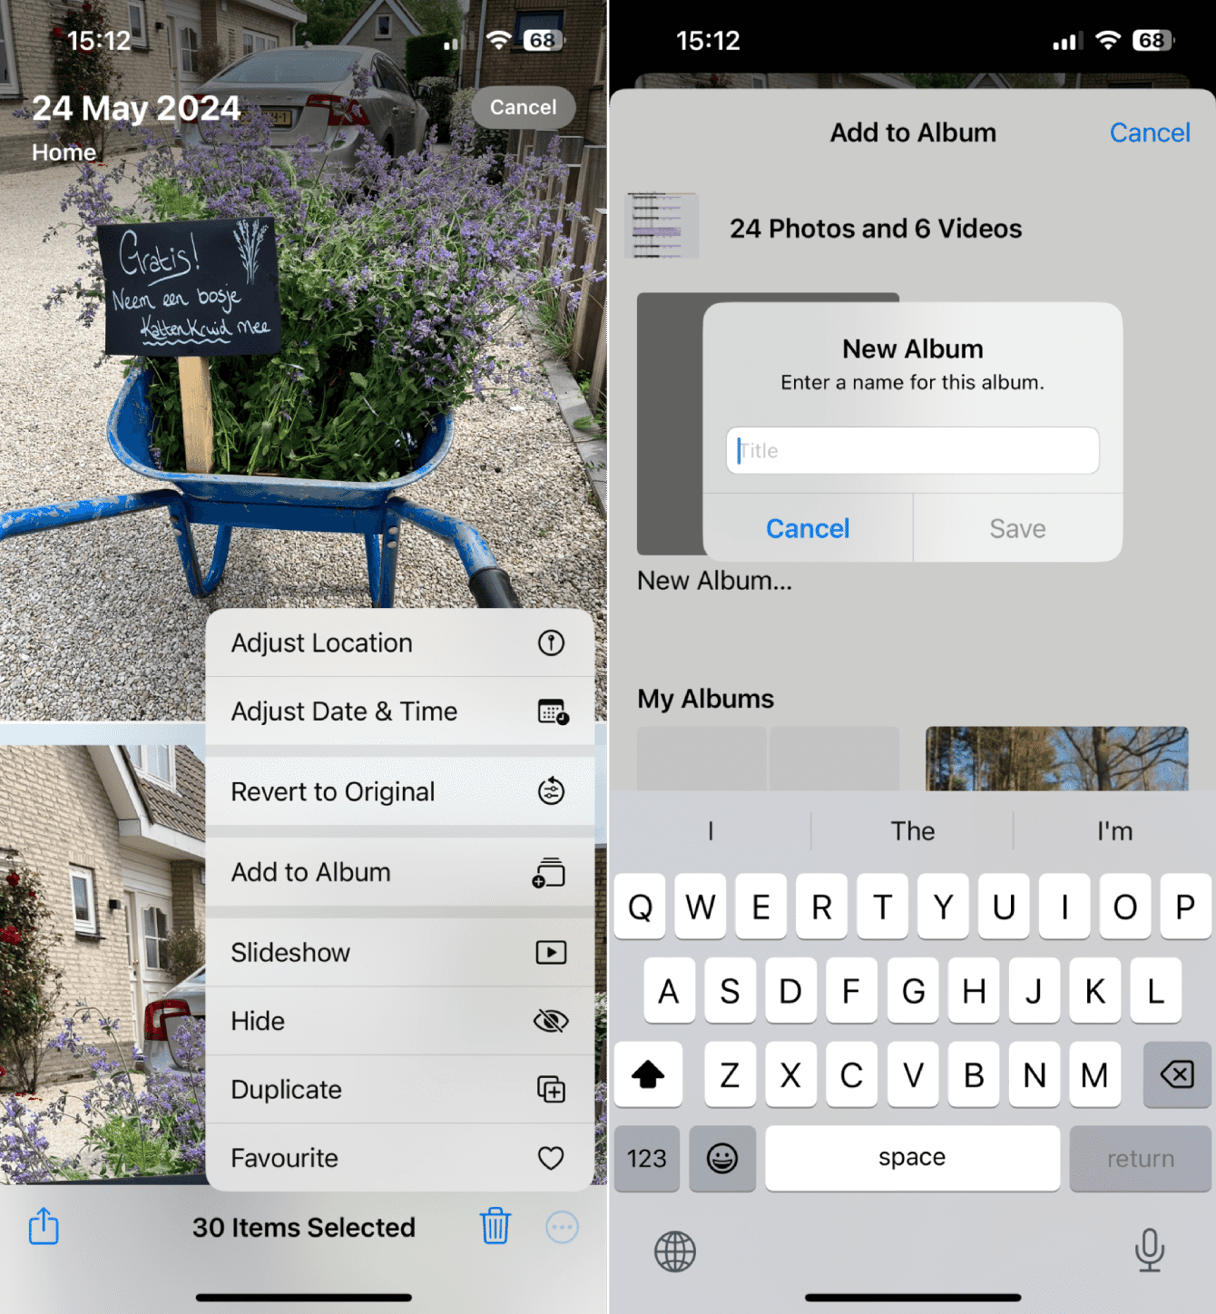
- In the Photos app > Library, select all the photos you'd like to group into an Album.
- Press the three dots (bottom right) and press Add to Album.
- Then you can select New Album
- Give it a name and press Save.
3. Use Folders
Next up, when it comes to knowing how to sort photos on an iPhone, utilize the Folders feature within the Photos app. So, as you create an album, you can create folders to store various albums.
Think about grouping your Albums together by year or type here show:
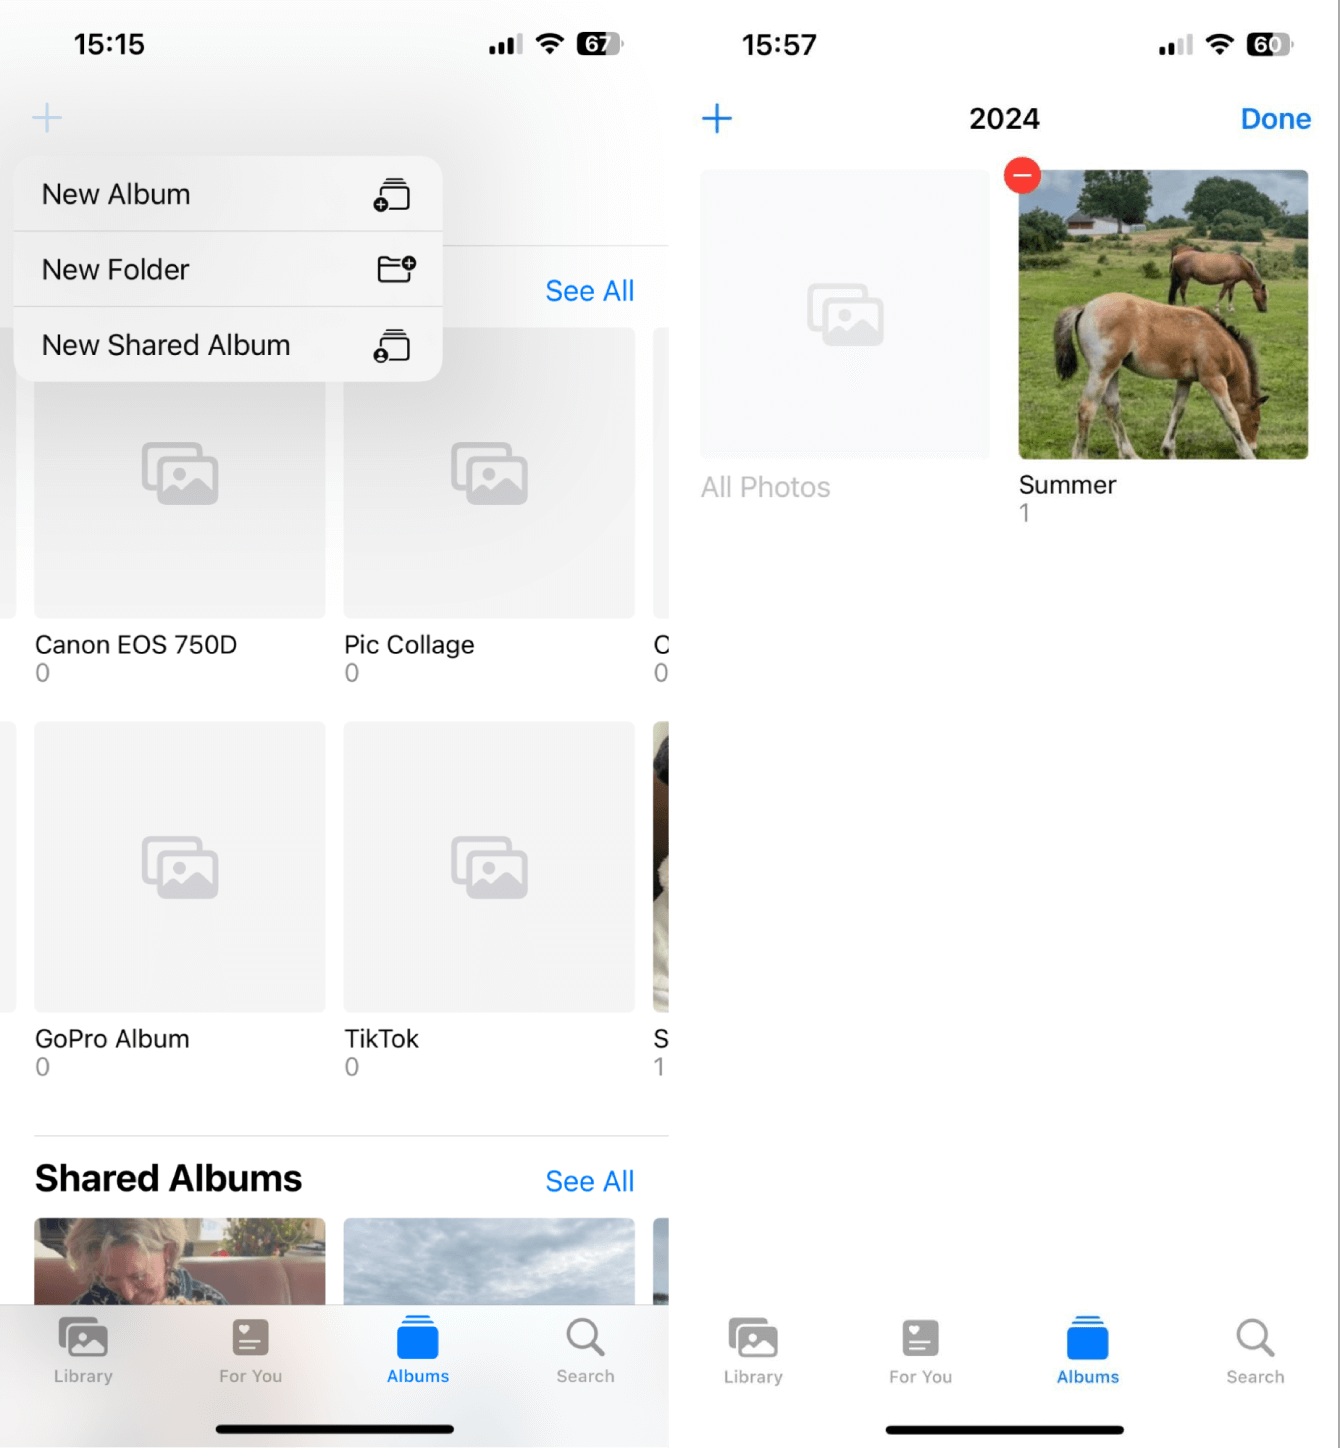
- Open the Photos App > Albums and Press the + icon on the top left > New Folder.
- Give your Folder a name > Save. Then open your new Folder and press Edit.
- Press the + Album and create a new Album; when you go to add photos, you can select previously made Albums.
4. Favorites feature
The Favourites feature is another great way to keep your best pics and videos organized, making them quick to access at any time; here's how:
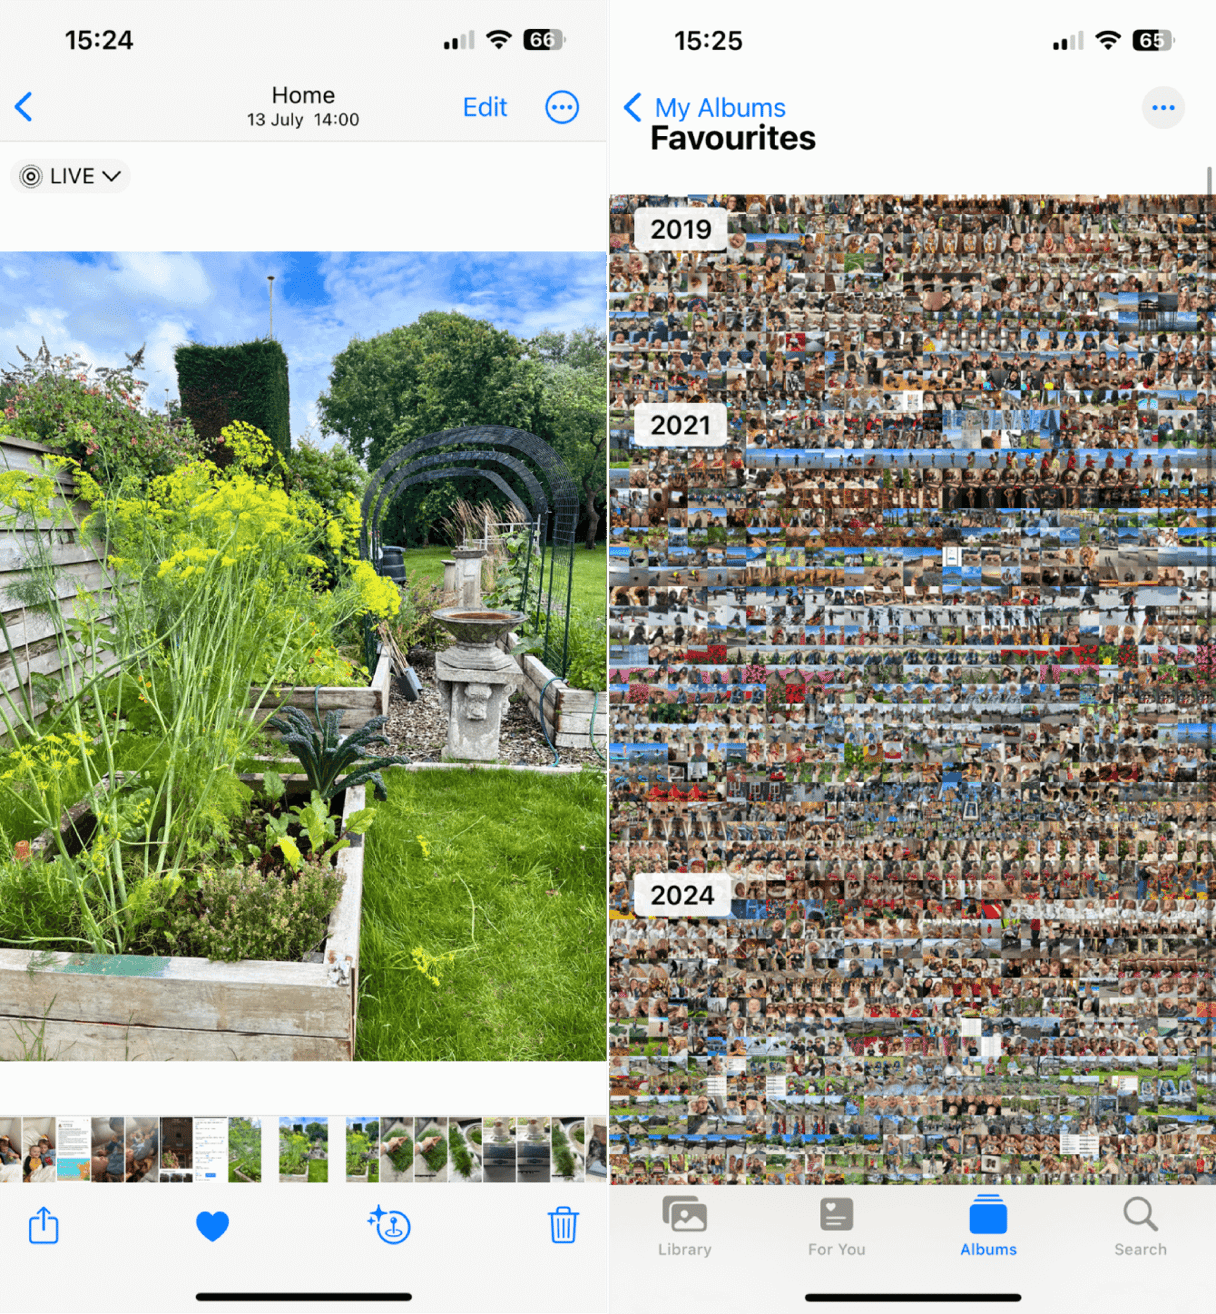
- In your media library, mark your favorite snaps by tapping on the heart icon.
- To access them, select Albums from within the Photos App and select Favorites.
5. Try and People, Pets, and Places feature
The Photos app uses facial recognition to group photos of the same person together and animals.
If you also have location services enabled, it can use this to group photos by place. This is a really great way to access pics by person, Pet, or place visited; here's how:
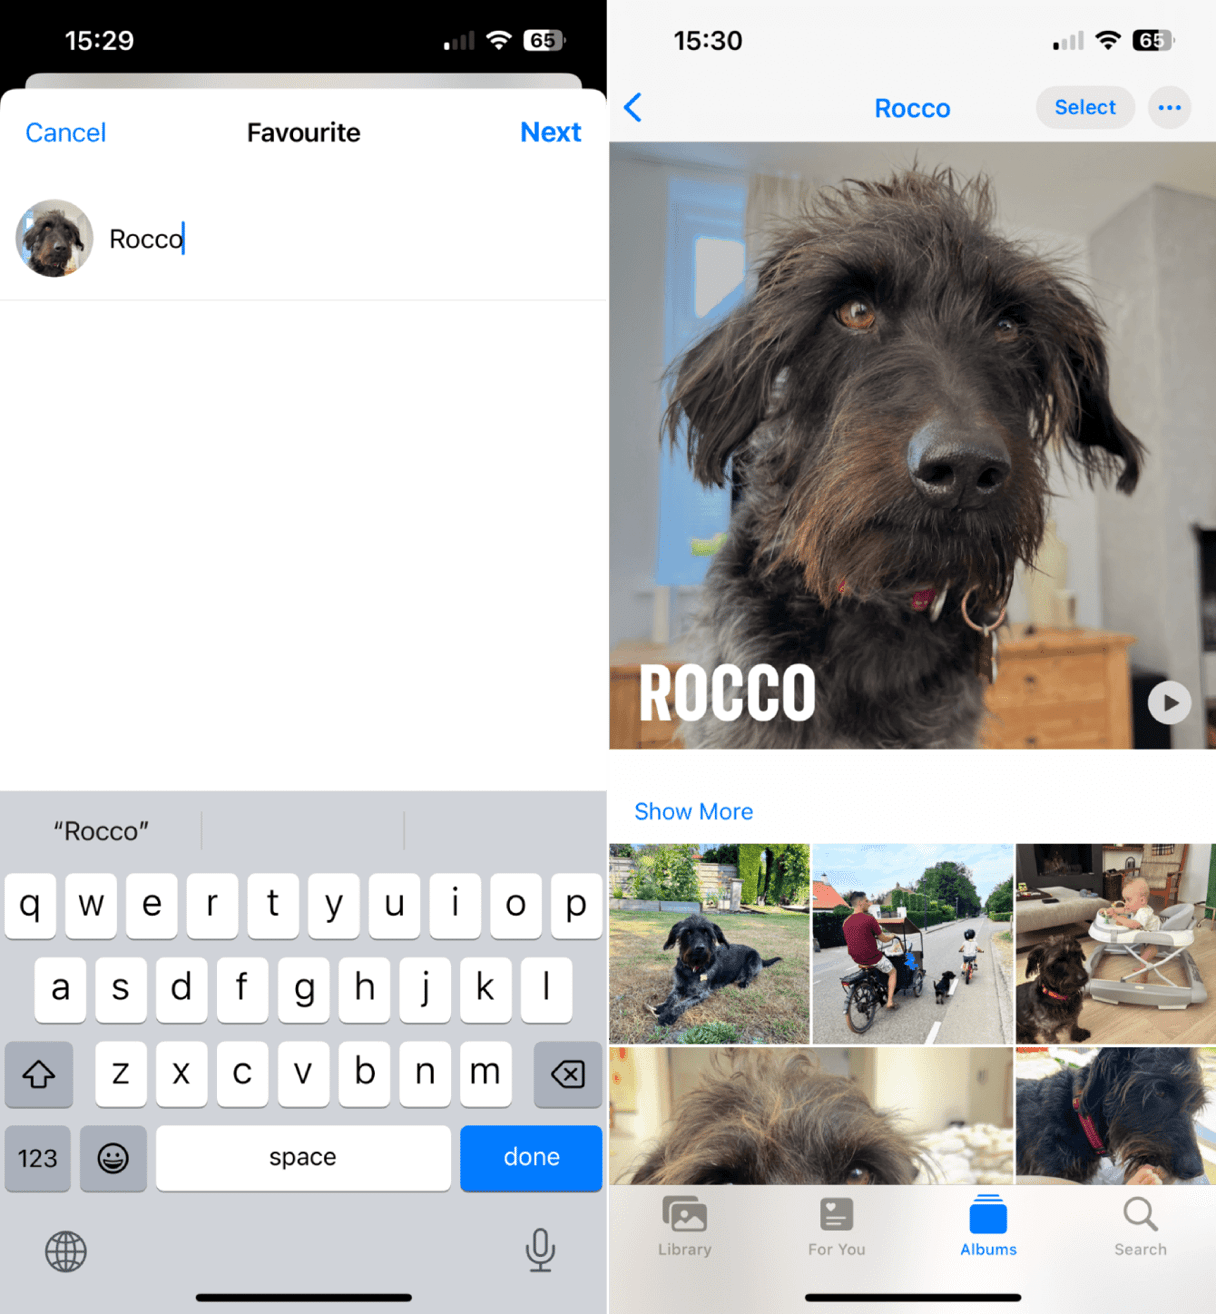
- Open Photos > Albums.
- Scroll down to People, Pets & Places.
- Select People & Pets to see the auto-suggestions from Apple. You can favorite this and even name them.
- Select a person or Pet to review the contents, look at specially created memories, and review more photo suggestions.
Ok, let's take a look at photos by location:
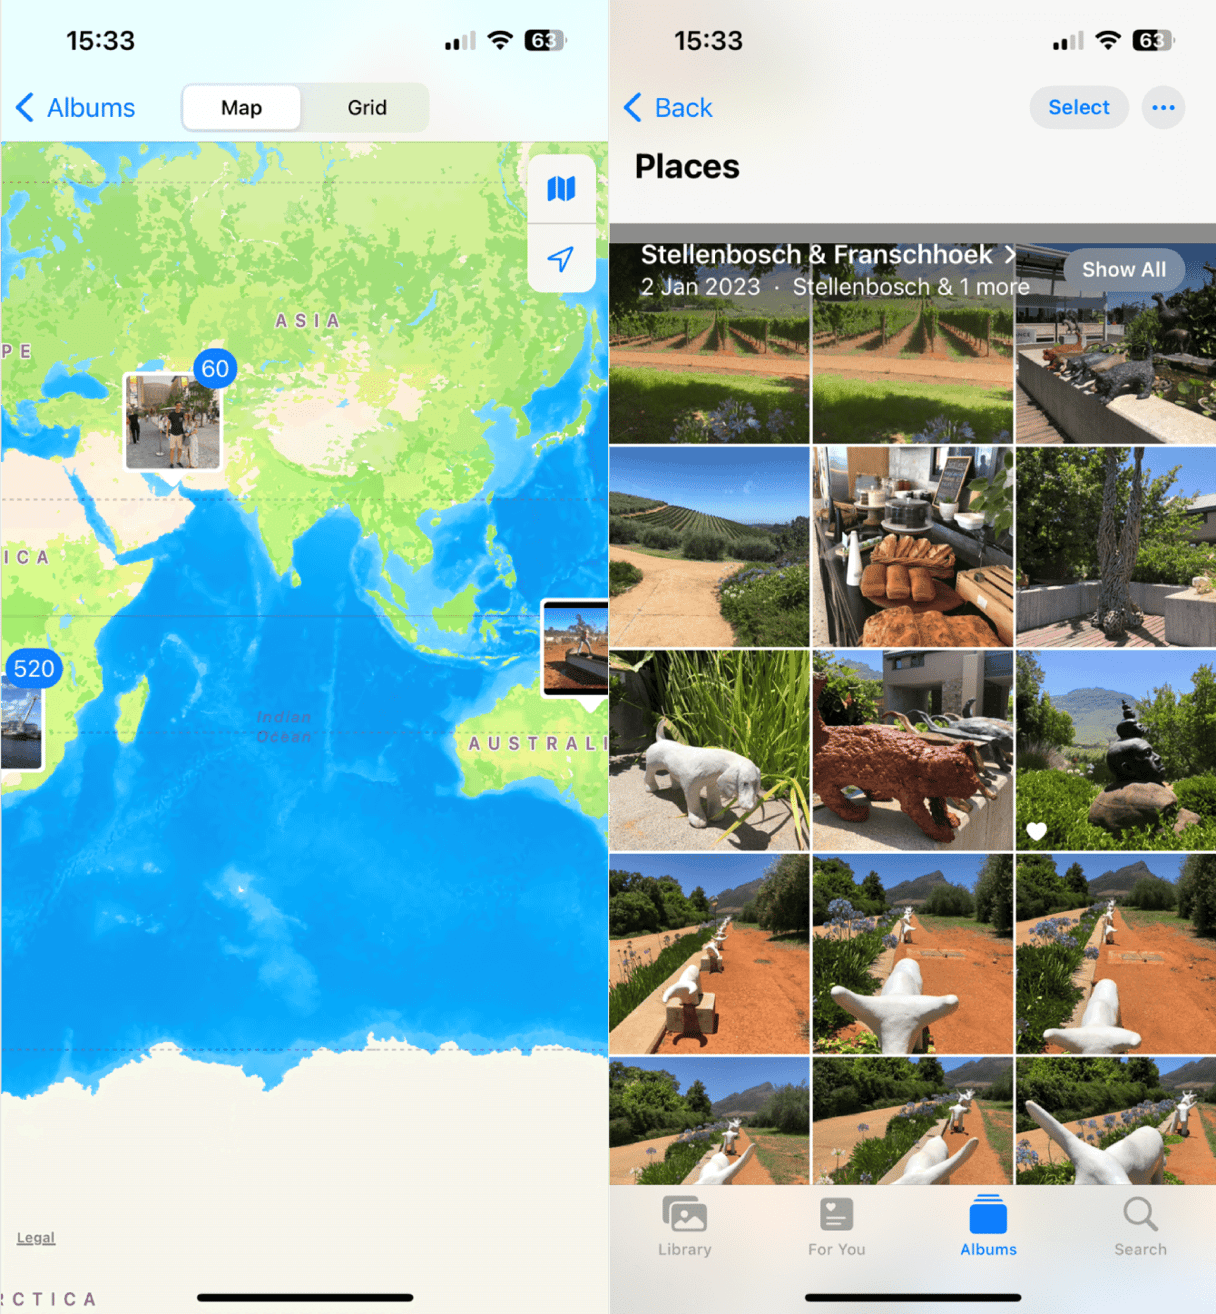
- Open Photos > Albums.
- Scroll down to People, Pets & Places.
- Select Places.
- Navigate around the world map to see photos grouped by place.
- Select a location to view the photos inside.
6. Sort by Date
In the Photos App, you can quickly sort by date, so think of a particular day, month, or year. This is a great way to quickly find photos; here's how:
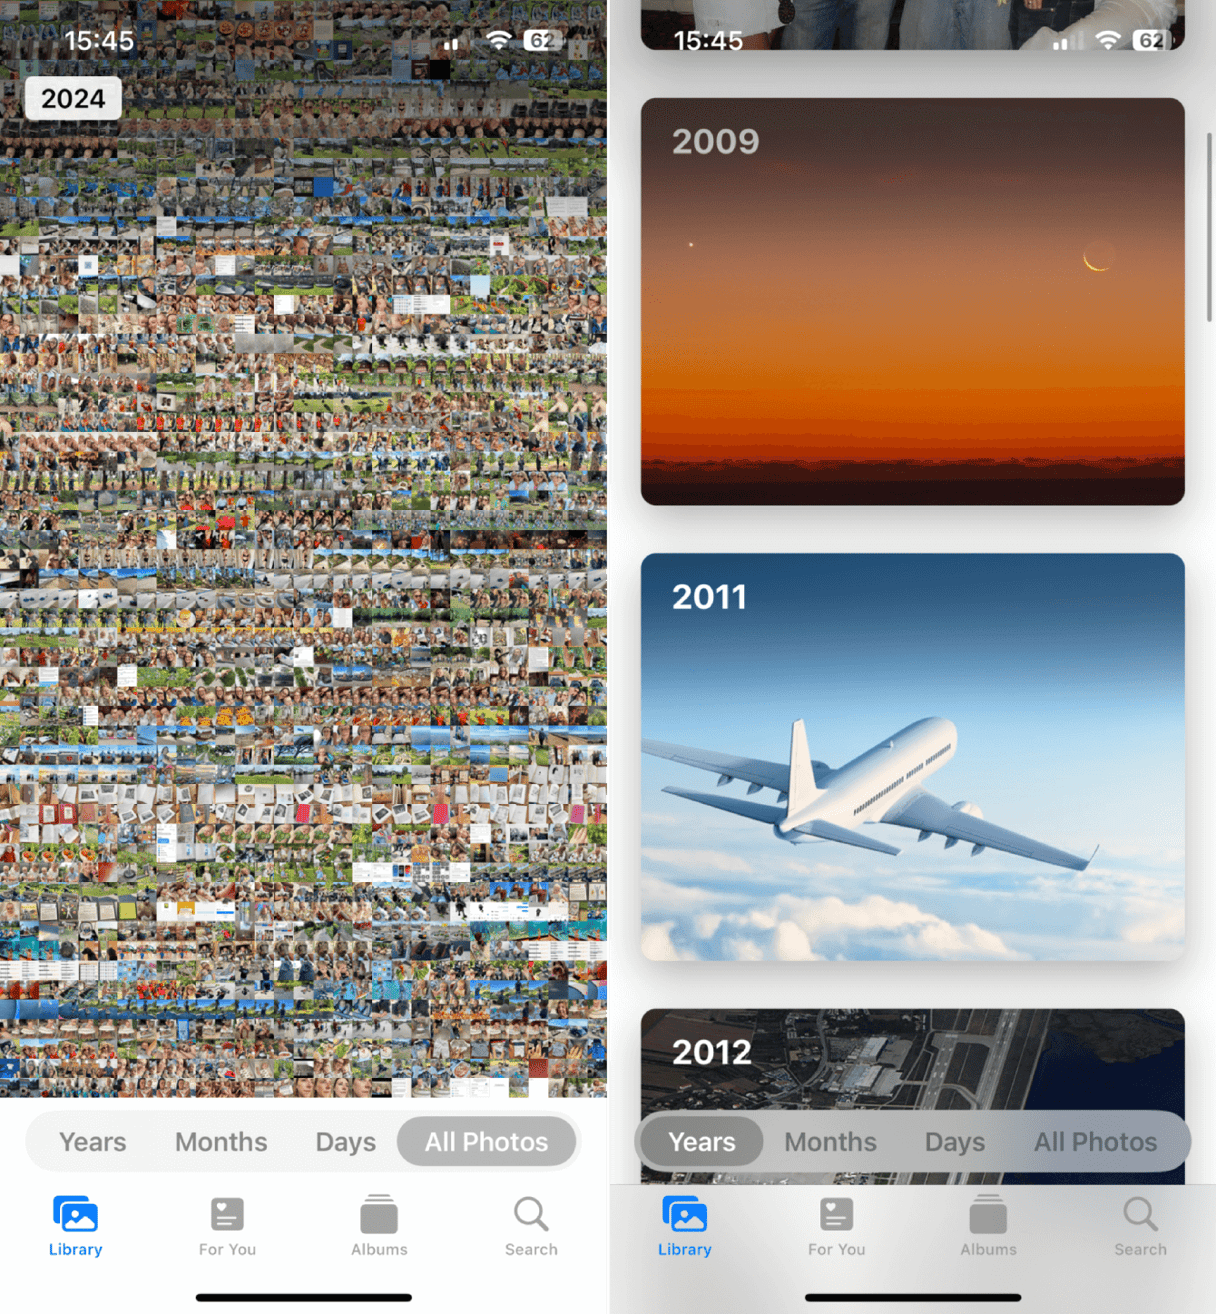
- Open the photos app > Library.
- Here, you can select from All Photos, Days, Months, or Years.
This is a great way to quickly select a group of items into an Album, which we showed you how to do earlier in the article, or to make and play memory videos;
- Open Photos > Library > Months.
- Select the three dots on a selected month and press Play Memory Video from the menu.
So, there we have it; now you know how to rearrange photos on your iPhone. We hope these tips not only help keep your media tidy but also keep your iPhone running smoothly.


