The ultimate guide to protection for a MacBook Pro [or any other Mac]
What springs to mind when you think about protection for a MacBook Pro, Air, or any other Mac? It varies from user to user: some only think about physical device protection, while others focus on keeping malicious threats at bay. Both are important, and that's why we've put together this ultimate guide on how to care for your device. We'll cover physical MacBook protection, privacy security, and data protection.
So, let's jump straight in and get started with our Mac protection tips.
How to protect a Mac
1. Physical MacBook Pro protection
Macs are a serious investment, and while you can't plan for every single unforeseen circumstance, you can take precautionary measures to protect your Mac and sidestep expensive repairs. Let's start with the basics.
Dodge temperature extremes
Macs simply do not like extreme cold or heat. Exposure to either of these extremes can cause irreparable permanent battery damage.
Apple advise using your Mac between 50° to 95° F (10° to 35° C), also known as ambient temperatures.
Close your lid gently
Take care when closing your laptop lid — never slam or forcefully shut it. Apple advises removing keyboard films, covers, palm rests, and camera covers before closing your lid, especially for newer Mac models. Failure to do so may result in display damage or screen cracks.
Clean your screen
You might be alarmed to discover that a build-up of dust and debris can cause your screen to crack when you close the lid. So, keeping your screen clean is another essential when it comes to physical device care.
Apple gives clear guidance on how to clean your screen correctly here.
Insurance or AppleCare +
It's wise to invest in some kind of insurance for your device — you could speak with your current home or contents insurance provider or consider opting in for AppleCare+.
You can purchase AppleCare+ within 60 days of buying a new MacBook. It provides 24/7 technical support and extra hardware coverage as well as battery service coverage — very handy.
So, we've covered the physical aspect of MacBook protection. Now, let's take a look at some other ways we can keep our computers safe.
Sleeves and cases
Lastly, if you want to protect your Mac laptop from scratches and minor impacts, consider buying a sleeve or a case. Sleeves are great for minimal protection during transportation, and cases provide a more robust protection. While they can be bulky, they can keep your Mac safe from drops, but they can cause overheating if airflow is limited.
2. Update your software
Running the latest macOS software and installing the latest updates for all other apps you have installed on your Mac is one of the simplest ways of keeping it secure.
You'll not only benefit from all the latest Apple security updates and security patches, but you'll also get enhanced and improved features, along with software fixes.
Here's how to check if there are any updates available:
- Select System Settings from the main Apple menu.
- Click General > Software Update.
- Check for updates and follow the onscreen instructions to install any available.
- Ensure that Automatic Updates are turned on to never miss an update again.

In addition to updating your macOS, do not ignore your apps. Newer versions of the apps come with security patches and minimize the risks of compatibility conflicts with the operating system. There are two main ways to keep your apps up-to-date:
- App Store and its Updates section.
- The app itself and clicking "Check for Updates" from the menu bar.

3. Secure login password
Using a strong login password should be top of your MacBook protection list. Consider disabling auto-login and password hints as an additional layer of protection.
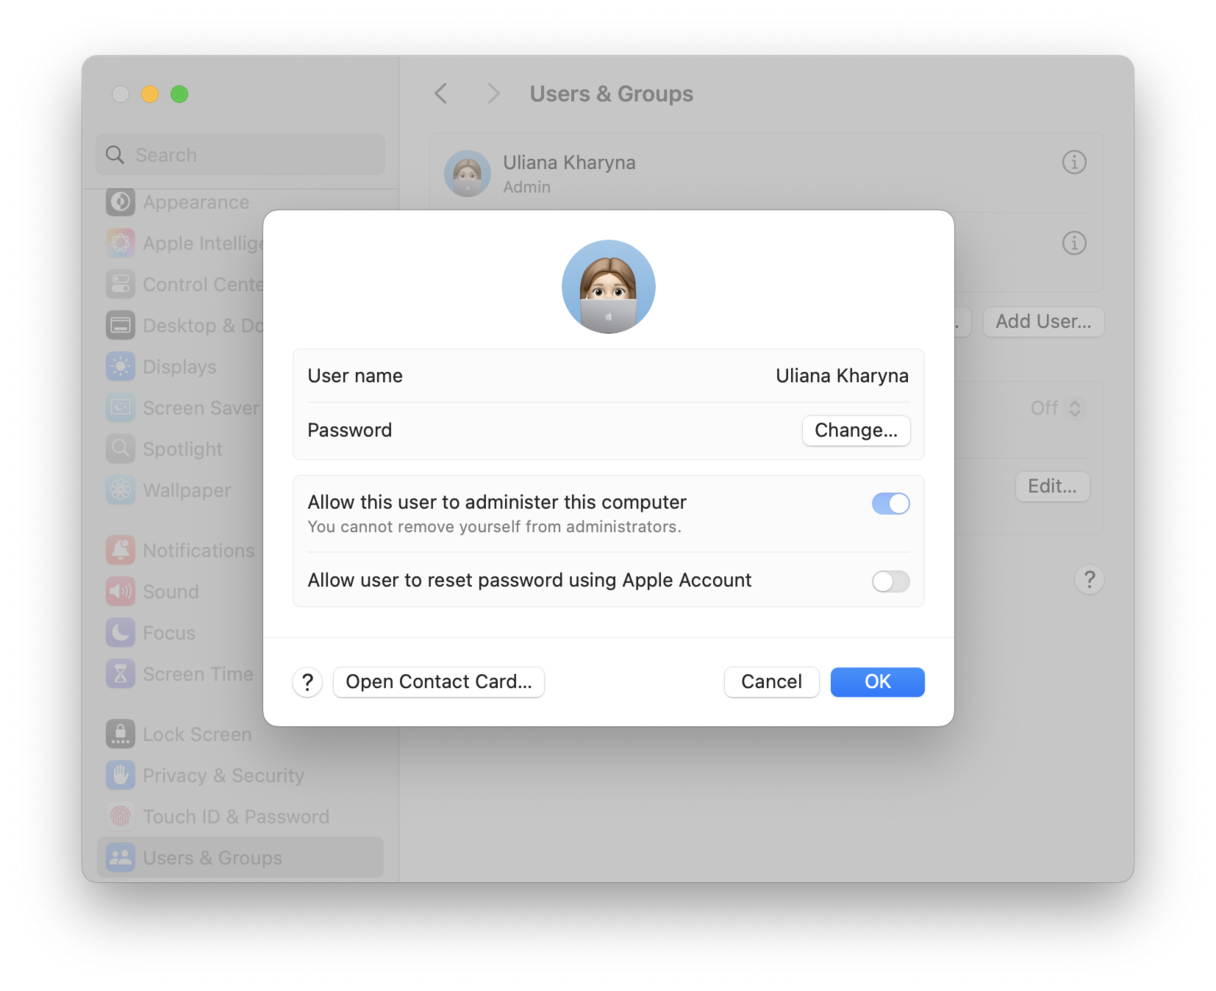
From the main Apple menu > System Settings > Users & Groups, you can adjust your various password settings.

Apple has also put together some guidance and tips for creating secure passwords. And in macOS Ventura, Apple introduced passkeys — a suggested replacement for passwords. You can use it to log in to apps or websites. Once you create a passcode, you can either use Touch ID or enter the passcode to authorize the passkey and enable a passwordless login. Passkeys are safer and more convenient, and you can manage them in the Passwords app.
4. Improve your online privacy
Our Macs come with some awesome built-in security features like XProtect and FileVault Encryption. But when it comes to our online privacy, this requires us as users to take some regular actions to make sure we're not exposing our private data. Here's a list of basic best practices:
-
Clear your browsing history regularly. Alternatively, utilize private or incognito browsing. This way, you won't have to clear the browsing history manually.
-
Enable firewalls. You can enable built-in Firewall in System Settings > Network > Firewall. Once turned on, it will prevent unauthorized apps and services from accepting incoming connections, thus blocking malicious or unrecognized data.
-
Switch on VPN when using public Wi-Fi networks, although avoid using such networks whenever possible.
-
Be cautious online. Never click a link on a website or in a message/email unless you are sure where it leads to avoid phishing or other malware. Also, be careful about your downloads — make sure they are legit and come from trusted sources or senders.
- Enable two-factor authentication (whenever possible). It will help avoid losing your data.
The problem is items like the ones above take time and effort, and we often let them slip from our minds. When it comes to upping the ante on my online privacy game, I like to use the Protection feature from CleanMyMac.
This Mac protector can instantly remove your online and offline activity imprints, obliterate your browsing history, and erase any autofill form data — all in one go. It can also find viruses and malware and check your Mac for other threats and vulnerabilities. Notarized by Apple, this app helps you take back control of your online privacy. Here's how to use it:
- Get your free CleanMyMac trial — you can test it for 7 days for free.
-
Open the app. From the sidebar, click Protection > Scan.
-
Now, check what CleanMyMac has found. You can either do it from the main screen with scan results or click Manage Privacy Items and select more items to remove from there. Pay special attention to the Privacy tool.

5. Enable Disk Encryption
You can use FileVault on your Mac to encrypt your personal information. FileVault encodes your startup disk, protecting your Mac from unauthorized access.
Here's how to check that FileVault is enabled on your device:
- Select the main Apple menu > System Settings > Privacy & Security > FileVault.
- Select Turn On and enter your admin password if prompted.
- Now, decide how you want to reset your login password if forgotten and unlock your disk.
- Click Continue.

6. Check application permissions
It's easy to forget over time what information we've given our apps permission to access.
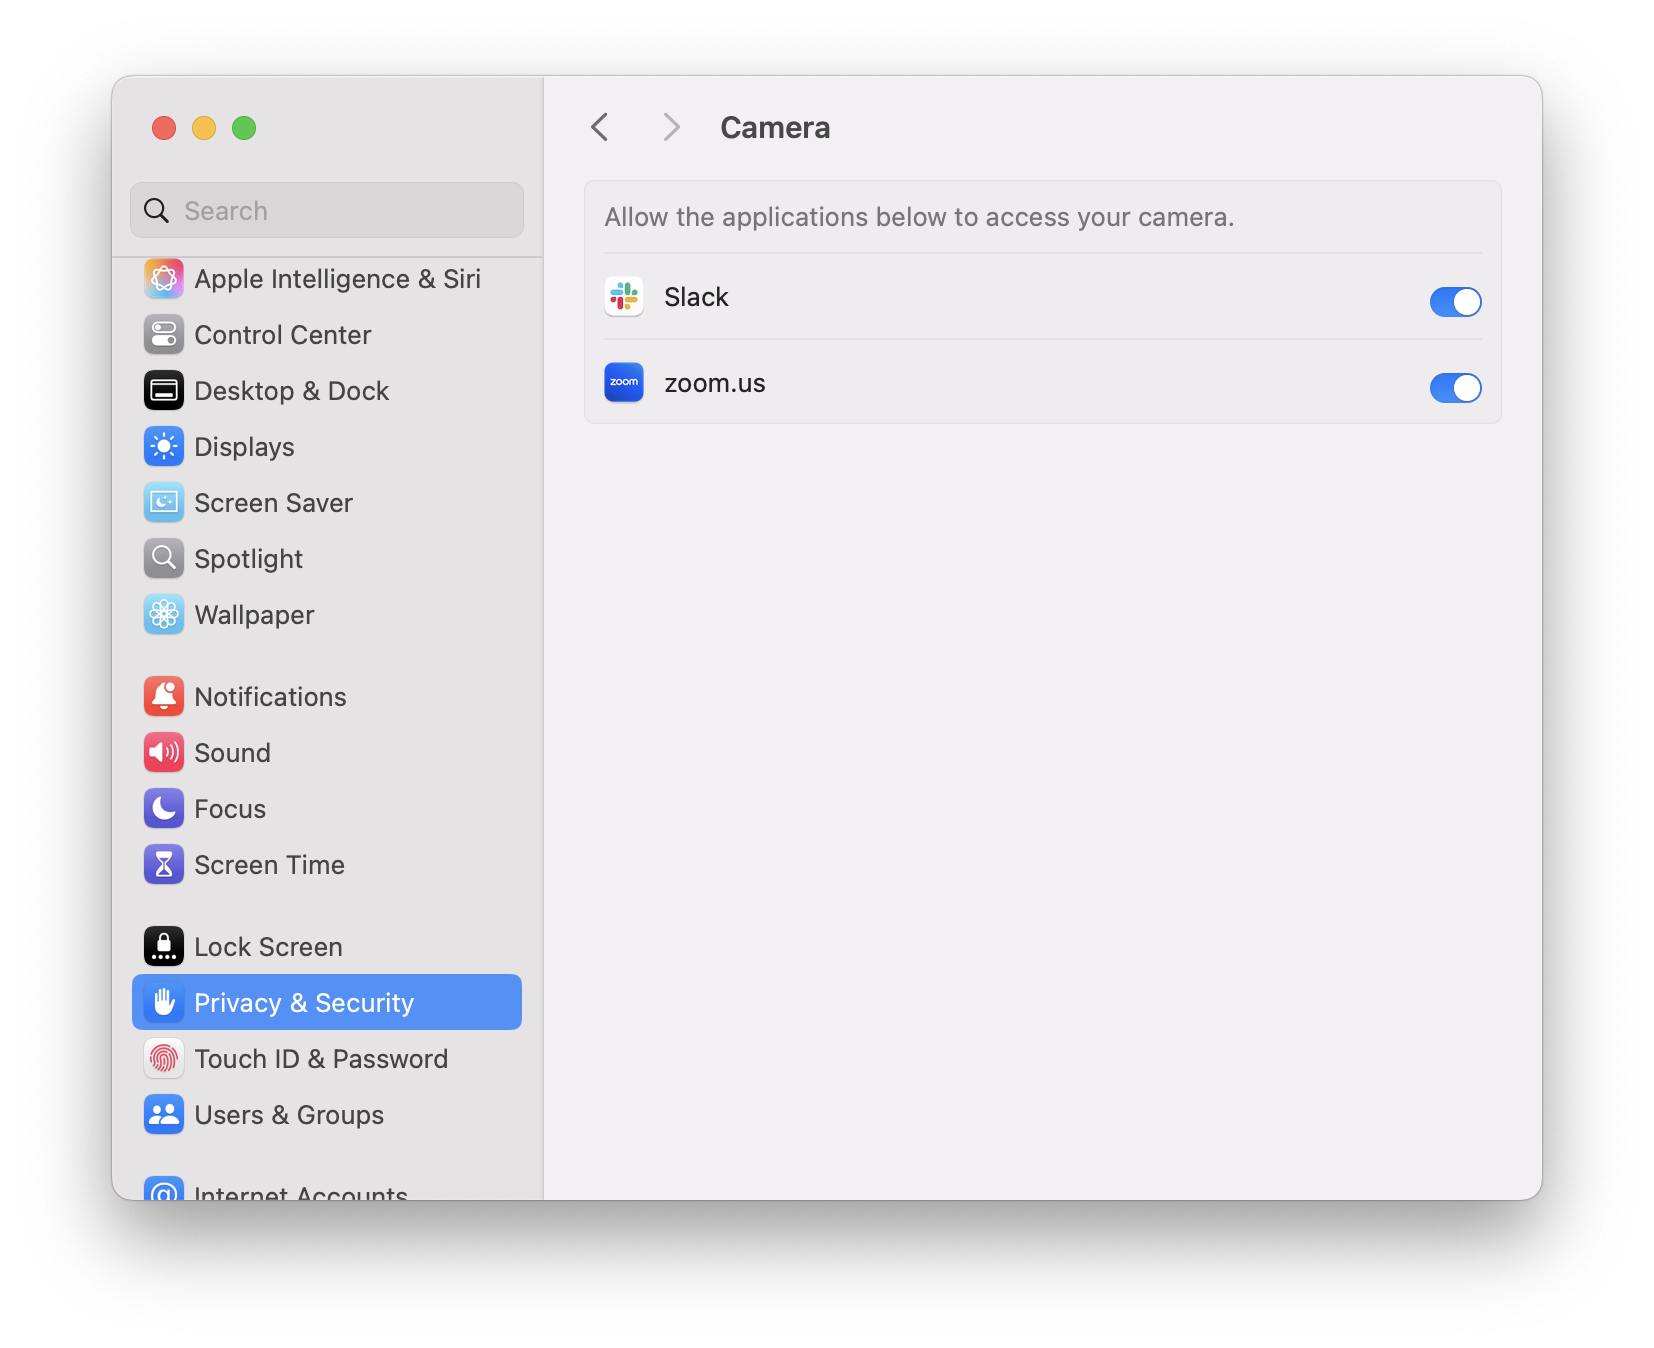
Every now and then, it's a good idea to review permissions and privileges, like which apps have unnecessary access to your location, microphone, or camera; here's how:
-
Go to System Settings > Privacy & Security.
-
Under the Privacy section, go into each of the following options and toggle on or off individual application access:
-
Location Services
-
Microphone
-
Camera

7. Use antivirus software to protect your Mac from malware
Although our MacBooks come with Apple's native antivirus component, XProtect, this won't ensure your device is free from threats and malicious malware. Apple isn't a security company, so investing in additional MacBook protection from a dedicated expert tool is essential.
I personally use CleanMyMac. Not only does it come with a powerful Malware Removal instrument within its Protection tool that I've already introduced above, but it also provides a real-time malware monitor.

You can rest assured that this Apple notarized app will report any potential threats immediately. You can also use the handy Menu App to see your current protection status. Just click the application icon from your menu bar to open it.
If your Mac starts acting strange, you can also run a deep system scan. Basically, doing it from time to time serves as an additional MacBook protection layer. Just run the scan using CleanMyMac's Protection tool as described earlier in the article. This smart tool finds all kinds of threats: spyware, browser hijackers, Trojan horses, and other types of viruses.

If you are wondering whether you can scan your Mac for malware manually, the answer is both yes and no. Of course, you can check your Mac for suspicious apps and browser extensions or use Activity Monitor to see if anything starts eating up too many system resources, but such checks are less effective than the use of a dedicated malware cleaner.
8. Secure your device when it's idle
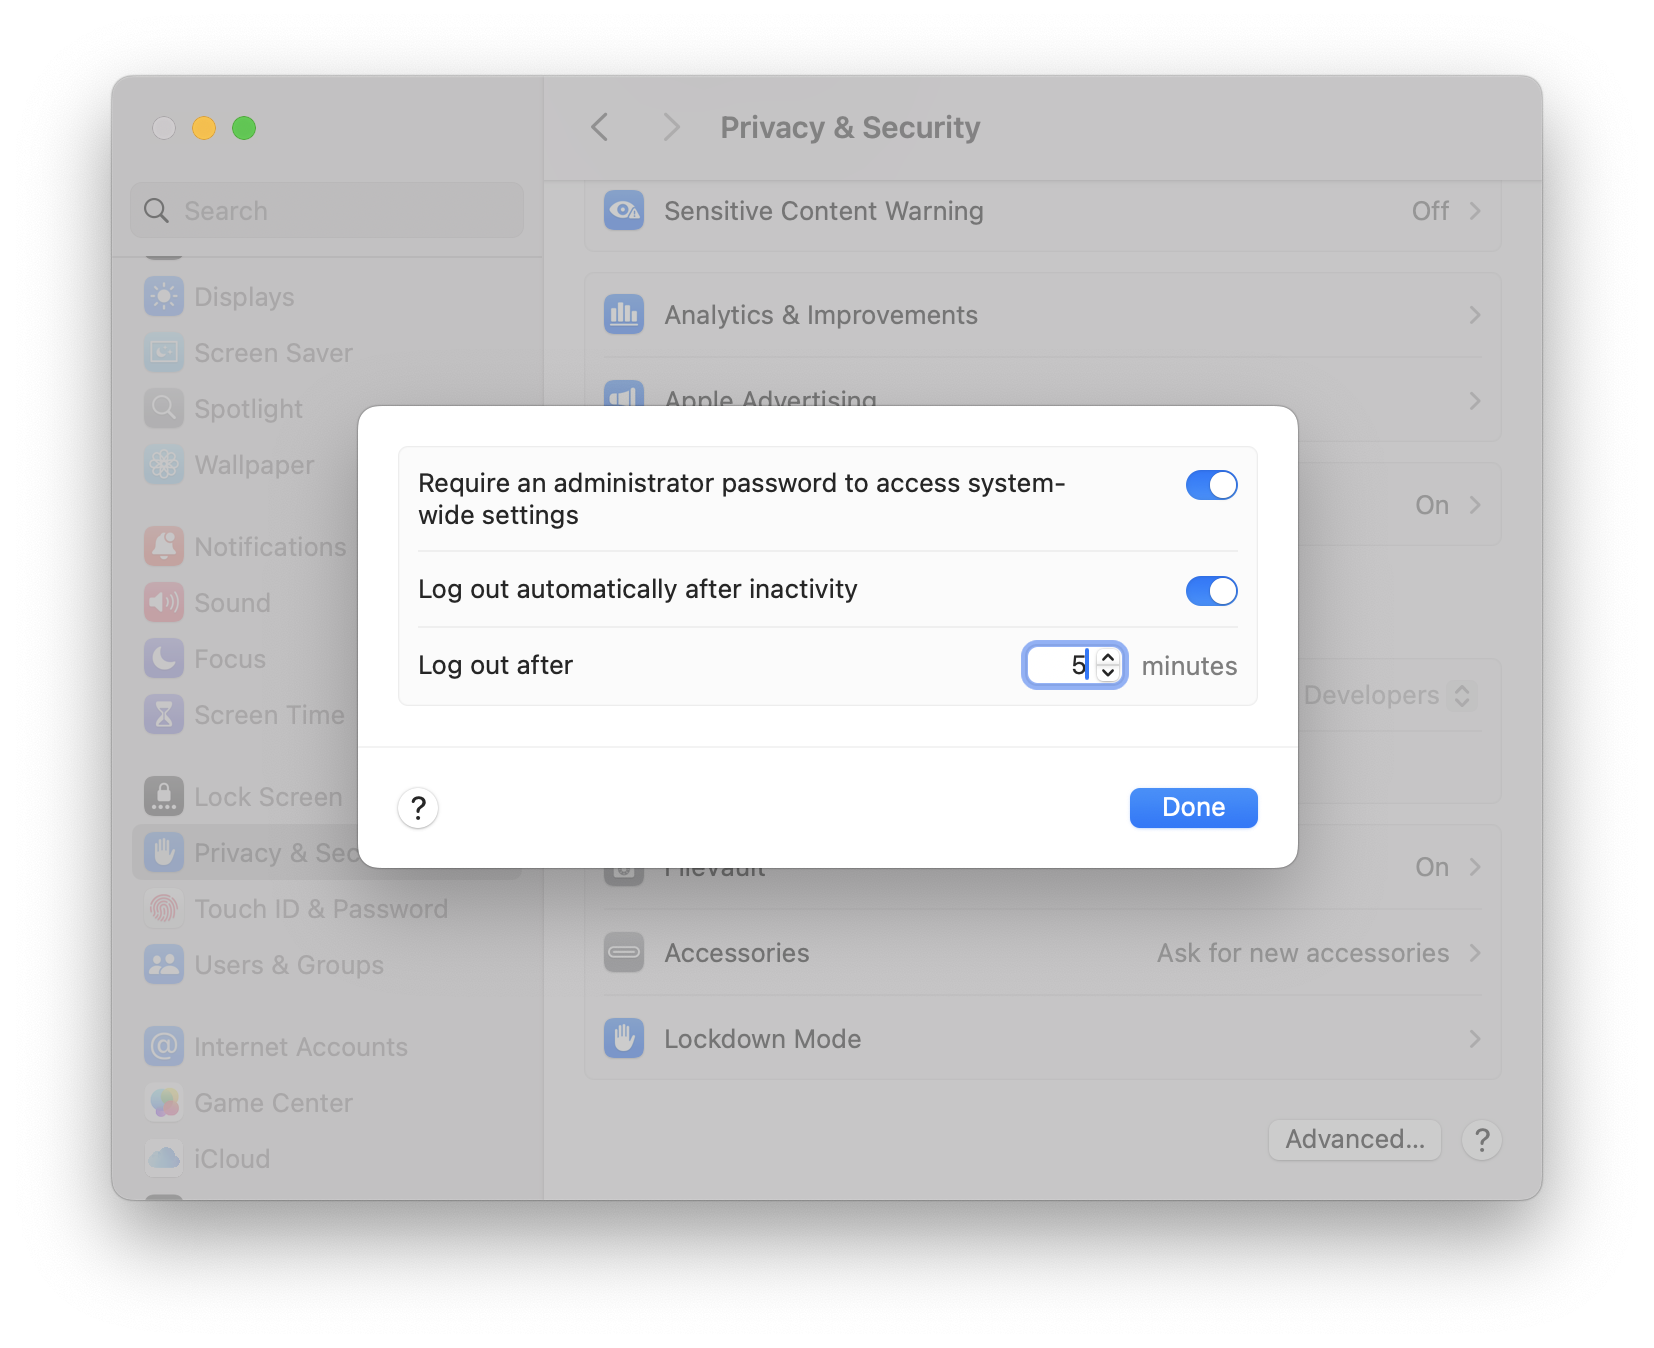
If your Mac has been idle for a certain duration of time, you can adjust your settings so that your Mac automatically logs out. Here's how:
- Select the main Apple menu > System Settings > Privacy & Security > Advanced (right at the bottom of the page).
- Toggle on Log out automatically after inactivity.
- And adjust the time duration and click Done.

9. Limit administrative users on your device
Administrators can manage, create, and remove other users, change important system settings, and alter or remove installed software.
If you share your device with multiple users, you should try to limit the number of people to whom you give administrator privileges.
This is a handy guide from Apple on how to set up various users.
10. Enable the Find My feature
When activated in advance, the native Find My feature from Apple will allow you to locate your MacBook if it gets misplaced or stolen and, more importantly, lock it or erase its data remotely.
Here's how to set Find My up:
-
Open Privacy & Security from System Settings.
-
Open Location Services and Toggle on Find My.
-
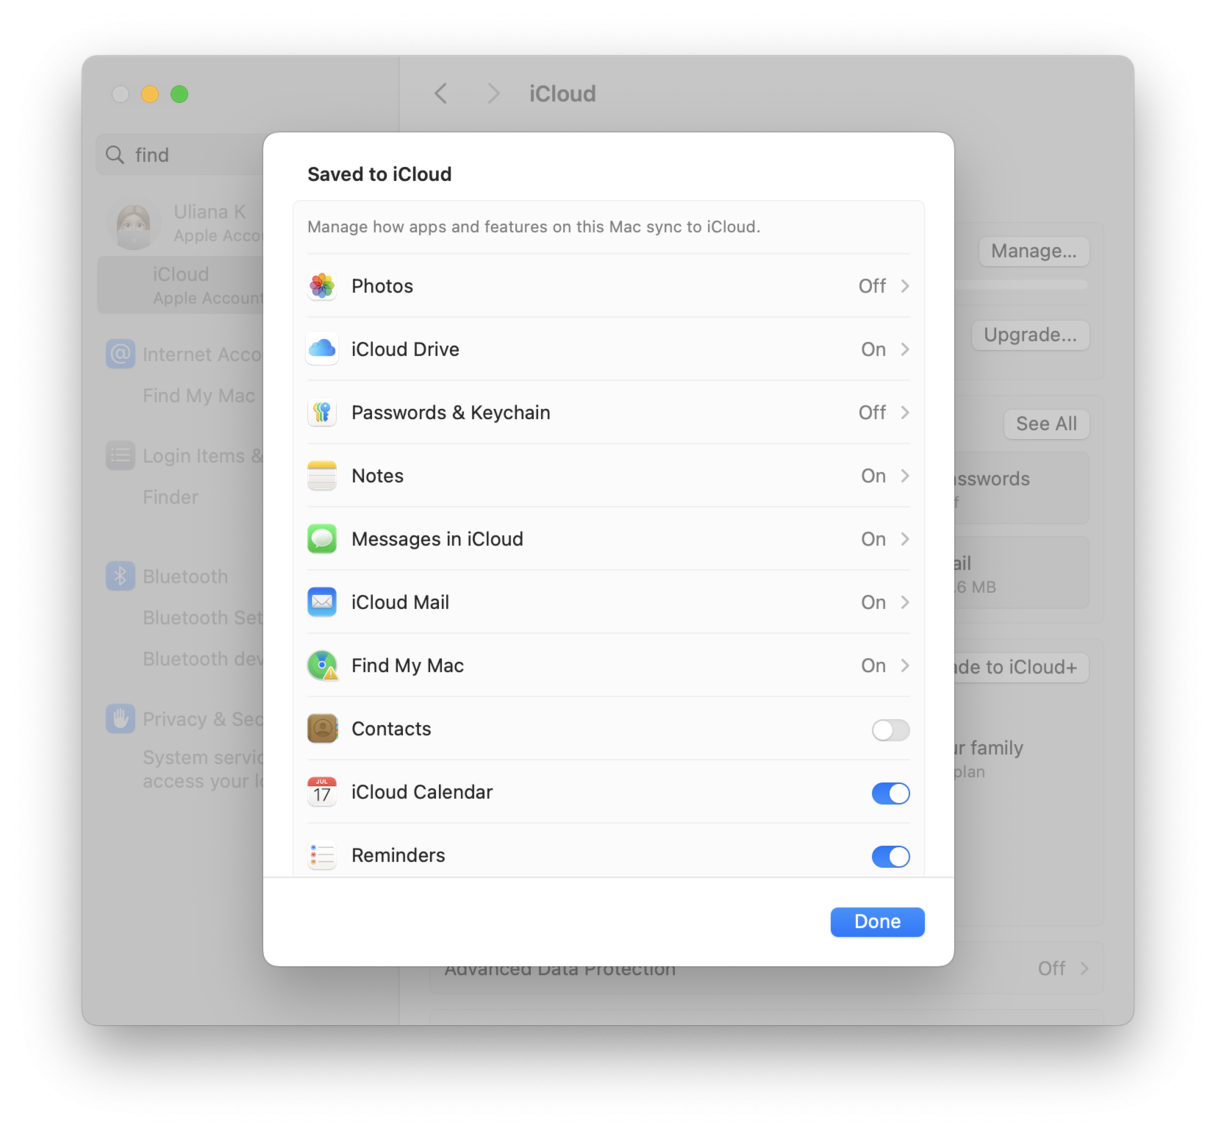
Now, back in System Settings, select your name from the top of the sidebar.
-
Select iCloud, click See All, and turn on Find My Mac.
-
Enable Find My Mac and Find My Network from the pop-up menu.
-
Click Done.

11. Use Lockdown Mode [for high-risk users only]
Apple introduced Lockdown Mode in macOS Ventura. Once enabled, it can protect your Mac against extremely rare and highly sophisticated cyber attacks like highly targeted mercenary spyware. It also limits the "normal" work of your Mac to prevent the spread of the attack. For instance, it will block message attachments or complex web technologies and will not show location information from the photos you share.
Note that Lockdown Mode is extreme protection most users would never need. You can read more about it here on Apple's website.
So, there we have it — your ultimate guide to protection for a MacBook Pro. Some of these tasks might feel time-consuming, but when it comes to keeping your device safe and your data secure, it's worth the time investment.

