Mac Internet Recovery Doesn’t Work. What can you do to fix it?
Mac Recovery is the last-ditch solution to resurrect an unusable Mac. To enable this mode, it’s stated everywhere that you need to hold down Command + R. But what if you keep pressing these two keys and nothing happens?
In this article, we’ll explain why this is and why Command + R is not working in some cases. We’ll also give you a few alternatives to Internet Recovery when your Mac doesn’t work.
Mac Recovery vs other options
First, you need to know that Mac Recovery is a part of macOS Utilities menu. macOS Utilities was intended for critical situations, like system crashes or a hard-drive that’s been accidentally erased.
This menu (normally accessible via Command + R) offers a number of tools to repair your system.
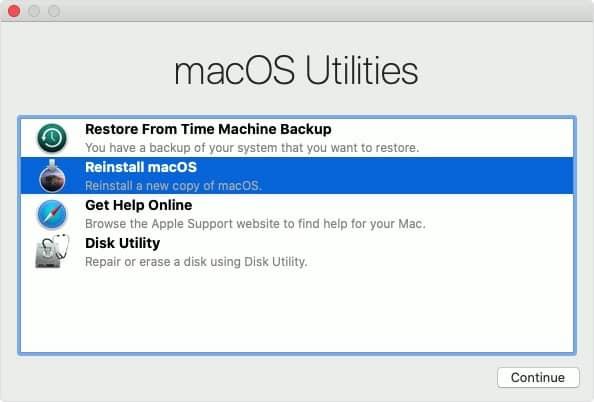
In most cases, your Mac should be able to repair itself either from a Time Machine backup or a reserve macOS copy that is stored on your drive (the first 2 options). But when none of these options is available to you, you can repair your system via Mac internet recovery.
How to enter Mac Internet Recovery
There is another combination of keys that will boot your Mac into Mac Internet Recovery mode. So when the standard Command + R combination doesn’t work, you can try one of these:
Option + Command + R
Shift + Option + Command +R
Internet Recovery protocol looks like this. It will repair your Mac by reinstalling the original macOS version that came with your computer.

How to press the keys
- Turn your Mac off completely.
- Press the Power button to start it up.
- Hold down the startup combination until the globe icon appears.
Note: Some keyboards have the Alt key instead of Option. So you need to use that instead.
Reasons why Command + R is not working
There are several reasons why Command R is not working, and your Mac would not start up in the Recovery mode. Here are some of the reasons:
-
Your macOS version is pre Sierra: Recovery options only originated on that macOS.
-
The keys on your keyboard are not functioning (have become dirty, etc.)
-
Recovery partition on your drive is corrupted or erased.
-
Your Mac has a T2 security chip set into Secure Boot mode.
The case with T2 security chip
Newer Mac models (released after 2018) come equipped with a special piece of hardware, namely, T2 security chip. This chip ensures that you only install macOS from a reputable source. It basically overrides some startup settings when set to Full Security level.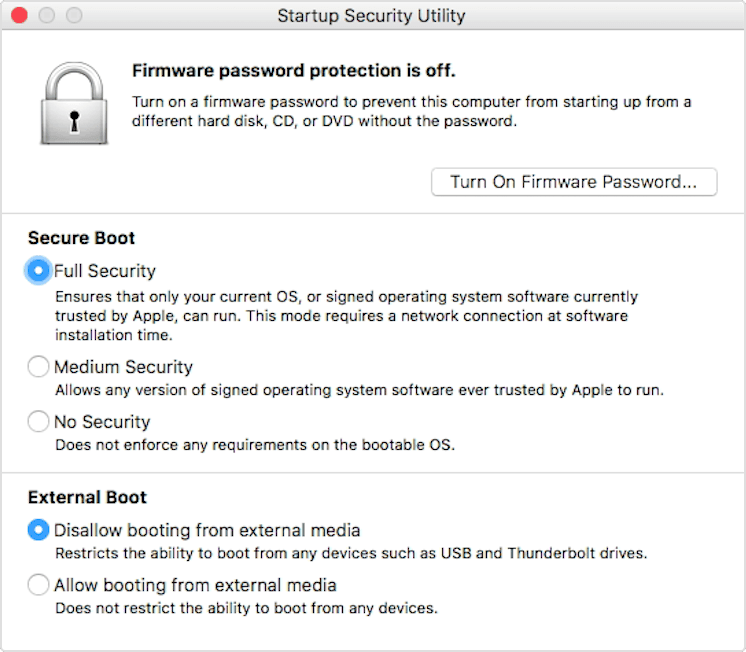
You can get around that if you press Option + Command + R upon startup — this will install the latest macOS version on your Mac.
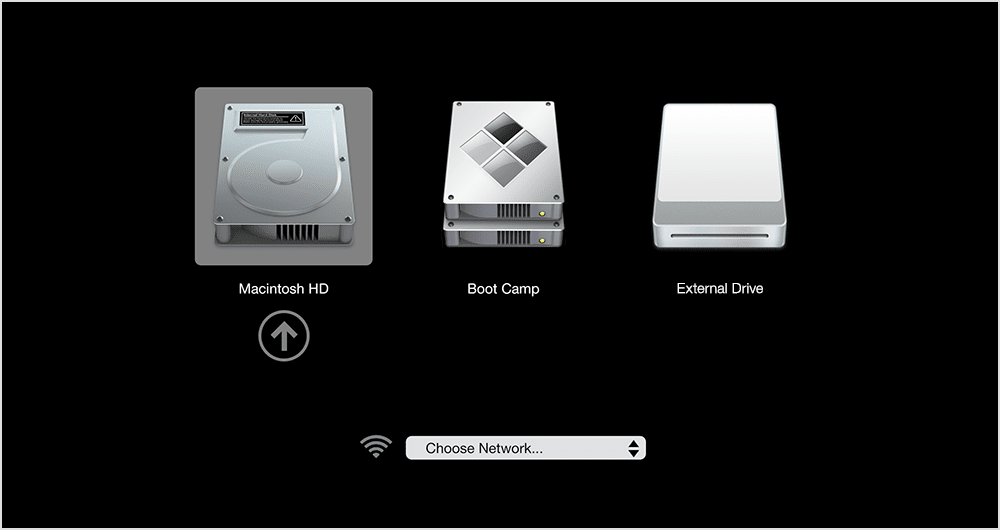
Another option: Try the Startup Manager
Since we’re trying to boot your Mac in an alternative way, you can use Startup Manager for that. The Startup Manager allows you to pick the different source from which to load your operating system. If you have an external drive with a bootable macOS installer on it, this may be the one to try and load your system from.
So here’s another startup combination for your fingers:
Hold down the Option key immediately when starting up your Mac.
Clean out the system junk
As everyone knows, any electronic device creates tons of temporary data. Such data, along with outdated software may cause your Mac to slow down, or even crash at some point.
This means system junk might be the reason why your Mac will not boot into recovery mode. HowToGeek and other Mac blogs recommend using CleanMyMac to clean your system. This software comes from MacPaw (independent Mac developer) that is notarized by Apple.

-
Run CleanMyMac — It has a free version you can download here.
-
Launch it and select System Junk.
-
Click Scan, and when it’s done, click Review details.
-
Check the boxes opposite to User Cache Files, System Cache Files, Language Files, and other items you want to delete.
-
Click Clean, and you’re all good.
CleanMyMac will only delete user cache, system logs, broken downloads, and the rest of invisible stuff you’ve accumulated over time.
Create a recovery USB
The next option to try instead of Mac internet recovery, is the bootable USB drive. It should have macOS installer on it. The basic steps can be found in this article. It refers to macOS Big Sur but the logic is the same for any macOS.
- When you’ve created a bootable USB installer, stick it in.
- Press Command + Option upon startup.
This will enter the Startup Manager, where you can select the USB as the startup option.
Apple Diagnostics: A disk health checker
If you’ve tried all of the above and nothing worked, make your Mac scan itself for disk errors. There’s a special tool called Apple Diagnostics that checks the motherboard, memory, and the rest of your hardware for critical issues.
How to run Apple Diagnostics
- Shut down your Mac.
- Press the Power button.
- Now, immediately press and hold down the D key.
Give it some time to perform all the important scans.
Wrapping it up
So, there you go. Now you have plenty of options on what to do when Mac will not boot into recovery mode. When one startup combination is not working, there are a few others you can try.
The full list of helpful startup combinations
Command + R: Reloads the last macOS that your Mac has been running.
Option + Command + R: Upgrades your Mac to the latest available macOS.
Shift + Option + Command +R: Reinstalls the factory version of the macOS.
Option: Boot with the Startup Manager.
D: Runs Apple Diagnostics.
Shift: Loads your Mac’s system under Safe Mode.
The listed combination could be used as an alternative when the regular Command + R is not working. On Mac, there are also many helpful Mac maintenance apps that may put your macOS back on track. The mentioned CleanMyMac, for example, is able to run Maintenance Scripts to improve your Mac’s performance. So, check it out, too.