How to remove photos from Mac but not iCloud: 2026 guide
Want to know how to remove photos from Mac but not iCloud? If you’re trying to free space without risking your memories. I’ve been in that exact spot. I was running out of space on my Mac running Tahoe, but I knew my iCloud plan still had room — a pretty standard scenario for many.
You can remove local copies of photos while keeping everything stored in iCloud. I’ll walk you through what works and how to double-check that nothing was lost. Let’s get started.
Why you might want to do this
The main reason to want to remove photos from Mac but not iCloud is to optimize your Mac's local storage.
The problem is that many users don't know how to do this correctly, and deleting media feels risky. What is key here is understanding that iCloud Photos works as a sync system, not a simple backup, and that distinction is important.
Your full-resolution photos live in iCloud, and your devices, like your MacBook, mirror that library. Depending on settings, your Mac may also store full copies locally, which over time becomes a real burden on system storage. If your Mac runs low on storage, you may run into issues like failed system updates, sluggish apps, and unexpected crashes — even when your iCloud storage has plenty of room.
When you remove local copies correctly, it's not risky.
What happens when you delete photos from a Mac?
If iCloud Photos is enabled and you delete a photo normally inside the Photos app, it deletes everywhere — Mac, iPhone, iPad, and iCloud — because it is a synced library, and this is where the fear of removing images and videos kicks in.
What you actually want is different. You want to remove local copies, not erase the photos themselves.
When you do this correctly, your photos stay in iCloud. They remain visible on your iPhone and on iCloud.com. Your Mac just keeps lightweight versions instead of huge files.
That difference is the whole point, and I'll show you below exactly how to do this.
Method 1: Use Optimize Mac Storage
This is the safest and easiest way to remove photos from Mac but not iCloud. When you set this up, macOS will keep small preview versions locally while the full-resolution originals stay in your iCloud. When you open a photo, the original downloads temporarily. Otherwise, it stays in the cloud.
This is the method I trust most because it aligns with how Apple designed iCloud Photos to work, and if your Mac storage is already tight, it may take a little time for space to recover, as the system needs to reindex and replace files. Here's how:
-
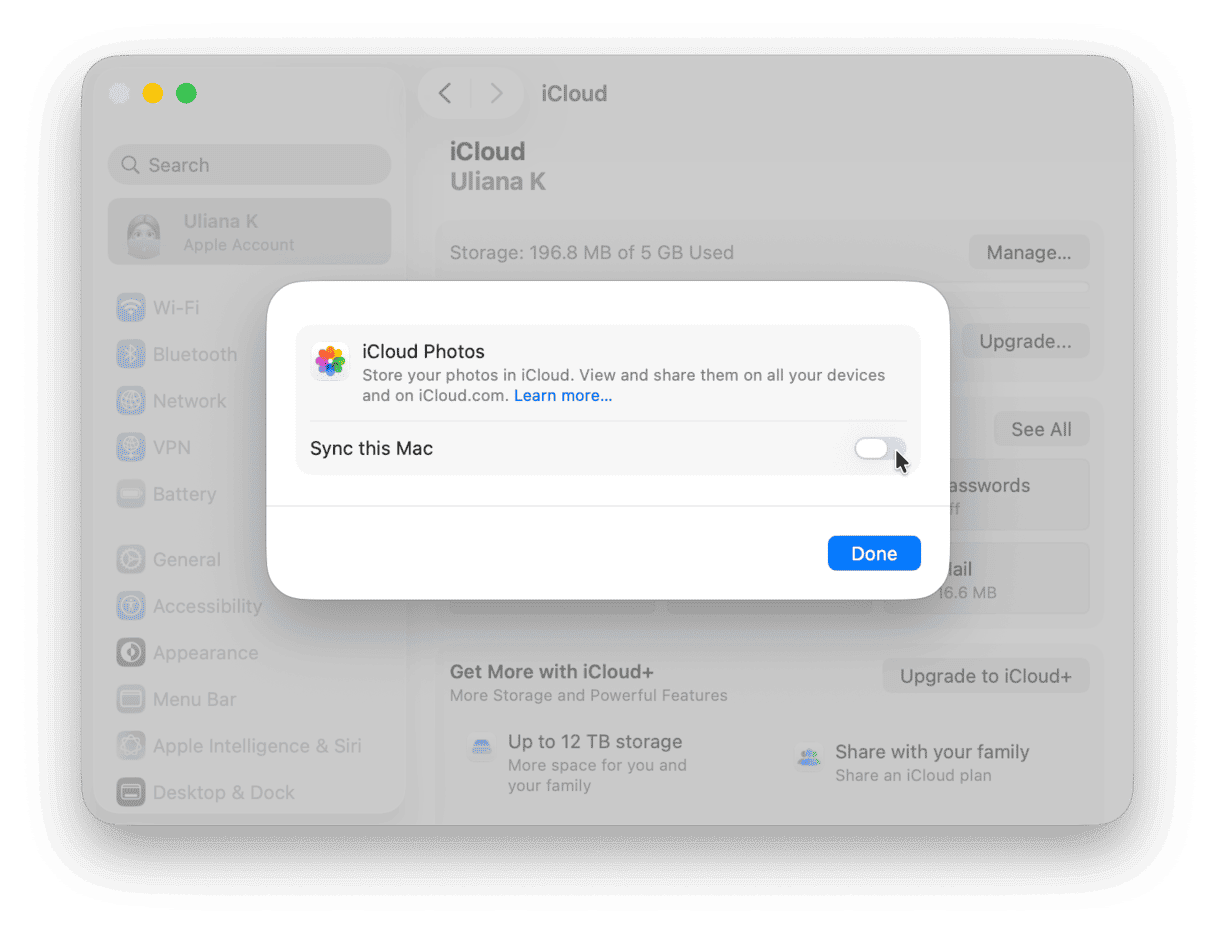
Open System Settings and select your Apple Account at the top.
-
Go to iCloud > Photos and make sure that Sync this Mac is turned on.
- Next, open up the Photos app.
- From the menu bar, select Photos > Settings > iCloud.
- Select Optimize Mac Storage.

Even after I switch on Optimize Mac Storage, I often find the real local problem is not the Photos library itself, but duplicate images, similar shots, screenshots, and stray copies saved elsewhere on Mac.
I use the My Clutter feature from CleanMyMac to help me review and clean up photo-related clutter sitting on the Mac itself, freeing local storage more deliberately. Here's how:
-
Open CleanMyMac — get your free trial here.
-
Open and select My Clutter > Scan.
-
Click Review All Files and search through the various categories.
-
Remove what’s not needed anymore.

Method 2: Manually remove downloaded originals
If you want everything kept in iCloud but removed from your Mac, here’s what to do.
Important: this method only works safely if iCloud Photos sync is enabled in iCloud settings.
-
Open the Photos app.
-
Go to Photos > Settings.
-
Click the iCloud tab.
-
Turn off iCloud Photos.
Now, you have the freedom to go through, select, and delete any large images or videos in the Photos app, without permanently deleting them from your iCloud.
If you opt for this method, keep an eye on your cloud storage levels. I use the Cloud Cleanup feature from CleanMyMac to review what is taking up space in iCloud so I can manage cloud storage more intentionally, rather than guessing which files are causing the bloat. Here's how:
-
Open up the app again and click Cloud Cleanup.
-
Select or set up your iCloud account, then press Scan.
-
Click Review All Files and manage your media.

Verify your photos are still in iCloud
- Open icloud.com in a browser window and check the Photos section. If everything is there, then your cloud copy is safe.

- Next, on your iPhone or another synced device. Check the Photos app. If the same media is there, then it’s syncing correctly.
- You can also go to System Settings > Apple Account > iCloud to confirm one last time that Photos sync is enabled.
- Review iCloud storage in System Settings > Apple Account > iCloud. If photos still occupy cloud space, then it’s working.

Knowing how to remove photos from Mac but not iCloud is important, because if you get it wrong, you could permanently remove media. But it’s simple once you know how.
Frequently asked questions
Will my photos be deleted from iCloud if I delete them from my Mac?
Yes, if you delete normally inside the Photos app with sync enabled, photos are removed everywhere. You need to follow the steps in this article carefully to remove files locally without deleting them permanently from your iCloud account.
How do I know if Optimize Storage is working?
Storage will gradually increase, and file sizes in the Photos library will also shrink over time. This doesn't happen instantly, so give it a little time to work.
What’s the difference between “Download Originals” and “Optimize Mac Storage”?
Download Originals keeps full-resolution files locally on your MacBook, while the Optimize option keeps lightweight previews and stores originals in iCloud.
Can I reverse this?
Yes, you'll just need to switch back to Download Originals to restore full files locally — inside the Photos app > Photos > Settings > iCloud.