How to reset MacBook before selling: a complete guide
Need to know how to reset your MacBook before selling? This is the only guide you need to read.
I've been through the process myself a few times over the years, and I've learned how important it is to do a proper reset. It isn't just about wiping data; it's about protecting your identity, avoiding Activation Lock issues, and handing over a Mac that feels fresh.
Don't worry if you don't know where to start; this article covers it all. So, let's jump straight in.
Why you should reset your MacBook before selling
Even if you're passing your Mac down to a family member or reselling it to a stranger, failing to reset it properly can cause serious headaches. I've read loads of posts online where users handed over their Macs only to get panicked texts hours later because the new owner was stuck at the Activation Lock screen. In one thread, someone said the buyer thought they were being scammed because the Mac asked for someone else's Apple Account during setup. That's how tightly iCloud is baked into the system now; it won't let go until you explicitly sign out.
And it's not just iCloud. Your saved passwords, autofill data, Mail cache, and even login credentials for apps can stick around in the background if you don't fully wipe the device.
Resetting the right way ensures your digital fingerprint is gone, and the next person gets a clean slate. It also avoids any future contact with frustrated buyers, which is something I've seen more than a few sellers deal with unnecessarily.
So, it's time to get to the actual complete steps on resetting a MacBook before selling.
Step-by-step: How to reset your MacBook before selling
I've tested this process on a MacBook Pro running macOS Sequoia, and it works every time, as long as you don't skip steps. Apple's made things simpler in recent macOS versions, but I've still seen people miss key parts and run into trouble later.
Step one: Back up your data
I hear you sigh, but really, don't skip this step. Even if everything seems like it's in iCloud, there's almost always something local that slips through. Forum users often mention files tucked away in Downloads or the Desktop that never synced.
One of the most common regrets? Erasing a Mac only to realize a folder of project files or unbacked photos never made it to the cloud. For me, personally, I use iCloud and Time Machine; this combo gives me coverage across cloud sync and a physical copy, just in case something goes sideways.
Here's what I do:
-
Plug in your external drive.
-
Open System Settings > General > Time Machine.
-
Click Add Backup Disk and select your drive.
-
Let the backup run fully before moving on.

I also use AirDrop to send critical files to my iPhone as a second backup layer, just in case.
Optional but worth it: Clean up your Mac
Before I do a full reset, I always run the Cleanup feature from CleanMyMac. It's not mandatory, but here's why I recommend it: It gets rid of clutter that could slow down the reset process or trigger unnecessary storage messages during the wipe.
Here's how I use it:
-
Get your free CleanMyMac trial — test the app for 7 days at zero cost.
-
Open CleanMyMac and select Cleanup > Scan from the sidebar.
-
Check through the recommendations or click Review All Junk.
-
Select things you no longer need and click Clean Up.

What I like is that it doesn't touch your personal files unless you tell it to.
Step two: Sign Out of iCloud, iMessage, and other services
This is where most people mess up. If you forgot to sign out of your iCloud account, the new owner might not be able to use the Mac or might be able to access your data, so here's the check for you to use the Mac.
Follow this checklist:
-
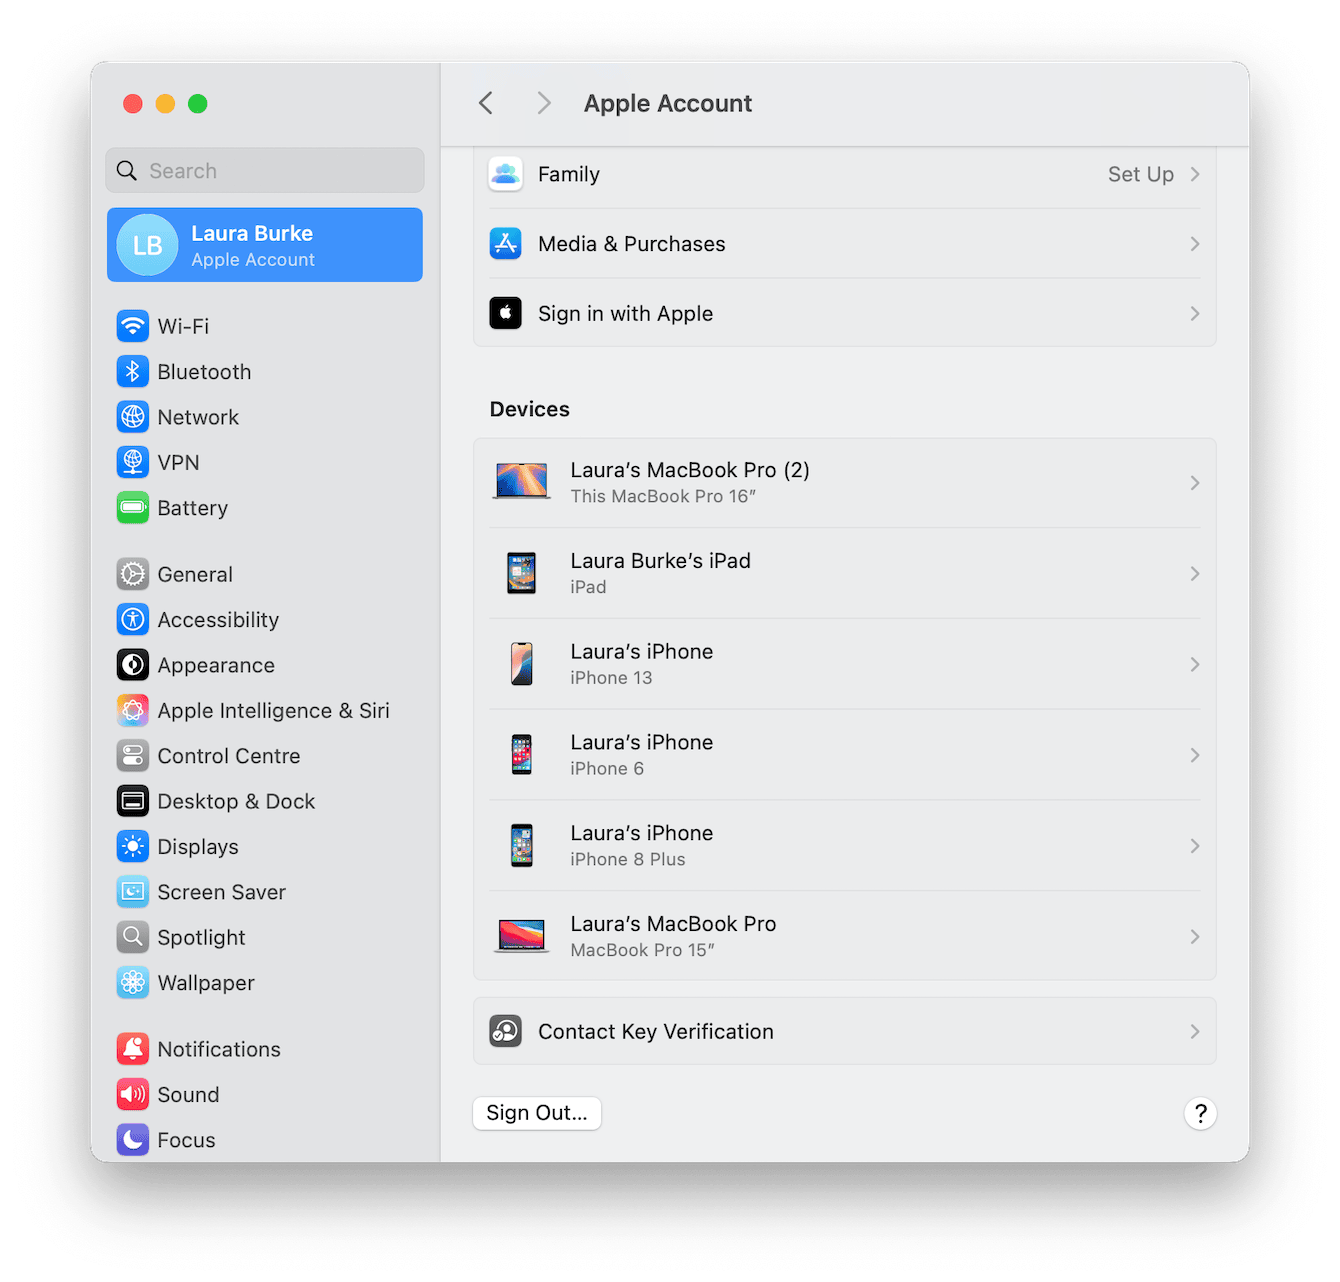
Open System Settings > Apple Account and click the Sign Out button right at the bottom.
-
Sign out of iMessage by opening the Messages app, going to Settings > iMessage, and deselecting your Apple ID.
-
If you've installed any third-party apps with licenses (like Adobe Creative Cloud), sign out of those, too.

Step three: Erase all content and settings
macOS 15 and up make this easier with the Erase Assistant tool. It's kind of like the nuclear option, but in the best way.
Here's what I do:
-
Go to System Settings > General > Transfer or Reset.
-
Select Erase All Content and Settings.
-
Enter your admin password.
-
Confirm and let it run.

The process will wipe your user data, network settings, fingerprints, and more without needing to reinstall macOS manually. The Mac will reboot to the setup screen, ready for a new owner.
What to do if you can't erase all content and settings?
Not all Macs support the Erase All feature, especially older Intel-based ones. If you don't see this option, you'll need to erase your device manually using macOS Recovery. This method takes more time and precision.
Here's a short checklist based on Apple's 2025 updated guide:
Step one: Restart into macOS Recovery
Shut down your Mac from the main Apple menu, then:
-
On Intel Macs: Hold Command - R at startup.
-
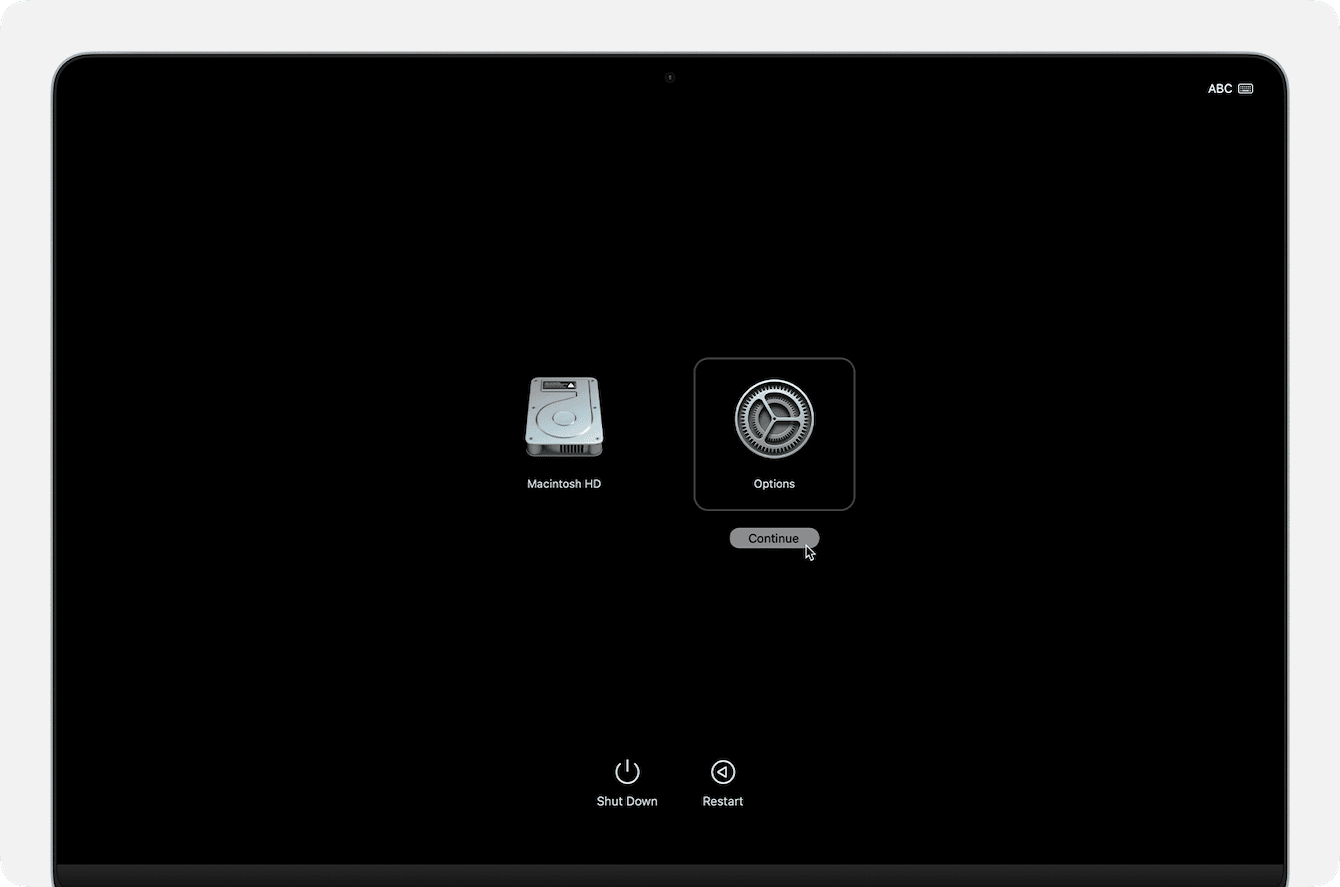
On Macs with Apple silicon: Press and hold the power button until "Loading startup options" appears, then select Options > Continue.

Step two: Erase your disk
-
In Recovery, open Disk Utility.
-
Choose your startup disk (usually "Macintosh HD").
-
Click Erase, choose APFS format, and GUID Partition Map.
-
Confirm and wait.

Step three: Reinstall macOS
-
After erasing, exit Disk Utility.
-
Choose Reinstall macOS from the utilities menu.
-
Follow the steps. Once installation completes, shut down from the setup screen. This is the new Mac screen the buyer should see.

Resetting your MacBook before selling it is like preparing your apartment for a new tenant. You want it clean, secure, and welcoming. In 2025, Apple's tools will make this simpler, but it still requires attention to detail. I've seen too many horror stories online about resales going sideways because someone skipped a step or assumed iCloud would sort everything out. And if you're like me and enjoy the ritual of closing out a device's chapter with care, don't rush the process. Back it up, sign out, clean it, wipe it, and only then, let it go.

