How to run Apple Diagnostics and fix all issues
Curious how to run Apple Diagnostics and actually use it to fix all those annoying Mac issues and glitches?
I've run Apple Diagnostics on just about every Mac I've ever owned, old Intel-based models that chugged through tasks, and now my newer MacBook onApple silicon that's running macOS Sequoia. It's not always the miracle fix you might be hoping for, but understanding when and how to use it is essential.
It's like checking your engine before a long drive. Easy to skip, but when something feels off, you'll wish you had. So, let's get into it, from how to run it to making sense of the results.
What is Apple Diagnostics or Apple Hardware Test?
In the most simplest of terms, it's a native diagnostic tool built into your macOS that checks your hardware for problems.
It looks at your logic board, memory, battery, and other components to see if anything's out of line. It used to be called Apple Hardware Test (AHT) on older Macs; same idea, just older branding.
What's important to clear up is that this isn't about viruses or junk files. This is about the bones of your Mac. If your screen flickers or your fans sound like a jet taking off, this tool should probably be your first stop.
Signs to run Apple Diagnostics
From the last 12 years of owning Macs, these are my go-to signs that it's time to run Apple Diagnostics:
-
Mac overheating randomly: even after a fan clean or reset.
-
Random shutdowns or restarts, especially under load.
-
The battery is not holding a charge as it should.
-
Weird graphic glitches or display bugs.
-
Persistent kernel panics: those dreaded black-screen crash messages.
If you're nodding along to any of these, then yes, you guessed it, it's time to prep your Mac for a run at diagnostics.
Prepare your Mac before running diagnostics
Before launching into the diagnostics itself, a bit of prep will go a long way; it might feel unnecessary, but completing this quick checklist can really make a difference, you might even solve the issue that's making you want to run Diagnostics in the first place, so it's worth a shot.
1. Back up your Mac
When was the last time you backed up your Mac? If it has been a while, I would recommend it; you never know. Running diagnostics won't wipe data, but if you end up needing repairs, backups are your safety net. So whatever your preferred method is, now is the time.

2. Unplug everything
Next, it's time to disconnect external drives, printers, and USB hubs. Apple Diagnostics hates distractions, so removing all peripherals will help it focus on the task at hand.
3. Connect to power
Always run Diagnostics with your Mac connected to a power source.
4. Ensure stable Wi-Fi
For full error reporting and reference codes, especially on Apple Silicon Macs, you need to make sure you're connected to strong and stable Wi-Fi.
5. Update macOS
Take a few minutes to check if your Mac needs a system update; bugs can cause false positives, so make sure you're running the latest macOS. Go to System Settings > General > Software Update.

OK, you're prepped and ready to get to the good part: how to Run Apple Diagnostics.
How to run Apple Diagnostics
There are a couple of methods depending on your Mac's processor. Apple started shifting to Apple silicon (M1 or later) in 2020, so your method is going to depend on which chip you've got.
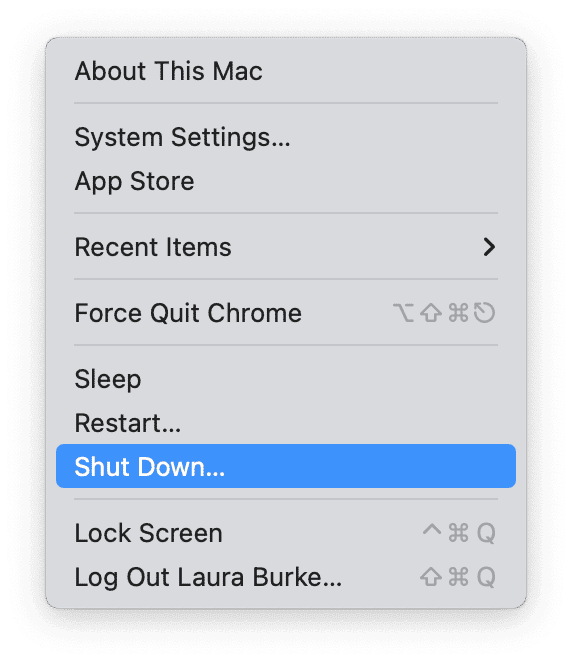
Not sure? Press the main Apple menu > About This Mac.

Running Apple Diagnostics on Apple Silicon Macs (M1, M2, M3, M4)
-
From your Mac's main menu, Shut down your device.
- Hold your power button until Loading startup options show up on your screen.
- Next up, press Command - D.
- Apple Diagnostics will start running and scan your hardware.

Expect it to take a few minutes. Once done, you'll see a list of reference codes; these are what you'll use to figure out what's wrong (or if anything's wrong at all).
Starting Apple Diagnostics on Intel-based Macs
For Intel-based Macs, the steps feel a bit like a throwback. Still works well, though:
- Shut down your Mac.
- Turn it on and immediately press and hold down the D key.
- Keep holding until a screen appears asking for your language.
- After selecting, the scan will begin automatically.
How to run Apple Diagnostics on Intel-Based Macs without Internet
If your Mac isn't connected to Wi-Fi and you want to run diagnostics anyway:
-
Follow the same steps.
-
The system runs a basic offline diagnostics check.
-
You'll still get error codes, but won't be able to look them up online from the tool itself.
How to deal with the results
OK, so you've run the diagnostic; this is, in my opinion, the hard part: trying to decode the somewhat cryptic results.
You'll see codes like ADP000 (which means no issues) or something like PPM002, which might mean a memory issue.
My tip? Don't panic over a code. Cross-reference it with Apple's support page here or on the Apple Community forums. Some codes are false flags or the result of temporary glitches.
If your diagnostics turn up nothing, but you're still seeing symptoms or running into glitches, that's when I bring out CleanMyMac and utilize its Performance feature.
Boost your Mac's performance after running Apple Diagnostics
The Performance feature can help you keep running basic yet essential Mac maintenance tasks, help you clear background processes, repair disk permissions, and remove login items, all the things that could be causing your Mac to act strangely; so here's how to run it:
-
Open it and select Performance > Scan.
-
Either run the recommendations or click View All Tasks.
-
Select items and click Run.

Why Apple Diagnostics isn't always enough
So you know how to run Apple Diagnostics, but the truth is, it's not always enough; in some cases, it's only half the story. It might tell you what could be broken, but it doesn't indicate why or what caused the issue in the first place. For example, I once had a MacBook Pro that passed diagnostics with flying colors, but the thing would freeze whenever I opened Adobe Premiere. Turned out to be a background agent from an old display driver.
Using a tool like CleanMyMac that I mentioned above can help uncover the other half of the story and fill in the gaps. I also thought it was interesting to read on some of the forums that Diagnostics still can't catch SSD wear, subtle thermal issues, or rogue login items. So, being open to some extra third-party help isn't a bad thing.
Running Apple Diagnostics is useful; I personally treat it as a starting point. If it finds something serious? Off to Apple Support or a certified repair center. If not? I jump into investigation mode, monitor apps and background processes, and run maintenance tasks.