How to scan photos on iPhone
So, you want to know how to scan photos on your iPhone? Thanks to the convenience of smartphone technology, digitizing your cherished physical photographs is easier than ever.
Whether you're looking to preserve family snapshots, important documents, or vintage negatives, your iPhone's camera can transform physical prints into high-quality digital images.
Join us as we explore the various methods, techniques, and apps available to help you scan photos with precision and ease, ensuring that your memories are preserved for years to come. Let's get started.
Reasons to scan photos with iPhone
You might be surprised to discover that there are actually plenty of benefits to scanning photos with an iPhone; let's take a closer look:
-
Safeguard precious memories against damage, loss, or deterioration by digitizing photos.
-
Great way to share old photos with friends and family.
-
Store digital copies in multiple locations for added security against loss.
Regardless of your reason for digitizing your old snaps, we've put together the best methods out there, so you no longer need to scour the forum threads.
How to scan a picture on an iPhone
Scanning pictures on your iPhone opens up a world of possibilities for preserving memories and organizing your photo library. Let's explore various methods to scan photos on your iPhone, ensuring your cherished moments are digitized and easily accessible.
1. Using your iPhone's camera
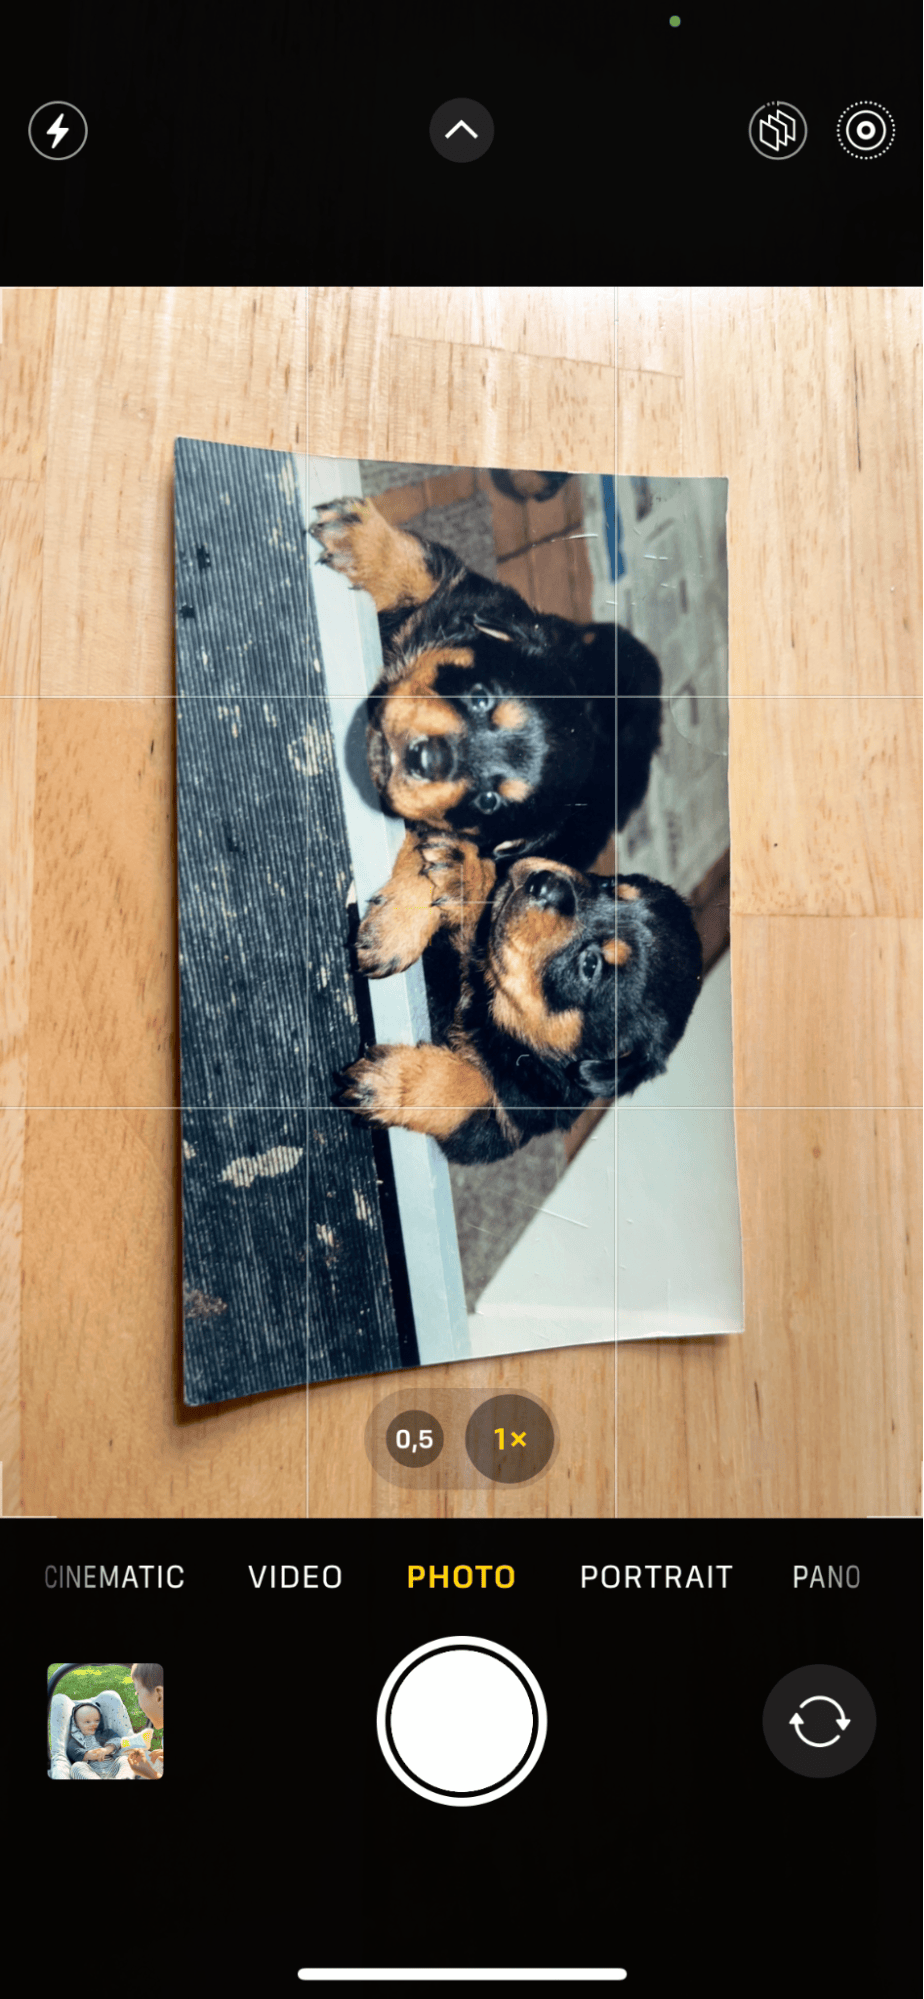
Undoubtedly, using your iPhone's built-in camera is a great way to digitize your old photos. It requires minimal setup, but there are a few things to consider. We’ve detailed this in the steps below.

-
Before capturing the image, ensure that the photo is well-lit (ideally with natural light) and positioned correctly on a flat surface. Lighting is definitely the key to producing clear and detailed scans, minimizing shadows, and enhancing image quality.
-
Hold your iPhone directly above the photo, ensuring that it is parallel to the surface and positioned centrally for an optimal angle. Consider using a tripod. Once positioned correctly, tap the Shutter button within the Camera app to capture the image swiftly and accurately.
-
After capturing the photo, utilize the built-in editing tools within the Camera app to crop and adjust the image as needed. Remove any excess background surface surrounding the photo to focus solely on the captured image, enhancing its visual appeal and clarity.
While using your iPhone's built-in Camera for scanning photos offers convenience, it may result in lower image quality and contribute to storage issues on your device. If you're worried about your iPhone's available storage, here's a bonus tip for you.
How to keep your iPhone media organized and tidy
Optimize your iPhone's media library effortlessly with CleanMy®Phone's advanced Declutter module, eliminating the hassle of sifting through endless photos and videos:
-
Launch the app and access the Declutter module.
-
Initiate a scan to identify duplicates, bad shots, and low-quality images.
-
Review the categorized items and remove unwanted media with a single tap, freeing up valuable space on your device.
Once your media is decluttered, maintain organization with these steps:

-
Next, open the Organize feature.
-
Customize your search time frame and press the Scan button.
-
Review and organize your collections by swiftly removing unnecessary items, keeping your media library organized and clutter-free.
Ok, back to how to scan a photo using iPhone methods.
2. Scan with your Apple Notes app
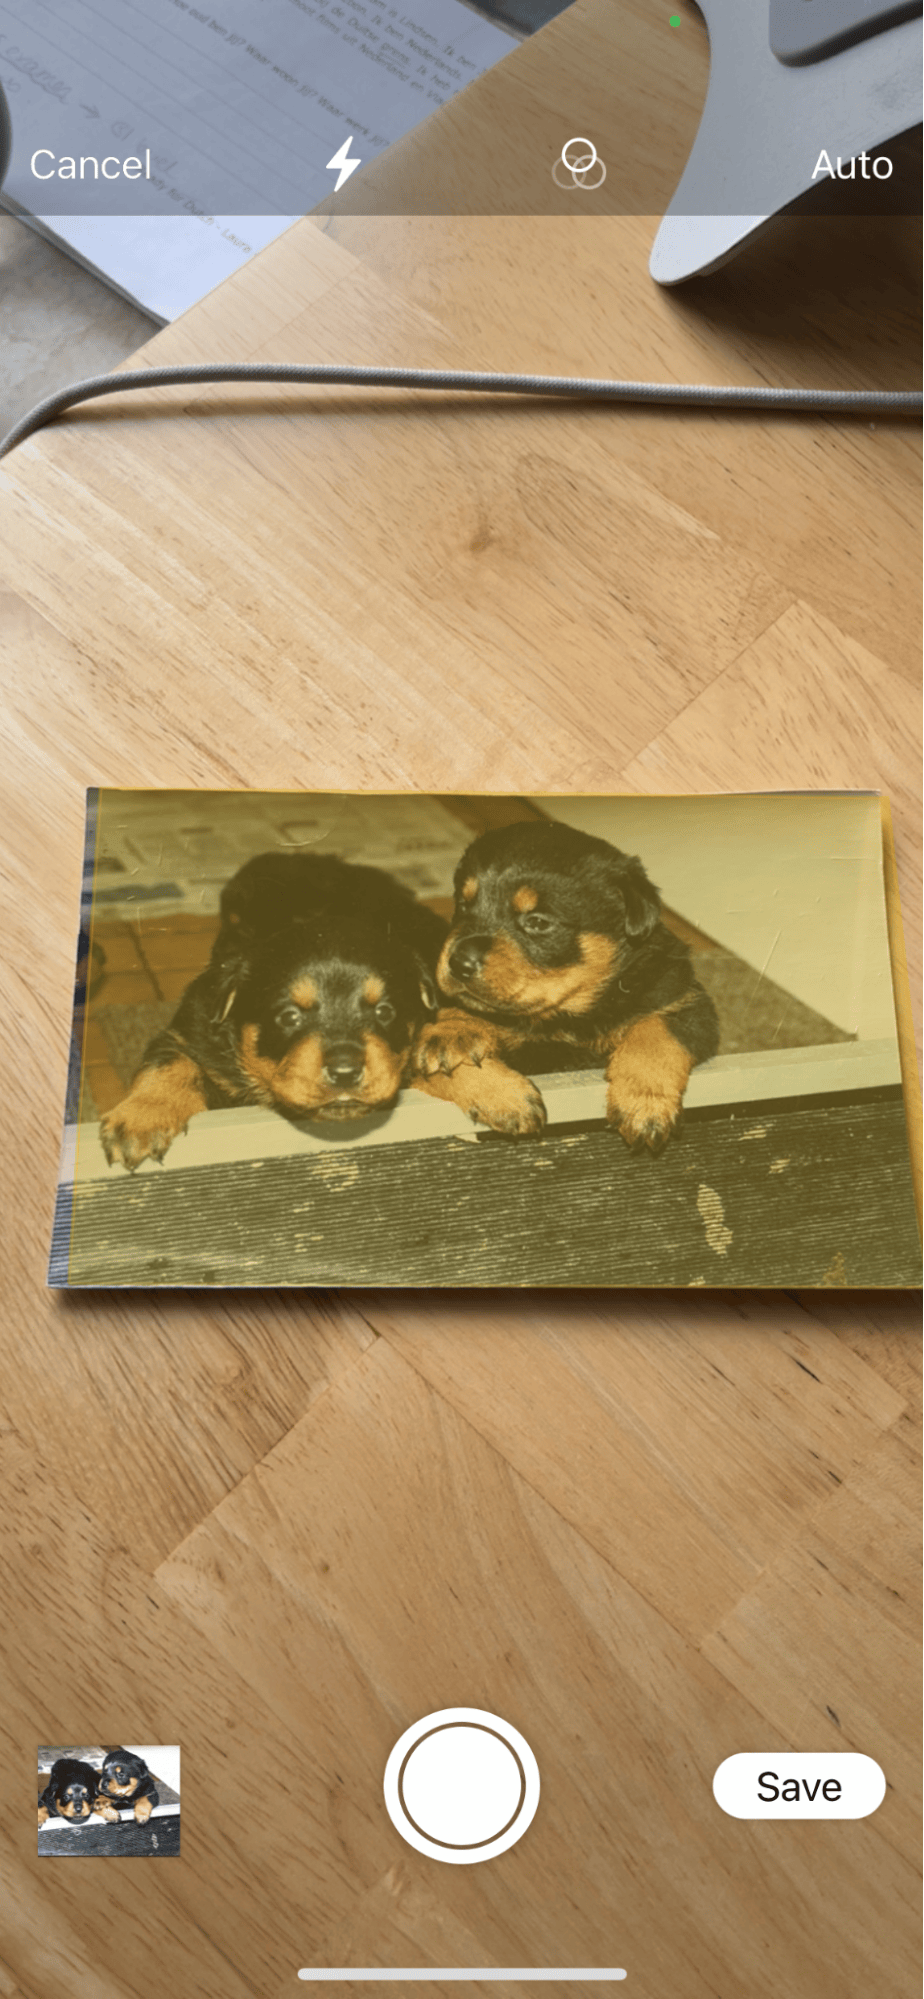
You can also use your built-in Notes app to scan photos and documents on your iPhone.
-
Open up the Notes app on your iPhone, create a new Note, or open an existing one.
-
Tap the Camera button, then choose Scan Documents.
-
Position your image or document within view of the camera.
-
If your iPhone is in Auto mode, the image will automatically scan. Otherwise, you can manually capture it by tapping the Shutter button.
-
If needed, you can adjust the corners to fit the page, then press Keep Scan. Once you're finished, tap Save or continue adding additional scans to the document.
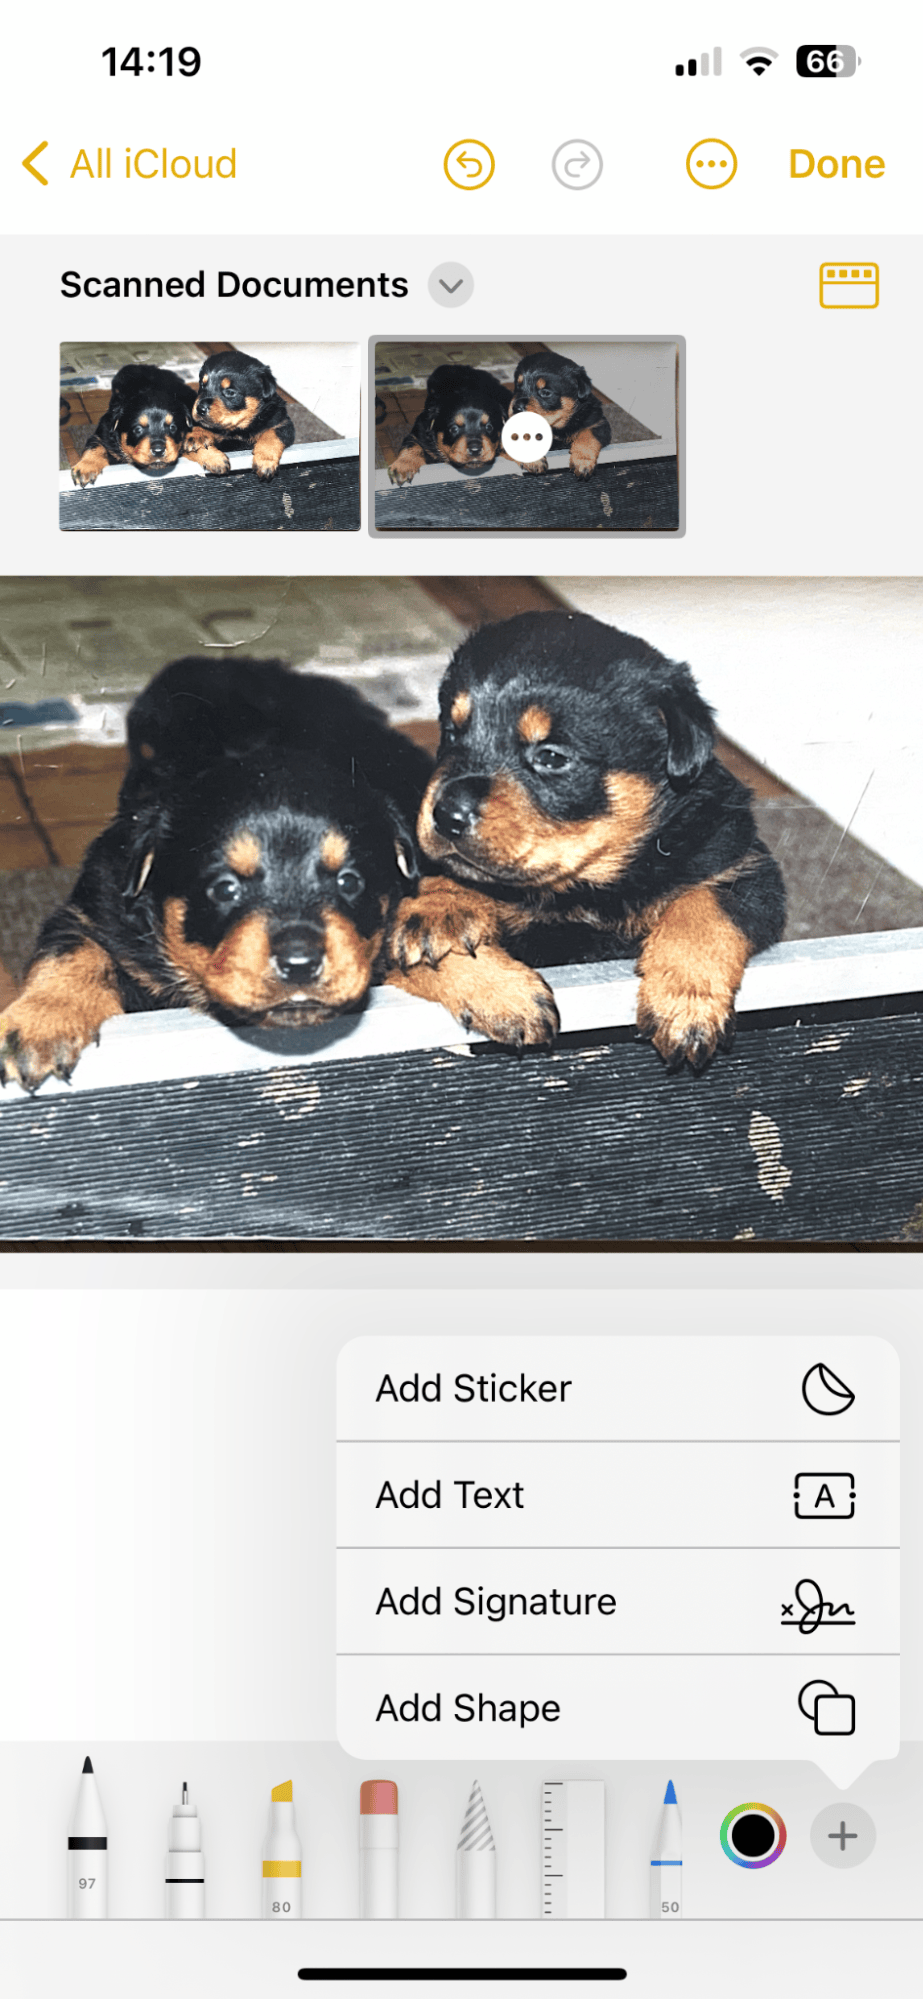
You can also add a signature or text to the image or document you just uploaded; here's how:
- View the scanned item.
- Press the Pen tool at the bottom.
- Select the + icon and add either text or a signature.
3. Third-party apps
While the native camera and Notes app provide efficient ways to scan documents and photos on your iPhone, third-party apps offer additional features and functionalities for even more flexibility and convenience.
Here's a quick roundup of some top-rated third-party apps tailored for scanning tasks:
PhotoScan by Google Photos (Free)
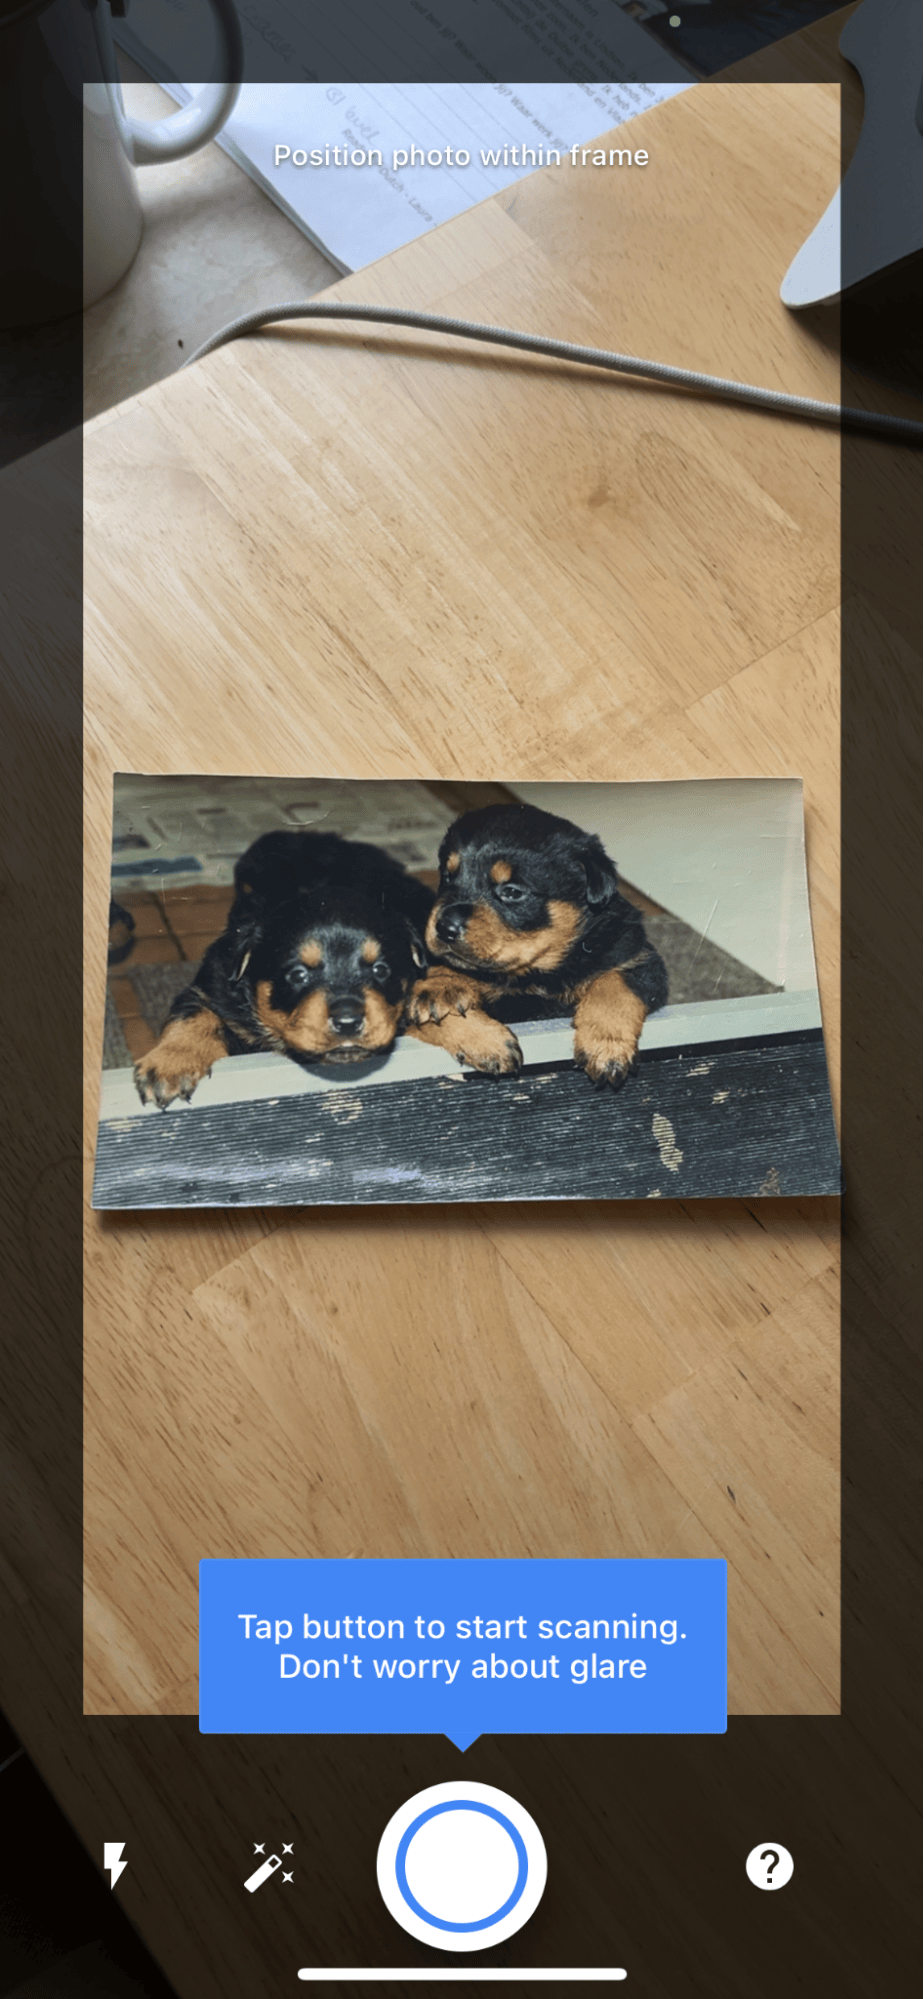

This app elevates photo scanning with step-by-step instructions, automatic cropping, glare removal, perspective correction, smart rotation, and edge detection. Scanned photos are seamlessly integrated with Google Photos for easy sharing and storage.
Photomyne Photo Scan App (Free or $39.99/Year)
Ideal for scanning entire photo albums quickly, Photomyne offers batch scanning, automatic boundary detection, rotation correction, and automatic enhancements. The paid subscription unlocks additional features like story tagging, face tagging, photo filters, and colorizing black and white photos.
Pic Scanner ($3.99)
Claiming to be the world's first app to scan and crop multiple photos per click, Pic Scanner offers unlimited features such as photo editing, filters, perspective correction, and photo captions. It's a one-time purchase with no subscription required and works seamlessly offline.
These third-party apps extend the capabilities of your iPhone, providing many advanced scanning features and enhancing the quality of your digital scans.
There are, of course, many other apps on the market; just be sure to do your research and read reviews first.
So, we've reached the end; you now know how to scan pictures on an iPhone. Don't forget to keep your media library tidy; an excess of images will quickly consume valuable storage space on your iPhone. Join us again soon.


