How to transfer photos from iPhone to iPhone
Wondering how do I transfer photos from iPhone to iPhone? It might seem like a daunting task, but with the right tools and guidance, it's actually quite straightforward.
So, whether you're upgrading to a new model, sharing memories with a friend, or simply wanting to ensure your precious photos are backed up, this guide will walk you through the various methods available.
From using iCloud and AirDrop to leveraging wired connections, we'll cover all the bases to make sure your photos move seamlessly from one iPhone to another. Let's dive in and explore the easiest and most efficient ways to transfer your photos.
Reasons to transfer photos from iPhone to iPhone
Transferring photos between iPhones is actually a versatile and essential task for different practical reasons, including:
-
Upgrading to a New iPhone
-
Sharing Memories
-
Backing Up Photos
-
Freeing Up Space
-
Preparing for Device Maintenance or Repair
So, whatever your reason, let's uncover the various methods available.
How to transfer pics from iPhone to iPhone
Let's take a look at some simple ways to transfer photos to the new iPhone.
1. AirDrop
Top of the list is Apple's built-in AirDrop feature. AirDrop has been around since 2011 iOS 7 and is a great way to share media because it offers fast, simple, and secure wireless file transfers between Apple devices.
With the latest iOS17 update, AirDrop has been upgraded to support transfers over the internet, eliminating the need to remain in close proximity during large file transfers. So, let's take a look at how to use it:
Step one: Enable AirDrop on both iPhones
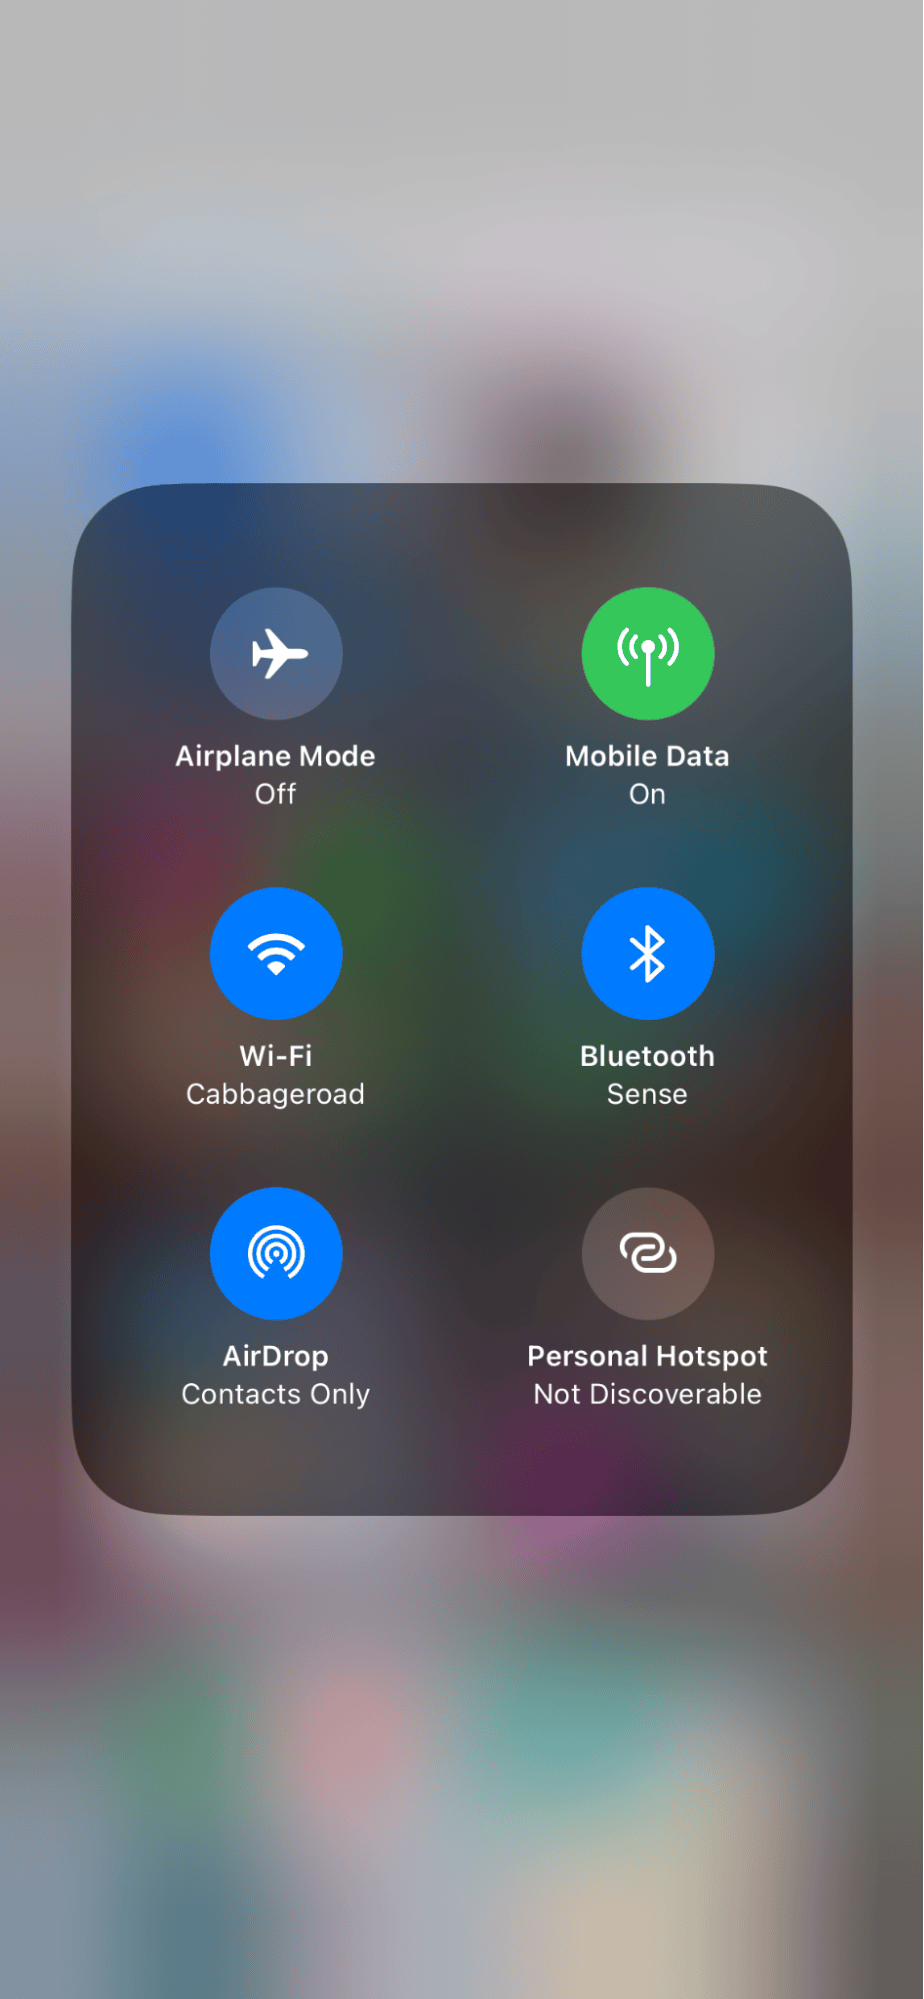
-
Swipe down from the upper-right corner to open the Control Center.
-
Hold down the network settings card, then select the AirDrop icon to enable it.
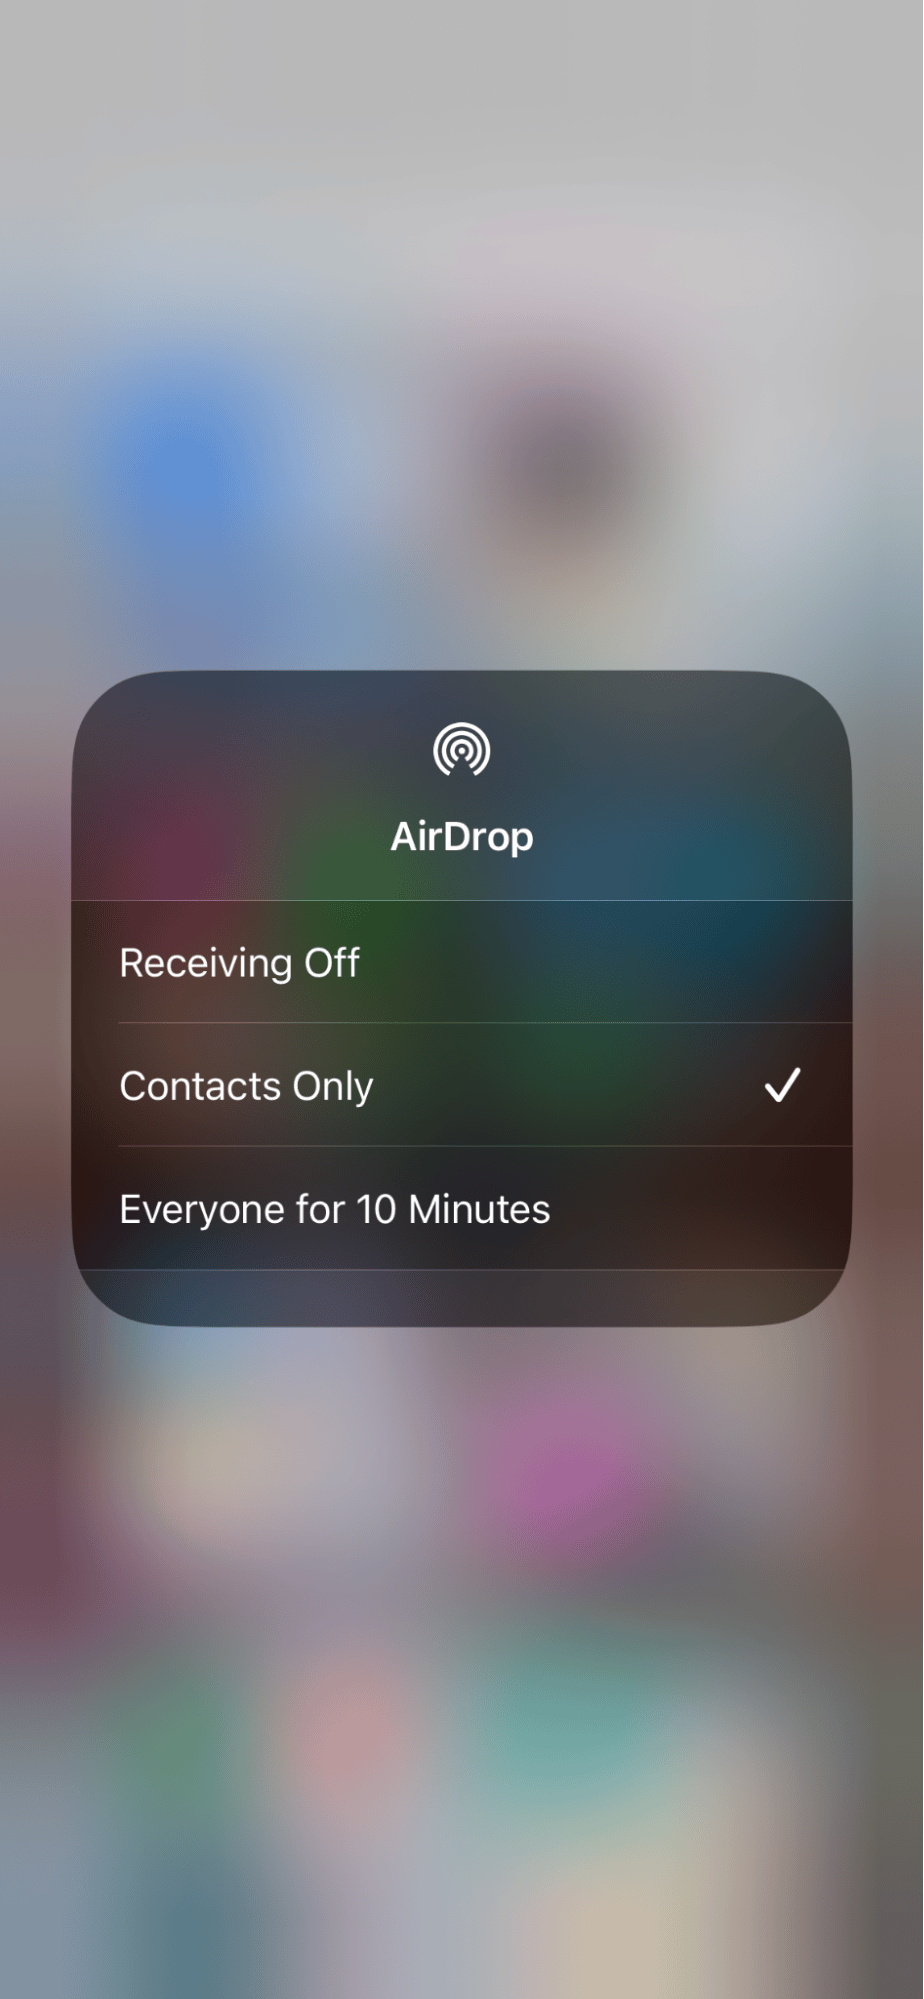
-
Choose Contacts Only or Everyone, depending on your preference.
Step two: Prepare your media
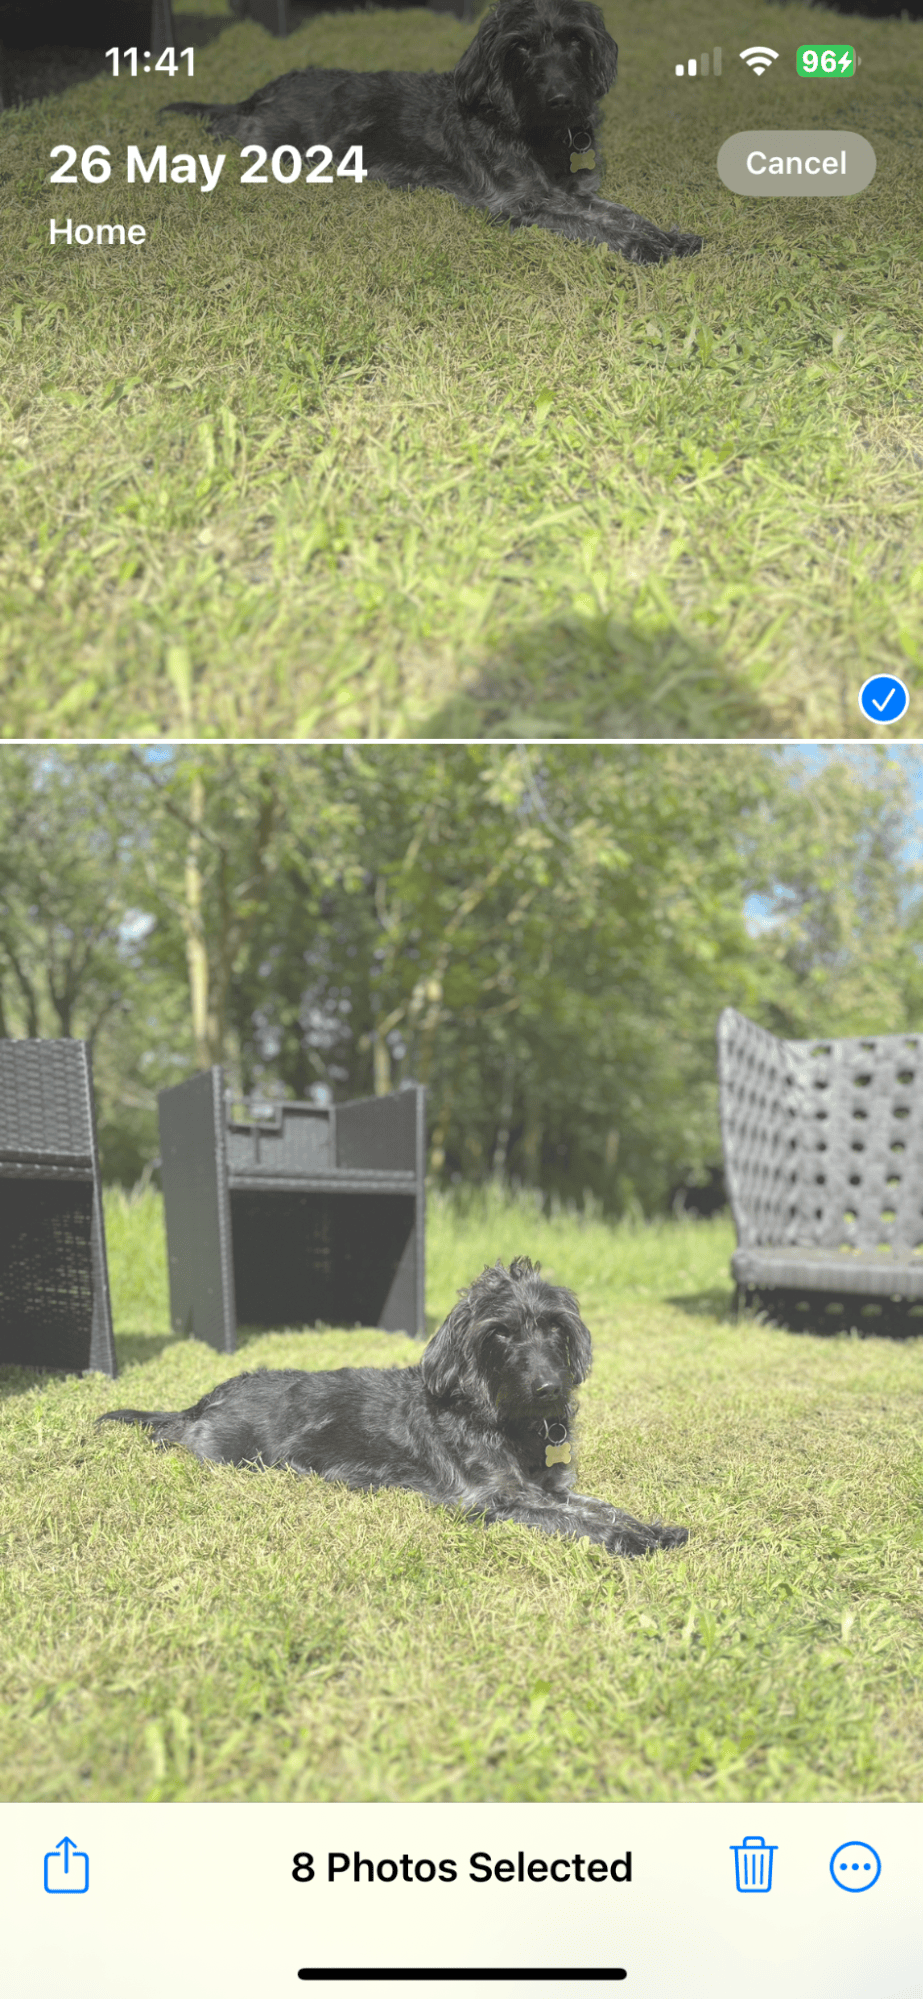

- From your Library select the photos or videos you want to share on the source iPhone.
- Press the share icon (square with an arrow pointing up) and select the recipient iPhone from the AirDrop list.
- On the recipient's iPhone, tap Accept to receive the photos.
2. iCloud
When it comes to transferring photos between iPhones, iCloud is another efficient solution. Once enabled, iCloud seamlessly syncs your images and videos across all of your Apple devices, ensuring that your entire photo library is accessible wherever you are.
Let's take a look at the process:
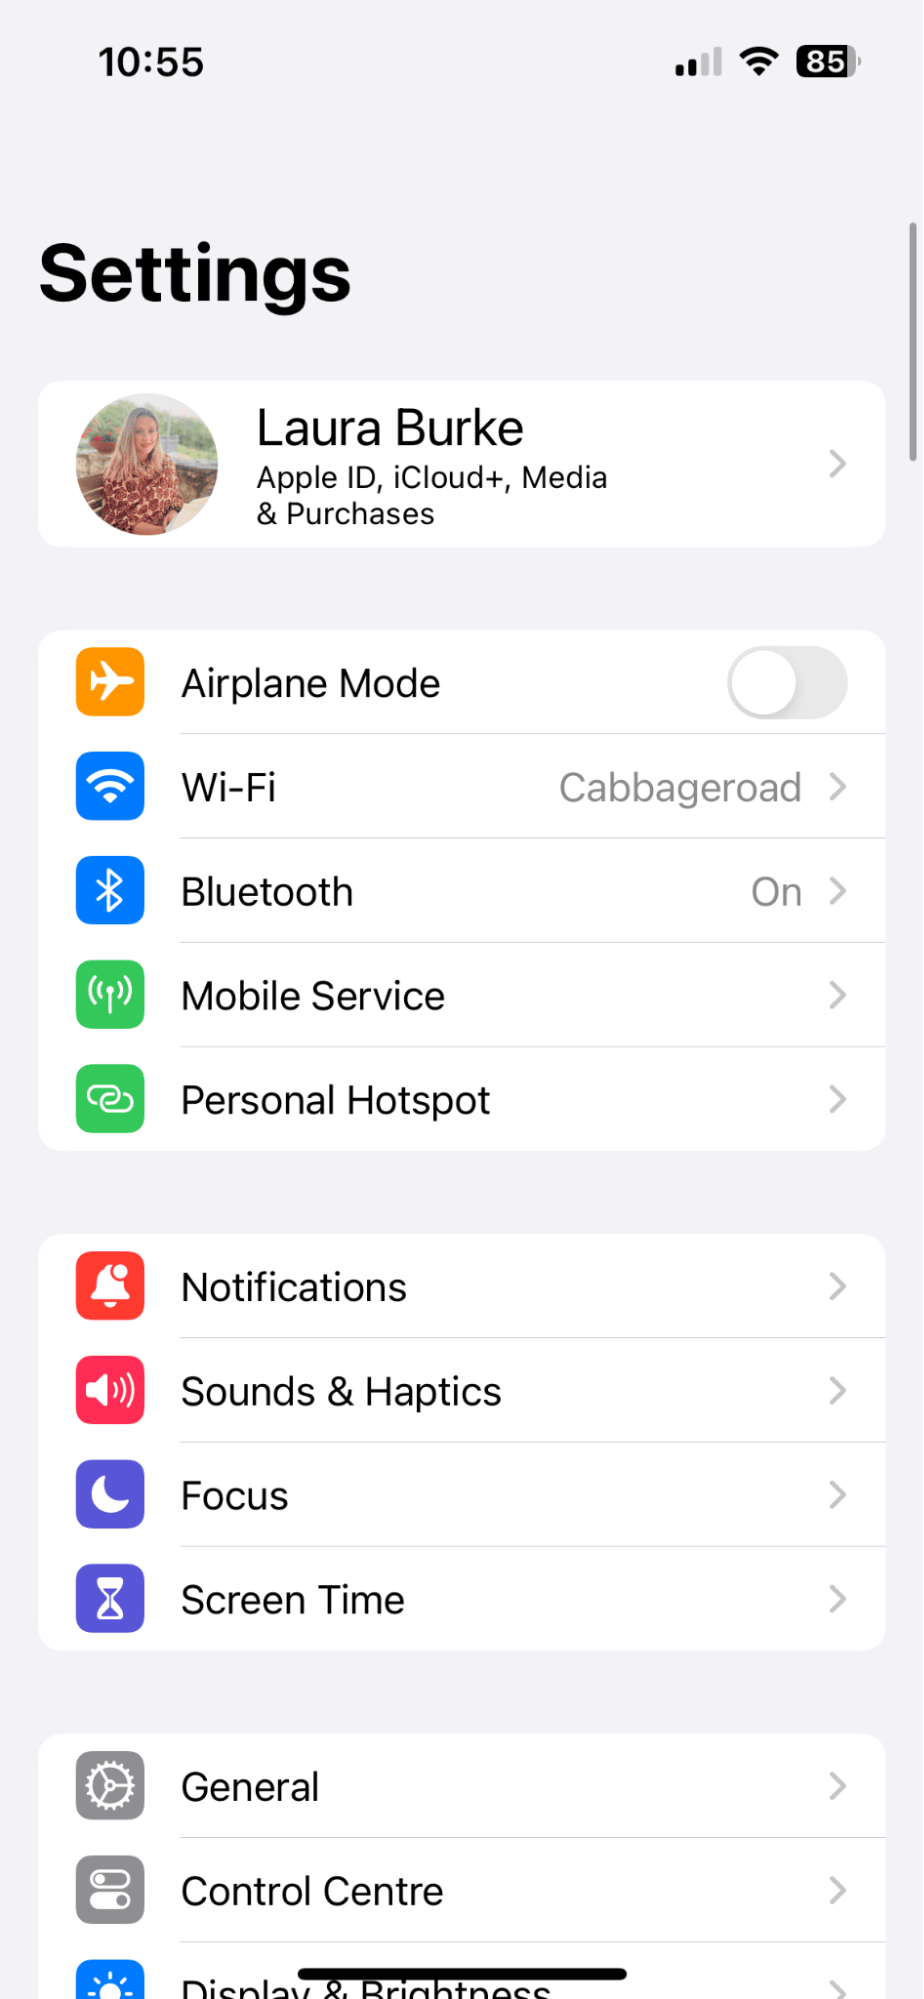
-
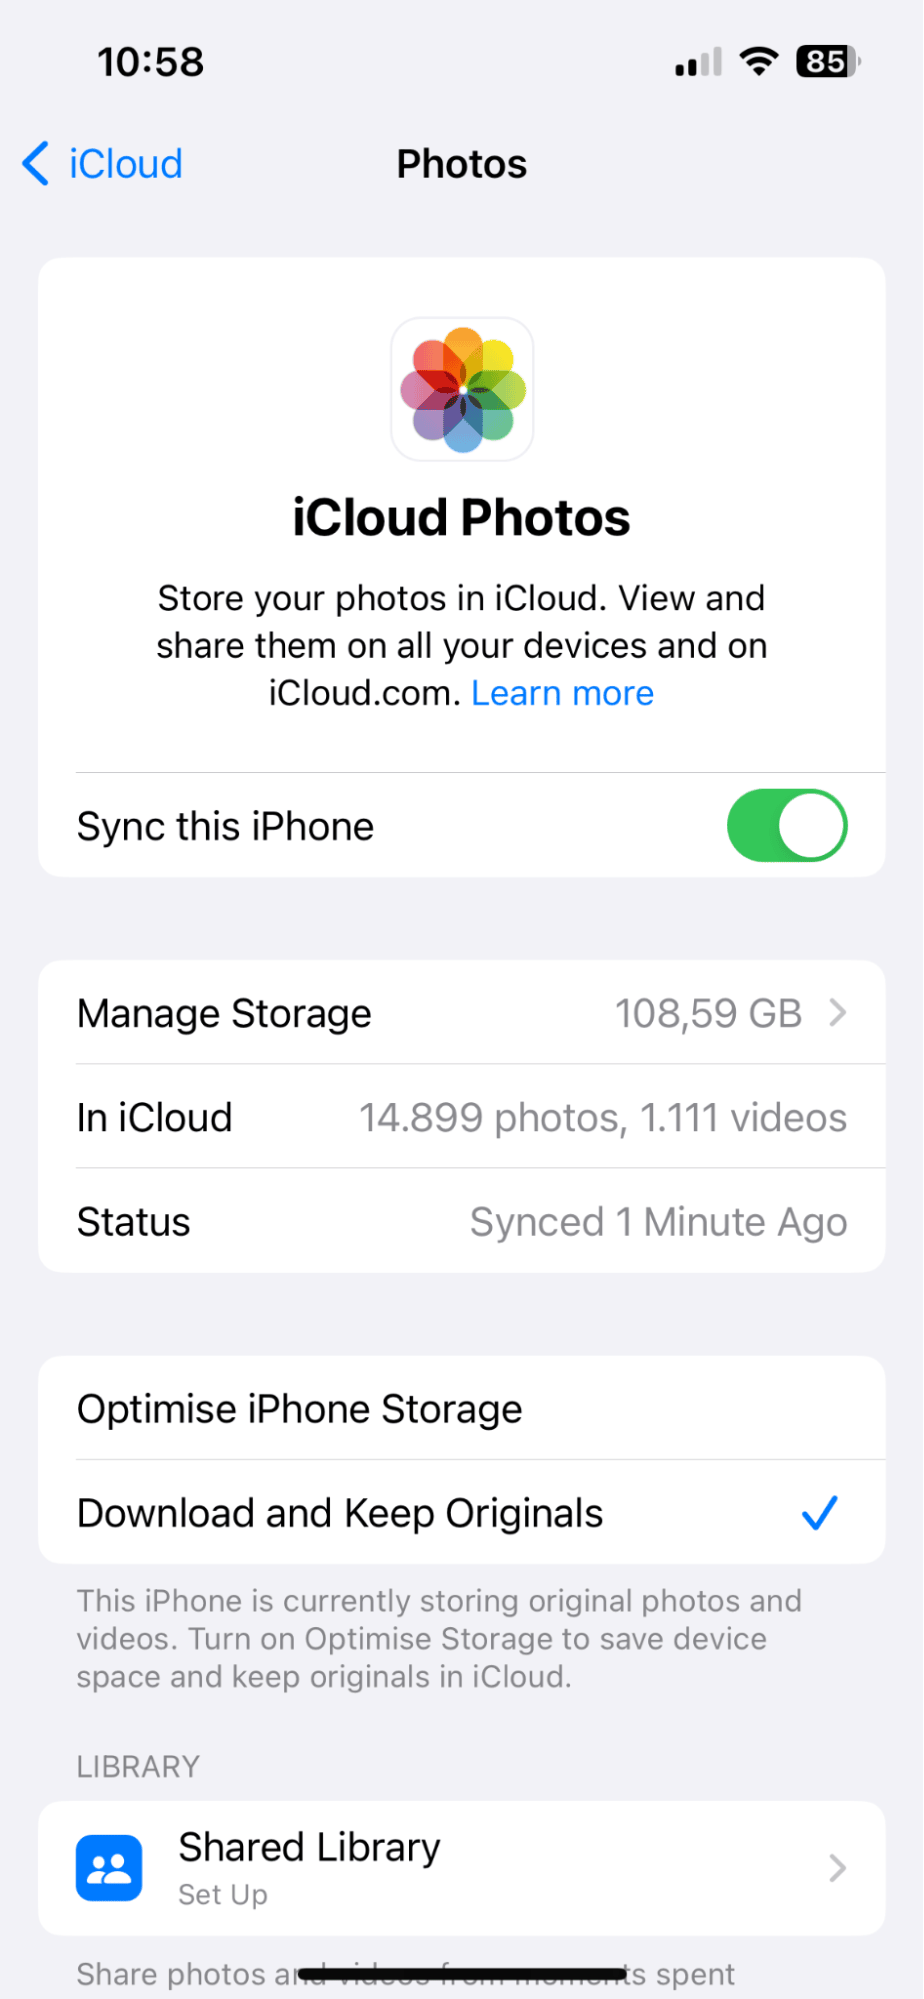
Open Settings on your iPhone > Select your name > iCloud.
-
Select Photos under Apps Using iCloud.
-
Check if Sync this iPhone is turned on; if not, toggle it on to enable iCloud Photo Library.
-
Ensure you have enough iCloud storage for all your photos and videos. If additional storage is needed, consider purchasing an upgrade or deleting some items to make space.
-
Repeat these steps on your second iPhone to enable iCloud Photo Library and download your images from iCloud.
If you do discover your iCloud storage is pretty full and you don't have enough space to sync your Library, here's an extra tip for you.
How to quickly clean up your Photo Library
Before transferring your photos, it's always a good idea to clean up your media library to avoid transferring unnecessary images.
CleanMy®Phone offers a great solution for this with its Declutter and Organize modules:
Declutter Module: Instantly scan your library for duplicates, blurry shots, and low-quality images. Remove these unwanted items to free up space:

-
Launch the app and navigate to the Declutter module.
-
Start the scanning process.
-
Review the categories of identified items and remove them with a single tap.
Organize Module: Efficiently categorize and manage your photos, making it easier to find and transfer what you need.

-
Open the Organize module in CleanMy®Phone.
-
Choose a time frame for your search.
-
Review and tidy up your collection by deleting any unnecessary media with the tap of a button.
Taking the time to organize and tidy up your media ensures that only your best and most important photos are transferred, making the process more efficient and saving valuable storage space on your new iPhone.
Ok, back to the methods.
3. Wired sync transfer
If you're looking for a way to transfer photos to a new iPhone without iCloud, this tip is for you. It's possible to also use a Mac to transfer images; although it's a longer method, it works; let's take a look.
Step one: Transfer the photos
-
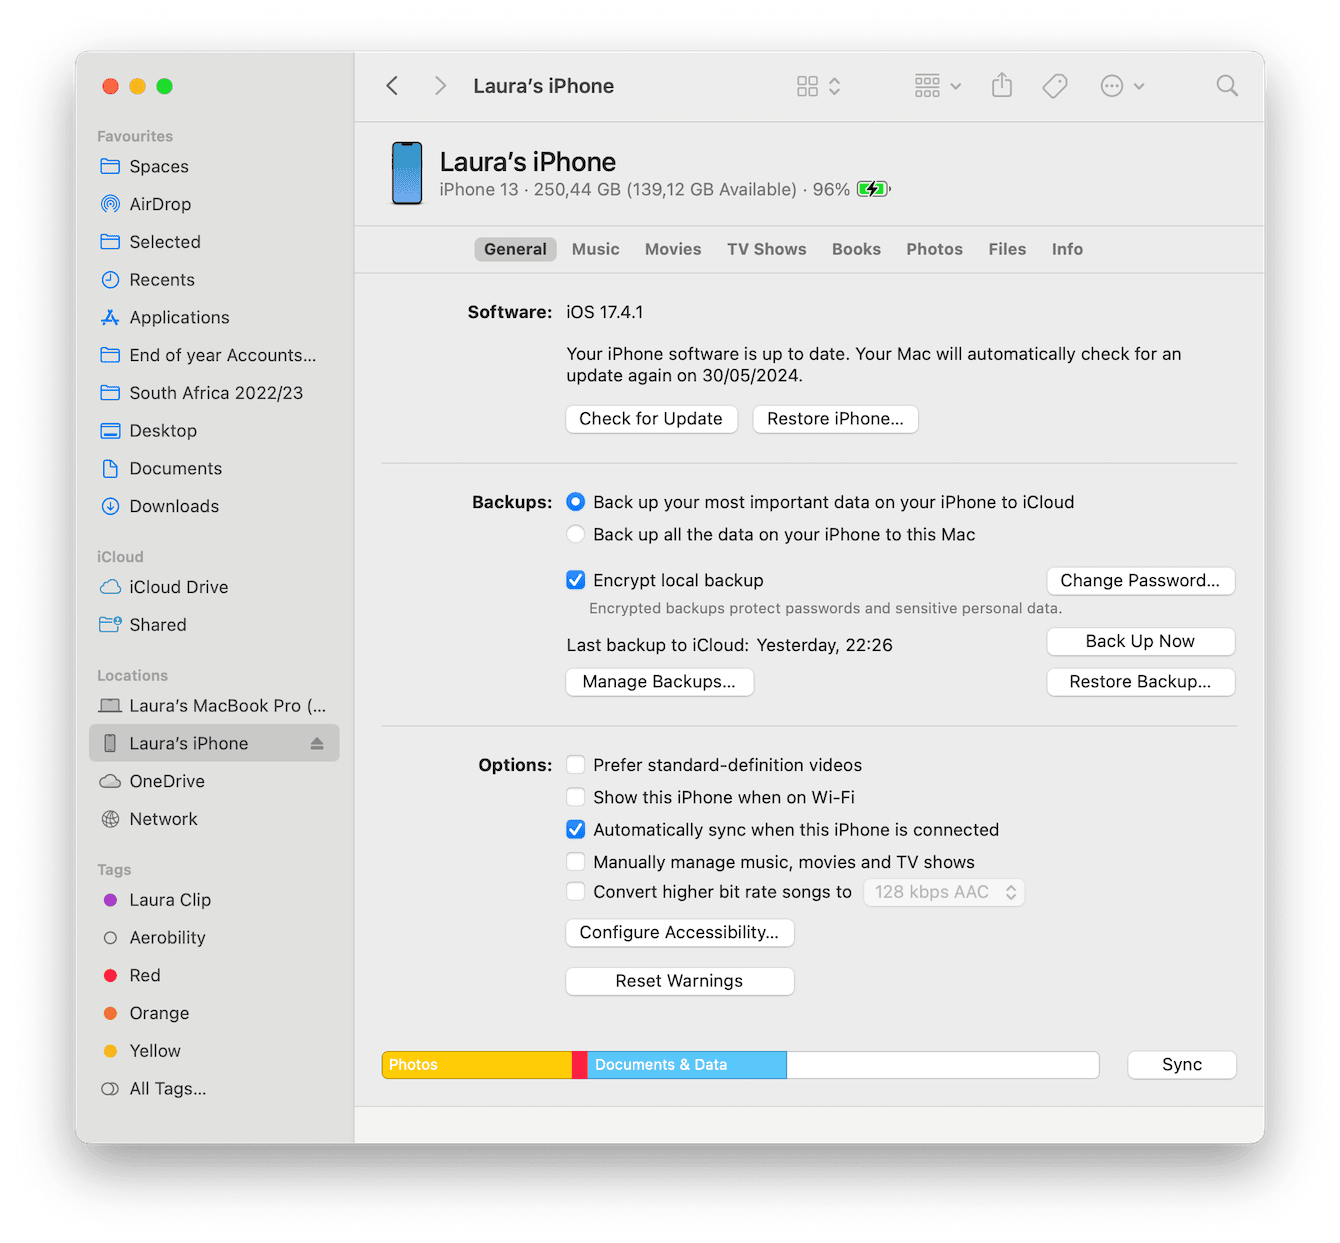
Connect your original iPhone to your Mac using the correct USB cable.
-
Open Finder over on your Mac and select your device from the sidebar.
-
Click on Photos from the options at the top.
-
Select the Sync Photos to your device from the tickbox, then choose either a folder from the pop-up menu.
-
Choose your syncing preferences, and then once ready, click Apply to start the syncing process.
When you're finished, be sure to click the Eject button on the Finder sidebar to remove the iPhone safely.
Step two: Transfer to your new iPhone
-
Now, connect your other or new iPhone to your Mac.
-
Open Finder again, and select your iPhone under Devices.
-
Once again, select Photos.
-
Tick Sync photos to your device from and pick a folder.
-
Click Apply.
Again, don’t forget to correctly Eject this iPhone.
Thanks to the methods in this article, transferring photos from iPhone to iPhone is easy. Whether you prefer using iCloud, cables, or AirDrop, there's a method that suits your style. Just follow the steps we've outlined, and you'll be seamlessly moving your memories between devices in no time.
