How to repair your Mac disk with First Aid
If you're experiencing these issues on your Mac, it might be time to run the Disk Utility’s First Aid function and repair your disk:
-
Regular system and app crashes
-
Vanishing and corrupt files
-
Trouble starting up your Mac
-
Cryptic error messages
-
External devices not working properly
First things first, if you're encountering any of the above items, it's time to backup your data before it's too late. These kinds of issues indicate there could be a problem with your Mac disk that definitely needs investigating. Here, we’ll explain how to run First Aid to fix possible problems on your Mac.
What is the Disk Utility’s First Aid function?
Some folks really don’t like the thought of poking around in Disk Utility, but it’s simple to use and not a place to fear.
The First Aid function within Disk Utility can quickly check the status of your Mac disk, volumes, and external devices. It has multiple built-in capabilities that can detect and repair errors. After analyzing the disk directory, First Aid will determine if it can repair any detected damage.
If you're facing a problem with your startup disk, you'll need to run First Aid from recovery mode— we'll cover this in just a moment.
Repair your disk using Disk Utility
It's straightforward to run a check on your Mac with Disk Utility. You'll quickly be able to identify if any of your disks have issues.

-
Open Disk Utility (Finder > Applications > Utilities).
-
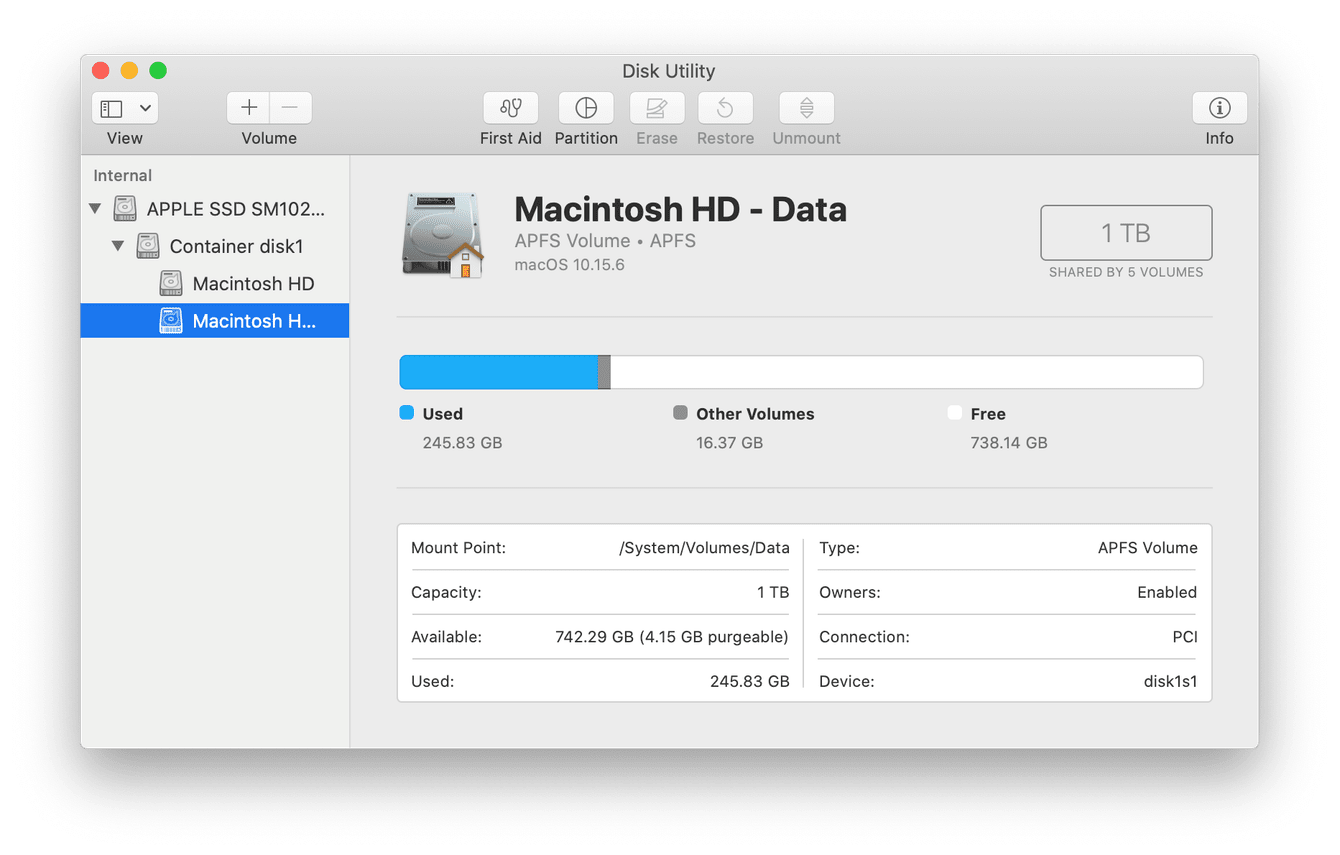
In the sidebar, select the disk you're having problems with.
-
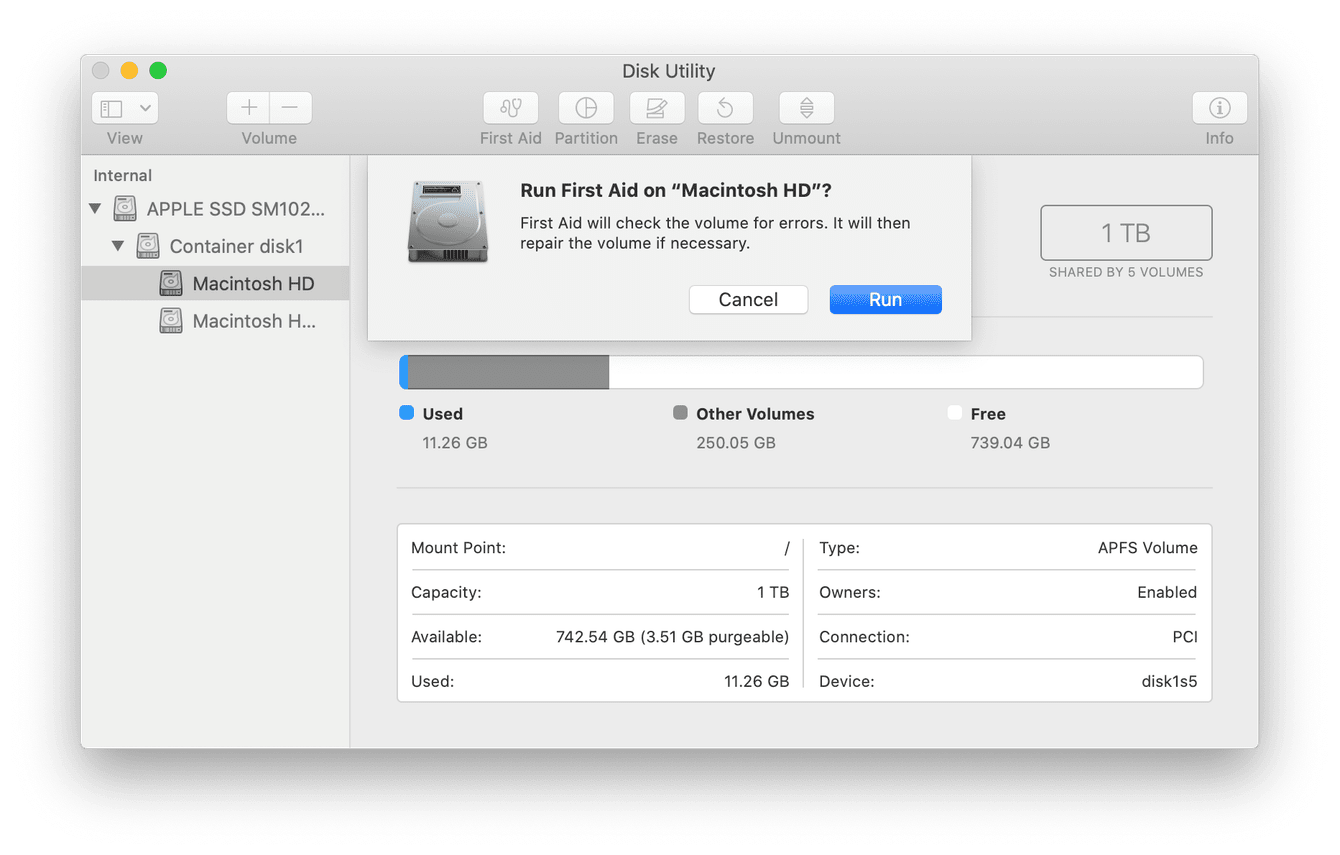
Click on First Aid at the top, and select Run.
-
Once complete, you'll see a drop-down showing the status; click this to explore. Disk Utility will try to repair what it can and warn you about errors it found that it can't fix.
Although this method checks all disks, we can't repair a broken startup disk from here; for that, we need to run First Aid from recovery mode.
Quick Tip: If you suspect your Mac disk is failing, CleanMyMac has many easy-to-use maintenance tools that can help keep your drive running smoothly. I'll talk you through some of the features later in the article. Start your free CleanMyMac trial now — the app is notarized by Apple and is completely safe for your Mac.
How to run First Aid from recovery mode
Although Disk Utility checks your startup volume as well, it can't fix any errors if those are found. Running First Aid from recovery mode is necessary for repairing your startup disk. So, let's jump straight in:
-
Restart your Mac, immediately pressing and holding Command (⌘)+R on its startup. When you see an Apple logo or spinning globe, release the keys.
-
Now, choose Disk Utility from the macOS Utilities window.
-
Select your startup disk from the sidebar, then click the arrow to view all the containers and volumes. Apple recommends repairing volumes first, then containers, and then the startup disks last.
-
So, from the sidebar, select the last volume listed, then click First Aid at the top, and then Run, working your way up the list for each volume, container, and finally, the disk itself.

As you can see, I've got two volumes, one container, and then the startup disk.
This could take a while, so don't be alarmed if it's not over in a couple of minutes; Disk Utility will run its checks and try and repair errors for you.
If Disk Utility finds errors that it can't repair, it's now time to erase (format) your disk.
Did you know? You can run Windows apps on your Mac.
Erase (format) your disk
Formatting a disk deletes all files it stores. Make sure you backup all your data to prevent losing anything important.-
To start up from macOS Recovery again, simply follow steps 1 and 2 above.
-
Select your disk from the sidebar, then click Erase from the top and complete these items:
Name: The name your disk will have after the erase
Format: Disk Utility shows a compatible format by default.
Scheme: Choose the GUID Partition Map. -
Now, select Erase to start erasing your disk and every container and volume within it.
-
When complete, quit Disk Utility.
-
You'll now need to reinstall macOS if it's your startup disk.
Repair disk permissions and run maintenance scripts
Earlier in the article, I mentioned using CleanMyMac. For issues with your hard drive, this app has some great tools to improve your drive performance and keep your Mac feeling fresh.
I like to regularly run the Performance tool, which can specifically help with repairing disk permissions and running other maintenance tasks.
Consider running it if you have issues like apps not working correctly and files not deleting.
Other maintenance tasks include flushing DNS cache, reindexing Spotlight, and speeding up Mail that can give your Mac a notable boost. It can also help you manage login items and background processes that are also known for consuming many resources.
Here's how to get started with CleanMyMac's Performance tool:

-
Open CleanMyMac — get your free trial here.
-
From the left sidebar, select Applications and run a quick scan.
-
Click View All Tasks > Maintenance Tasks, select Repair Disk Permissions, and click Run.
There are other useful items on the list, which you can, of course, run as well.
It's a pretty obvious one, but running regular maintenance on your Mac will help to keep it in good health and fully optimized. CleanMyMac is more than just another Mac maintenance tool. It's a powerful cleaner, malware remover, and performance enhancer that will give you more control over Mac care.
Tip: Now that you've fixed the issue, take some time to manage files and get rid of those you no longer need. To do that, you'll need to learn how to access different kinds of files. Here's an article on how to view all files on Mac — a good starting point for your search.
Bonus tip: What else you can do with Disk Utility
In addition to running First Aid and erasing your Mac, there are a few more things you can do with Disk Utility.
1. Create a disk image using Disk Utility
Disk Utility also makes it easy for you to create a disk image of the contents of a particular folder for transfer to another MacBook, archive, or any location that won't allow folders.
You could compare this to a zip archive compression; it allows you to save space and encrypt the data.
The instructions vary depending on your exact need and desire; read the official how-to from Apple here.
2. Partition a physical disk
A partition is a precise percentage of space on your hard drive that is purposely separated from the rest of your disk, also known as Containers.
Here are a few reasons why users want to do this:
-
To run multiple versions of macOS
-
Repair disk issues
-
Better organization
-
Manage your backups more efficiently
So, before you dive into creating a partition on your device, it's a good moment to back up any data using Time Machine.
How to create a partition:

-
Open Disk Utility once again using the steps from earlier in this article.
-
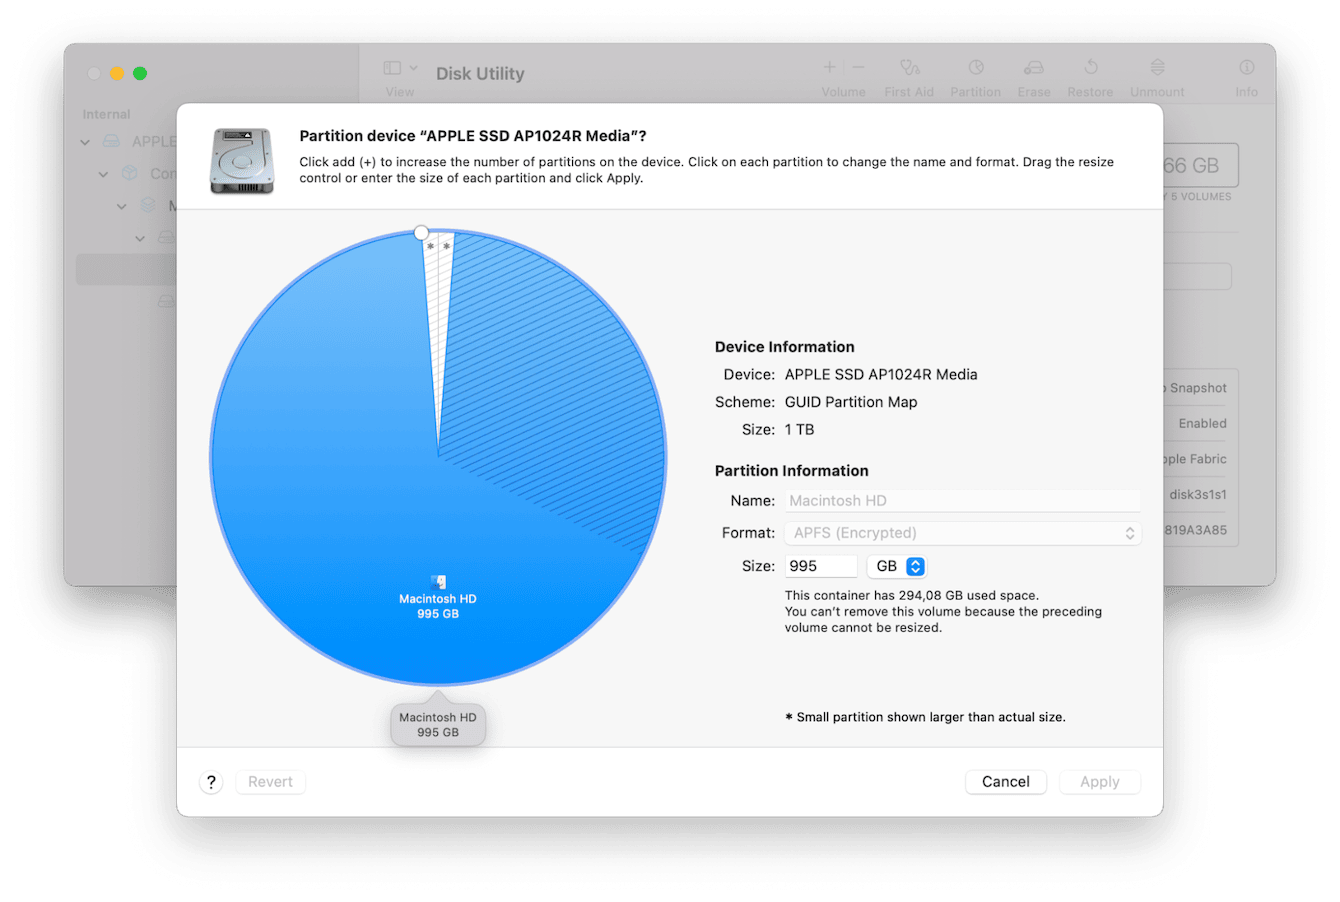
Select your hard drive from the sidebar and click Partition from the top toolbar.
-
Click the Add or Plus button just below the pie chart and select Add Partition.
-
Enter a name and select an appropriate format.
-
You can now drag the partition size directly on the pie chart or enter the desired size in the Size dropdown and click Apply.
-
Finally, click Partition and follow any additional on-screen instructions.
This may take a while, depending on the size of the partition.
If you want to know how to delete or erase a partition, you can read the Apple help guide here.
3. Use Disk Utility to fix an external storage device that won't connect
Yes! You've got two options here, you can either try to force mount the device or run First Aid.
Here's how to try a force mount:
- Ensure your device is properly connected.
- Open Disk Utility.
- Find the external disk in the sidebar and click Mount from the toolbar.
Here's how to run First Aid on a storage device:
- Again, make sure the device is connected to your Mac properly.
- Open Disk Utility, select your device from the list.
- Click First Aid from the toolbar and click Run.
Issues with your drive always require a little bit of troubleshooting. Hopefully, this article helped you to investigate and repair the hard drive on your Mac.
Good luck, and come back soon for all the latest Mac tips.

