How to use Task Manager on Mac
Wondering where the Task Manager on a Mac is? If you're an ex-Windows user and new to the world of Apple, this is a valid question many new users ask.
For PC users, the familiar Ctrl - Alt - Delete command opens up the Windows Task Manager, so if you're new to Apple, you're probably wondering what the Mac equivalent is.
Get the answers you've been looking for right here. So, let's get started.
How to open Task Manager on a MacBook
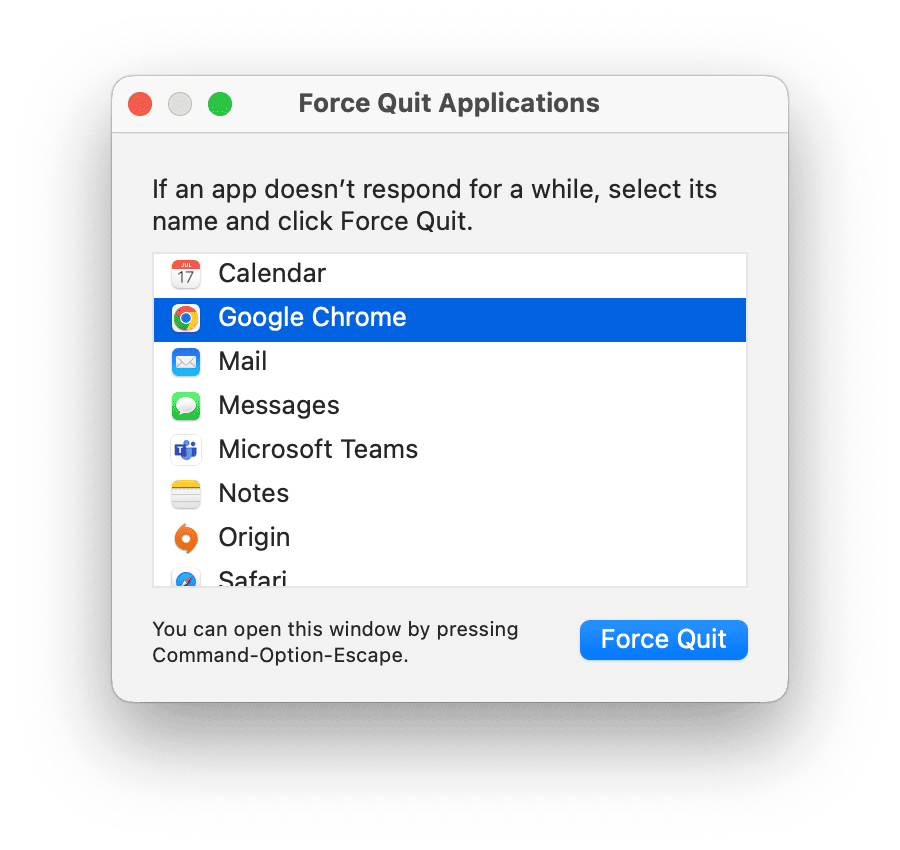
The Apple Task Manager, similar to the Windows Task Manager, lets you quickly close frozen applications and programs. Apple's Task Manager is a mini-version of the much more powerful Activity Monitor, so if you want more detailed information about unresponsive applications, CPU statistics, energy use, or memory load, you'll need to open Activity Monitor.
But first, let's look at how to open the handy Apple Task Manager.
Mac task manager shortcut
The Apple Task Manager shortcut will quickly become ingrained in your shortcut memory. It's simple and handy — just press the following keys to open it:
-
Command - Option - Escape
How to force quit apps with Mac task manager
If you encounter issues with slow, frozen, or stalled applications opening, using the Task Manager for Mac will let you Force Quit and close it.
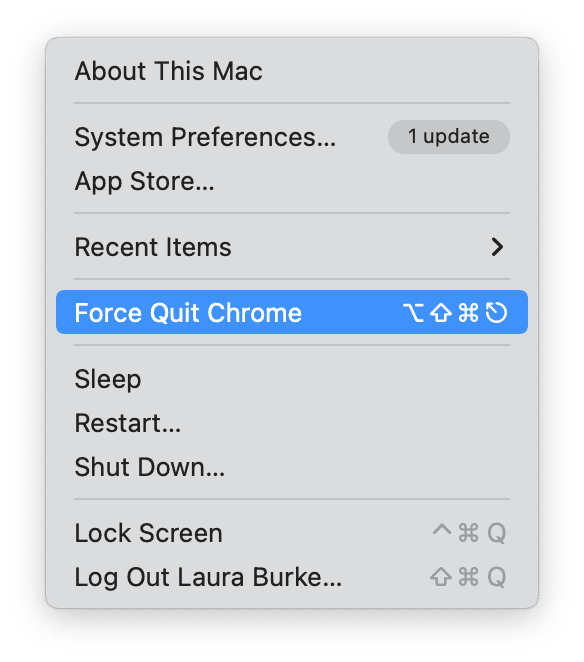
Simply use the above command or select Force Quit from the main Apple menu (a little Apple icon on the top left), choose your problematic application from the list, and press Force Quit.
How to check RAM and memory-heavy apps
Task Manager is handy, but it doesn't give you any insights into why you might be experiencing issues with specific applications. For that, you'll need to do your own investigation work.
My recommendation would be first to check your device's available RAM and then monitor memory-heavy applications. Let's jump in.
-
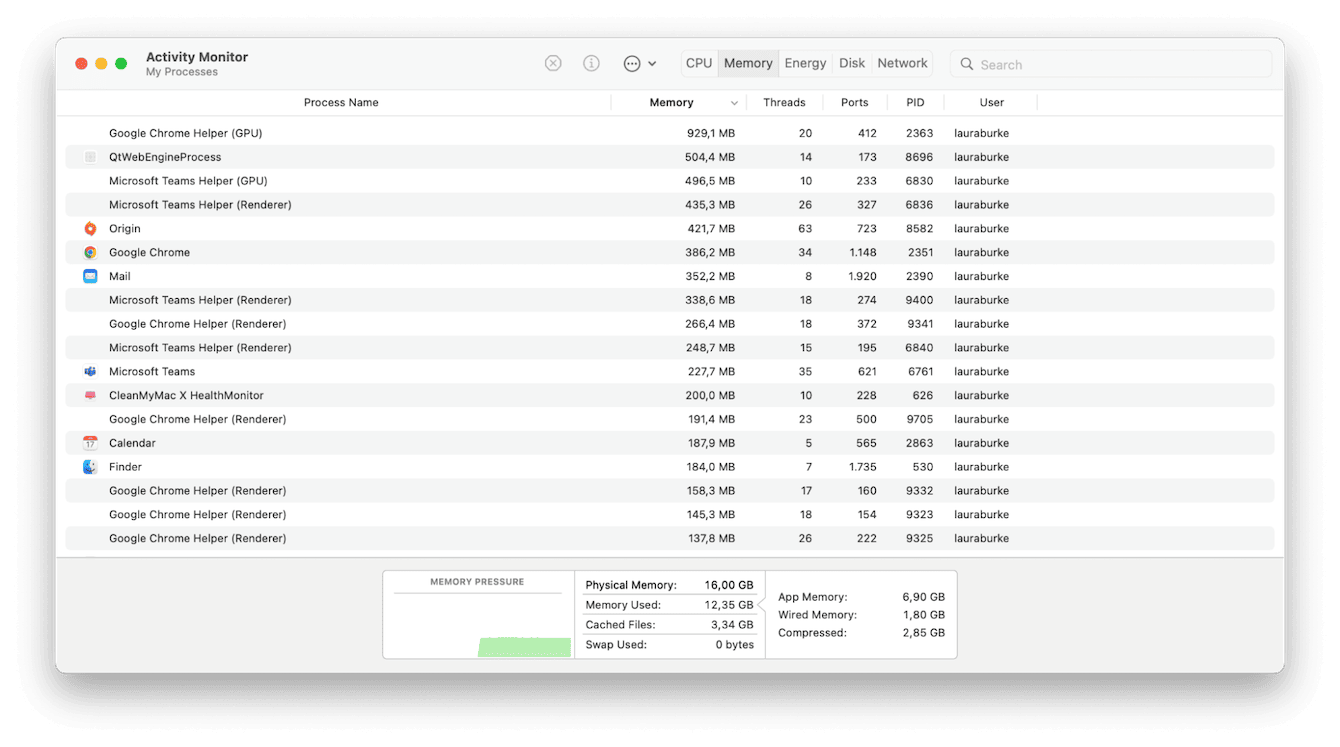
Open Finder > Applications > Utilities > Activity Monitor.
-
Select the Memory tab at the top.
-
You'll see a graphical breakdown at the bottom of the window. Here, you can see your device's Physical Memory Vs. Memory Used.
-
In the list, you can select any memory-hungry programs and applications and press the X button to kill them, giving your Mac some extra room to breathe and perform.
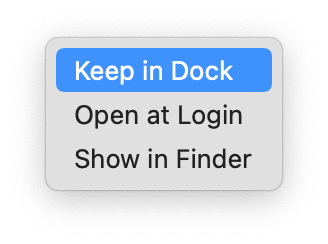
Another handy tip is to keep the Activity Monitor application in your Dock. That way, you can access it instantly when you need it. With the application open, right-click on its icon in your Dock, select Options, and choose Keep In Dock from there.
Some people feel overwhelmed when they see Activity Monitor. I'll give you a walkthrough in the next section, but if you'd prefer a more straightforward way to check your Mac's resources, I recommend the Apple notarized tool CleanMyMac.
It has a useful, all-in-one Menu app that gives you an instant overview of your available memory. If you haven't tried this awesome tool yet, get the free version here. Once installed, follow the steps below:

-
Select the iMac icon from your top menu bar.
-
Under Memory, you can see your available memory and what is currently free.
-
Press Free Up to let this tool optimize your Mac and free up valuable space.
As promised, in the next section, I'll give you a walkthrough on how to use Activity Monitor — the expanded version of Task Manager on Mac.
How to use Activity Monitor
Activity Monitor lists and details all the processes currently running in real time on your system.
In a nutshell, it allows you to kill unresponsive applications quickly, check your energy consumption, and manage CPU, Disk, and Network usage.
It's a lot of information, and many users shy away, but it's actually not as complicated as you think. Let me walk you through it.
CPU
You'll first encounter the CPU tab within Activity Monitor. This displays all the active processes consuming the CPU on your Mac. Let's look at what some of the most valuable columns mean:
Process Name — The name of the application, program, or process.
% CPU — Indicates the precise percentages of power consumed.
CPU Time — How long the process has been running.
Threads — The number of segments open from the active process.
Idle Wake-Ups — Number of times a thread woke the system up to execute a thread.
You can sort all the processes from highest to lowest in the CPU tab by clicking on the %CPU column.
To quit a large, CPU-consuming application, just select the process from the list and press the X button to shut it down.
Another simple way to manage your CPU usage is by using the app I mentioned earlier in the article, CleanMyMac, and its Menu app. Here's how:

-
Select the application icon from your top menu bar.
-
Look under CPU for information on Load.
-
Press the information icon to see and quit heavy-consuming apps instantly.
Memory
The second tab is Memory. It shows you exactly how much RAM every active process consumes. As we discussed earlier in the article, closing down heavy-consumer apps will speed up your Mac.
At the bottom, you'll see the RAM Memory Pressure graph. If the bar is green, your RAM is sufficient. Instead, if this turns red, you'll need to consider extra ways to increase RAM.
Energy
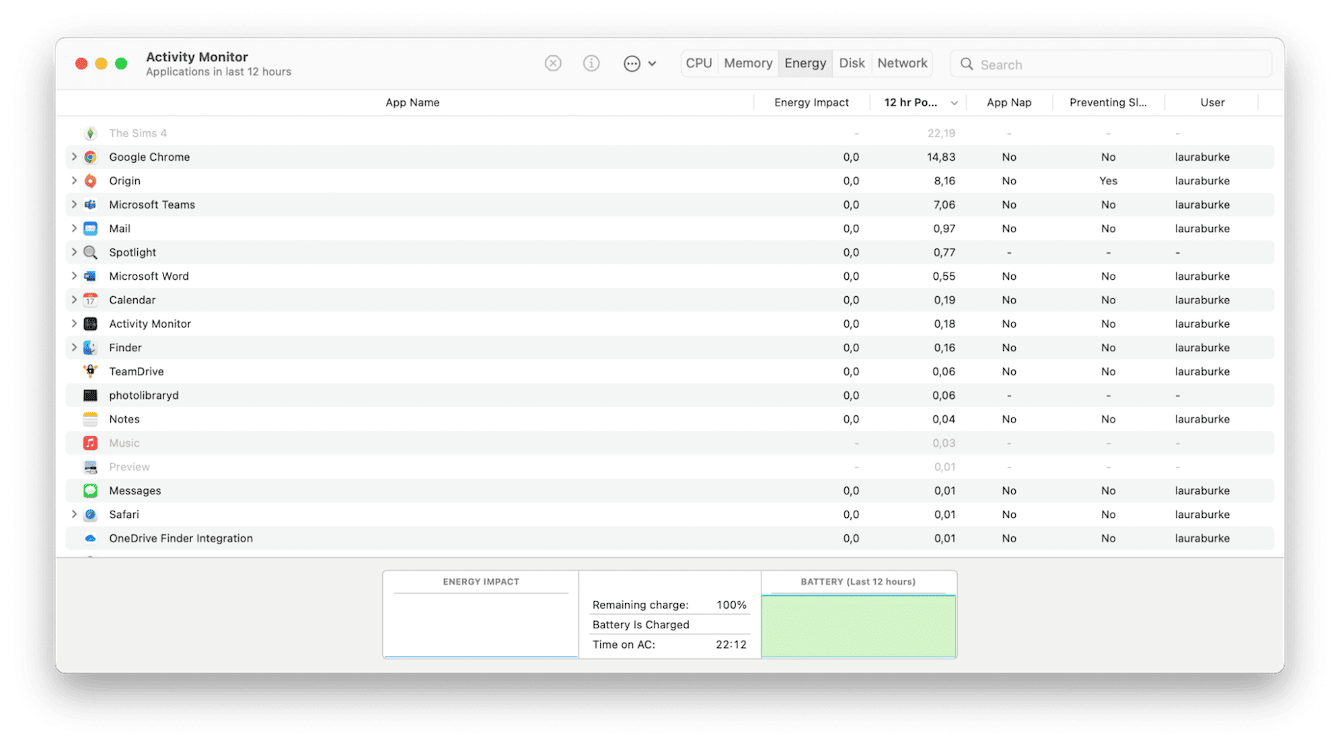
The third tab is Energy. You can see all your apps and processes that drain your battery. Quit any you are not currently using to save screen time.
Disk
The fourth tab, Disk shows how processes interact with your hard drive. This can come in handy if you accidentally download malware. You can quit any processes you don't need if they consume many resources, but make sure to google those you don't recognize.
Network
The final tab is Network, which shows the portion of data received and sent by every application installed on your Mac. Again, quit the most heavy-consuming ones by pressing the X button.
So, now you know where to find Task Manager on a Mac and how to navigate your way around Activity Monitor like a pro.

