What is other volumes in containers on a Mac?
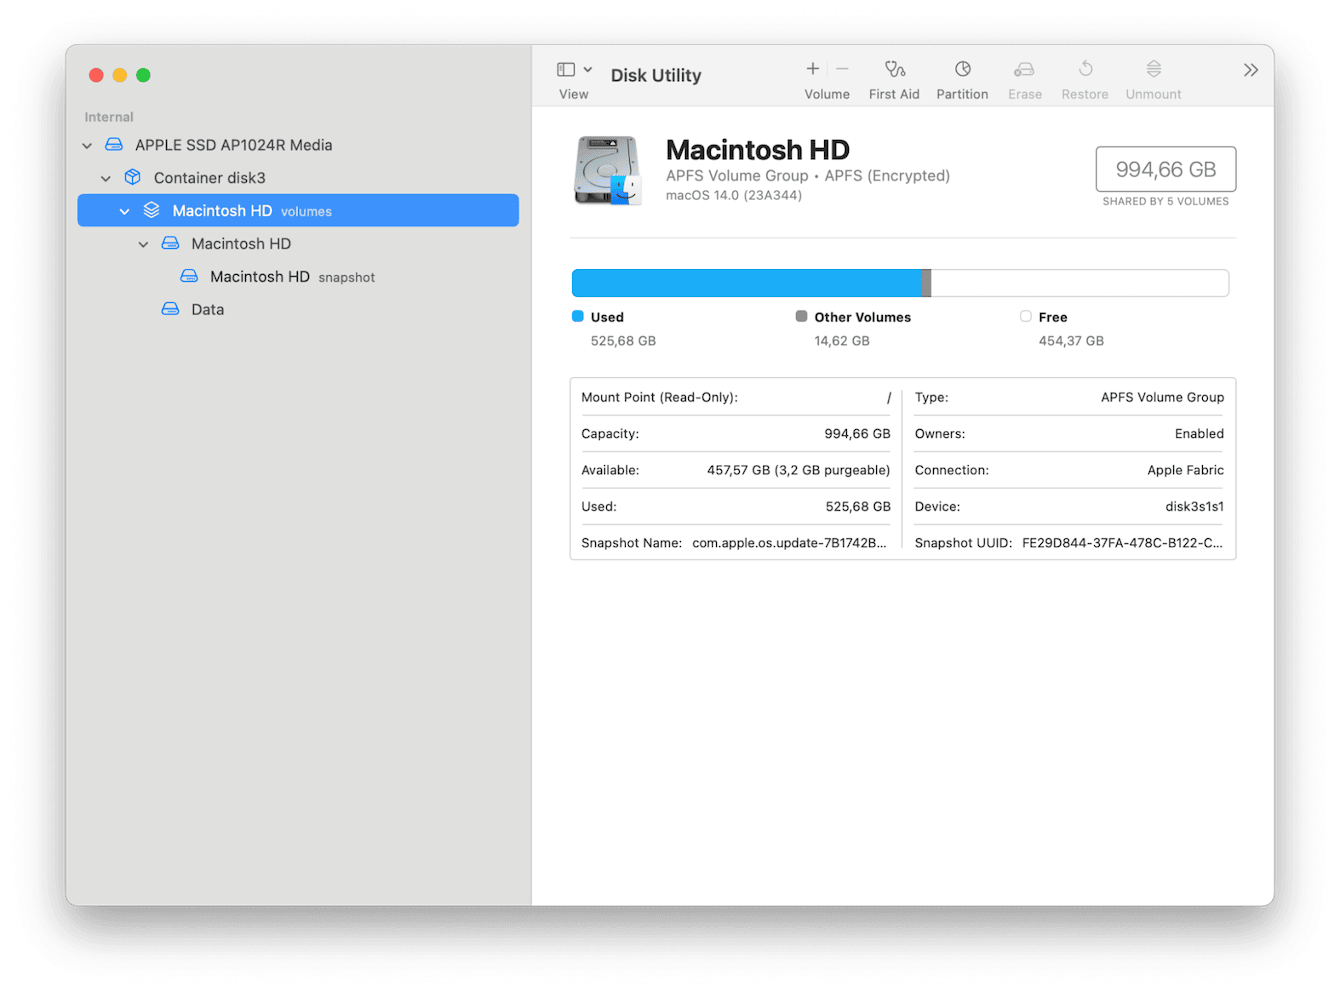
What are other volumes in container on your Mac? If you've stumbled across this cryptic label while checking your storage usage or looking through Disk Utility, you might be puzzled about what these other volumes are, why they occupy space, and whether you can delete them.
We'll help demystify them and uncover why they exist and how they impact your Mac's storage.
So, whether you're looking to optimize your storage or simply understand your Mac's system better, we've got you covered. Let's dive in.
What is other volumes in a container on Mac?
Let's start by understanding what are other volumes on Mac.
The term Other Volumes comes from Apple's APFS (Apple File System), which arrived with macOS High Sierra.
APFS allows one physical drive to hold many different parts, called volumes, all packed together like items in a box. These volumes share space dynamically, meaning they can use more or less space depending on what's needed.

So, let's break this down, what's included:
-
Macintosh HD: This is the main folder where all the important macOS system stuff lives.
-
Preboot: It's like the manager that helps your Mac start up correctly.
-
Recovery: This is like a special backup room where you can restore your Mac if something goes wrong.
-
Virtual Machine (VM): This is like extra memory space for your Mac to use when it's running out of room in its brain.
You might wonder if you can delete other volumes to save space. Unfortunately, it's not that simple. Parts contained within the other volumes may hold vital items that ensure our Macs work correctly.
Thankfully, there are things we can do to manage them better and optimize your Mac. Jump to the next section to find out more.
How to delete other volumes in container on Mac
As discussed above, deleting other volumes in a container on your Mac is not wise. If "other volumes" seem to take up considerable space, this could be a glitch; deleting them isn't really an option, as they could be crucial to your OS.
There are much easier ways to reclaim space; if your Mac feels slow, try these tips instead.
1. Free up your purgeable space
A great way to free up space quickly on your Mac is to free up purgeable space with a dedicated tool like CleanMyMac. Its intelligent Maintenance module is a game-changer because it identifies those chunks of space on your startup disk that your macOS deems safe to delete when your storage is running low.
The catch? Usually, you'd have to wait until your Mac hits that critical point before the automatic cleanup kicks in. But with CleanMyMac, you're in control; you can run the Maintenance module to reclaim space whenever you want or need. Here's how to use it:
-
Open the app (alternatively, test it first for 7 days here).
-
Select Maintenance > View All Tasks.
-
Click Free Up Purgeable Space (and any other tasks).
-
Click Run.

2. Turn off your content cache
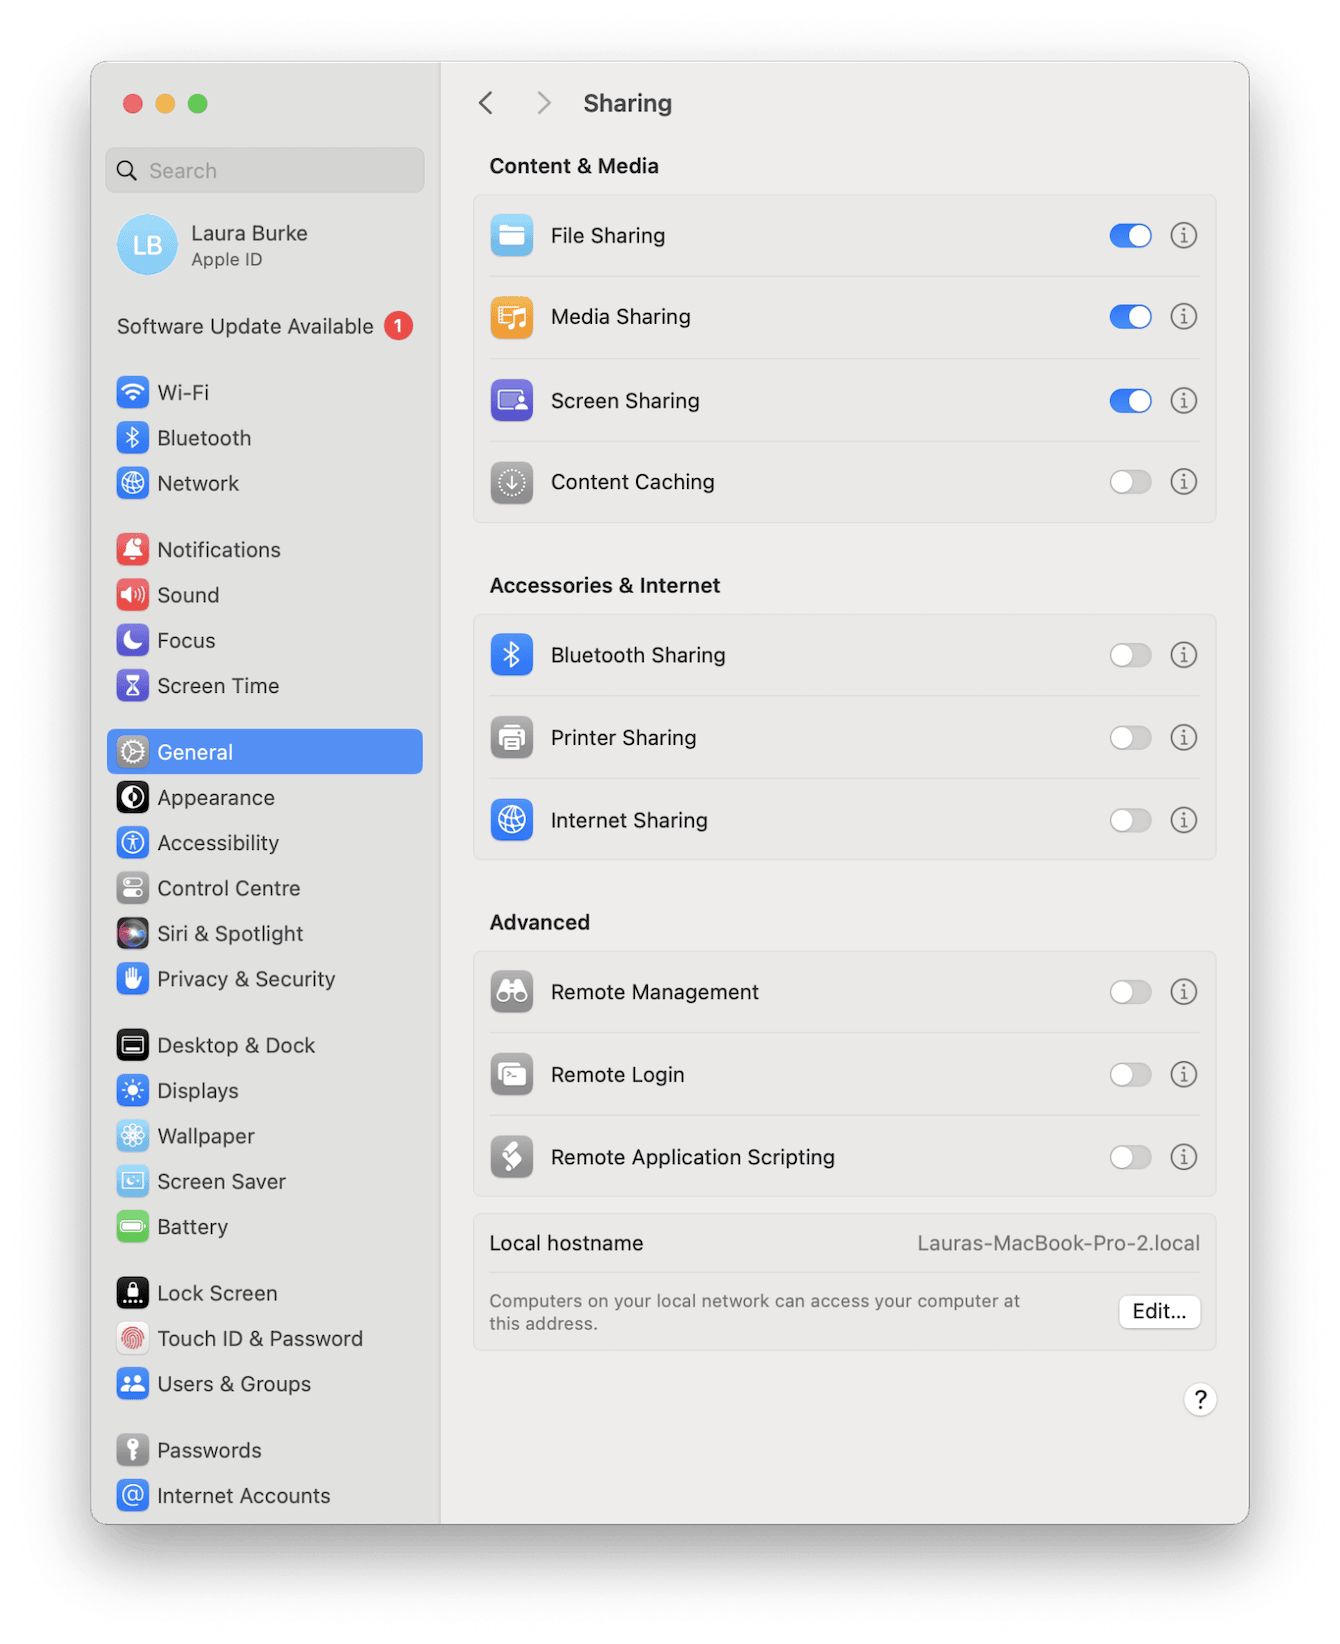
Have you ever heard of Content Caching? It's a smart feature that lets your Mac store download software updates and iCloud data so other devices on your local network can grab them without interrupting or consuming your internet bandwidth.
It sounds great, but here's the catch: it could unknowingly consume more of your precious storage than you bargained for.
Here's how to turn off Content Caching on your MacBook:
-
Go to System Settings > General > Sharing from the main Apple menu.
-
Toggle off Content Caching.
-
Restart your Mac.

3. Try setting up a new user account
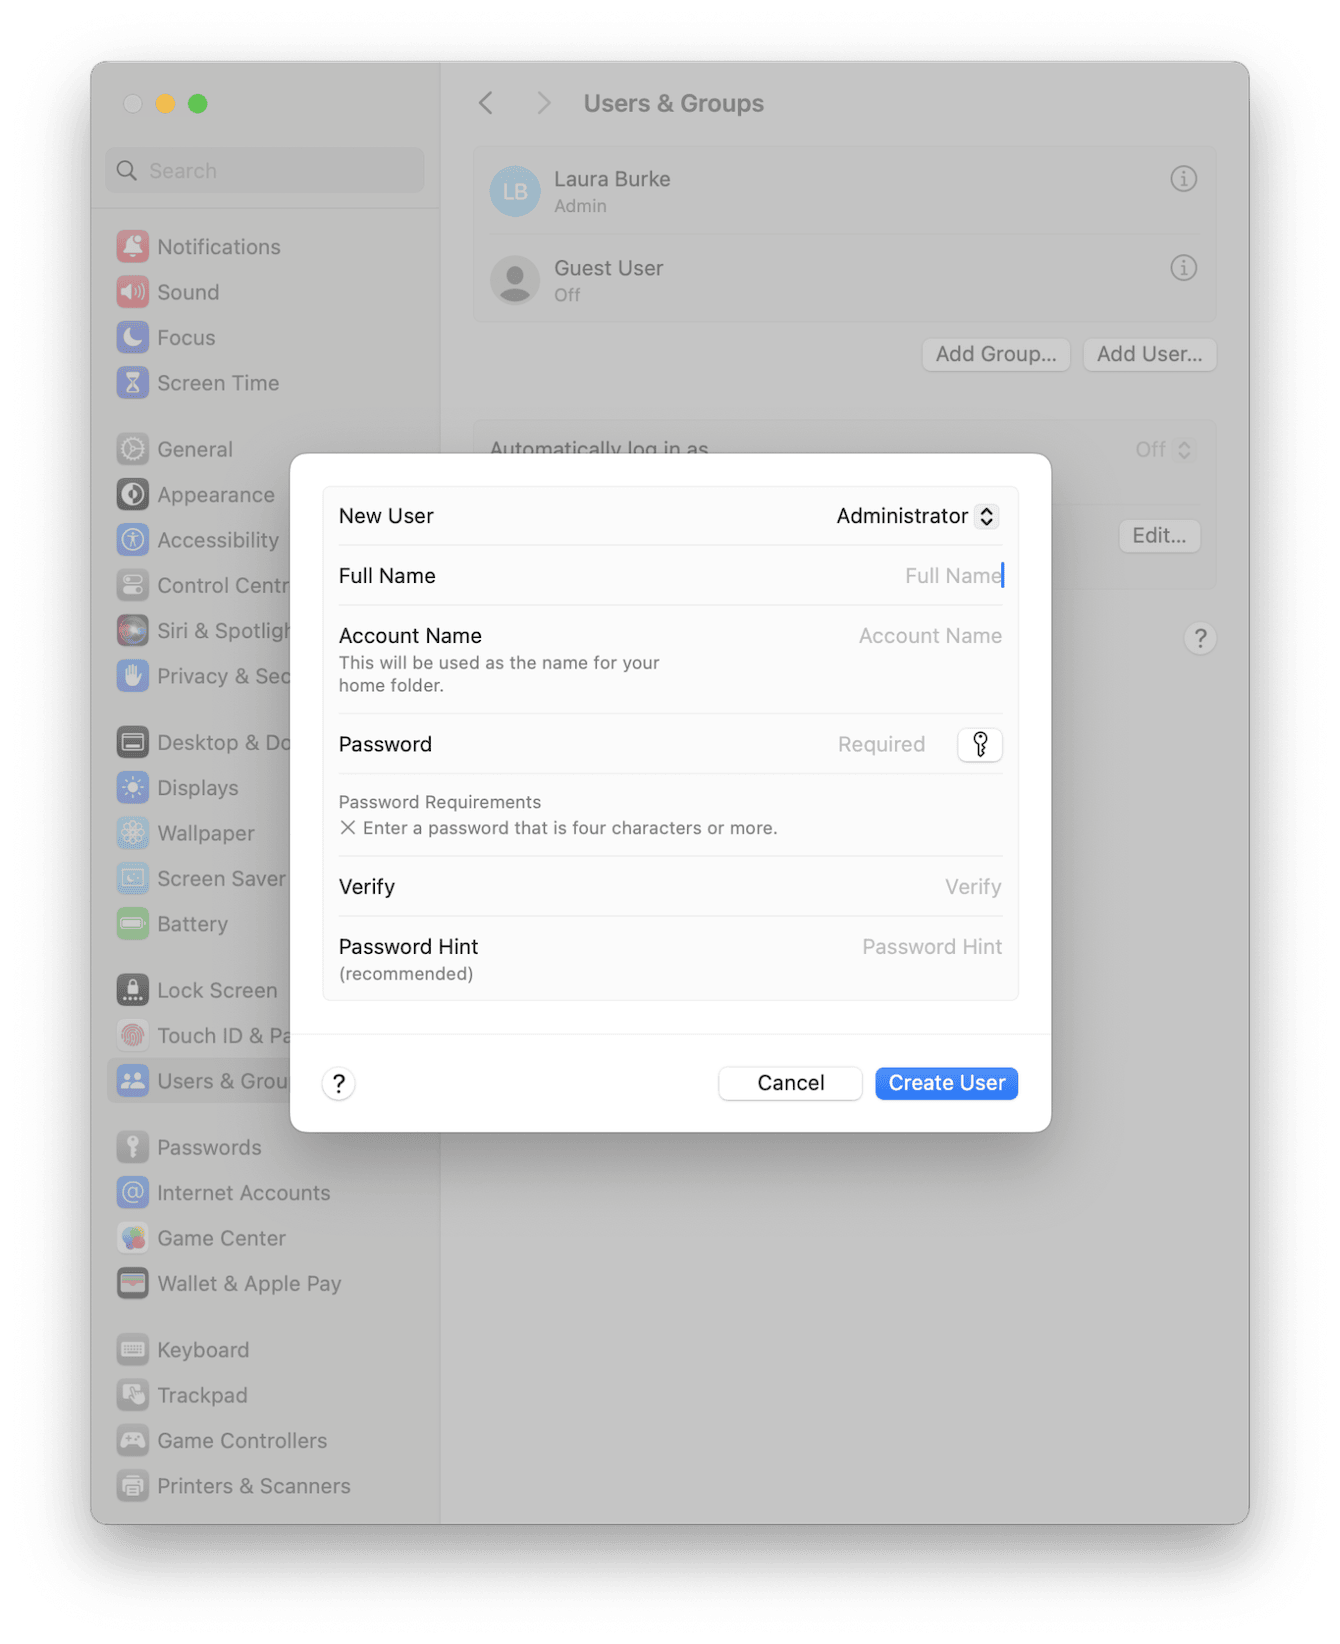
If you were alarmed by how much space "other volumes" seem to be consuming, this can often be a system error. Although tricky to identify, many users in the forums have reported that creating a new user account eradicates the issue. As it is a pretty simple task, it's worth a try; here's how:
- From the Apple menu, go to System Settings > Users & Groups.
- Click the Add User button and enter your system password.
- Select Administrator for New User, type in the new user window, and fill in the other credentials.
- Once complete, restart your Mac.

Check in Disk Utility if Other Volumes is removed or consuming less space.
4. Remove extra APFS volume
If you've been playing around in Disk Utility, you may have accidentally created a new volume. You can delete it safely if you're certain it's a mistake. First, ensure you back up your device with Time Machine, just in case. Now, follow these steps:
- Open Disk Utility from Utilities in Applications.
- Locate the accidentally created volume and select it.
- Right-click and choose Delete APFS Volume.

5. Remove apps with unusual activity
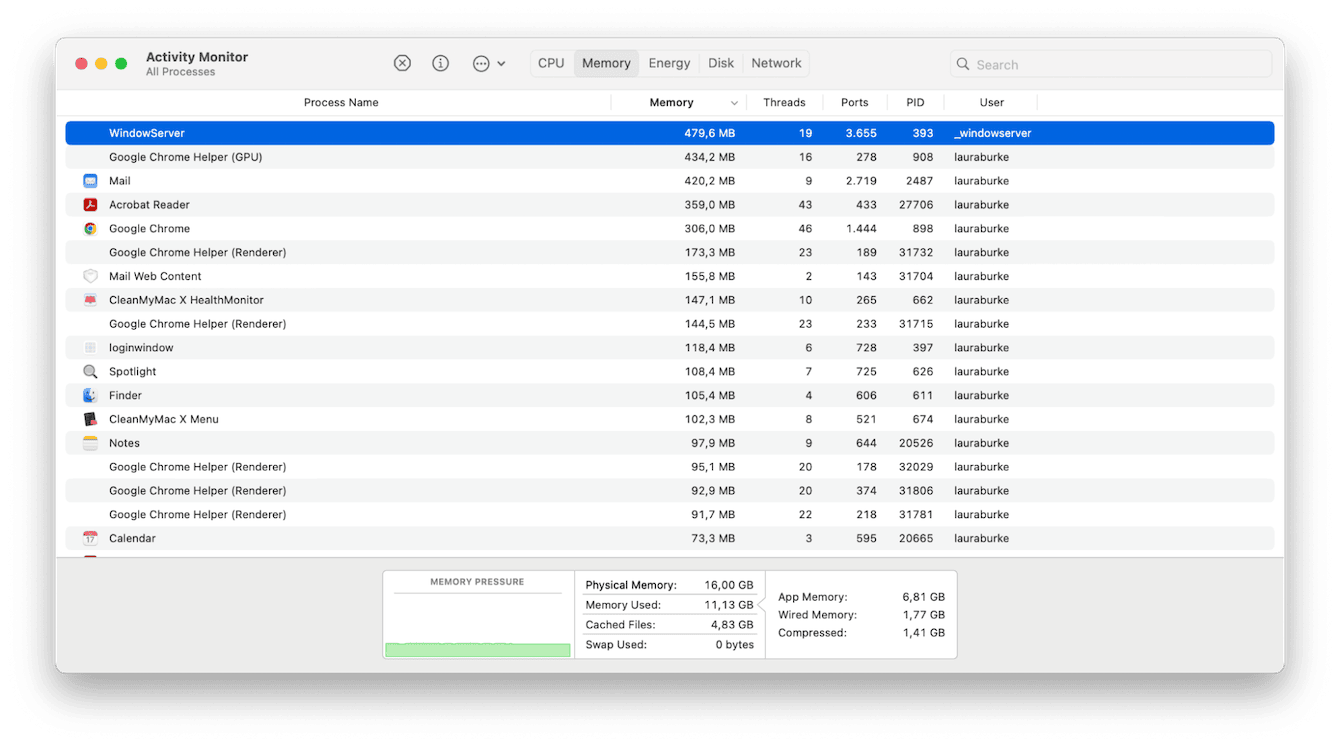
Another tip is to use Activity Monitor to look for any old or suspicious applications consuming large amounts of memory. These could also be causing the other volumes to swell in size. Deleting these apps from your Mac could help. Here's how to check for such apps:
-
Go to Finder > Applications > Utilities and open Activity Monitor.
-
Select the Memory tab at the top.
-
Look for any applications at the top of the list you don't recognize, use, or remember installing that are consuming memory.
-
Select an item and click X to quit it immediately.

If you do identify a suspicious app, now that you've quit the process, you should also fully uninstall it. Removing apps isn't as easy and simple as dragging them down to the Trash bin to remove all digital leftovers; read this how-to here.
Hopefully, we've answered your Mac's other volumes in container questions. If you're still struggling, consider erasing your disk completely and reinstalling your macOS. Here's the full guide from Apple.

