How to set the sleep timer on Mac?
Putting your Mac in sleep mode can help you save your battery life and get back to work quickly when you’re ready.
It’s possible to set your Mac to automatically start sleep mode after being inactive for a certain amount of time. You can also set a recurring schedule for your Mac to enter sleep mode.
Set your Mac’s sleep timer
-
Click the Apple menu on the top left of your toolbar.
-
Go to System Preferences > Energy saver > Power adapter.
-
If you’re using a Mac laptop, you’ll see two tabs: Battery and Power adapter. Each of these options has its own settings. (Note: If you’re on your iMac desktop, you won’t have multiple options, since your computer is always plugged into a power source. You’ll see both of these options on the same screen.)
-
Set sleep time using the Computer sleep slider (whether you have this option will depend on the version of macOS you’re using). This tells your computer to put itself into sleep mode after a set period of inactivity.
- Set your monitor’s sleep using the Display sleep slider. This turns your display off after being inactive for a set period of time. (Note: You can’t set the Display sleep slider for longer than the Computer sleep slider; when your computer goes to sleep, your display will, too.)
- The "Put hard disks to sleep when possible" box. It allows you to put your hard disks to sleep when they’re not in use, saving your computer’s power and increasing your disks’ lifespans.

Schedule your Mac’s sleep timer
You can also schedule your sleep timer so your Mac automatically goes to sleep and wakes up at specific times.
-
From System Preferences > Energy Saver, click the Schedule button on the bottom right of the window.
-
Check the box marked Sleep to set a time at which your Mac will automatically go to sleep or shut down. You can choose whether your computer will Shut Down or Restart. (You can also set an automatic wake timer by checking the box marked Start up or wake.)
-
Use the drop-down menu that’s preset to Every Day to choose the specific days for which you want to set your sleep (or wake) timer. The next menu lets you set the time at which your Mac will go to sleep and wake up on the specified days.
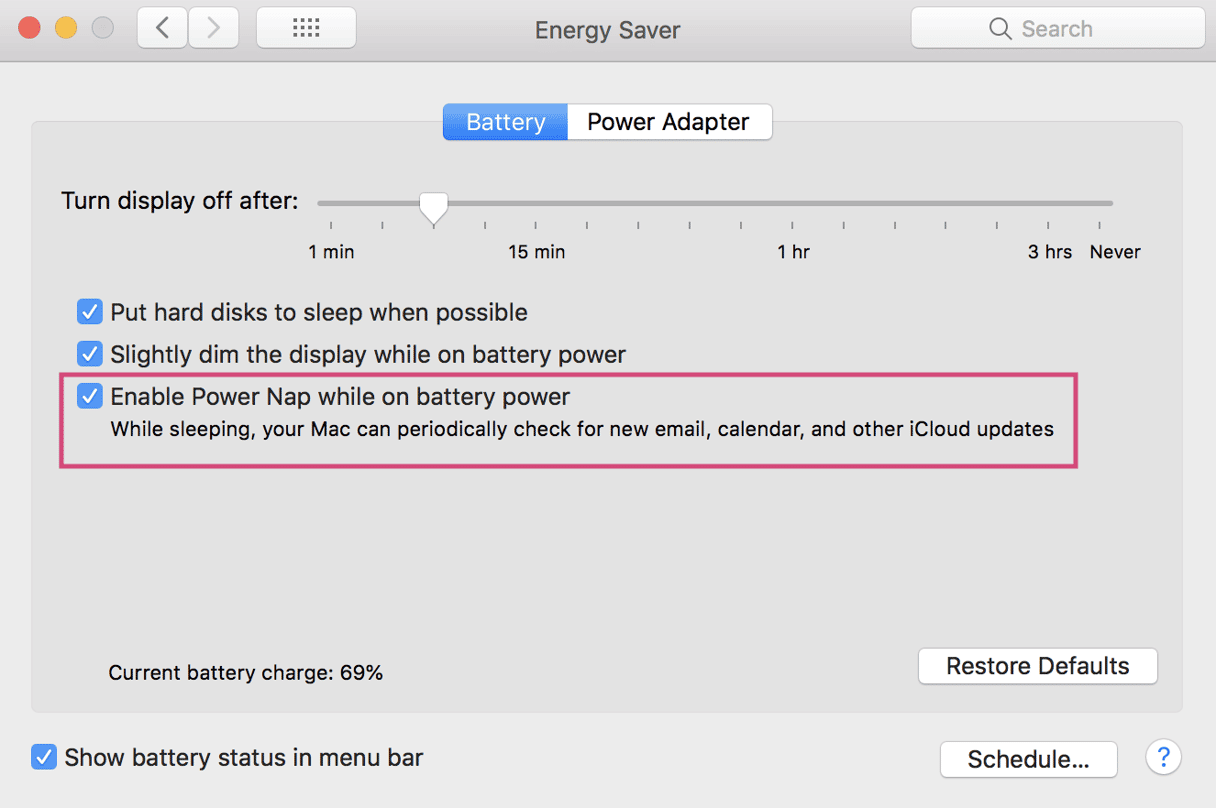
Enable Power Nap on your Mac
You can also enable the Power Nap function. This allows your Mac to check for things like emails, calendar events, and iCloud updates while it’s asleep. This can be enabled separately for when your Mac is using its battery and when it’s connected to a power adapter.

From System Preferences > Energy Saver, just check the box marked Enable Power Nap. That’s it!
How to optimize your Mac
Why does your Mac need additional optimization? Regular optimization increases the overall performance of your device. It allows you to control what is running on your Mac, including login items, launch agents, hung applications, and heavy consumers—all those unneeded things that slow down your system.
And what is the most effortless way to optimize Mac than Apple notarized utility tool CleanMyMac. It has a widely popular Optimization module designed to make your Mac run more smoothly. It disables login items or launch agents and helps manage hung apps & heavy consumers.

-
Download CleanMyMac for free here.
-
Choose Optimization from the sidebar menu.
-
Click View All Items. Select the area you want to optimize and the apps you’d like to quit.
-
Press Remove.
- Enjoy a faster and healthier Mac!