How to eject USB from Mac
Knowing how to eject USB from a Mac safely is important. It might seem like a small step, but it's essential for protecting your data and keeping your drive healthy.
Rest assured, the process is straightforward, and we've detailed all the steps along with some handy bonus tips in this article for you.
Why knowing how to eject a flash drive on Mac is vital
You might not realize it, but when you don't take the steps to remove your USB drive correctly, you put yourself at risk for data corruption or hardware damage.
Here's why ejecting it the right way matters:
- Data safety: When you remove your USB without ejecting it, ongoing read or write processes may be interrupted, causing file corruption.
- Drive longevity: Sudden removal can damage your USB drive's file system, reducing its lifespan.
- Error-free use: macOS caches data while you're using a USB. Ejecting ensures all cached data is written back to the drive before removal, which prevents file loss.
As you can see, there's more to ejecting your USB than meets the eye. Before you rush to remove your external drive, there are a couple of things to remember.
Before you eject your USB
-
Close all files and quit apps: Ensure no files or applications are actively using your USB drive before ejecting it.
-
Avoid force ejecting: If your macOS says the drive is in use, check for hidden processes using Activity Monitor or the Finder. Force ejecting can cause data loss.
-
Check for hidden activity: Sometimes, background tasks (like a Time Machine backup) might be using your drive. Pause these tasks first.
OK, so now we've covered the essentials, let's get to the removal steps.
How to safely eject USB from Mac
Well, like most things on a MacBook, there are a couple of different ways to do this. Let's take a closer look.
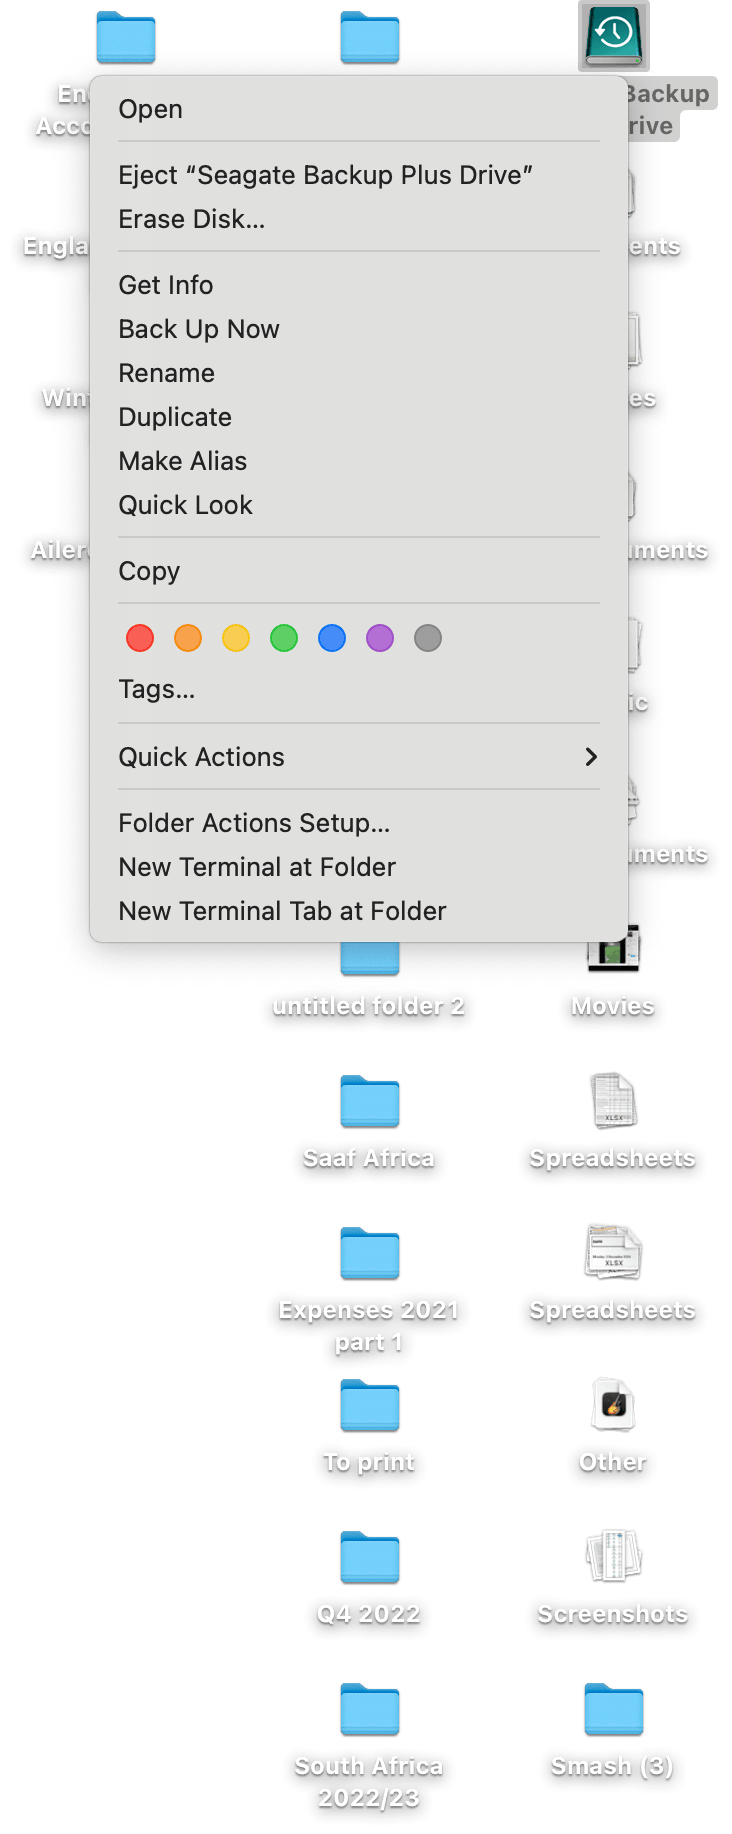
1. Eject from your Desktop

- On your Desktop, locate the mounted external drive or USB icon.
- Right-click it and choose Eject drive from the window that pops up.
- Wait a few moments until the icon disappears completely before removing it.
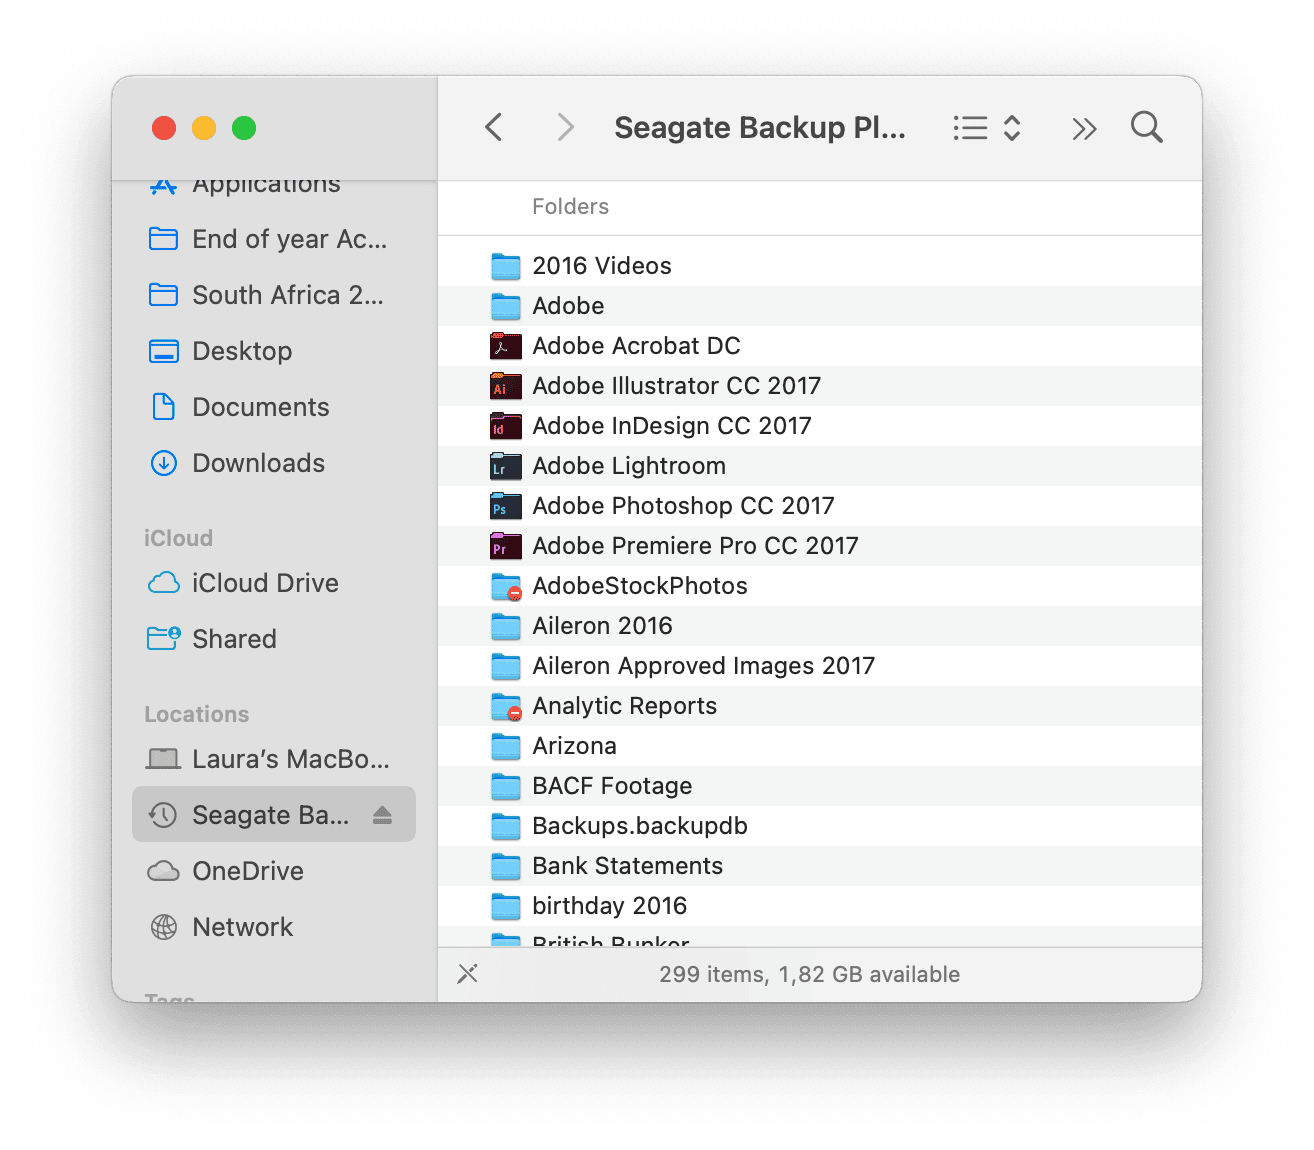
2. Use the Finder

-
Open the Finder, and under Locations in the left-hand sidebar, look for the name of your USB or external drive.
-
Either right-click and choose Eject or click the little eject icon next to its name.
-
Again, wait until its name is no longer on the list before removing it.
Don't forget if you're using a USB to transfer files, make sure you don't let these build up and clutter your Mac. We've got a bonus tip for you below.
How to keep your Mac in peak condition
Issues on our Macs happen from time to time. To keep them running smoothly so they can handle external devices like USBs issue-free, use a tool like CleanMyMac to help.
This app's Smart Care feature helps maintain your Mac's health by cleaning system junk, optimizing performance, and checking for potential threats from external devices like USB drives; here's how it works:

-
Open the app and click Smart Care > Scan.
-
Review items and click Run.
Knowing how to properly eject a USB on a Mac protects your data and keeps your devices functioning smoothly; thanks to the quick tips in this article, you know how to do it like a pro. Well, before we finish, let's answer a couple of USB-related FAQs.
FAQs: How to eject USB from Mac
Why can't I open my USB on Mac?
There could be lots of reasons why you're having issues opening a USB on your Mac. The most common culprit is format issues; check out this article on how to format a USB on Mac.
How do I know when it's safe to remove my USB drive?
Good question! Depending on which method you've used to eject your USB, either wait for its icon or name to disappear or, if your USB has a light, wait until that's out.
Why can't I eject my USB drive?
This is quite a frustrating issue with running into; if your USB won't eject or you keep getting an error message, then the drive is probably in use; check for any open files on your Mac, and close any apps that might be accessing items on the drive, then try again.

