Google Lens app for iPhone
I didn't expect to use the Google Lens app for my iPhone as much as I do now. At first, I just wanted to identify a plant in my friend's apartment, but before I knew it, I was using it to translate menus, scan handwritten notes, and even shop for furniture I'd only seen in photos.
In 2025, it's not just a hidden feature anymore; Google Lens has become one of those tools I reach for without thinking. So, if you're wondering how to use it, I'll walk you through how it works.
What is Google Lens for iPhone?
Google Lens is like a supercharged visual search engine. You point it at text, landmarks, animals, furniture, or literally whatever, and it tries to tell you what it is, translate it, shop for it, or pull up more info.
Does Google Lens Work on iPhone?
Yes, and better than you might expect. It's not a standalone app, which is what throws some people off, so you won't find a Google Lens app in the App Store. Instead, it's baked into other Google apps, but more on that in a moment.
It's like a Google search, but for everything your camera sees. And yes, it does feel like magic sometimes.
How to Get Google Lens on iPhone?
If you're wondering how to get Google Lens on iPhone, it's already available through these apps:
Option 1: Use the Google App
-
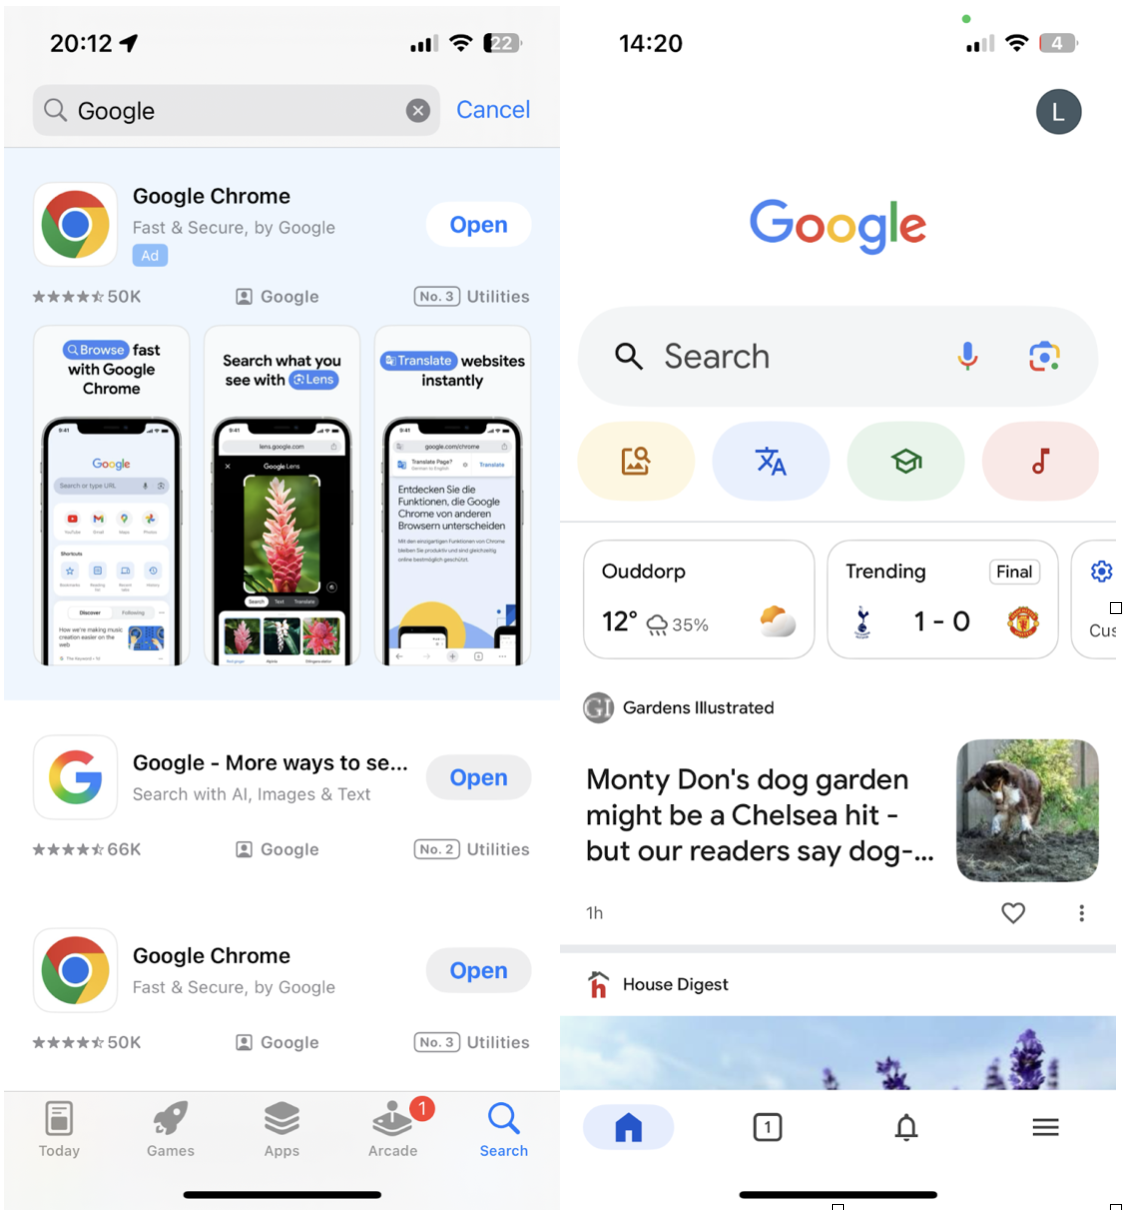
Download the official Google app from the App Store.
-
Open it and tap the camera icon in the search bar. That's Google Lens.
-
Grant camera access.
-
You're ready to start scanning.
Option 2: Use Google Photos
-
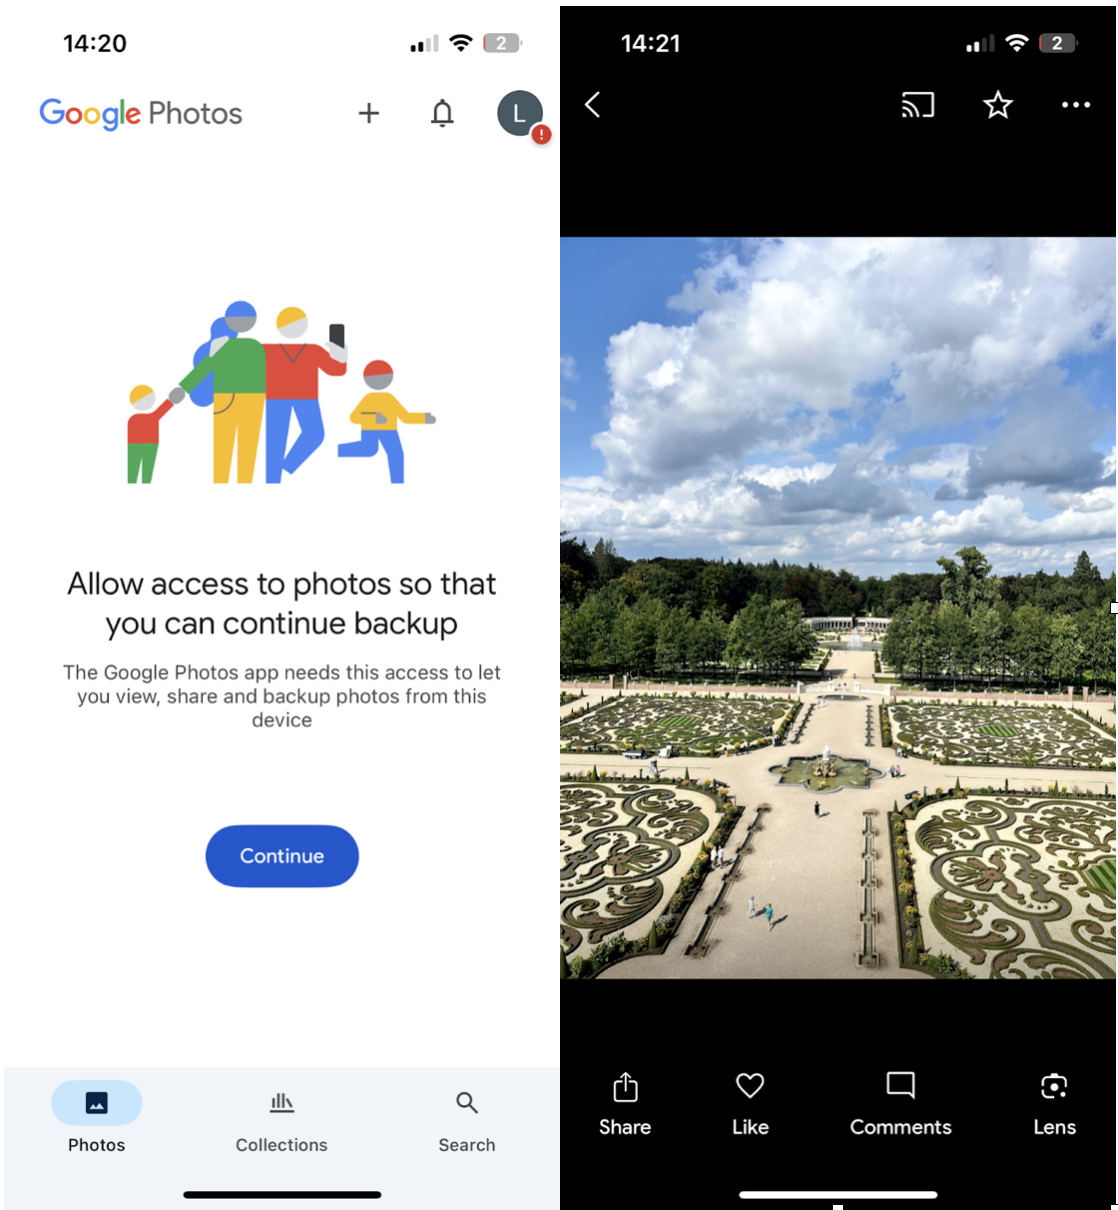
Install the Google Photos app.
-
Open any image.
-
Press the Lens icon at the bottom of the screen.
-
Let Lens analyze the image and suggest actions.
How to Use Google Lens on Your iPhone
Now that you've got it, here's how to make the most of it.
How to use the Google Lens App on iPhone
-
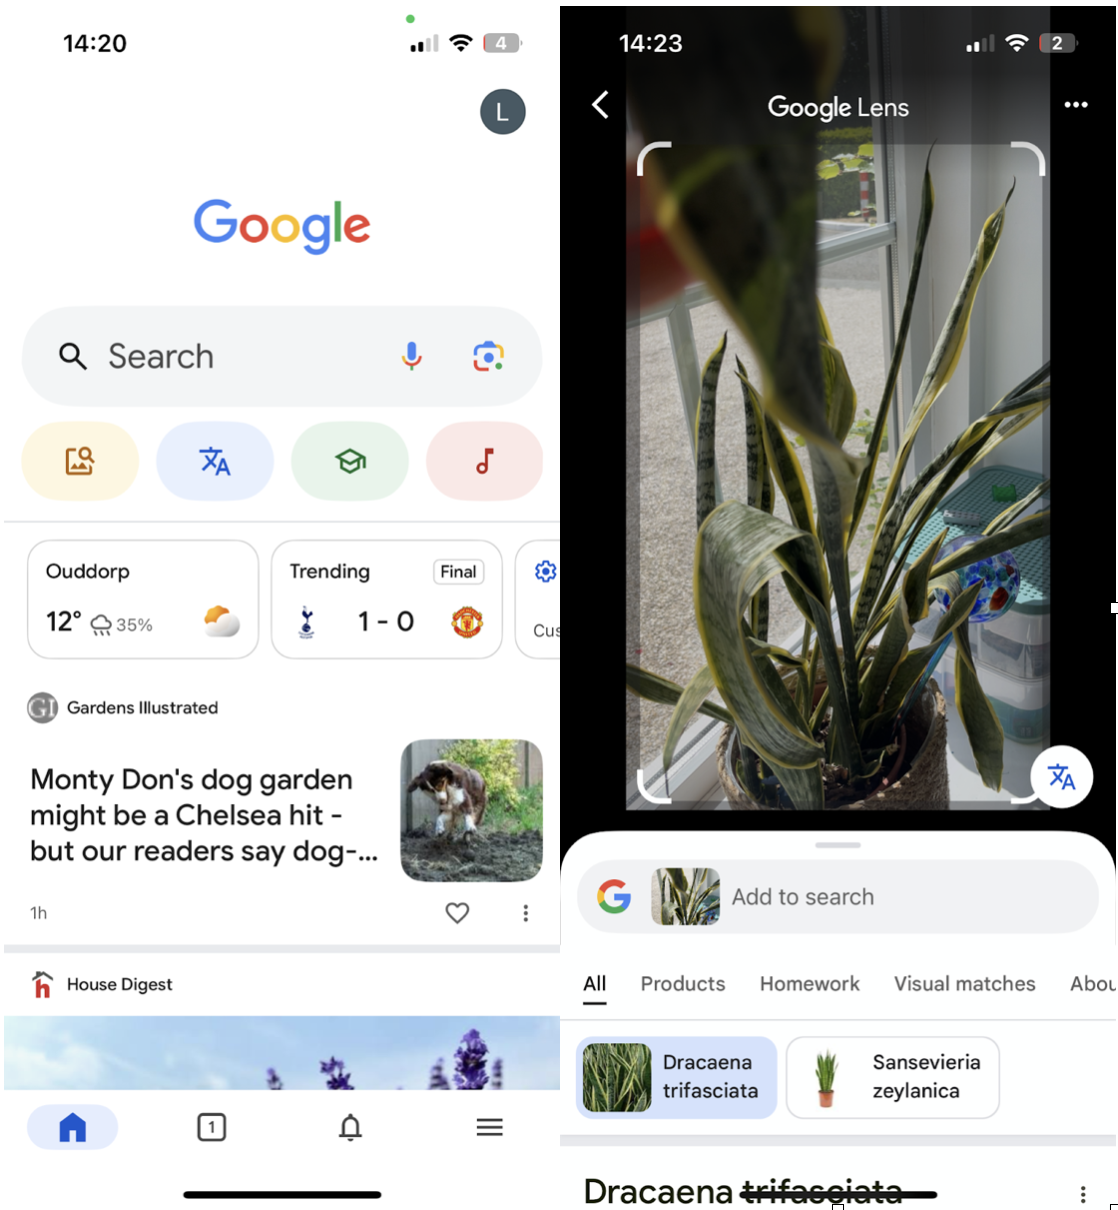
Open up the Google App and tap the camera icon.
-
Point your iPhone camera at what you want to search.
-
Tap on the area of the image you want Lens to focus on. (This step matters; the Lens tends to guess wrongly if you don't guide it).
-
Choose what you want to do: translate, search, shop, copy text, or listen.
Tip: If you're translating something like a handwritten postcard, be patient. It's good, but not perfect. I had to rescan once or twice.
How to use the Lens in Google Photos App for iPhone
This is perfect for screenshots and photos already in your gallery:
-
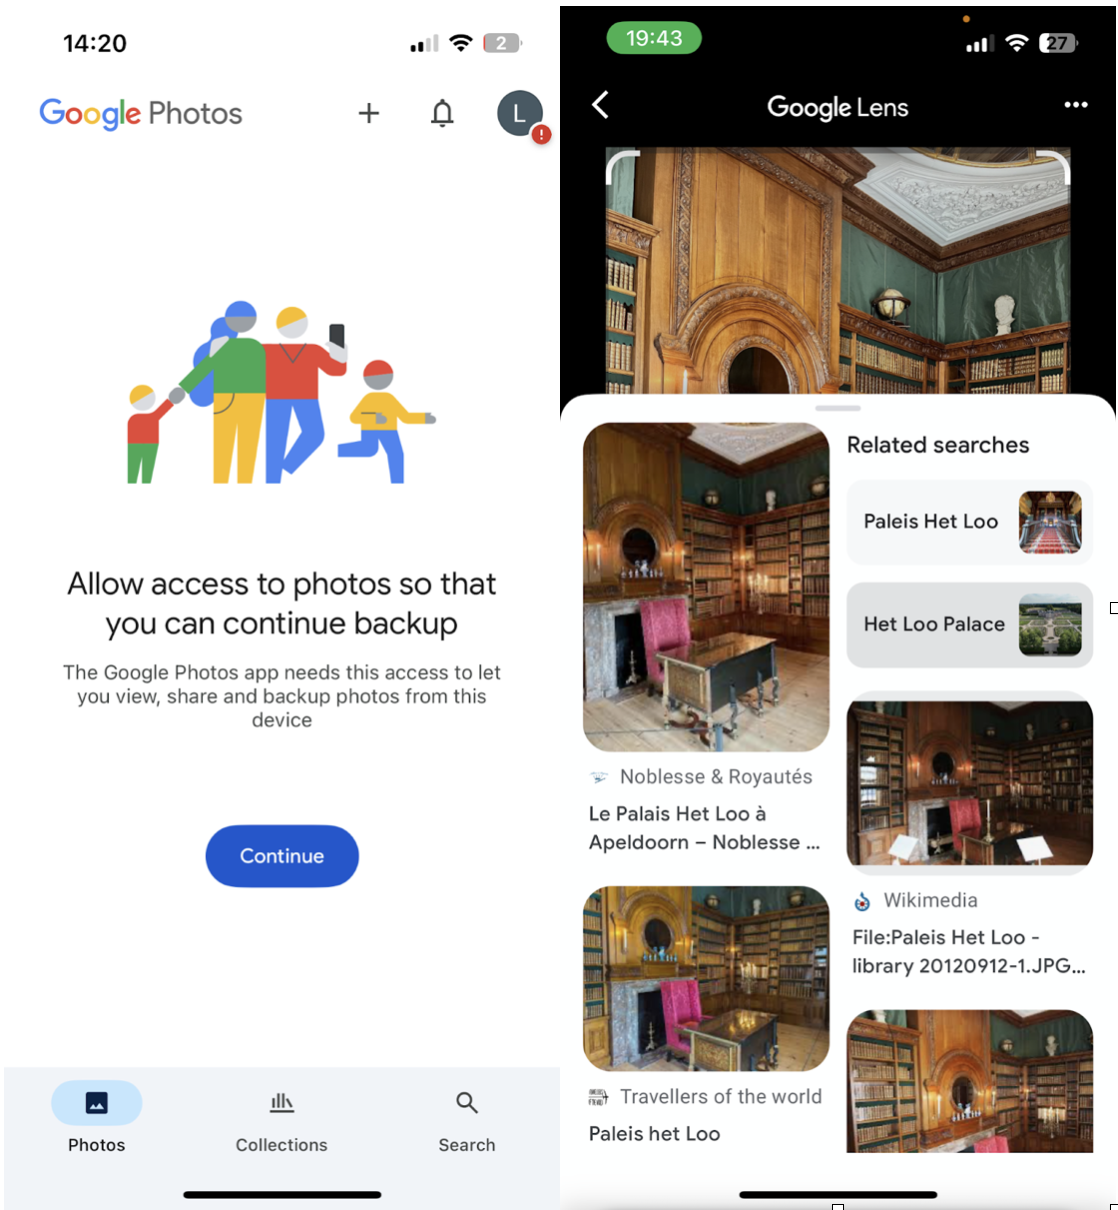
Open Google Photos and tap on any image.
-
Tap the Lens icon.
-
Google will scan the photo and suggest actions like identifying the location, calling numbers, saving dates, or visiting websites from text in the image.
Advanced Tip to Improve Your iPhone Experience
If you're using Google Lens regularly, chances are your iPhone is collecting a lot of visual clutter, screenshots, scanned documents, and near-duplicates. Over time, it adds up. One way I've kept things running smoothly is with CleanMy®Phone by MacPaw. The Organize module is especially handy: it finds similar images, removes visual noise, and helps you quickly clean out those Lens-related files that quietly pile up.
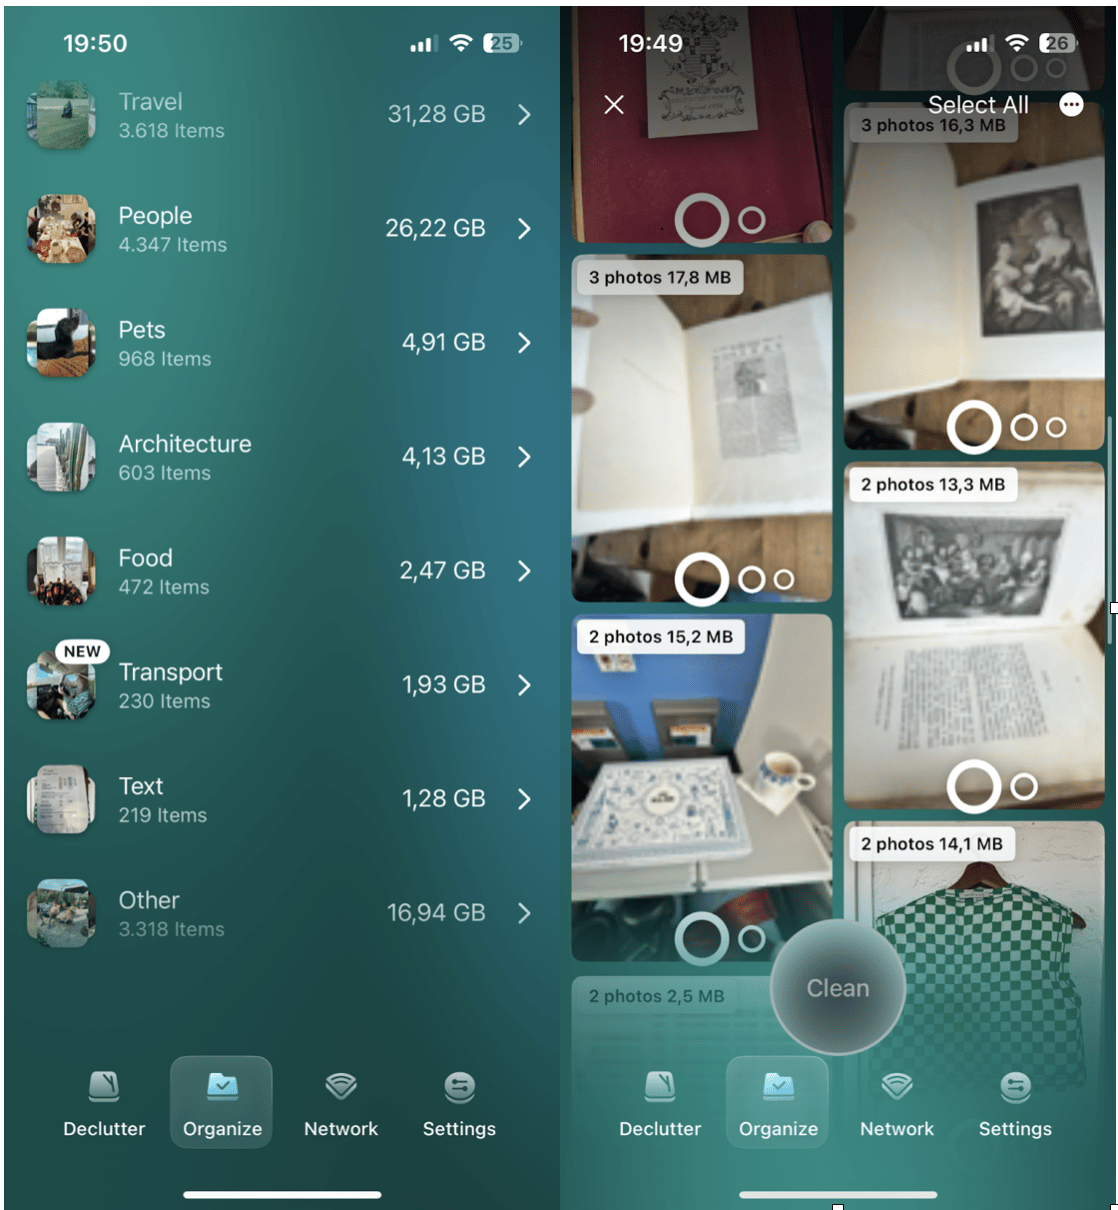
-
Open the app and select the Organize tab.
-
Take a look through all the smart categories.
-
Select unwanted images and videos.
-
Press Clean
FAQ: Google Lens app for iPhone
Can You Use Google Lens on an iPhone?
Yes, through the Google or Google Photos apps. No dedicated app is needed.
Is Google Lens available for free on iPhone?
Completely free. Just download the Google apps, and you're set.
Is using Google Lens safe?
From what I can tell, yes. Google is a trusted source.
Knowing how to use Google Lens on iPhone isn't just a one-time thing; it's a habit. Once you know where it lives, it blends into your daily flow. And if your storage starts to fill up with scans and screenshots, this quick iPhone storage guide helped me clear things out fast.


