MacBook not importing photos from iPhone: 7 quick fixes
It's really annoying when your MacBook is not importing photos from your iPhone correctly.
Usually, this is a pretty straightforward task — simply connecting your USB cable and selecting which photos to import — but occasionally, Apple users run into transfer issues.
Thankfully, with these seven tips, you can troubleshoot the problem swiftly and get your photos exactly where you want them.
So, let's get this article started.
Why can't I import photos from my iPhone?
Let's first understand why we run into issues with photos not importing from iPhone to Mac.
Image transfer failure can usually be narrowed down to these three areas:
-
Connection problems
-
Too many files to transfer in one go
-
Incorrect iCloud settings
Regardless of why you can't import photos from iPhone to Mac, the tips below will help you easily solve the problem, so let's get started.
Fixes: MacBook not importing photos from iPhone
1. Rule out connection issues
Ruling out connection issues is the most logical place to start. So work your way through this mini checklist before moving on:
-
Test that your cable isn't broken and try a different one.
-
Try a different Mac USB/USB-C port.
-
Check that your iPhone is unlocked.
-
When prompted on your Mac, make sure you select Trust this device.
If your cable and USB ports are working fine, jump to the next tip.
2. Software bugs
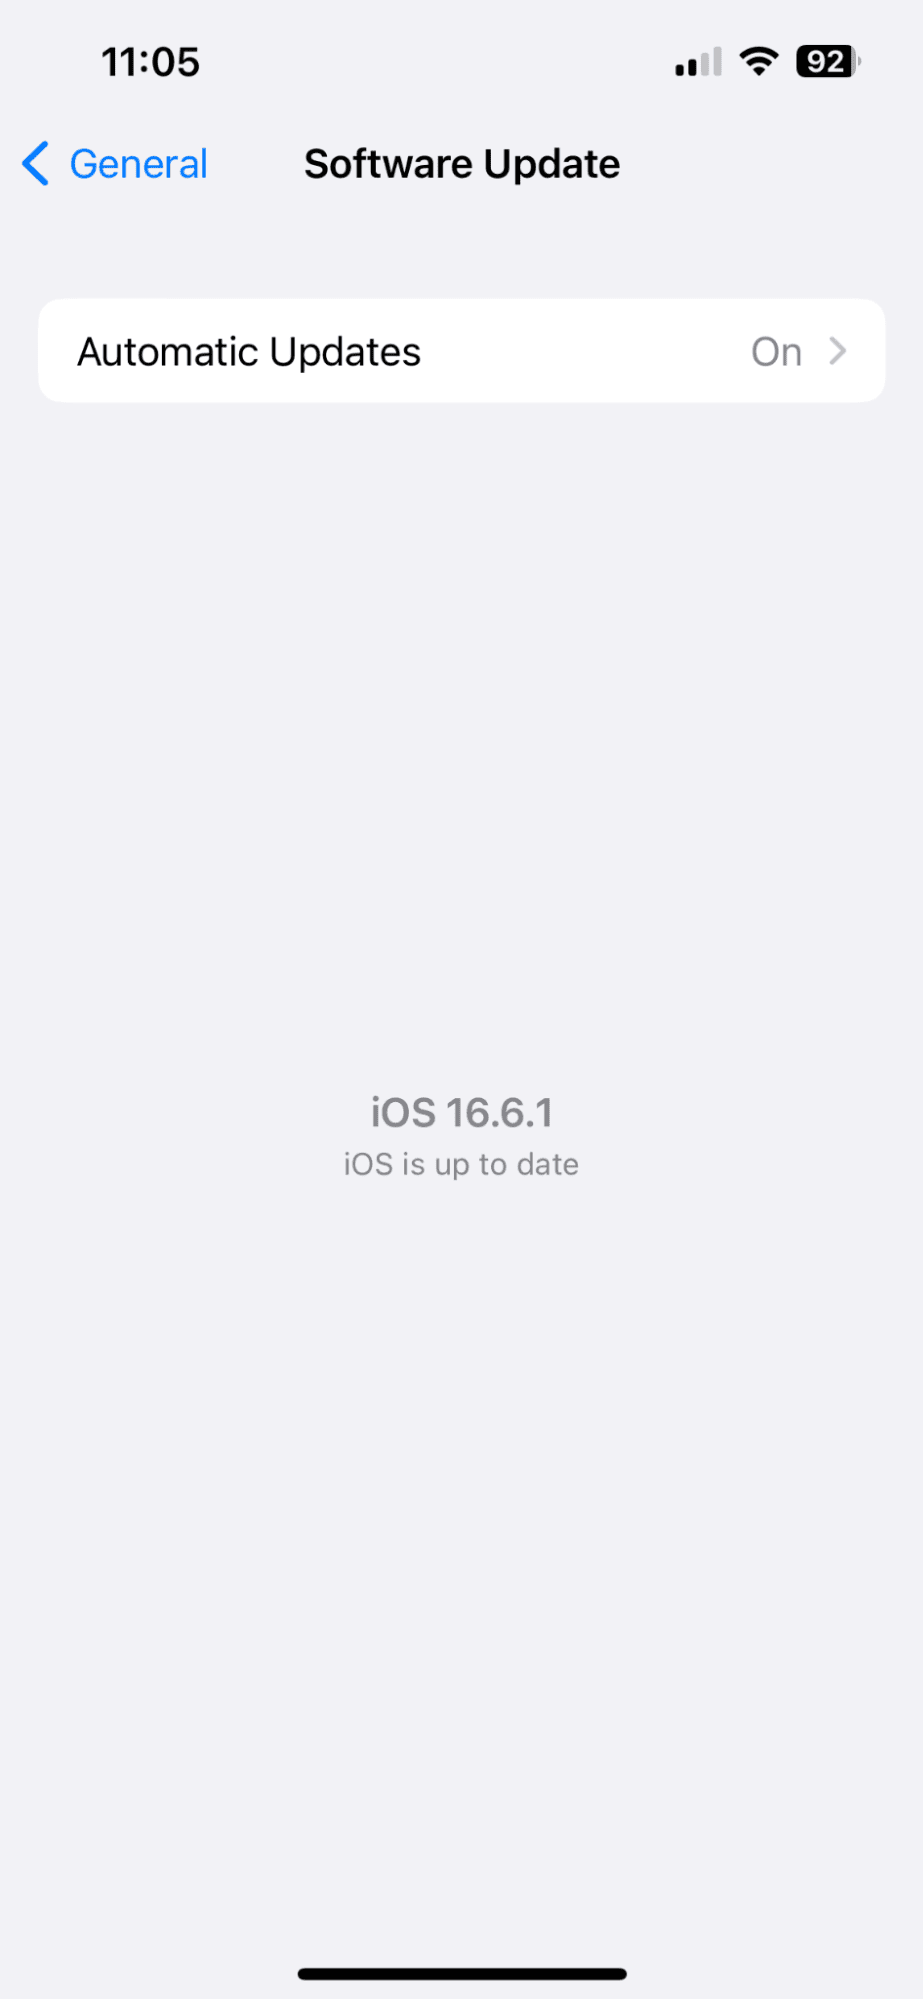
If your Mac just doesn't seem to recognize your iPhone, this could be down to a software glitch, so take a moment to ensure both your iPhone and your Mac are running the latest available software.
How to update your macOS
Select the main Apple menu > System Settings > General > Software Updates.

How to update your iOS
Select the Settings App > General > Software Update.

If your devices are both up to date, head to the step below.
3. Check your iCloud settings
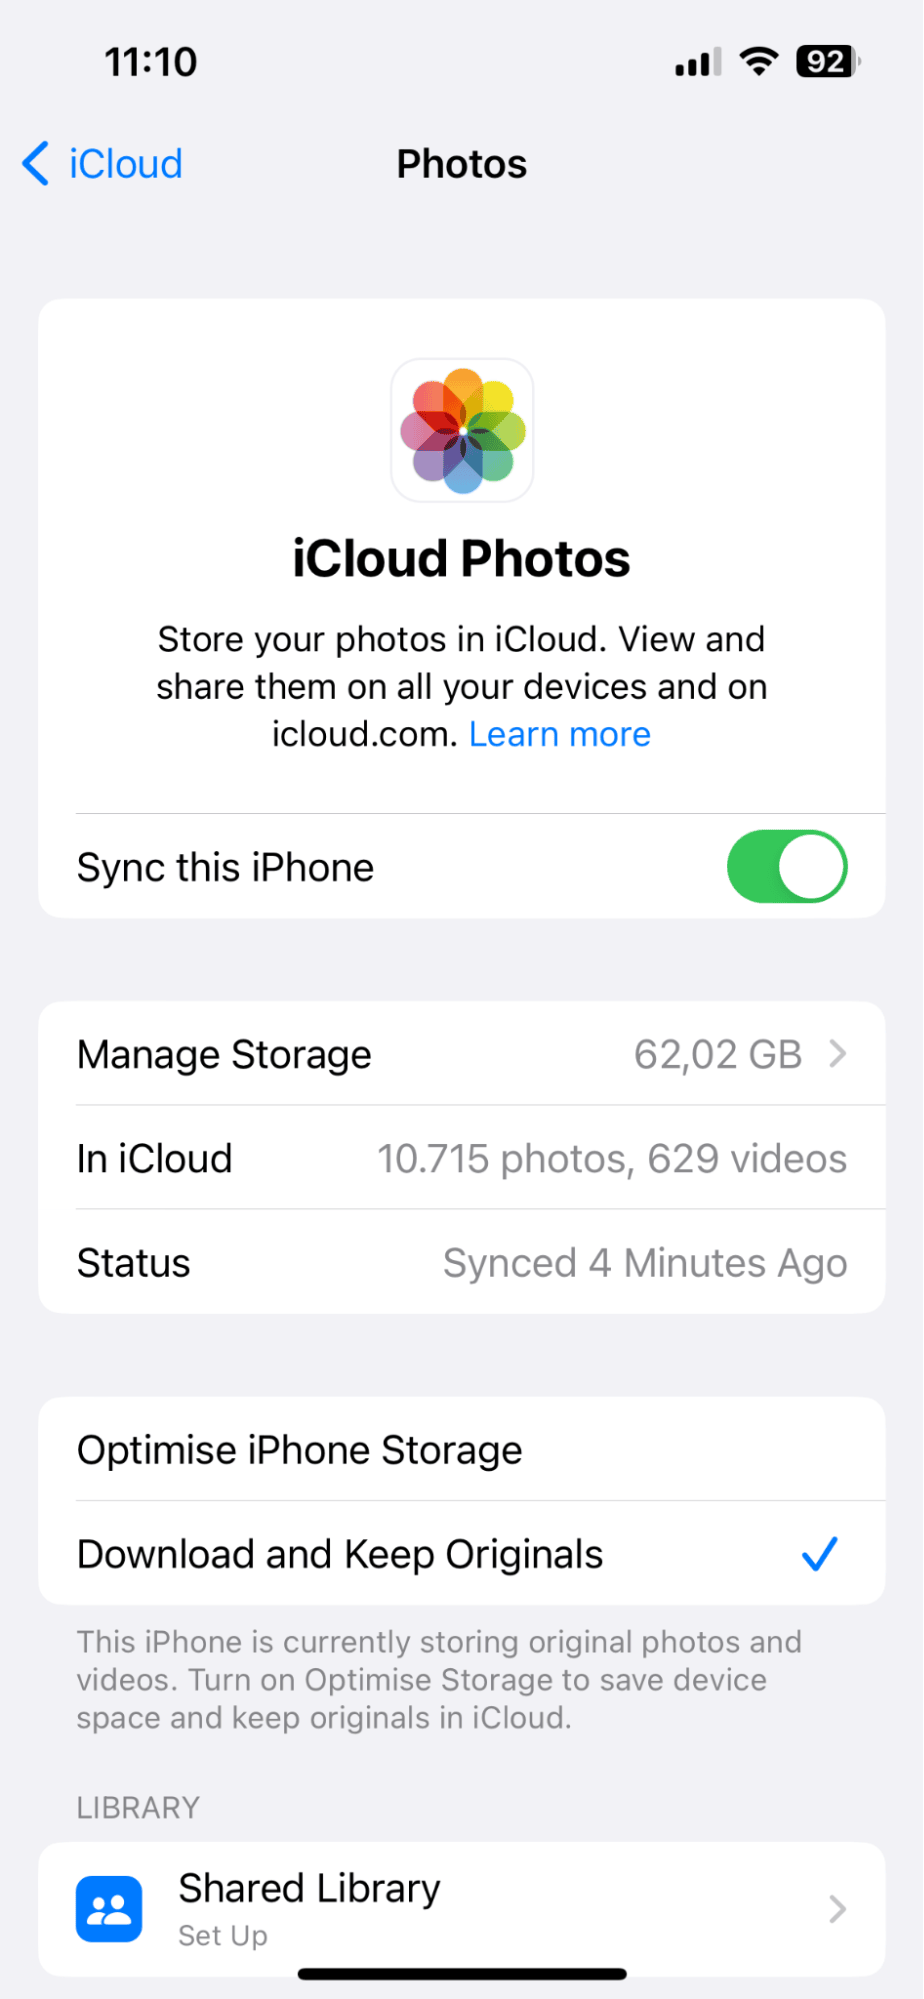
Lots of users don't realize, but if you've enabled Optimize iPhone Storage and iCloud Photo Library options on your iPhone, then images are not actually saved on your device, meaning when you connect to your Mac via USB, there's nothing to actually transfer.
Here's how to adjust your iCloud settings on iPhone:
- Open the Settings App > Select your Name > iCloud > Photos > Toggle off Sync this iPhone.
- Select Download and Keep Originals.

Once this is complete, try connecting your USB to your Mac again and importing images again.
4. Check your Mac's available storage
Another reason your MacBook is not importing photos from your iPhone could be that you've simply run out of available storage space.
Here's a quick reminder how to check:
- From the main Apple menu > System Settings > General > Storage.
- Wait for the colored graph to load and see how much free space you have.

If you do discover you're low on space, then importing images will be the least of your worries; you'll no doubt also encounter performance, speed, and output issues. It's time to spring into action and free up some breathing space for your MacBook.
One of the easiest ways to quickly claw back space is by using the Apple notarized cleaning and maintenance app CleanMyMac. Its Large & Old Files tool quickly scans your entire device, locating and categorizing considerable files and folders for you to easily clean up; here's how to use it:
-
Get your free version here or open the application.
-
Open Large & Old Files from the sidebar and click Scan.
-
Sort through items for removal by looking at the various categories, like file size, last accessed date, or file type.
-
Select what you no longer need and click Remove. Note that the app comes with different removal options.

This will help to free up space and boost your Mac's overall performance. Once you've got some storage capacity, it's time to see if your iPhone photos import works.
5. Check your import files
Another common reason users run into issues with image transfer failure is that they are trying to import way too many photos at once.
If you're importing thousands of photos in one go, you'll likely encounter glitches and problems, so why not try breaking your photos down into smaller, more manageable batches?
Did you know? If you import a lot of photos, it may interfere with some of your Mac's settings, such as sleep settings. So, if you close the lid, your MacBook with not enter sleep mode. However, it is not the only reason why this issue happens. To learn how to fix it if Mac doesn't sleep when lid is closed, check out this handy guide.
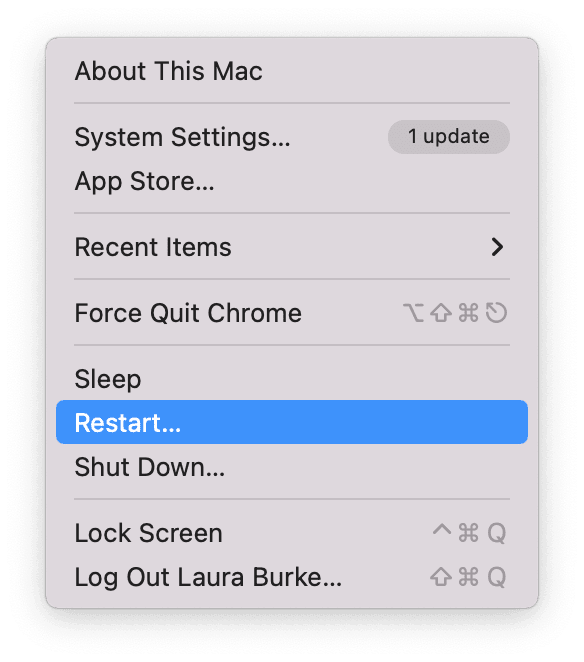
6. Time for a restart
If your photos are still not importing from iPhone to Mac, it's time to restart both your devices.
Restarting, as most people know, can help fix lots of known glitches and bugs.
On your Mac, select Restart from the main Apple menu.

On your iPhone, hold down either the volume button or the side button until on your screen you see the power-off slider; wait at least 30 seconds before turning it on again.
7. Try a different import method
If these tips haven't helped you import images via USB, then it's time to consider a different approach. Let's take a look at your options.
iCloud
iCloud is built exactly for this job— to seamlessly store and transfer files between Apple devices. Its free 5GB of storage space won't get you very far; you will need to upgrade to a paid service eventually, but this tool is the obvious option for image transfer. Saving both physical space on your iPhone and Mac.
If you're yet to set up and use iCloud for Photos on your iPhone or Mac, check out this comprehensive guide from Apple here.
AirDrop
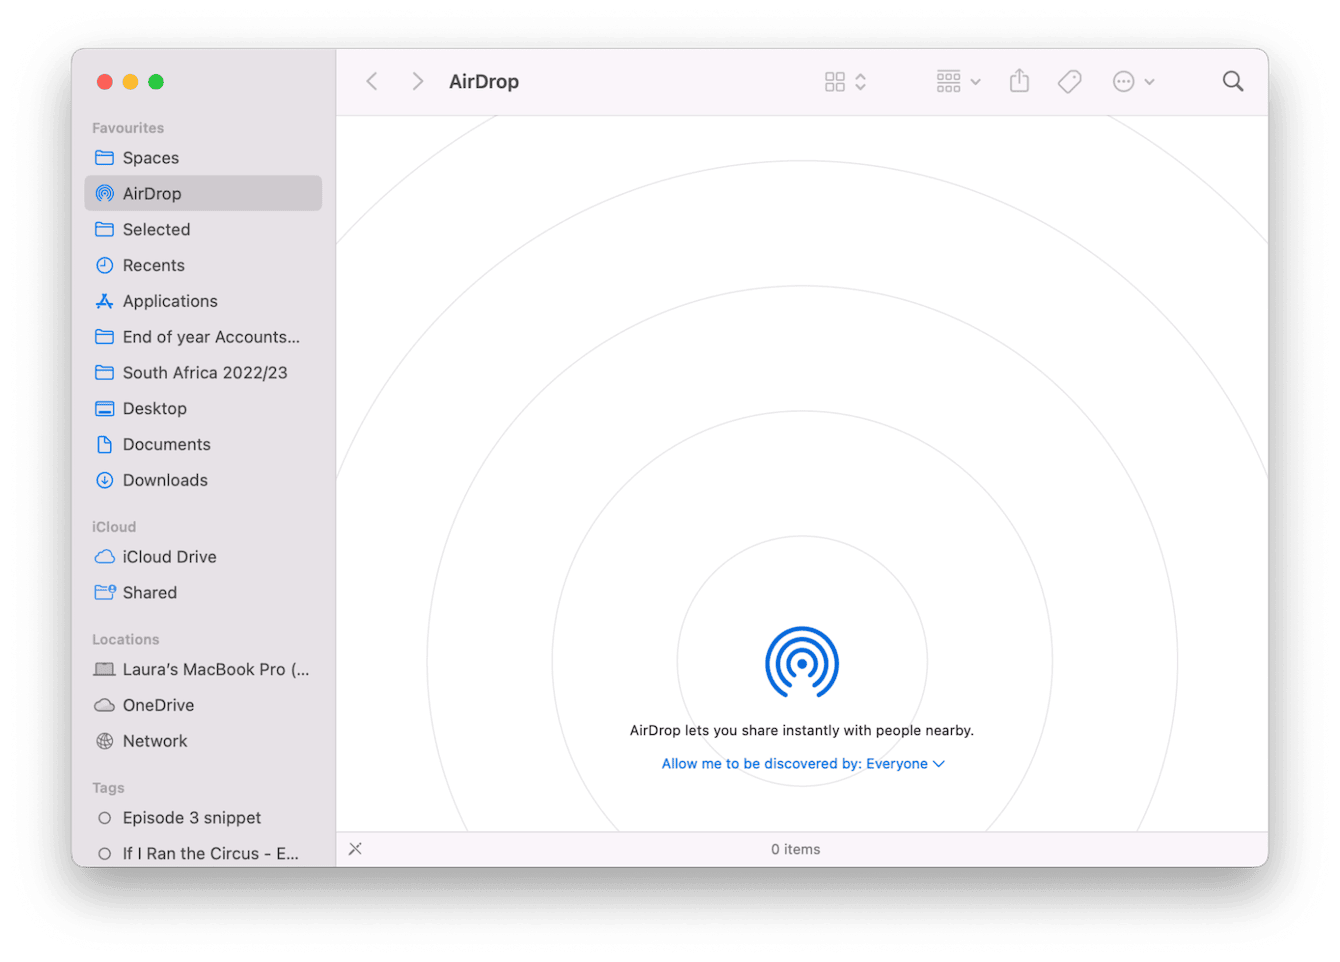
Another great way of transferring images between devices is to use the built-in AirDrop feature from Apple.
You'll need to ensure that your Mac and iPhone are in range of each other with Bluetooth turned on.
-
Make sure your Mac is configured to receive AirDrop files by opening Finder > AirDrop and toggling discoverability to Everyone.
-
On your iPhone, within your Photos app, select the images you want to transfer (again, try doing this in smaller batches).
-
Select the Share button > AirDrop > Select your MacBook.

To use iCloud and AirDrop, you will need to have your Mac and iPhone connected to Wi-Fi. Sometimes, things go wrong, and MacBook is not connecting to Wi-Fi. If you've experienced this annoying glitch, here are the fixes that will help you.
A final resort could be to send images to yourself via email. Adding them as email attachments. This might be very time-consuming if you have lots of photos.
So, now you know what to do when your MacBook is not importing photos from your iPhone.

