What is “Other” in Mac storage
Storage on your Mac is everything. Even as Apple released Mac computers with an available maximum storage boost of up to 2TB — yes, you read that correctly — it is still finite. Considering all our apps, software, and blurry photos, it's never enough.
You may be trying to figure out what’s taking up that much space. And most of that occupied space hides under “Other.” So, what is Other in Mac’s storage, and how to reduce it?
Did you know? In newer macOS versions, “Other” has become “System Data.” You can use the same steps to trim it. Also, you can check out this article for more cleaning tips.
What is “Other” in Mac storage
As you can see, this mysterious category is taking up almost 37GB on my Mac. But it can take more than 100GB! If it's not documents, images, apps, or movies, then what is the Other in Mac storage?
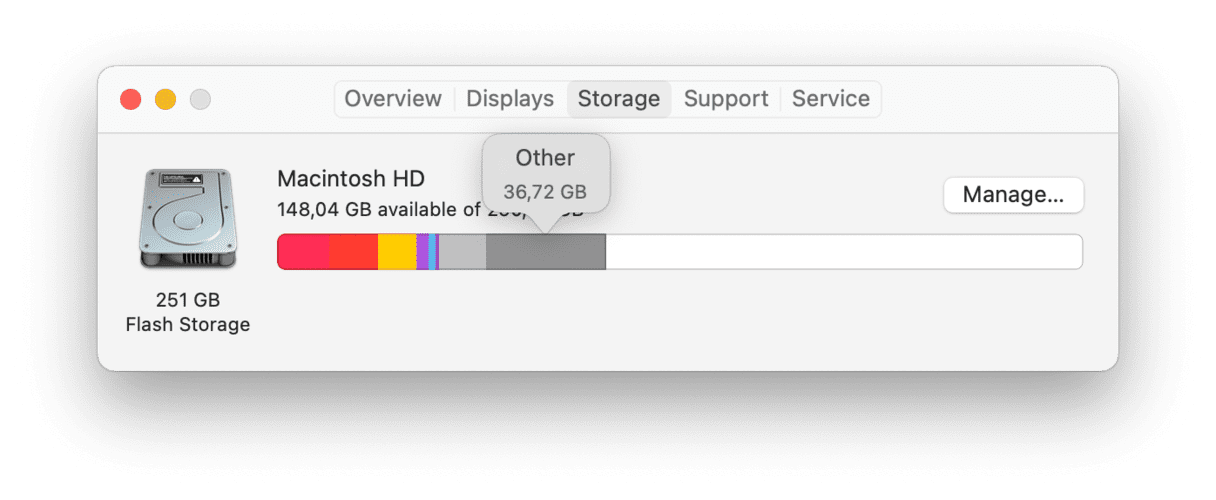
Tucked away inside the “Other" category are cache files, old backup data, installer packages, app extensions, and pesky temporary files.
How to check your storage availability and usage:
-
Click the Apple icon top left.
-
Select About This Mac.
-
Click the Storage tab at the top and wait for the data to load.
How to access Other storage on Mac
If you were surprised to find Mac Other storage taking up quite some space, you might want to know what exactly is hiding there. You’ll need to check your Library folder to find out.
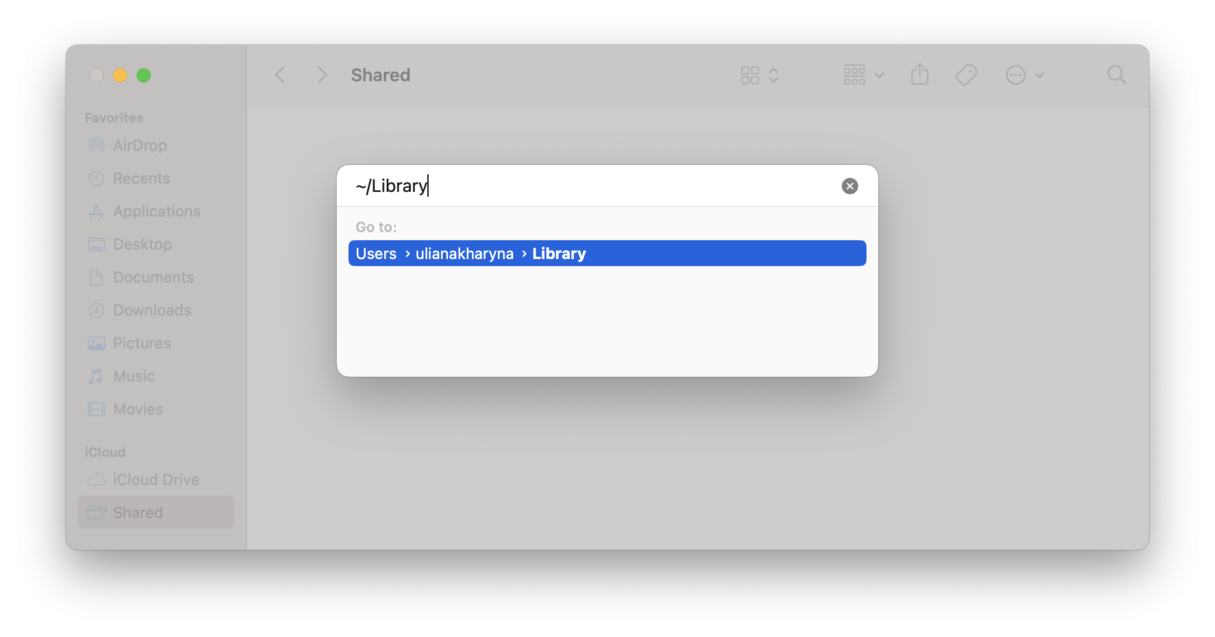
How to access the Library and find out what’s in your Other storage on Mac:
-
Open Finder.
-
Select Go in the menu bar.
-
Click Go to Folder.
-
Type in ~/Library and press Return.
Here, you'll find tons of folders; most of these contain all the items your system labels as “Other.” Obviously, there’s no way of telling which files you can delete.
Tip: Before you start digging around and deleting random files on your Mac, think of a backup. You don't want to delete something that could affect your Mac's performance.
How to delete “Other” storage on Mac
If you follow the tips below, you can free up at least a few gigabytes within your Mac’s “Other” storage.
1. Remove large documents
It's amazing how large documents can pile up over time and start to take up astronomical space. And we forget about these files every time. It's worth taking a look to see what you can remove.
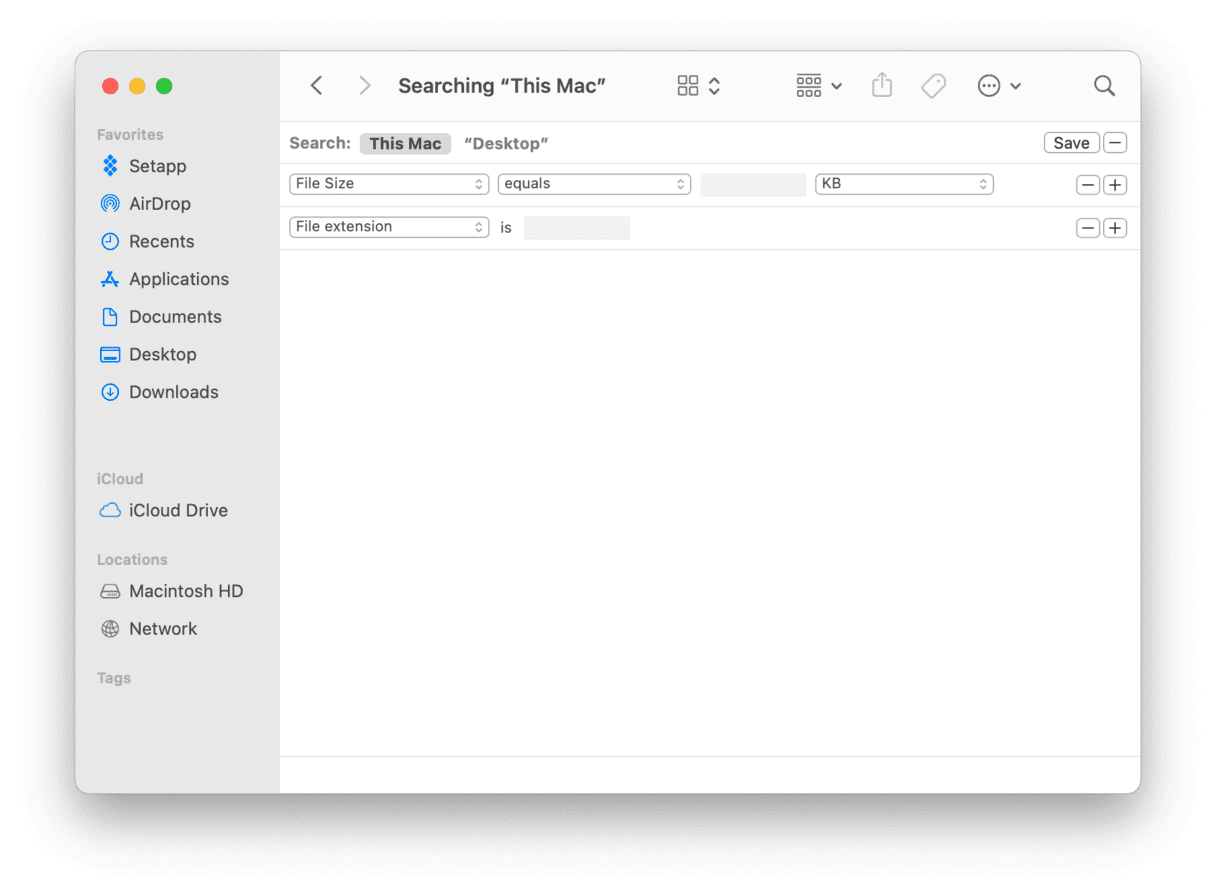
How to delete large files from “Other” space:
-
On your Desktop, press Command + F and click This Mac at the top.
-
In the first dropdown field, select Other.
-
Search Attributes window will open, choose File Size and File Extension from the list, and click OK.
-
Now you can search for different file types like .pdf.
-
Check through all the items and delete what you don't need.
Suppose you don't fancy poking around in your Libary folders, no problem. In that case, there's a much easier way to remove large files by using the Large and Old File tool from our favorite Mac cleaning app, CleanMyMac. You can find it within the My Clutter feature (get your free trial here).
CleanMyMac categorizes your files by type and makes it super easy for you to select outdated items for deletion. This is a fast way to locate “Other” files. This really well-designed Mac cleaner is actually notarized by Apple that it’s safe so as to be included in the App Store.

How to locate and remove large files with CleanMyMac:
-
Open CleanMyMac and select My Clutter in the sidebar.
-
Click Scan.
-
Once the scan is finished, take a look through all the categories and select items for deletion
-
Click Remove.
The same My Clutter feature can detect duplicates and similar images.
2. Remove downloads
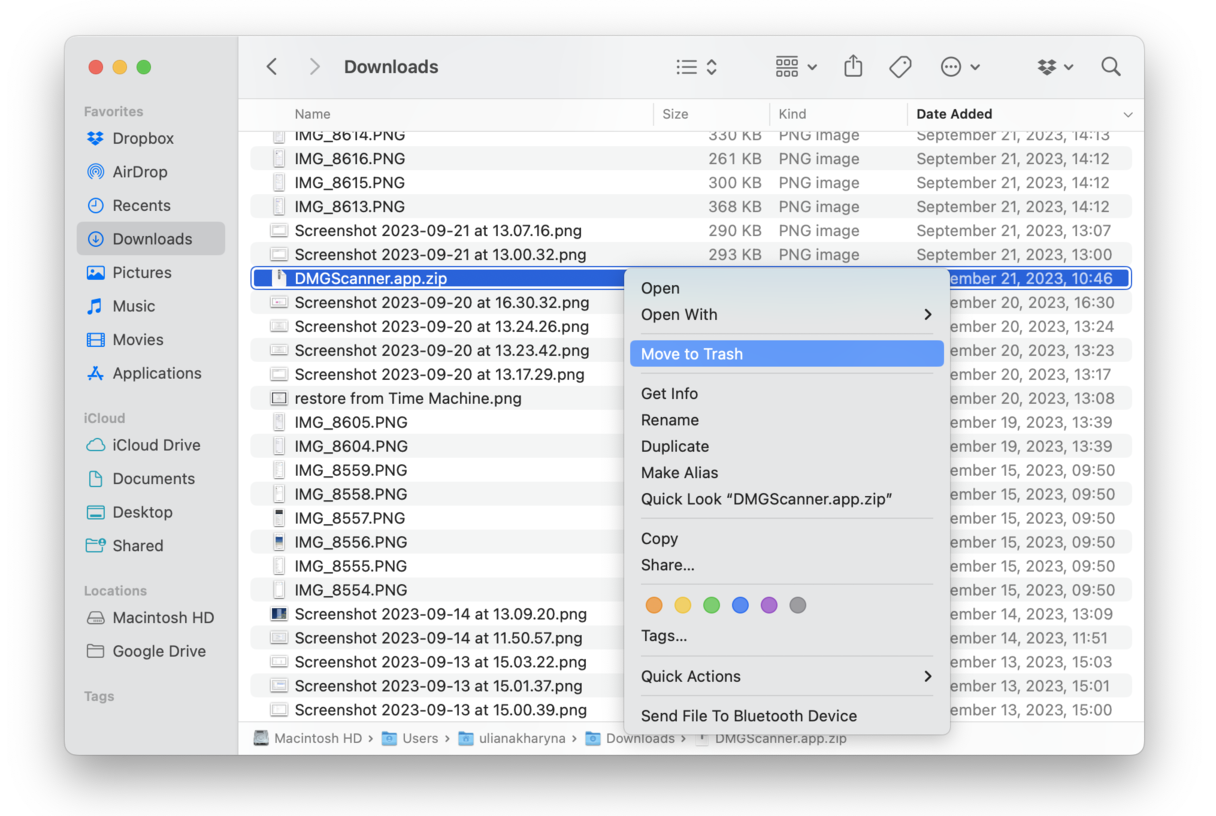
When did you last check your Downloads folder? This is another quick way to clear items that pile up in the Mac “Other” storage category. Old documents, installer packages, and .zip and .dmg files like to hang out here and take up precious space. Here's how to clear your downloads folder:
- Open Finder and select Go from the top.
- Select Downloads.
- Take a look around; you can categorize by file type for ease.
- Remove what is no longer needed by selecting items to Move to Trash.
Tip: In the search bar, you can start typing in file extensions that are known to be large, like .zip. Don't forget to empty your Trash after you’ve finished.
3. Clear cache
Cache files are shortcuts that apps create for faster access. On your phone, as well as on your Mac, these files are notoriously greedy when it comes to space. They build up quickly and take up gigabytes of valuable space.
There are three main types of cache:
-
System caches
-
Cache based on user activity
-
Browser cache
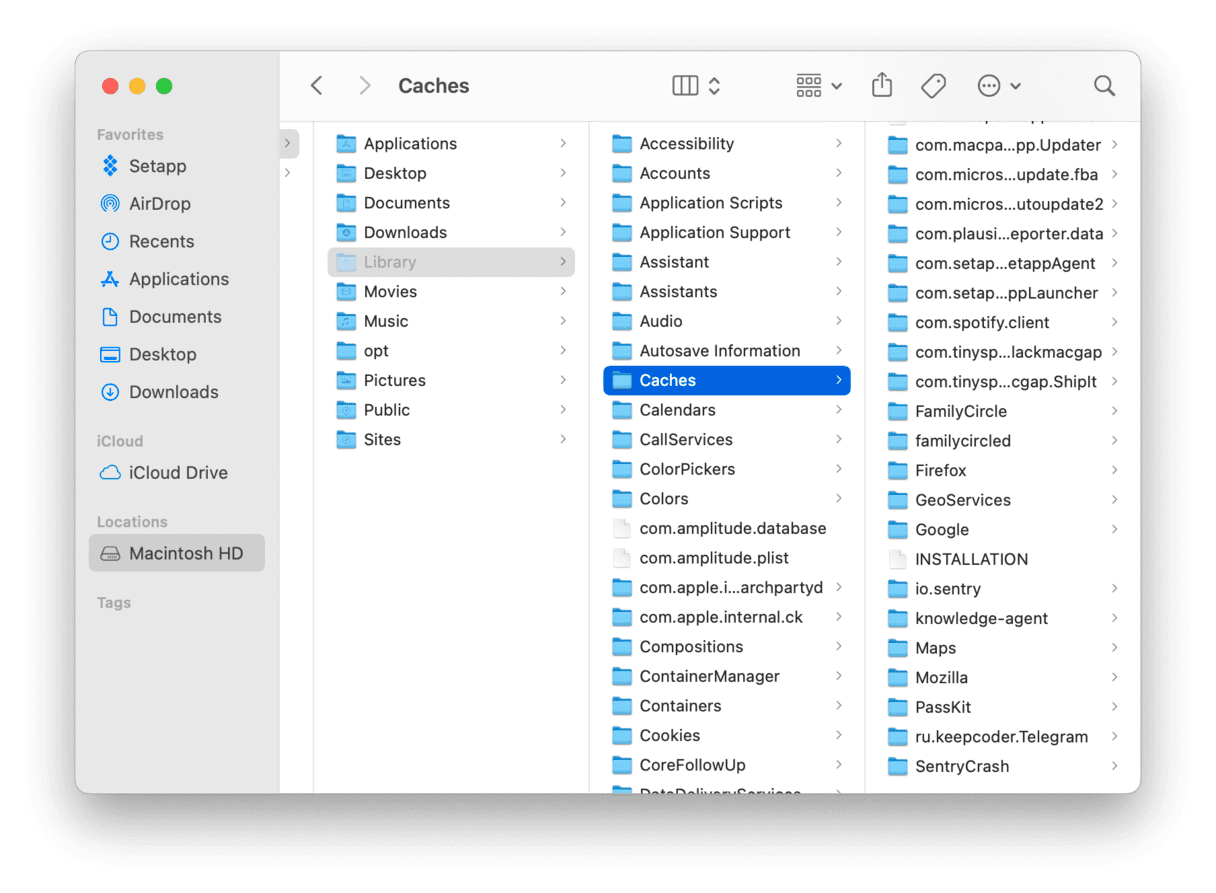
Here's how to manually clear cache files:
-
In the Finder, click Go from the top menu bar and select Go To Folder...
-
Paste in: ~/Library/Caches, then press Return.
-
Make a Time Machine backup of your Mac, just in case.
-
Now, select the unneeded files in those folders and drag them to your Trash.
Note: This is not an authorized way to deal with caches. You might delete something important by mistake. So first, make sure you’ve backed up your Mac using Time Machine. And really, better use CleanMyMac to do the whole thing automatically.
If you would like to proceed, follow the above steps for these folders, too:
-
/Library/Caches (without the "~")
-
~/Library/Logs
This task is a bit tedious, but at least it makes you feel like you’re a hacker. For a more detailed understanding of how to clear cache, check out this excellent instruction on clearing cache.
4. Remove system junk
System junk is another category of files that overlaps with “Other.” It contains all kinds of temporary and broken items, like logs and, again, caches. Removing these is an excellent place to reduce clutter within “Other” storage on your Mac.
The app I previously mentioned, CleanMyMac, has the Cleanup feature that will swiftly and safely remove “Other” files for you, making sure not to delete anything important on your Mac. It even finds your unfinished downloads from years ago!
How to use this helpful tool:

- Get your free CleanMyMac trial.
-
Open the app and select Cleanup from the left sidebar.
-
Click Scan.
-
Wait for the scan to finish, then click Clean.
It's really as simple as that. I try to keep on top of my system junk regularly, but it still managed to find 4GB of system logs, cache, and other temporary files I didn't know were hanging around.
I also like turning to CleanMyMac Assistant while I’m clearing out junk — this AI-powered helper gives fast, clear guidance based on CleanMyMac’s built-in knowledge, so expert help is always just a prompt away.
5. Remove installation files
Remember I told you to check what's in your Downloads folder? If, for some reason, you have not yet cleared out this folder, take your time to delete installation packages, as they usually occupy the most space. These may be in the form of .dmg, .zip, and .pkg files.
Just use the search to quickly delete them and reclaim some space. Do not forget to empty the Trash afterward.
6. Remove extensions and plugins
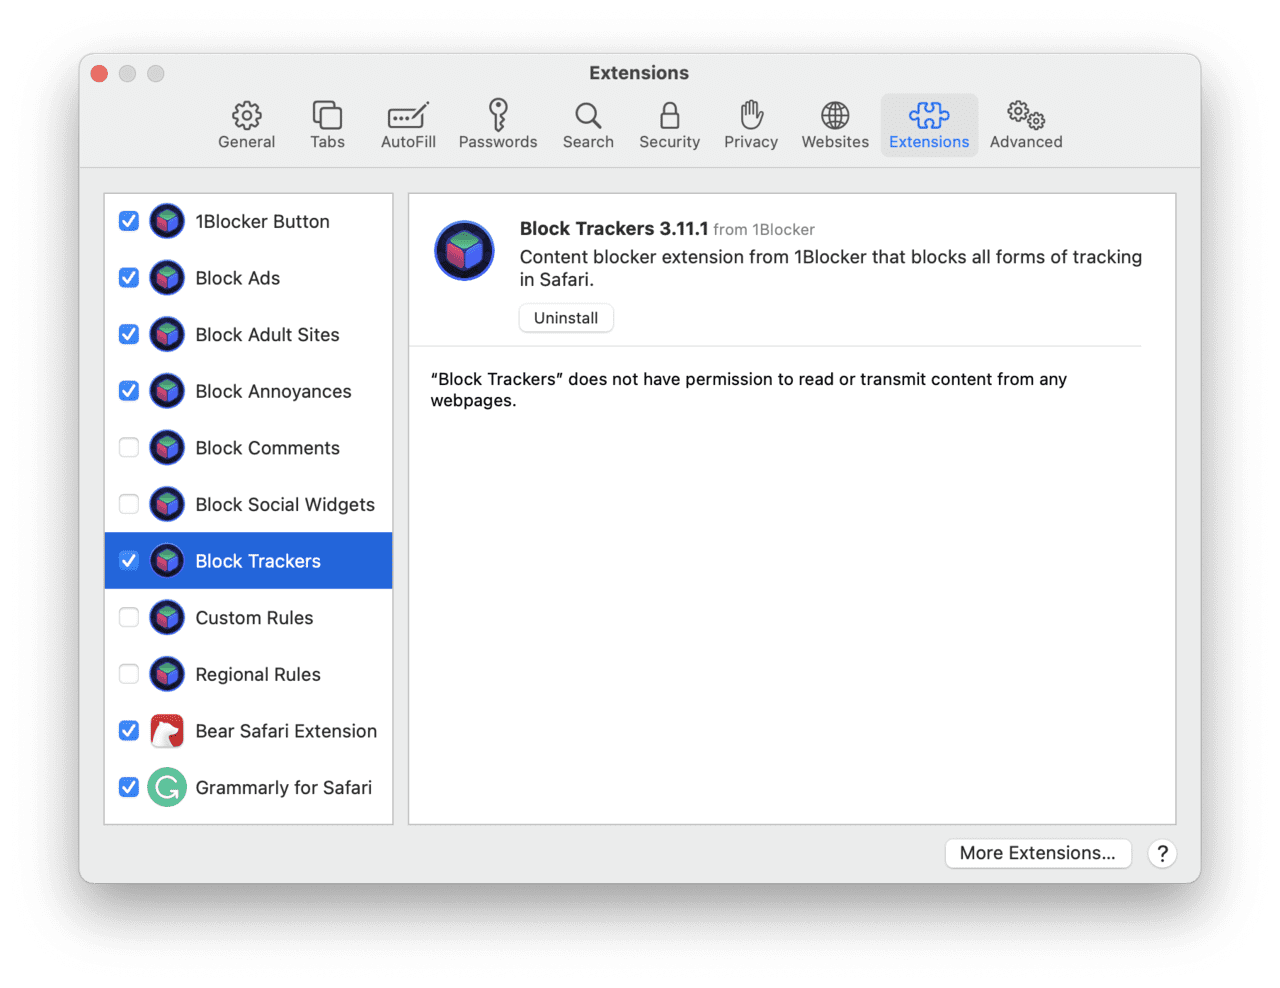
Another place to look for space hoggers is your browser. Or browsers if you use several at a time. You'll have to check and remove unnecessary extensions and plugins.
Safari:
- Open Safari and go to Safari Extensions from the menu bar.
- Click Uninstall next to any extension you do not need.
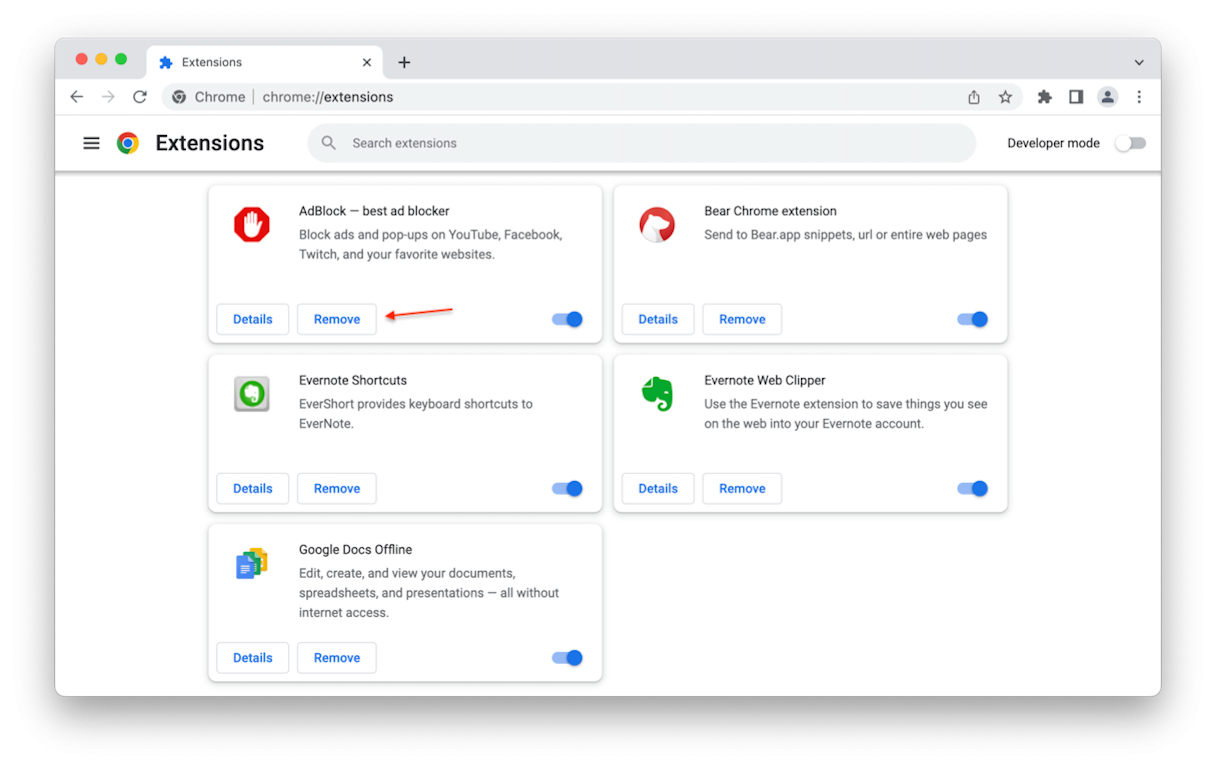
Chrome:
- Open Chrome.
- Click three dots top right > Extensions > Manage extensions.
- Click Remove next to anything you do not need.
7. Remove old iOS backups
If you use your Mac for backing up your iOS devices, your old backups are also labeled as "Other." Fortunately, they can be easily removed. Here's how:
- Open a new Finder window and click Go > Go to Folder.
- Paste the following path and press Return: ~/Library/Application Support/MobileSync/Backup
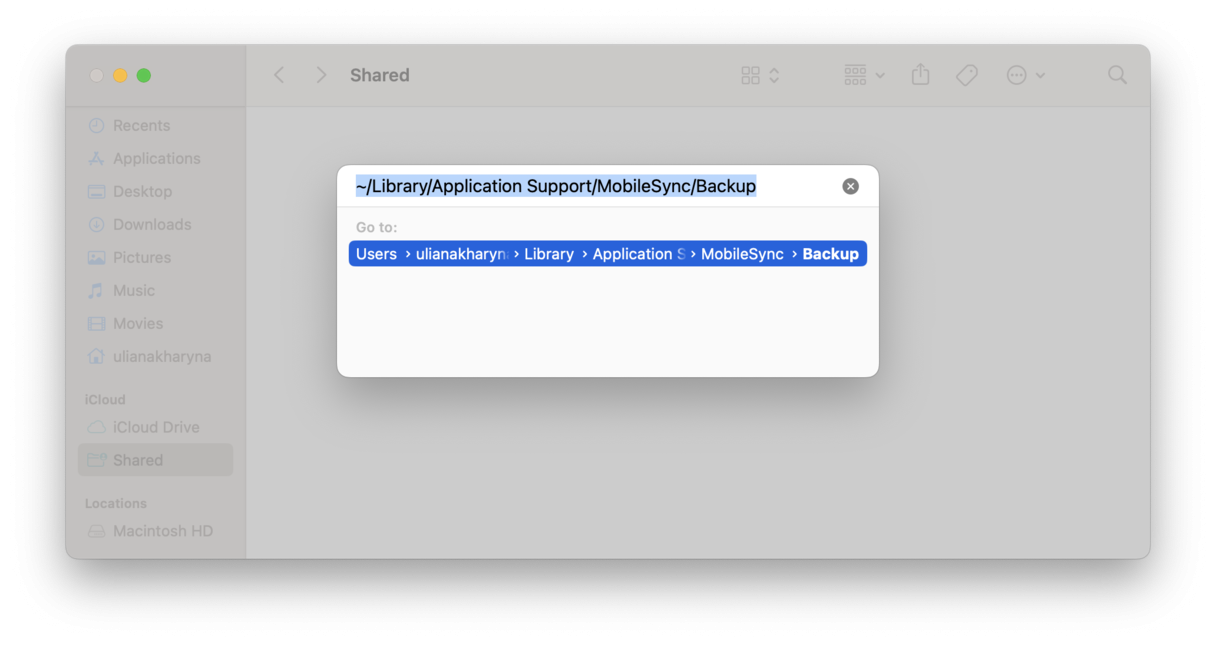
Inspect what's in this folder and send to Trash anything you do not need. Normally, you'd need the latest backup, and the rest can be removed.
8. Optimize storage
Finally, you can use built-in tools for removing the remainder of unnecessary stuff. macOS comes with the Optimize Storage feature that lets you do it. To access it, go to the Apple menu and choose About This Mac > Storage. Click Manage, and you'll see recommendations and the list of categories. Enable recommendations that work for you and browse through the categories to see what else can be deleted.
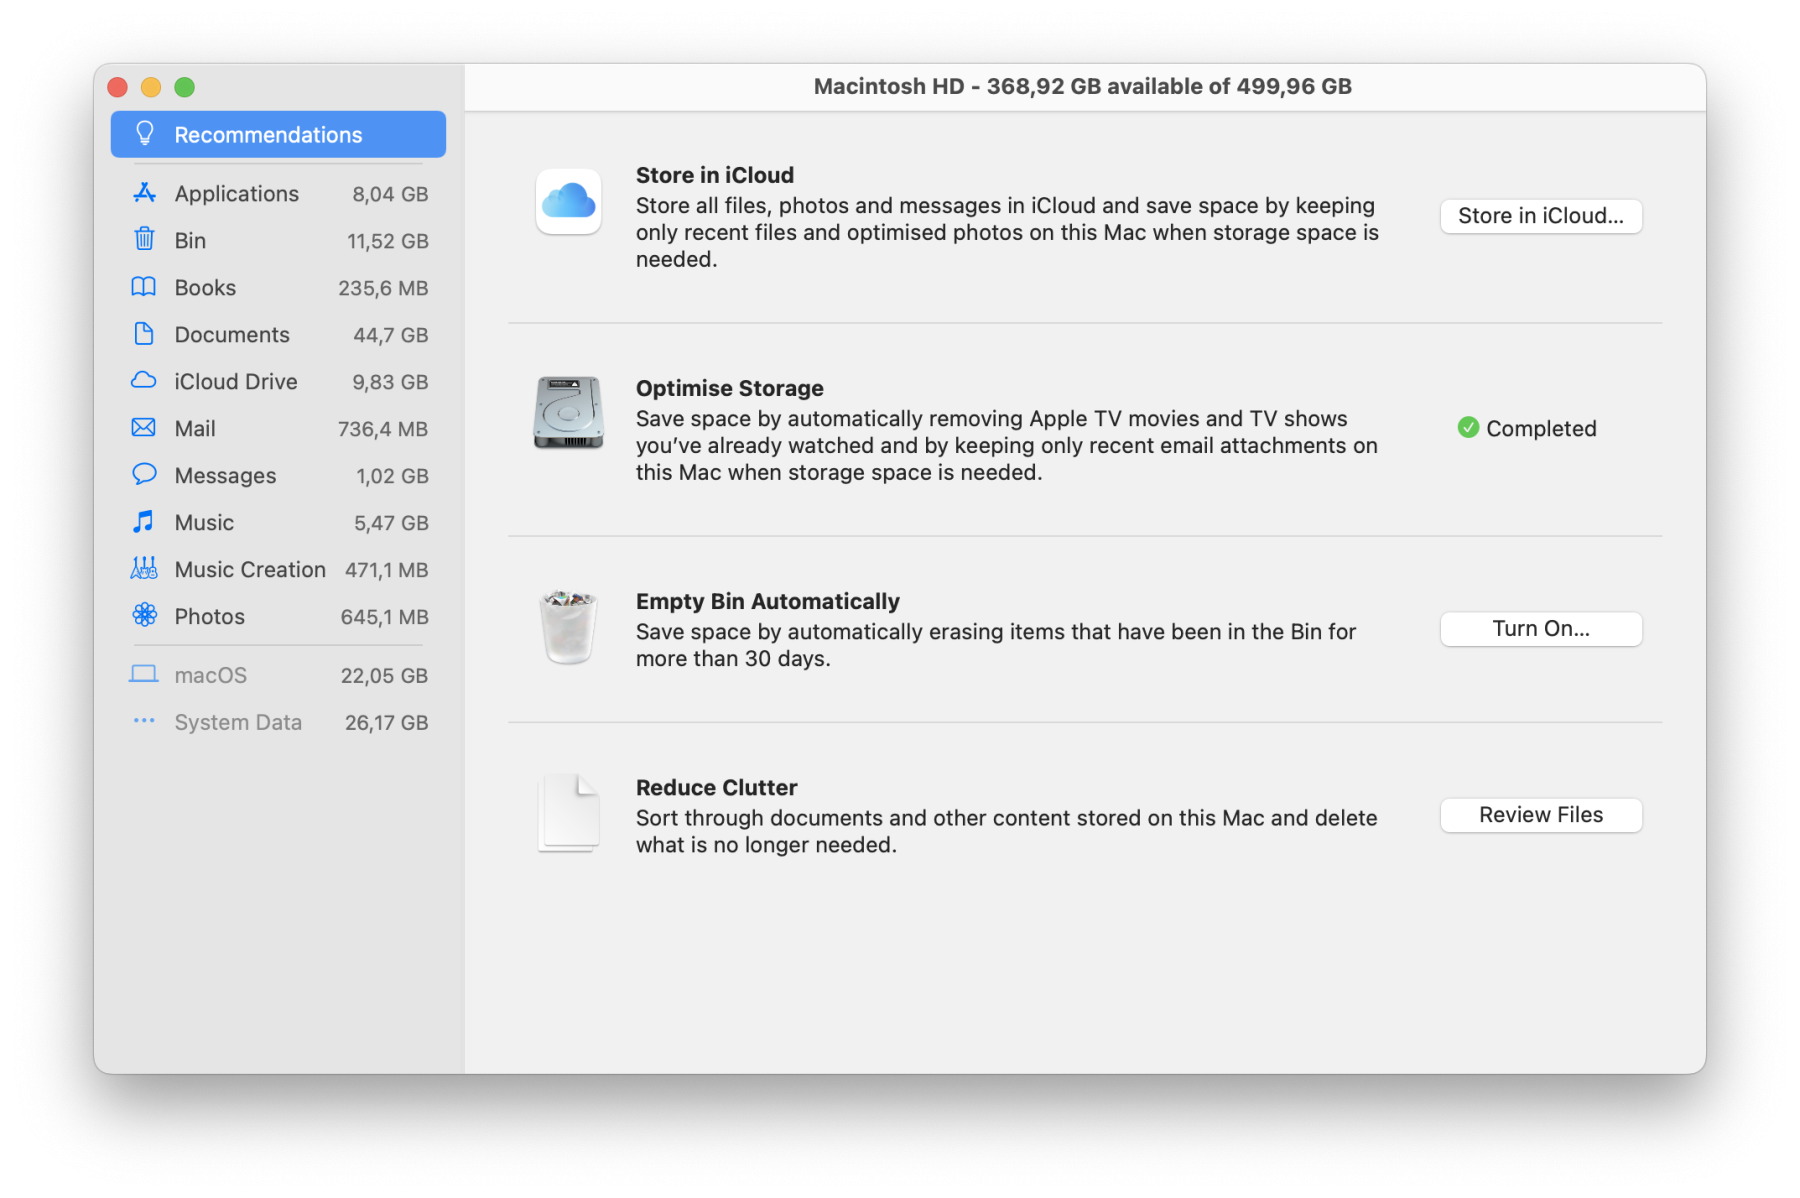
Note the Store in iCloud recommendation. If you enable it, some of your files will be offloaded to iCloud Drive, and so you might want to have more control over it. One way to do it is to browse iCloud settings, and the other (more effectve and automatic one) is to let CleanMyMac help you. Once you connect your iCloud account, you can scan iCloud Drive and reveal the largest files. You can then remove or unsync unneeded stuff and make managing your storage hassle-free.

There you have it, everything you need to know about “Other” files within your Mac storage. Happy hunting for those mysterious files, and here's to reclaiming valuable storage space. Come back soon for more Mac housekeeping tips.

