The zsh: permission denied: / error in Terminal explained
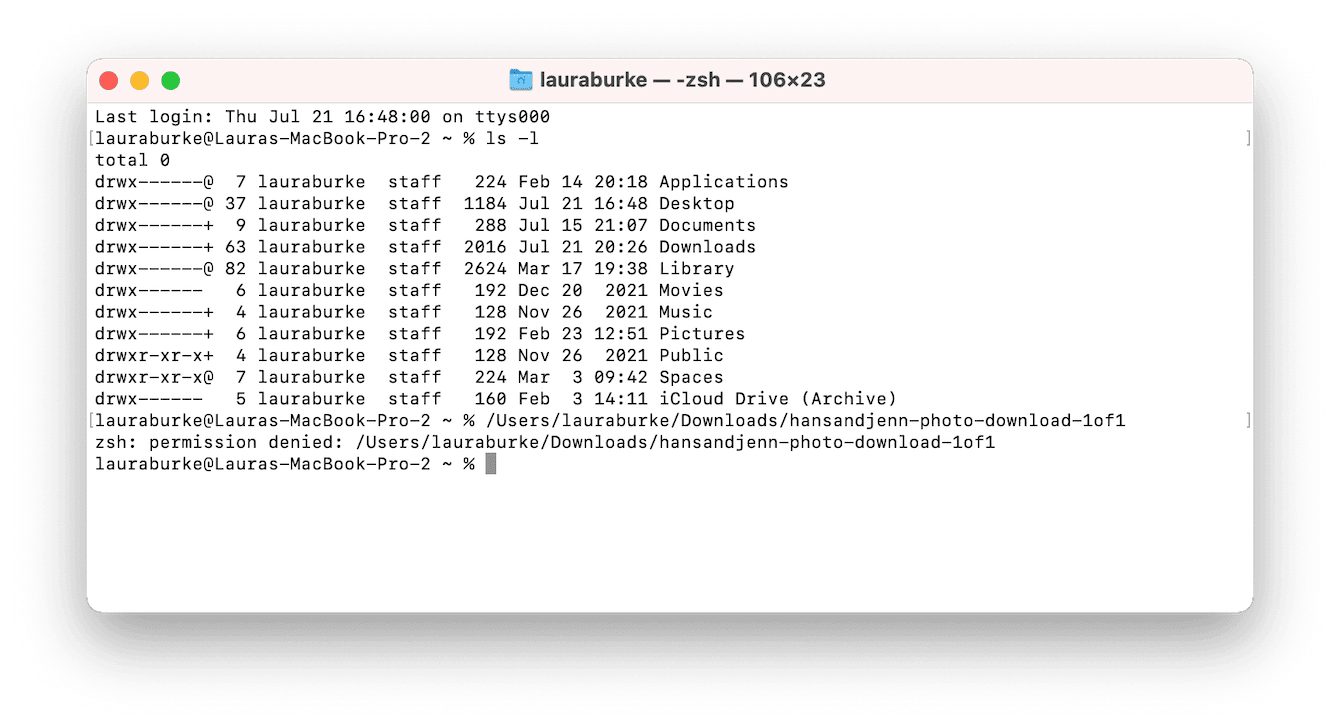
Has the zsh: permission denied: / error message in Terminal left you scratching your head? If you've got a permission error like the one below, look no further! We've put together everything you need to know in this article, including all possible fixes and solutions.
What is zsh on a Mac?
Alright, let's start from the very beginning. On a Macbook, the Shell is a command-line interpreter that can process various commands within scripts on Terminal.
The Terminal application allows users to operate their devices and execute specific tasks with various scripts and commands, such as:
-
Show hidden files and folders.
-
Move files and folders.
-
Download files without a browser.
Originally, bash was the default shell used on macOS, but since macOS Catalina, the default changed to zsh or Z shell.
Zsh is built upon bash and is essentially an extended version with more features. In fact, using it is a no-brainer with the little cherry on top: some tasks don't require strict user permissions anymore, unlike bash.
You could think of zsh as the text input interface that brings our Mac's hardware to life via Terminal.
You can see which Shell your Terminal is operating by looking at the top of any open Terminal window.
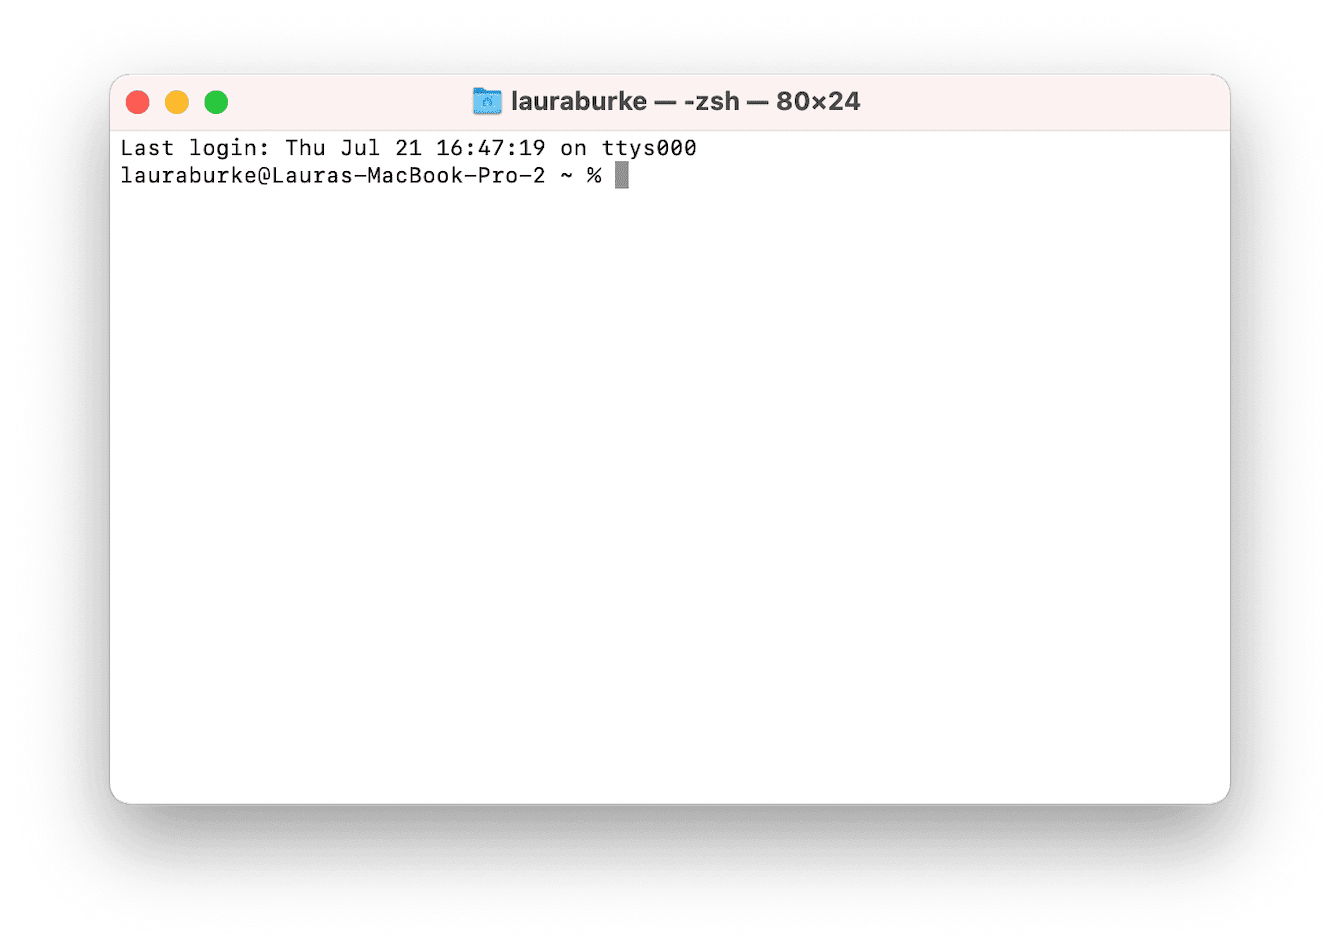
Notice your username, the shell name, and the window's dimensions.
If you've been trying to open a file using Terminal and came across the zsh: permission denied: / error message, keep reading!
What does zsh: permission denied on Mac mean?
Error messages like permission denied on Terminal mean that you've entered a command that couldn't be completed due to a problem with file access. Often, it can be caused by these three common reasons:
-
You entered the wrong command
-
Your file is locked
-
You don't have permission or admin rights to edit or alter the file
It's not always easy to identify why you're having file or folder permission access issues. Sometimes, they simply get broken.
You can often fix and prevent these issues by regularly running the Maintenance module in the CleanMyMac. It has a specific tool that repairs disk permissions and restores broken files and folders access in a few clicks.
Download the free version here, then follow the steps below:

-
Open the app and press Maintenance in the sidebar.
-
Press View all Tasks.
-
Select Repair Disk Permissions and press Run.
If you want to try options that do not include downloading an extra tool to tackle this challenge, jump to the next section for more troubleshooting tips.
How to solve the "zsh: permission denied" error
Before diving into any of the below-troubleshooting tips, it's wise to back up your data with Time Machine, just in case anything goes wrong. Here's how:

-
Be sure your external storage device is connected.
-
From the main Apple menu > System Settings > Time Machine.
-
If it is set up, press Select Backup Disk, pick your external drive, and click Use Disk. Otherwise, click Add Backup Disk and set Time Machine up by following the onscreen instructions.
Before wasting time on advanced troubleshooting, try these manageable hacks first.
1. Check your input text
Ensure you've inputted the correct command text. Yes, this may sound glaringly obvious, but it's surprising how many people miss a space or character from the command line.
Tip: Another common issue with Terminal is "operation not permitted". Here's a guide on how to fix it.
2. Check file permissions
First, let's start by checking the file permissions. Here's how:
-
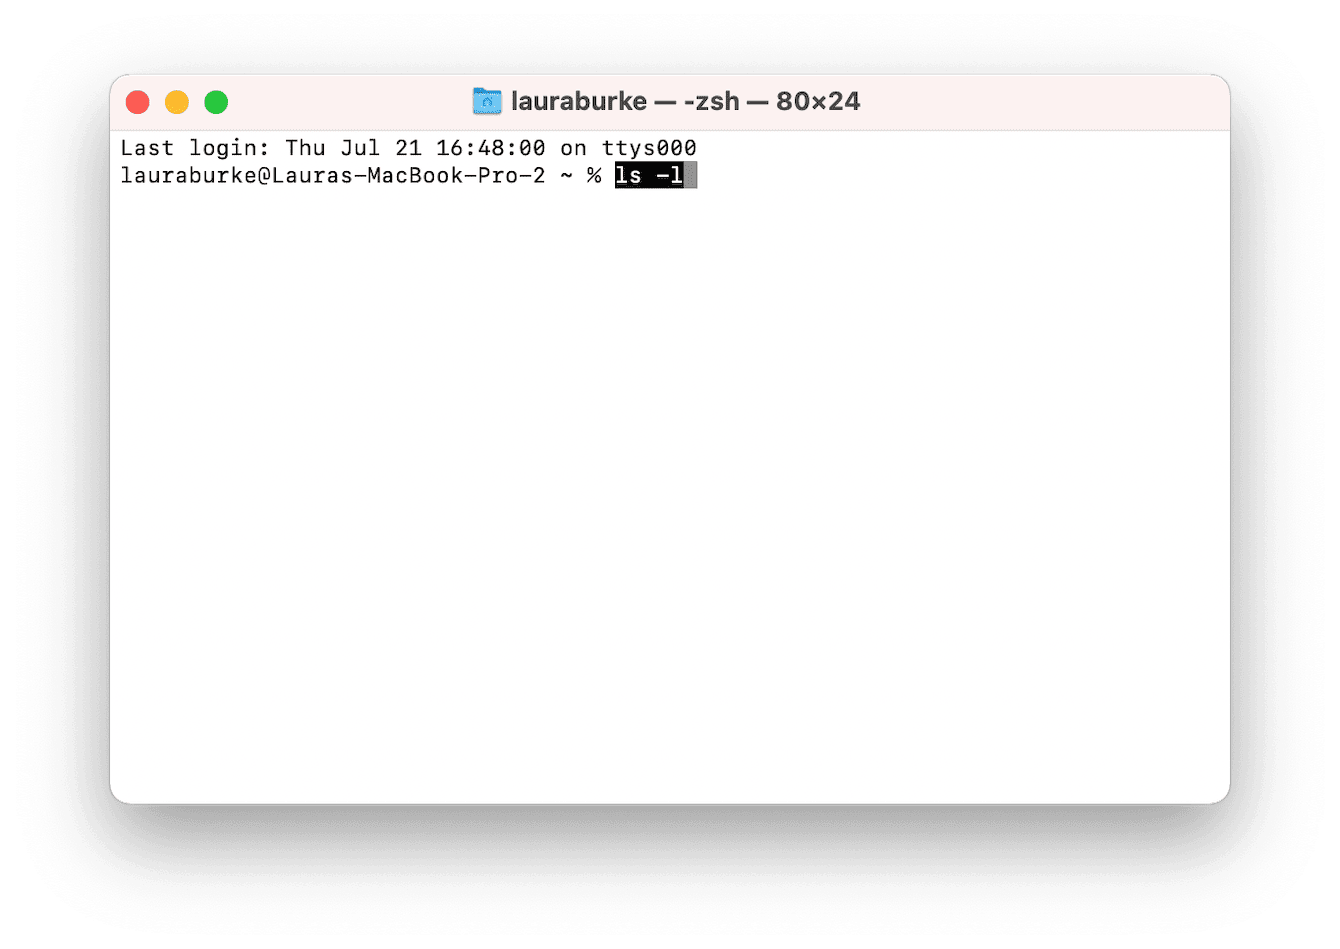
Open Finder > Applications > Utilities > Terminal.
-
Enter the below command followed by a space:
ls -l -
Now, find the file you were working with when you received the error notification and drag it into the Terminal window. Then, press Return.
-
Before your username, you should see a string of characters:
-
rwxr means you can read, write, and execute the file.
-
r means read-only.
3. Modify file permissions
If, after completing the above steps, you've discovered that permissions don't allow you to write a file, that's most likely the cause of the zsh: permission denied: / error message.
Looking for a fix? Try this:
-
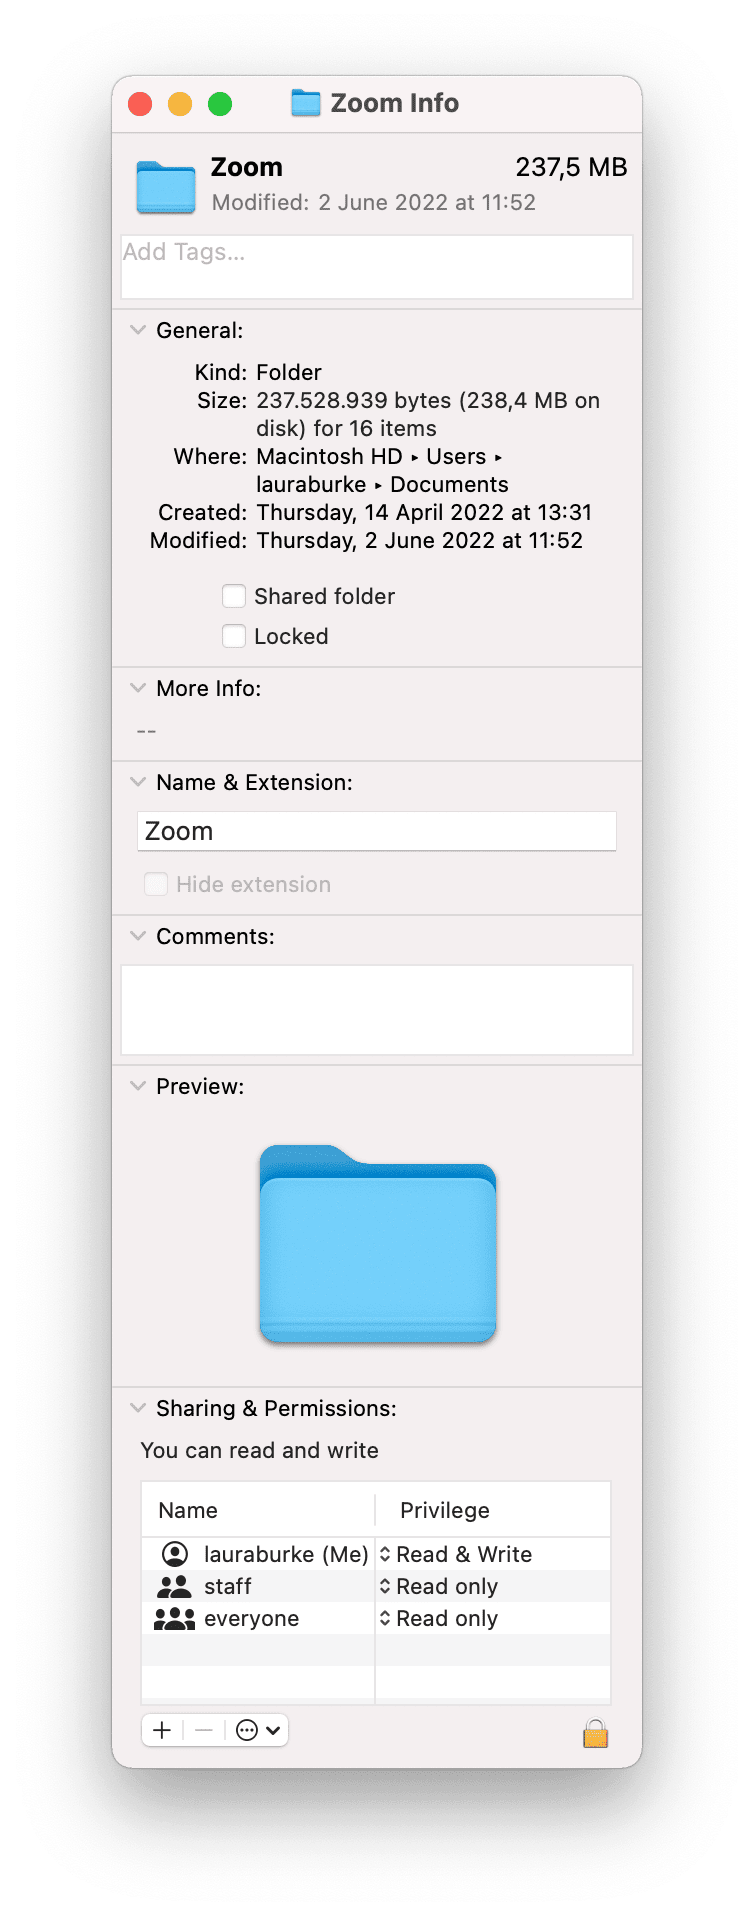
Locate your file, right-click on it, and press Get Info.
-
Press the lock icon bottom right to make or save changes.
-
Under Sharing & Permissions, locate your user profile under Name.
-
Now, under the Privilege column, change this to Read & Write.
Did you know? In some cases, you may see errors related not to Terminal, but your MacBook. One such message is "Your disk is almost full", and here's how you can fix it.
4. Adjust directory ownership
If modifying the file permission didn't fix the issue, try adjusting the directory's ownership using the chown command.
- Open Terminal, and enter the below command, but change $USER to your username and /path/to/directory to the path you want to write.
chown -R $USER:$USER /path/to/directory - Press Return.
5. Ensure Terminal has full access to the drive
In some cases, Terminal doesn't have full access to the drive, which could also be one of the reasons you're unable to open files. Here's what you should do to fix this:
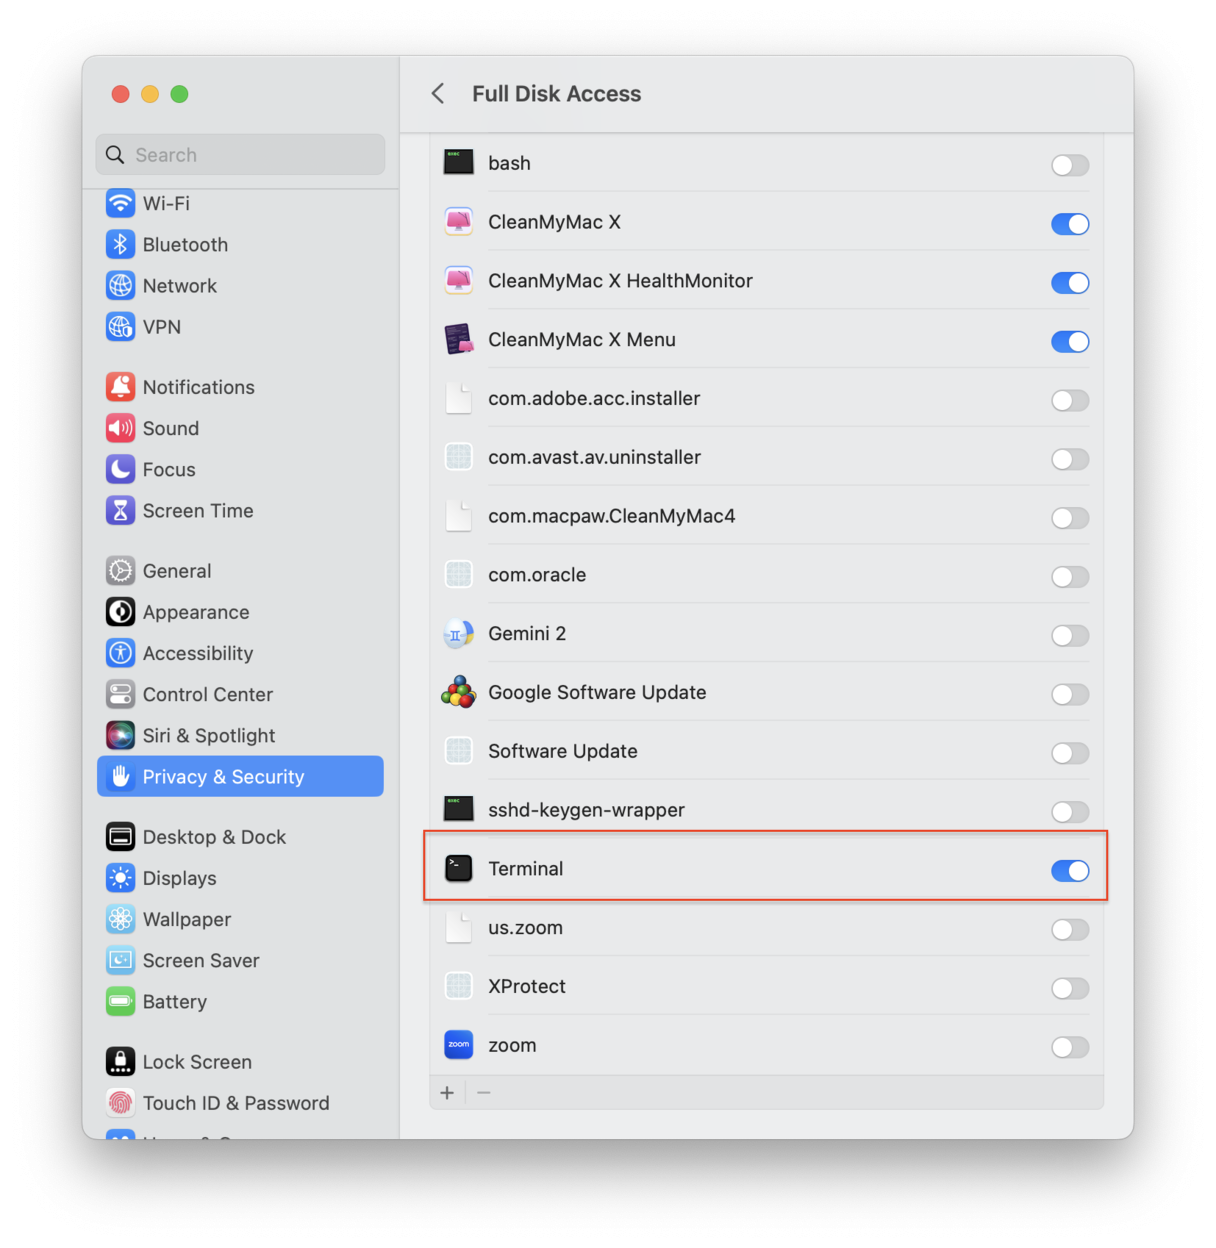
-
Select the main Apple menu > System Settings > Privacy & Security.
-
Locate Full Disk Access from the list.
-
Make sure the Terminal's switcher icon is toggled to on. Confirm the action by entering your admin password.
-
Now, quit and reopen Terminal.
Zsh: permission denied on Mac is an unpleasant matter, but hopefully, these easy-to-follow tips will help you to solve this problem. Now, you have a blueprint of what should be done if you ever reencounter this error. Keep an eye on more Mac tips and hacks from us!

