How to update iOS on iPhone: A Complete Step-by-Step Guide
Knowing how to update your iOS on an iPhone might sound like a background task, but keeping iOS up to date isn't just about getting the latest emojis or UI tweaks; it plays a real role in how secure, fast, and functional your iPhone is.
And before updating, it's a good idea to free up space, too; we'll show you how a little later.
Why You Should Keep Your iOS Up to Date
It's wild how updates have evolved over the years from simple bug fixes into full-blown performance refreshers. In 2025, iOS updates are more essential than ever; performance gains aren't just hype; here's what I've noticed personally every time I keep my devices updated:
-
Security patches are critical: The pace at which new exploits are discovered is no joke. iOS 18.4, for example, patched several zero-day vulnerabilities in just two weeks after release.
-
New features = more usable device: Features like StandBy mode or the Journal app didn't just arrive; they came packed inside iOS updates.
-
App compatibility matters more now: Some banking and productivity apps won't even load unless your iOS is current. Developers are tightening requirements to match Apple's frameworks.
The benefits of knowing how to update iOS on iPhone go far beyond aesthetics; they're tied to security, functionality, and usability in 2025's mobile ecosystem.
Things to Do Before Updating iOS
Here's my checklist, tested and refined after too many rushed updates that went sideways:
-
Check your iPhone's compatibility: Apple usually supports devices for 5–6 years. In 2025, if you've got anything older than an iPhone X, double-check the iOS compatibility list. It may not support the latest version.
-
Connect to Wi-Fi and charge your phone: It sounds simple, but skipping this can lead to partial downloads or errors mid-installation. I always aim for at least 80% battery or plug it in.
Free up storage before updating: iOS updates need space. Not clearing it often leads to the dreaded "Not Enough Storage" pop-up just when you're ready to hit install.
How to Free Up Space for the Update
Freeing up storage is one of the most common blockers during an iOS update, especially if you're running low on space to begin with. Here's a fast, reliable mix of what I personally use before every major update:
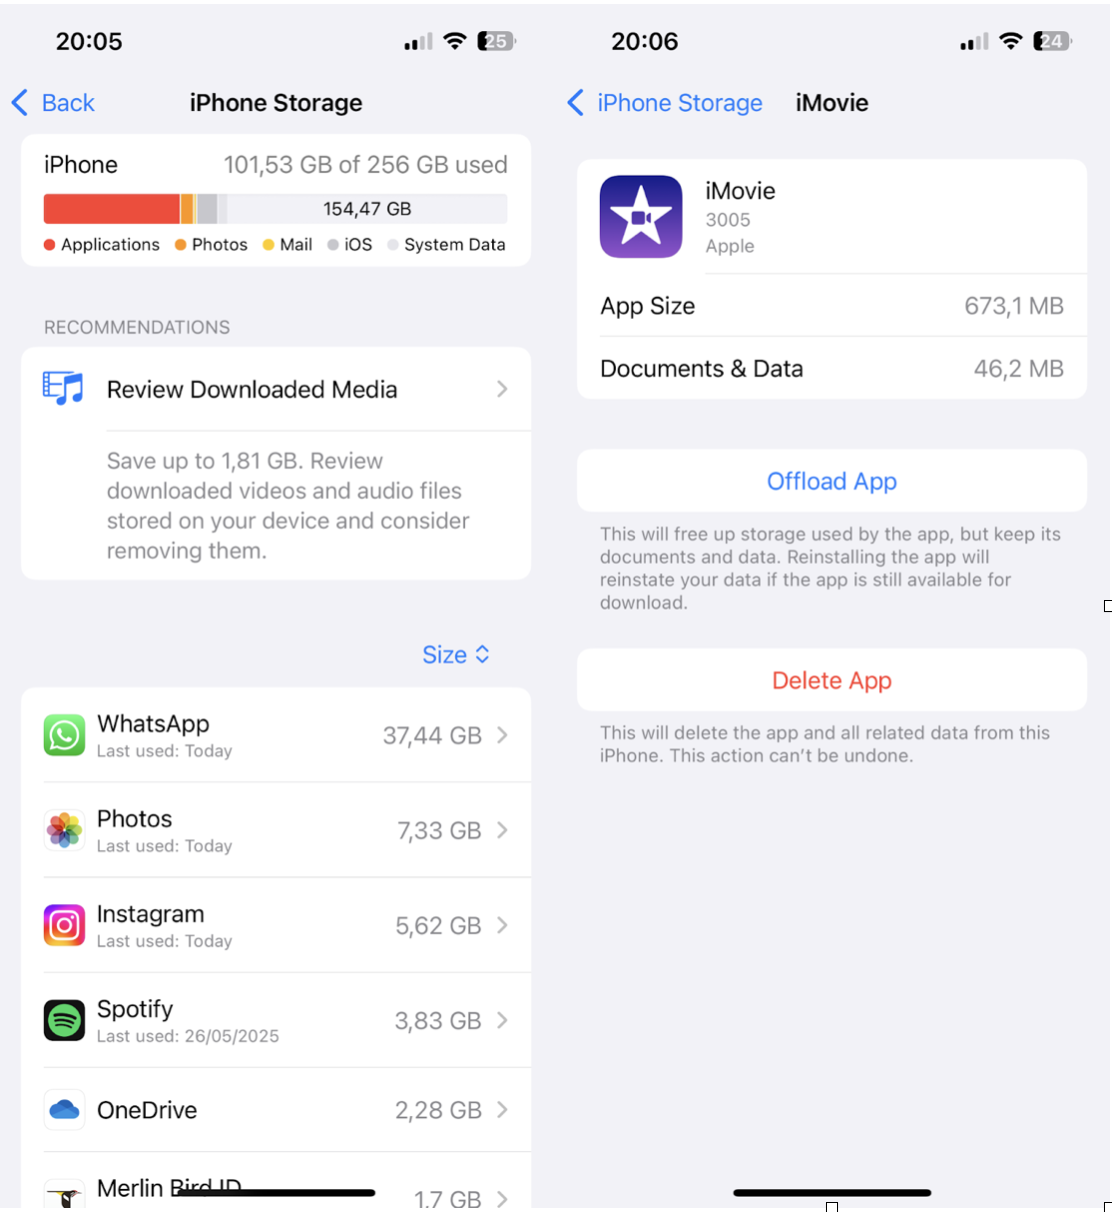
#1 Offload unused apps
-
Go to Settings > General > iPhone Storage.
-
Select any apps you don't use often and press Offload App.
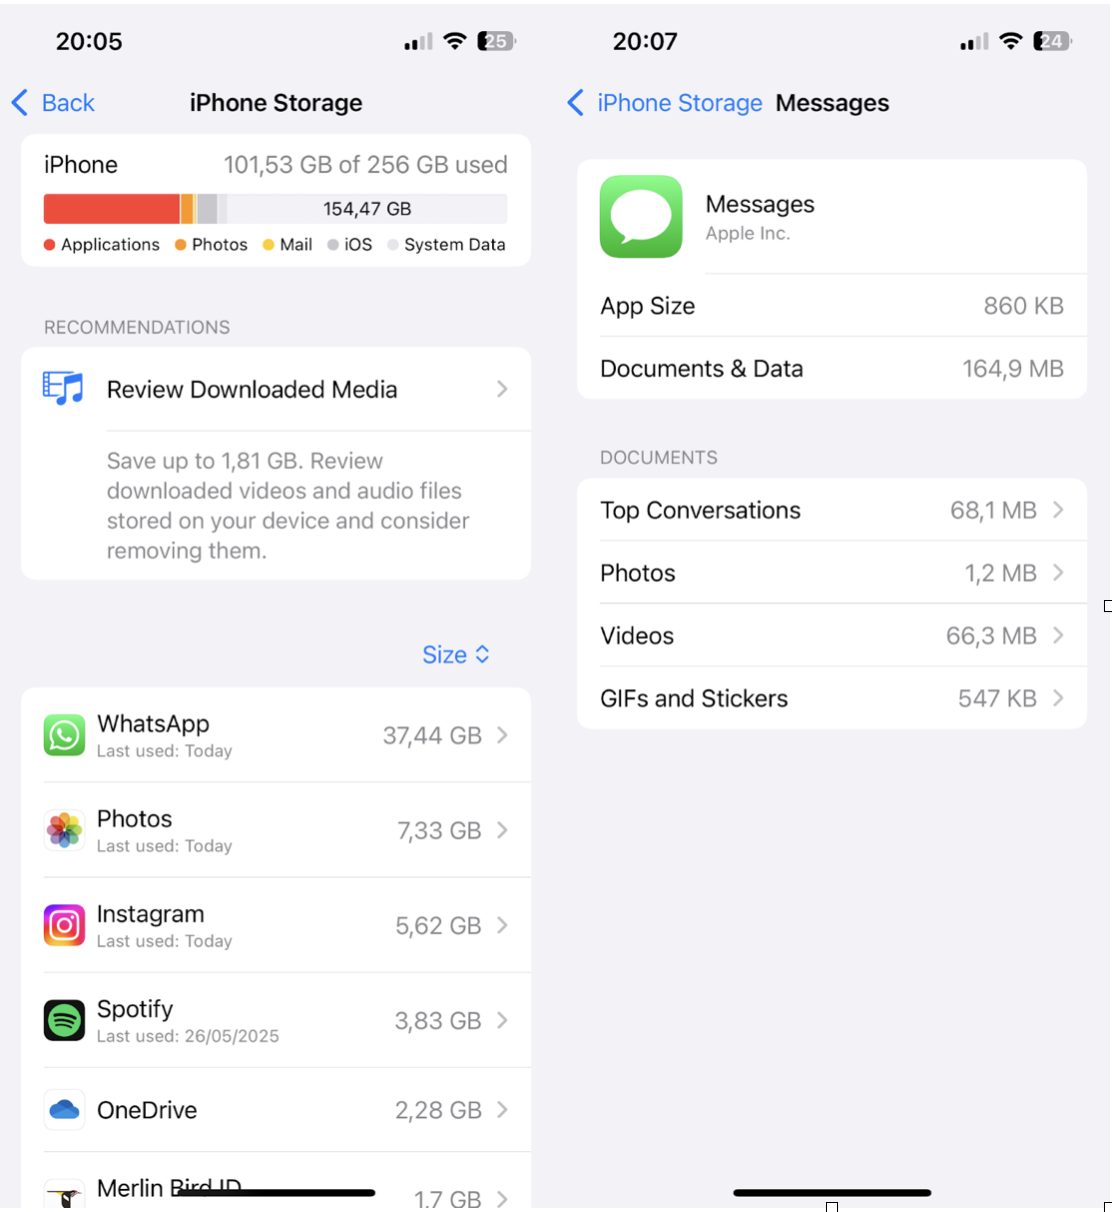
#2 Clear old Messages and downloads
Messages often store years of videos, voice notes, and memes; removing them can free up space.
-
Go to Settings > General > iPhone Storage
-
Press Messages > Review Large Attachments to delete them fast.
#3 Back up and remove local media
If you use iCloud, Google Photos, or an external drive, move large photos and videos off your device before the update. I usually back up vacation footage and delete them locally right before updating.
#4 Use CleanMy®Phone to declutter and organize media
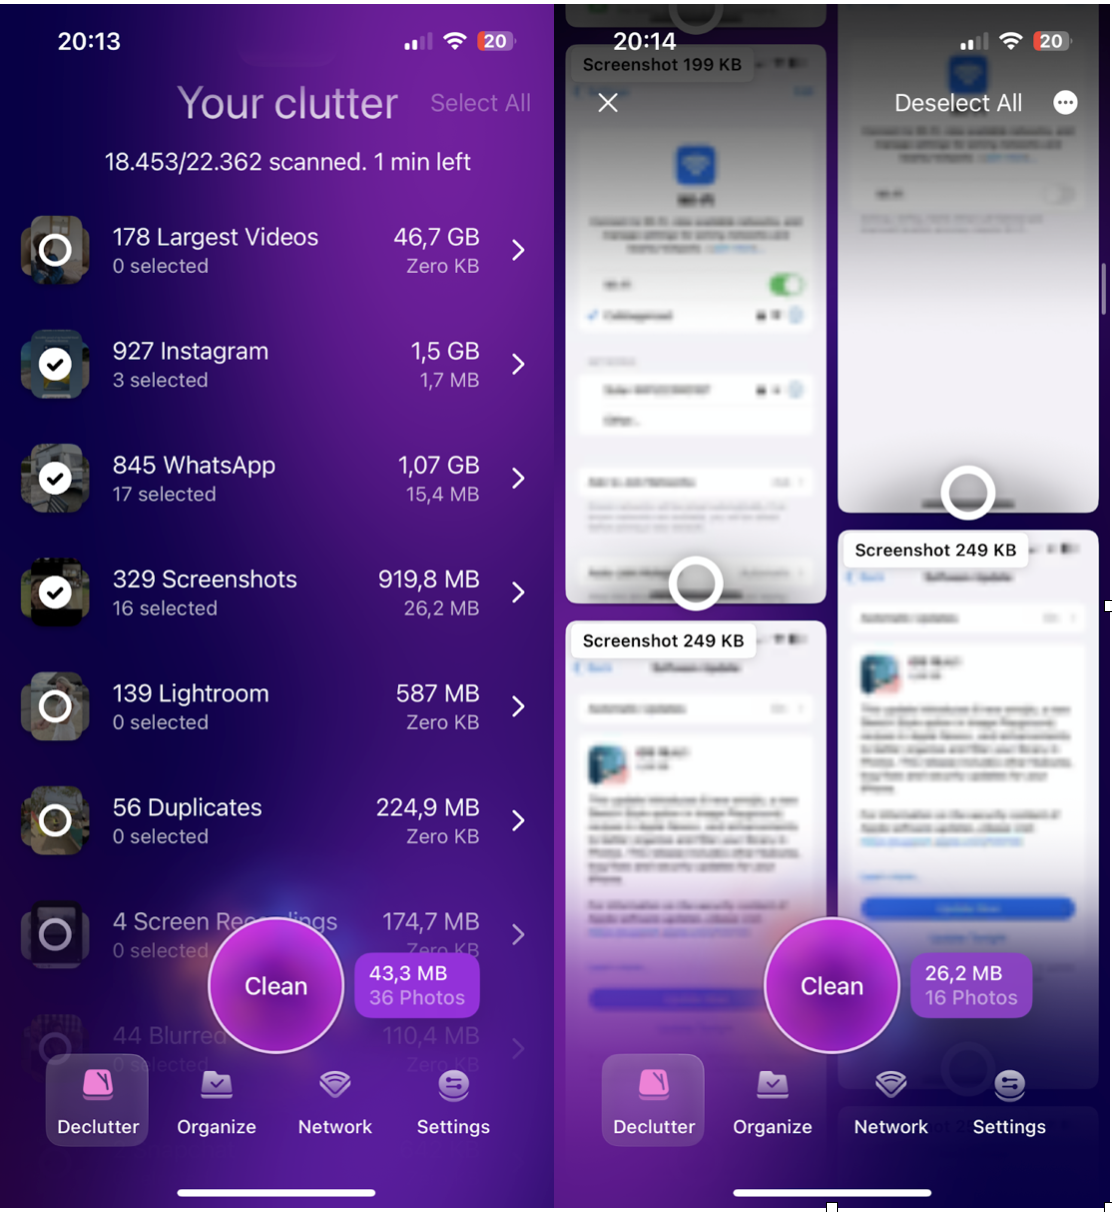
This tip can save you time and space. This smart Apple notarized iOS app comes with two powerful modules: Declutter, to remove Large Videos and unwanted screenshots, and an Organize module, which helps you quickly compress videos and convert Live Photos into still images, a new 2025 feature that's perfect for saving gigabytes.
Here's how to use CleanMyPhone:
-
Open the app and press Declutter.
-
Take a look through any of the categories, but be sure to browse through Large Videos and Screenshots (you can reclaim so much space here).
-
Next, press Organize, take a look at the Compress Video feature, and the Convert Live Photos to still option.
It's a quick, focused way to clean up without digging through every album or setting yourself.
How to Update iOS on Your iPhone
There are two methods, both straightforward but with subtle differences. I've used both, depending on the situation.
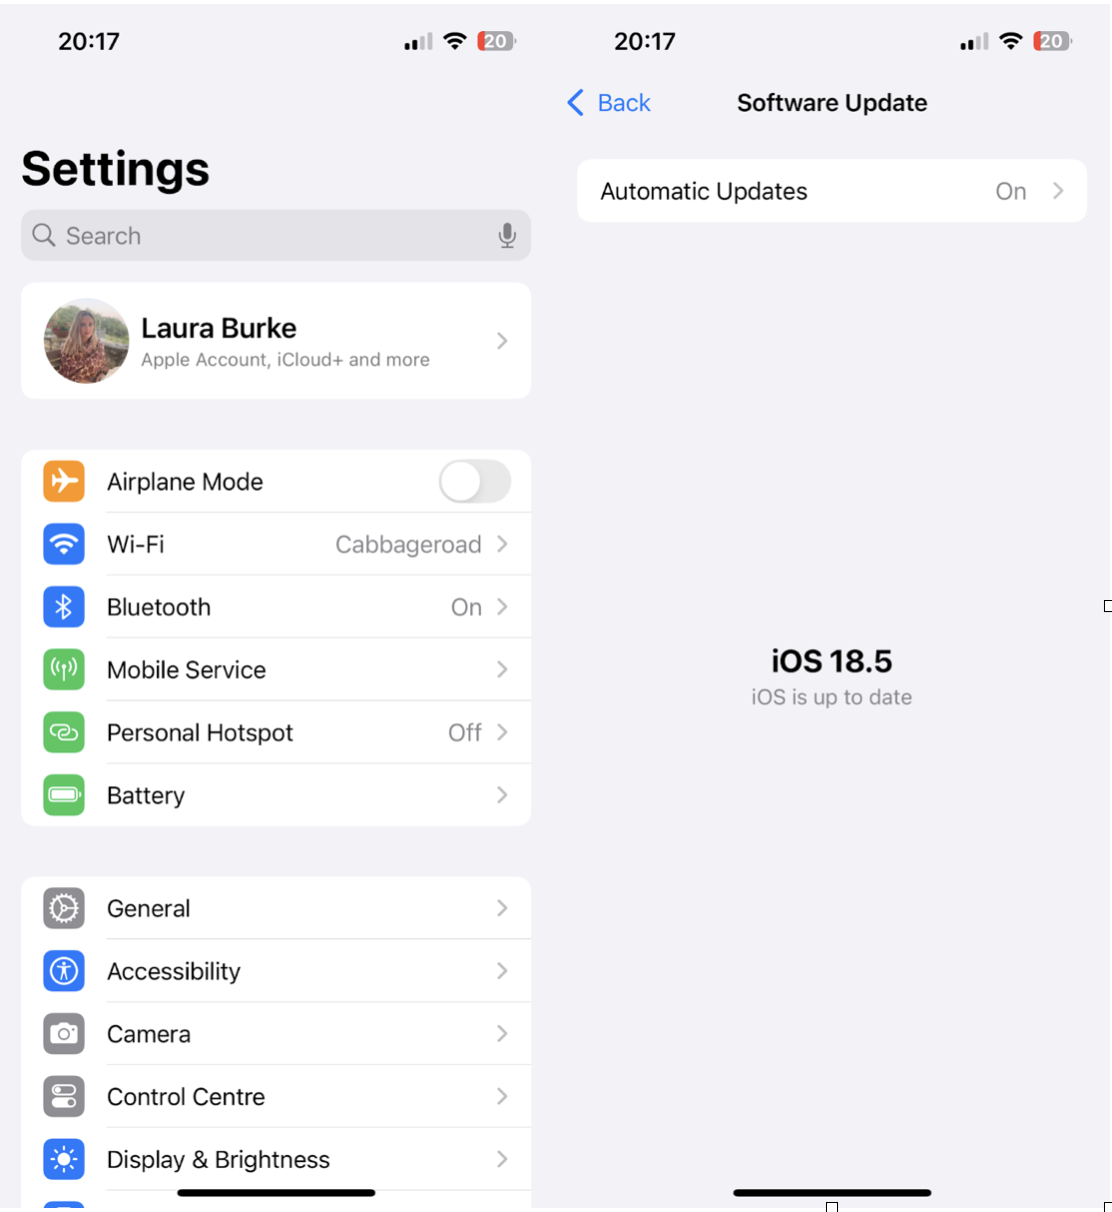
Method 1: Update iOS on iPhone via Settings
-
Open Settings > General > Software Update.
-
If available, tap Download and Install.
Tip: If no update appears, try restarting your iPhone and double-checking your Wi-Fi connection. I've also had success toggling Automatic Updates off and on again to force refresh the update server.
Method 2: Update via Finder or iTunes
Sometimes, this method is a lifesaver, especially when space is limited or Wi-Fi is unreliable.
-
Connect your iPhone to your MacBook.
-
Open Finder (macOS Catalina and later) or iTunes (older macOS/Windows).
-
Select your iPhone, then click Check for Update
-
Follow on-screen instructions
I've used this when my iPhone had barely any space, and Finder managed the process more smoothly than on-device updates.
Common Issues and How to Fix Them
Updating isn't always smooth sailing. Here's what's caught me off guard and how I fixed it.
#1 Run CleanMyPhone again
If you skipped this step earlier, here's a reminder: this can really help, especially when you target:

-
Large videos
-
Live Photos to Still images
-
Old media you forgot existed
It frees up just enough space to let the update breathe.
#2 Update Stuck on "Preparing Update…"
I've had this happen a couple of times; here's what helps:
-
Restart your iPhone
-
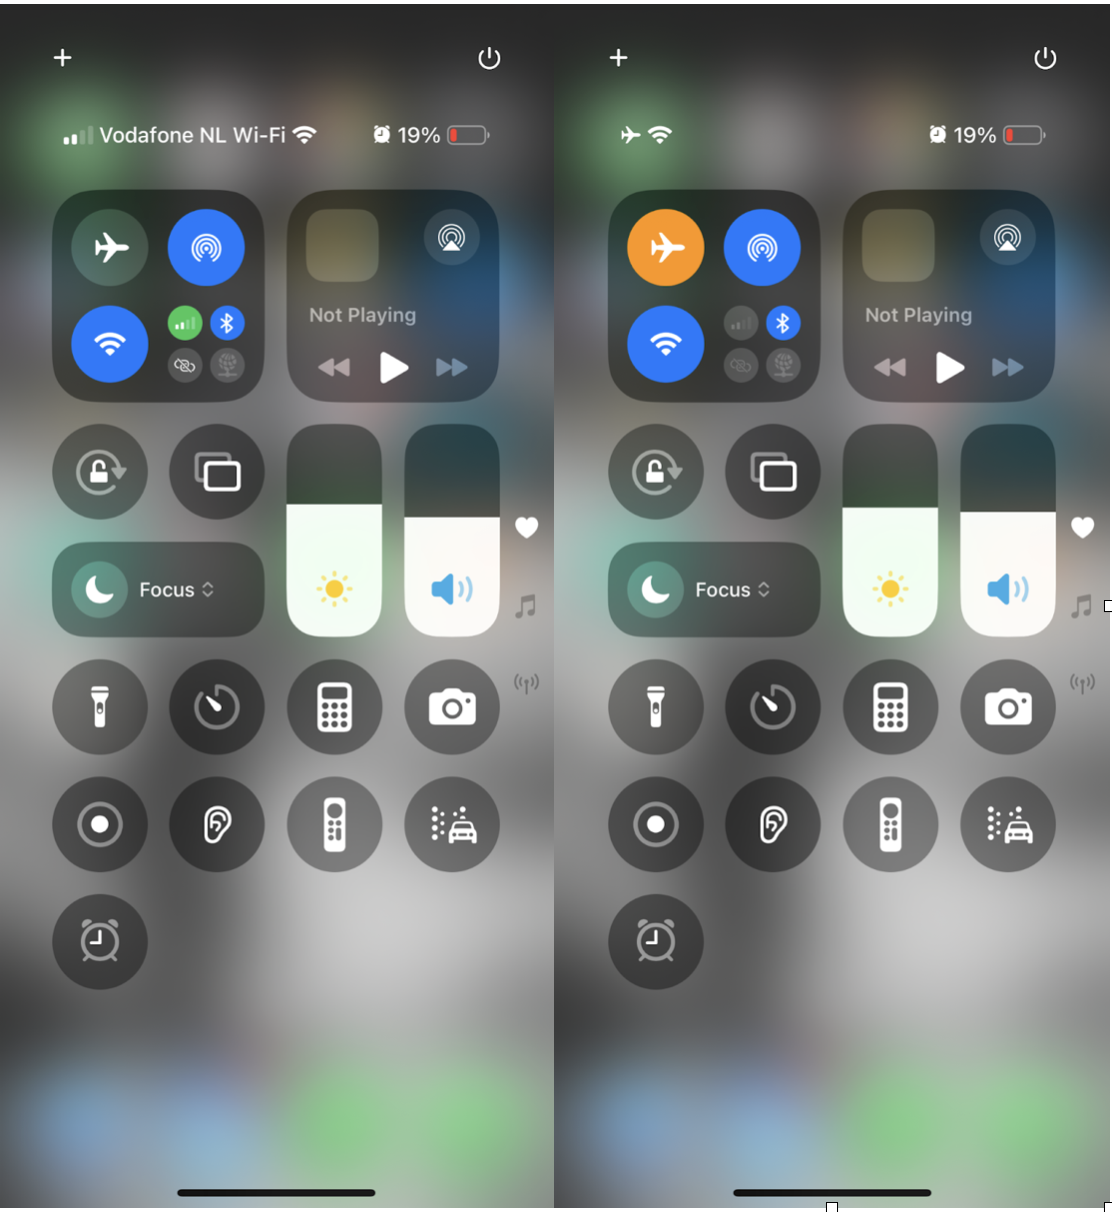
Toggle Airplane mode on/off
-
Delete the update (Settings > General > iPhone Storage > iOS Update) and redownload
If it happens twice, I switch to the Finder method mentioned above.
Final Tips for a Smooth iOS Update
This is what I always do now, and I recommend it to friends too:
- Back up your iPhone: Either through iCloud or a local backup on Finder/iTunes, don't skip this. Restoring is way easier when you've got a clean, recent backup. Here's a handy article on how to backup your iPhone to an external hard drive.
-
Wait a few days: Unless it's a critical security patch, I wait 2–3 days after release.
-
Review your settings post-update: Sometimes updates reset things like Background App Refresh or Location Services. I always double-check battery settings, too.
Updating iOS on your iPhone isn't complicated, but doing it the right way saves you time, space, and potential headaches.


