А guide to Intel Mac recovery mode
When it comes to Intel Mac recovery mode, I've used it more times than I can count over the years, from fixing boot loops to reinstalling macOS after a failed update. Recovery mode is built into every Intel-based Mac and gives you a set of tools that work independently of your main operating system. It can be a real lifeline for situations where your Mac won't start normally or when you need to perform deep-level maintenance.
How to boot an Intel-based Mac into recovery mode
I still remember the first time I had to do this on an older MacBook Pro. I pressed the wrong keys and thought recovery mode wasn't working, but it turns out the timing is everything.
-
Shut down your Mac completely from your main Apple menu. (Don't just close the lid.)
-
Press the power button and immediately hold down Command - R.
-
Keep holding them down until you see the Apple logo.
-
Then, release the keys and wait for macOS Utilities menu to pop up.

What can you do in Intel recovery mode?
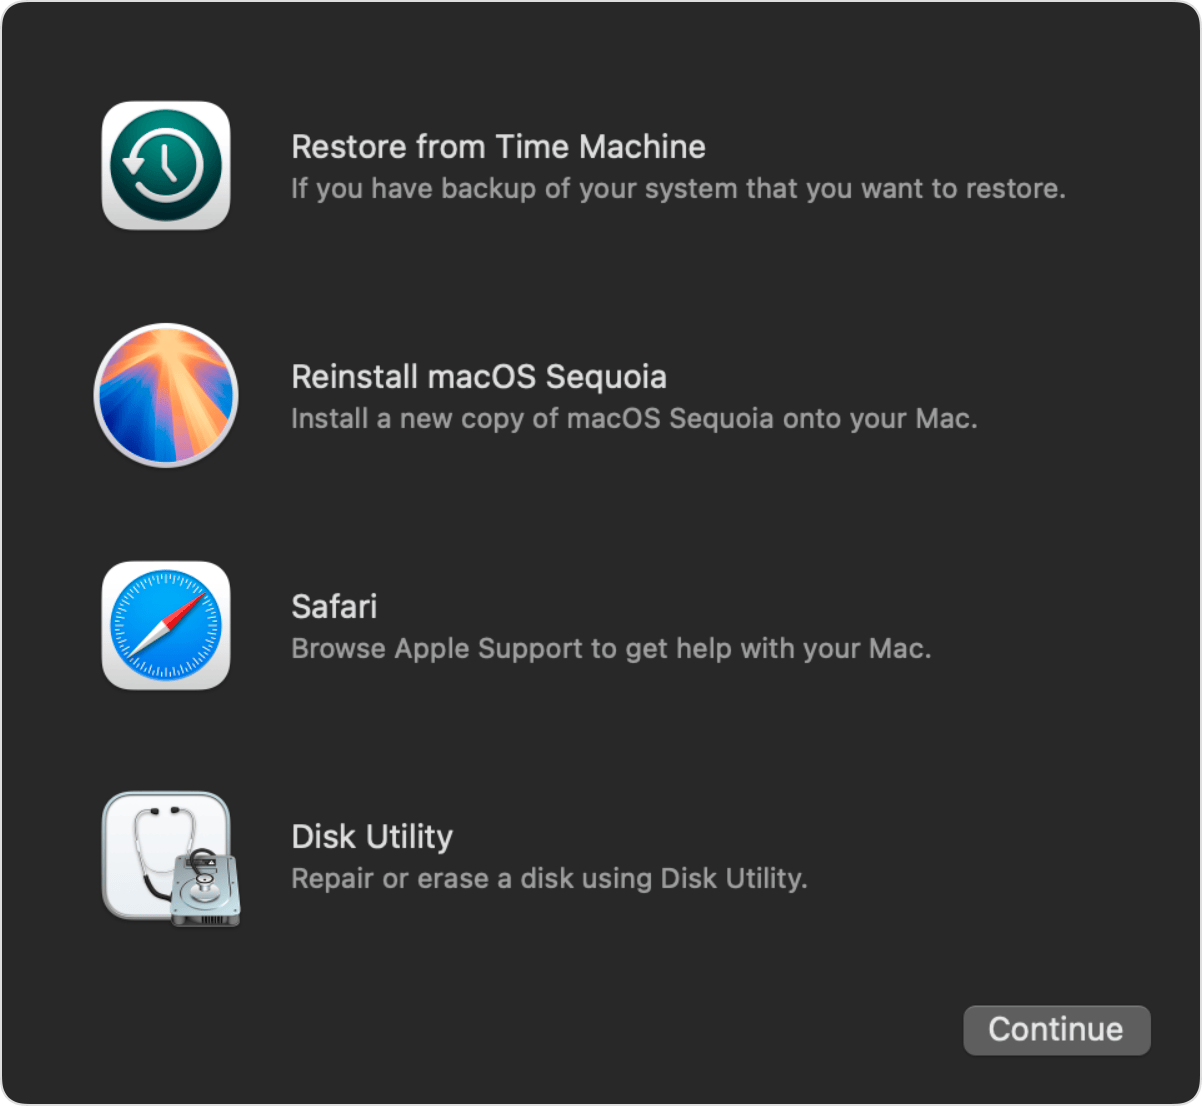
Once you're in recovery mode on an Intel Mac, you'll see the macOS Utilities window. Here's what all the options actually mean.
-
Reinstall macOS: Installs a fresh copy without erasing your data (unless you choose to erase first in Disk Utility).
-
Disk Utility: Let's you repair or erase disks. I've used First Aid here to fix corrupted drives without reinstalling macOS.
-
Restore from Time Machine Backup: Bring your Mac back to a previous state.
-
Safari: Access Apple's support site and online guides for troubleshooting.
Troubleshooting: Intel Mac recovery mode
Sometimes, you're trying to get into recovery mode to fix a wider Mac issue, and you find yourself having issues accessing or using it. It's common; here's a look at some of the most common recovery mode glitches.
1. Recovery mode doesn't load
-
Shut down your Mac properly, unplug all accessories except the power, and try again.
-
If it still fails, use Internet Recovery (Option - Command - R) to load tools from Apple's servers.
2. Disk Utility First Aid can't repair your disk
If First Aid shows an error saying the disk can't be repaired, that usually means the drive has serious file system corruption or even physical damage.
-
Back up your data immediately by opening System Settings > General > Time Machine and connecting an external drive. This ensures you don't lose files if the disk gets worse.

- Erase the disk. In recovery mode, open Disk Utility, choose View > Show All Devices, select your top-level drive, and erase it using APFS (or Mac OS Extended if installing an older macOS).

- Reinstall macOS. Use the Reinstall macOS option from the Utilities window to put the system back on a clean, repaired volume.
Damaged sectors often mean the drive is failing, so keep an eye on performance and consider a replacement if problems return.
3. System reinstall fails due to storage issues
This is where I've found CleanMyMac's Performance feature to be handy. Running the recommended maintenance tasks beforehand can repair disk permissions, clear caches, and optimize storage, making the reinstall less likely to fail; here's how:
-
Get your free CleanMyMac trial — you can test it for 7 days free.
-
Open the app and click Performance > Scan.
-
Under Maintenance Tasks, click Run.

Knowing how to start an Intel Mac in recovery mode is vital for troubleshooting. I've personally used it to bring back seemingly dead Macs without needing a Genius Bar appointment, and in most cases, it's the difference between a quick recovery and a full data loss.

