How to clone a Mac hard drive
So you want to clone a Mac? It sounds like a scary, somewhat challenging subject to many, but it's actually easier than you might think.
Cloning a hard drive basically means creating an exact and precise copy of the original disk, including all of its content and bootable macOS files.
You might be thinking, isn't the native Apple backup feature Time Machine the answer to this problem? Well, Time Machine sure is great at backing up our files and folders, but it's not built to clone an entire drive or bootable macOS data.
To create a clone, you'll need three things:
-
A new or completely erased external hard drive or SSD.
-
Disk Utility and the correct Mac cloner software.
-
Somewhere secure to store your cloned hard drive.
Don't worry; we'll walk you through the steps in an easy-to-understand way, but first, let's discuss reasons to clone.
Why you might need to clone a Mac hard drive
These days, Macs are generally fairly robust, but that doesn't mean they're invincible. Data loss is a horrible issue to deal with, so many users like to create a clone of their hard drive, but that's not the only motivation.
Let's take a look at some other reasons why people want to know how to clone a hard drive on a Mac:
-
To protect data when testing beta Mac operating systems
-
To safeguard data from theft
-
To prepare for an aging or failing hard drive
-
To switch to a new machine or SSD
So, now that we've covered the basics, let's get started with the fun stuff — the Mac clone!
How to clone a Mac hard drive
There are a couple of stages involved in cloning a hard drive, so I've broken this part down into bitesize steps; let's go.
Step one: Preparation
The first step in the Mac clone hard drive to SSD process is preparation. There's no point in making a backup of system junk and clutter, so before you do anything, take some time to clean up your device. Here are a few tips:
-
Remove old and unused apps.
-
Clear up your Desktop.
-
Tidy up your Downloads folder.
-
Remove different types of cache (system, browser, and user cache).
-
Delete duplicate files.
If you haven't got the time to clean up your Mac manually, consider using a dedicated tool like CleanMyMac.
Not only is this application notarized by Apple, but it's perfect for this particular job.
It's got two great modules — System Junk and Large & Old Files — which will help to tidy up your Mac and remove duplicate or unneeded files that don't need to be cloned.
Here's how to tidy your Mac the quick and easy way:

-
Download CleanMyMac for free here or open the app.
-
Locate System Junk from within the sidebar and click Scan.
-
Once finished, click Clean.
That's it; say goodbye to unnecessary language files, old cache, system logs, and useless temporary and broken files.
How to find duplicate or large and old files the easy way:

- Open the app or select Large & Old Files from the sidebar.
- Click Scan.
- Enjoy sorting through your files — search by type, size, or last opened.
- Select files you no longer want and click Remove.
Now you've got rid of all your useless system junk and files, and your data is ready to be cloned; let's head to the next step.
Step two: Format your external hard drive
Next, we'll use Disk Utility to format your external hard drive to ensure compatibility. This process will delete all contents on the drive, so make sure there's nothing on there that you might want later.

-
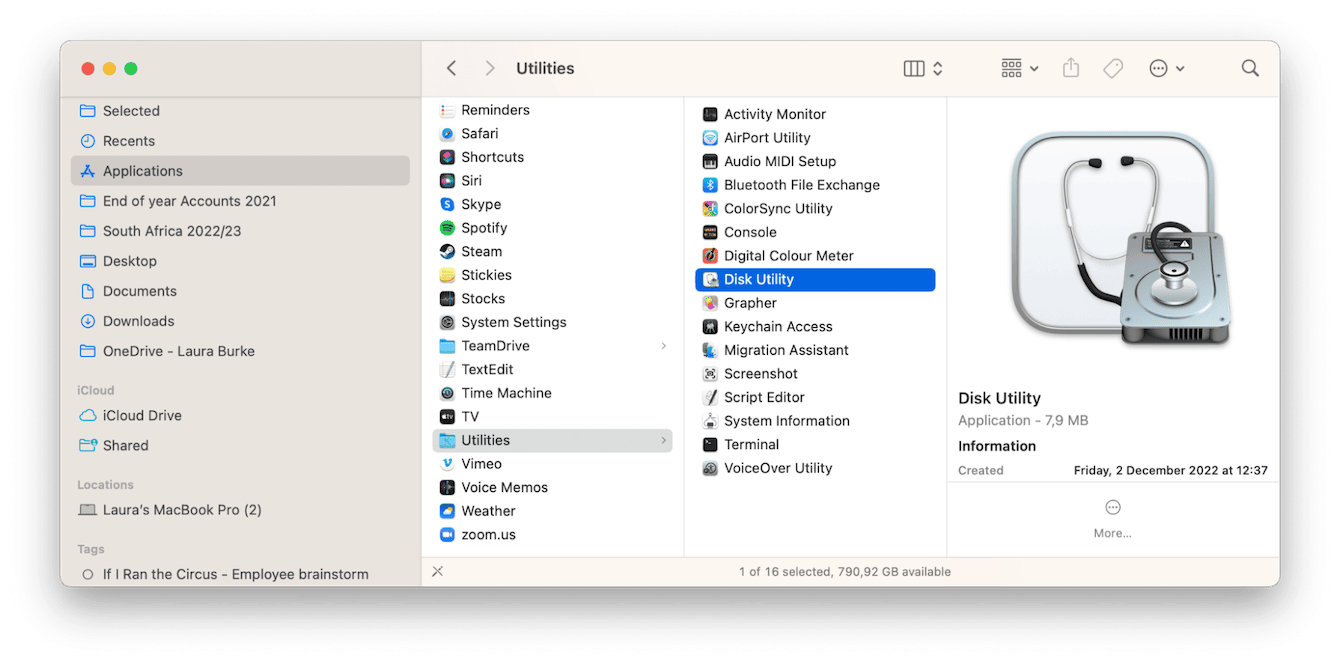
Open Finder > Applications > Utilities > Disk Utility.
-
From the sidebar, select your external hard drive and click Erase from the top menu.
-
In Format, choose Mac OS Extended (Journaled).
-
Click Erase.
Tip: If you need to erase your Mac's hard drive, here's an ultimate guide on how to do it.
Step three: Make a disk image using Mac cloner software
Next, you'll need to create a disk image, which can be done using your chosen cloner software. This will allow you to recover deleted files.
When it comes to finding the right app or software, there are lots of options on the market, but it's ultimately your choice; two of my recommendations are Disk Drill and ChronoSync. Both offer free trials.
For the purpose of this article, I'm using Disk Drill.

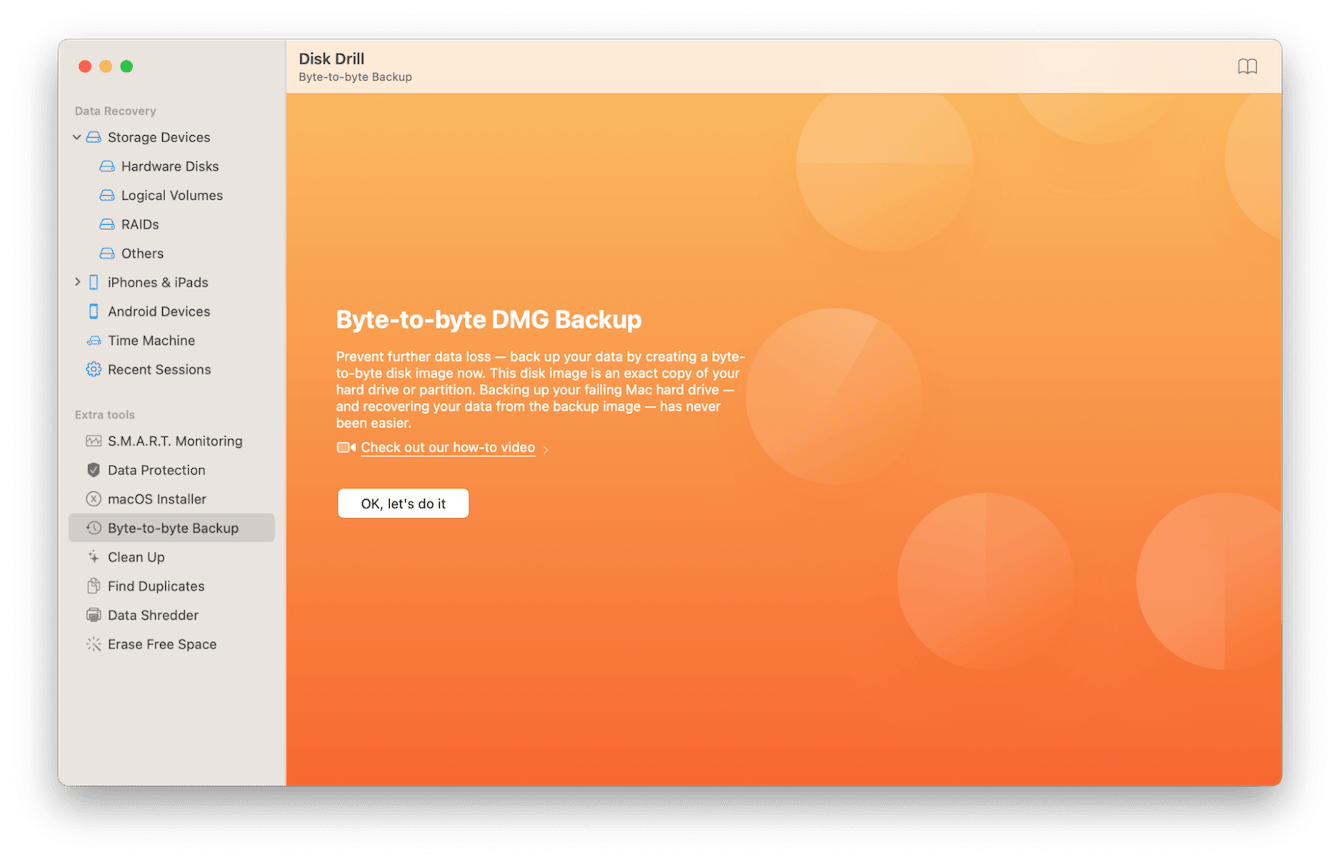
- Open the Disk Drill app and ensure your external hard drive is connected.
- Select Backup from the toolbar, then click Backup into DMG Image.
- From the pop-up, when prompted, click OK, let's do it.
- Select boot disk, then click Backup > save disk image.
- Locate the drive you've just erased and click Save.
That's it; Disk Drill has just made an identical copy of your boot drive as a disk image, and it's saved on your external drive.
Double-click it and mount it into Finder. You can treat it just like other macOS volumes. You can even drop files over from your main hard drive.
Step four: Verify the clone is bootable
It's a good idea to double-check and verify the clone is bootable. Here's how:
-
Restart your Mac but hold down the Option key.
-
You'll see your available drives.
-
Select the newly created drive and wait for your Mac to boot up; this will verify that your hard drive was successfully cloned.
-
It's also a good idea, once loaded, to check a few apps that everything works as expected.
Here are more ways to test a Mac hard drive to ensure that your clone works as it should.
How to restore your Mac from a clone
First, boot your Mac into recovery mode.
For Intel-based Mac:
-
Go to Apple menu > Restart.
-
Immediately press and hold Command+R.
-
Don't release the keys until you hear the Mac's startup sound or until the Apple logo appears.
For Mac with Apple silicon:
-
When turning on your Mac, press and hold the power button.
-
Keep it pressed until you see startup options.
-
Click the Gears icon (Options) and hit Continue.
-
You may be asked to select a user and enter their administrator password. Follow on-screen instructions and press Next after any action you take.
From recovery mode, follow these steps:
-
From the macOS Utilities screen, select Disk Utility > Continue.
-
Find and select your hard drive and go to the Restore tab at the top.
-
Next to Restore From, select your external device. Next to Restore To, select your MacBook hard drive.
-
Finally, click Restore and restart your Mac.
Boot your clone on a different Mac without erasing the original
There might come a time when you want to work on a different device, so booting up from your Clone will come in handy.
People worry that it's not possible without erasing or overwriting the original system, but that's not the case. You'll first need to create a partition, so more than one drive can be used on the system. Here's how:

- Open Disk Utility using the steps from above.
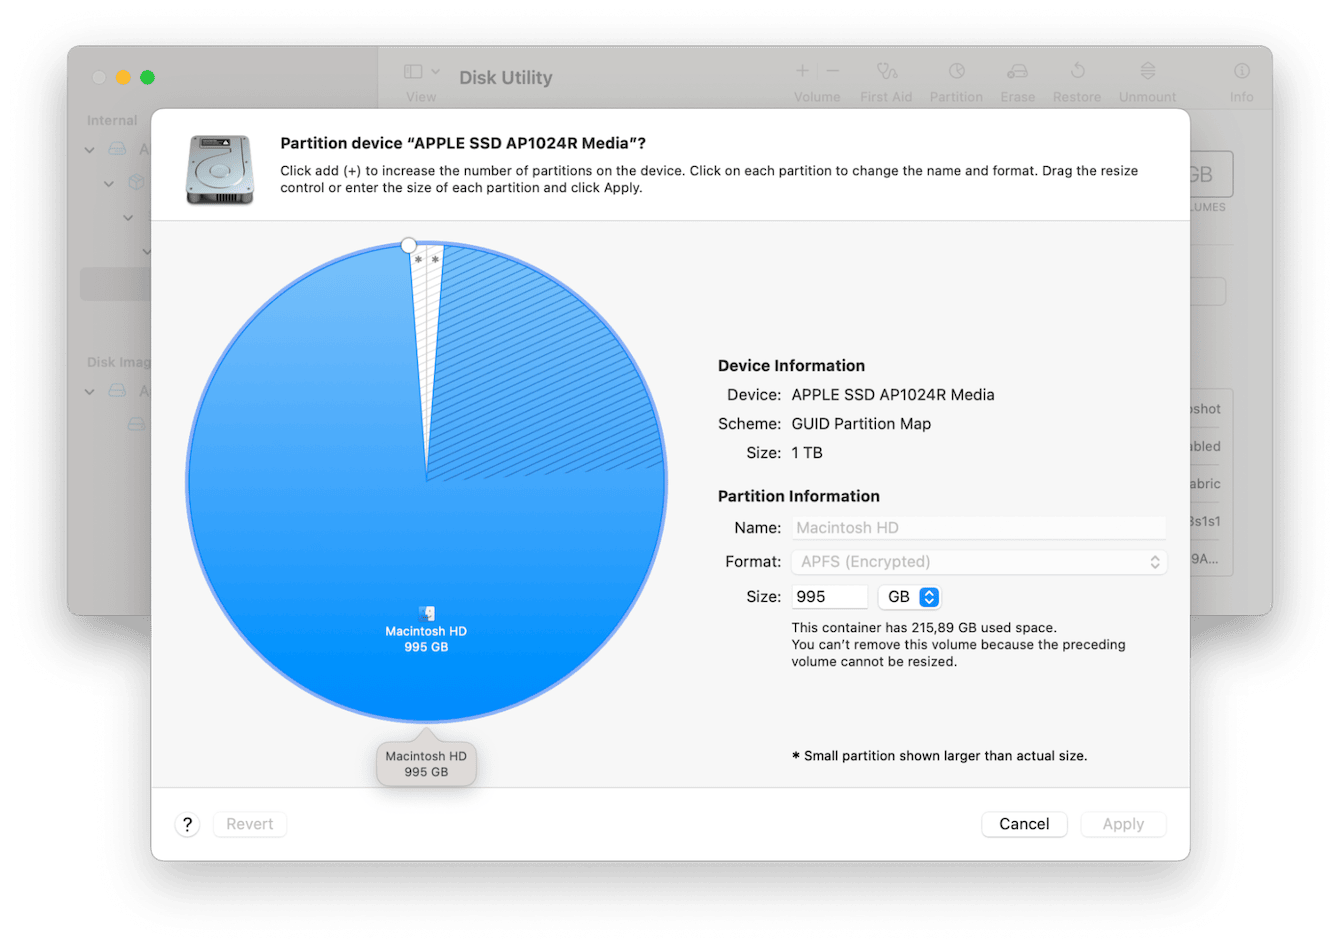
- Select your hard drive, select Partition, and press the + button.
- Adjust what size partition you would like to create by dragging the circle.
- Give the partition a new name and click Apply.
- This will take a few minutes to complete.
Now you have a separate space for an additional system. Next, here's how to upload your clone to the partition:
- Shut down the Mac you want to upload the clone to.
- Connect your external hard drive, which contains the clone.
- Turn your Mac on and hold down the Option key
- Select your external hard drive to boot from your clone.
So now you know how to clone a Mac and safeguard your data!

