How to turn off iMessage notifications on Mac
So, you want to know how to turn off iMessage notifications on Mac? Are you tired of constant message notifications interrupting your busy workflow? Well, you've come to the right place.
Whether you're trying to focus on a project, avoid distractions during a meeting, or just want some peace and quiet, turning off message notifications can make a big difference.
In this guide, we'll walk you through the simple steps to disable message notifications, helping you maintain a more productive and serene digital environment. Besides, we'll show you how to disconnect iMessage in case you no longer need to use it on your Mac. Let's get started.
What is iMessage, and why turn off iMessage notifications on Mac
First introduced in 2011, iMessage or Messages is Apple's instant messaging service that allows you to send texts, photos, videos, and more between Apple devices.
When you log in to your Apple ID on your Mac, your messages are synced, meaning you can view messages on your laptop. It's no doubt convenient, but the notifications can be overwhelming, especially if you're trying to work or you're screen sharing in a work or school meeting.
Turning off message notifications can help you stay focused and reduce distractions. So, let's dive in; we've got a couple of different methods you can try, plus some handy bonus Mac content.
How to stop iMessage notifications on Mac
Turning off your iMessage notifications on your Mac is a straightforward process; follow the steps below.
-
Open System Settings from the main Apple menu.
-
Click Notifications from the sidebar.
-
Scroll down to Messages and click it.
-
Toggle off Allow Notifications.
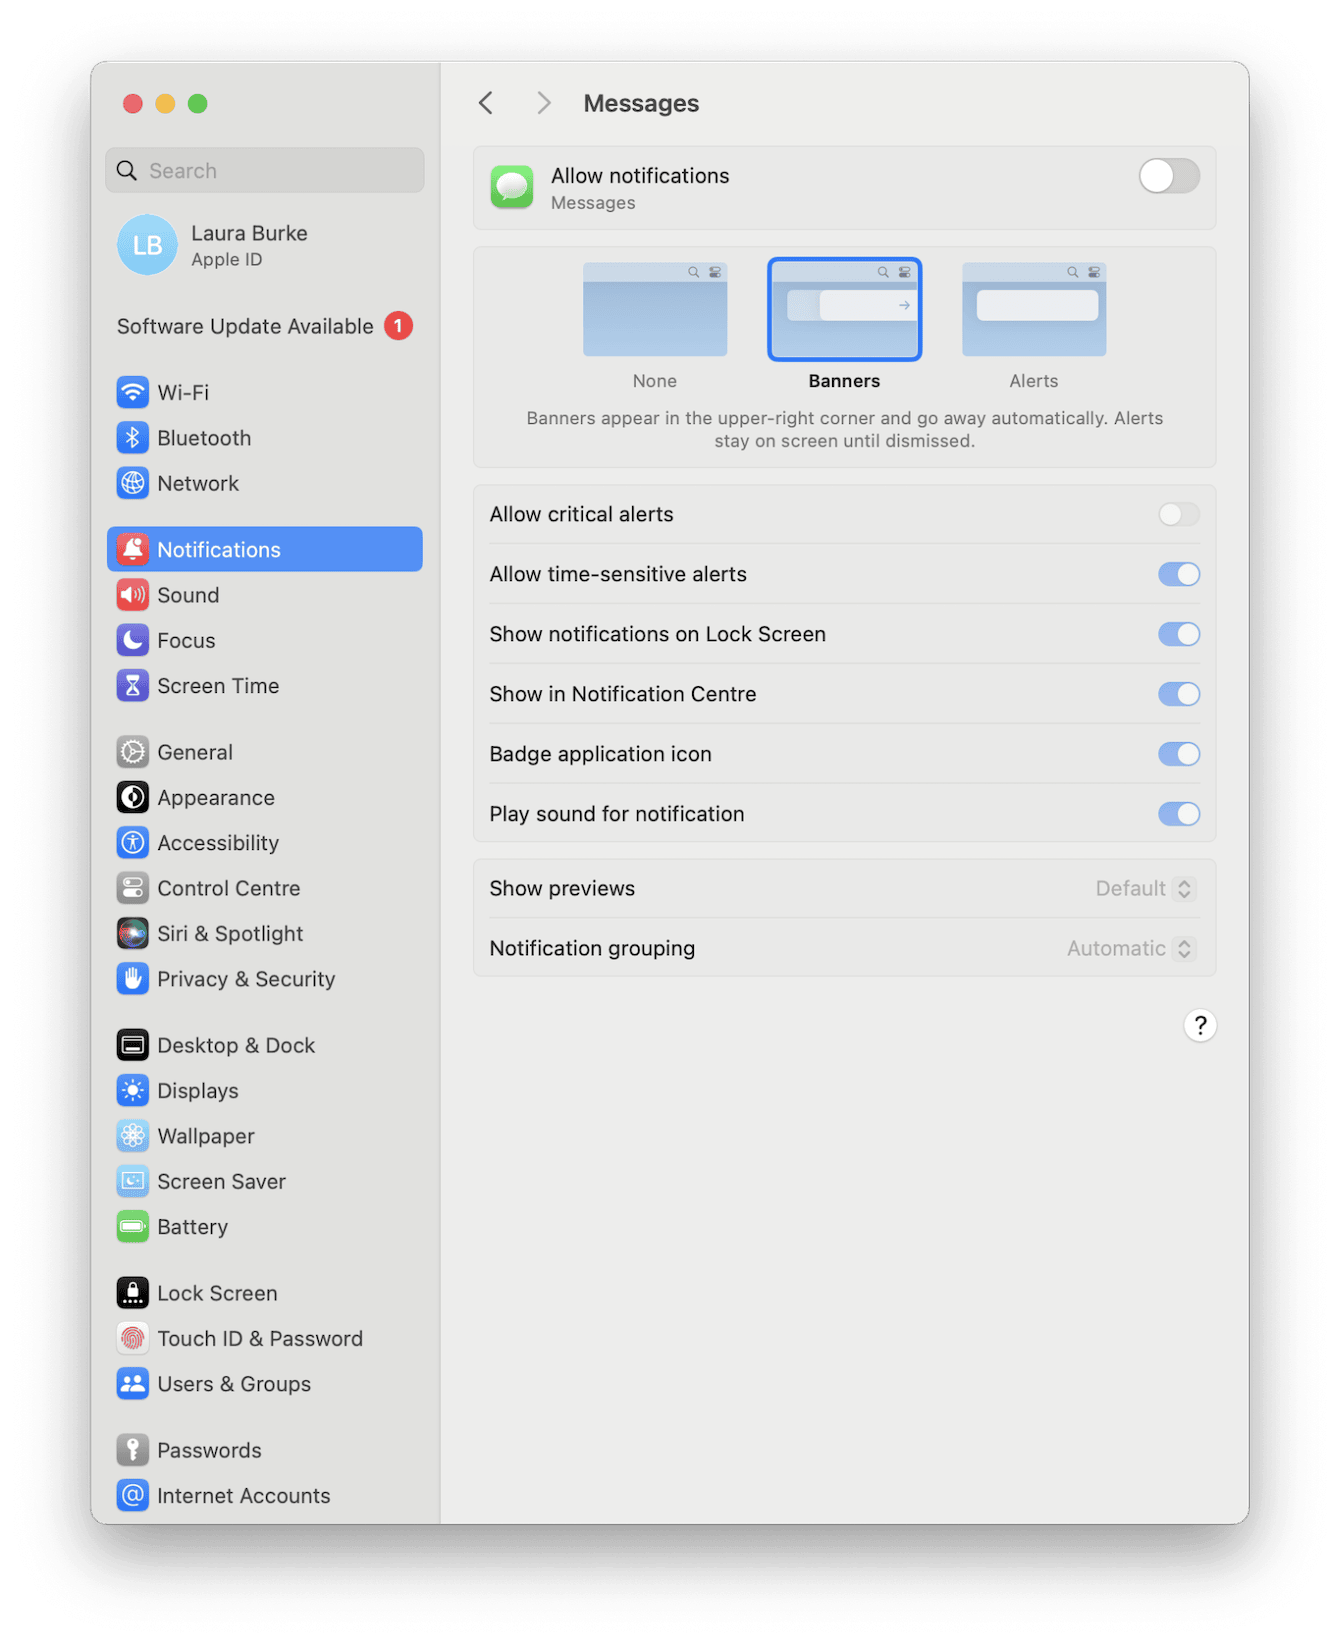
That's it! You've successfully turned off message notifications, allowing you to work without interruptions.
You can reverse this process by toggling Allow Notifications back to on again at any time.So you know how to turn off iMessage notifications on Mac, but did you know you can customize them, too? Head to the next step to find out how.
How to customize your Message notifications on Mac
Instead of completely turning Message notifications off, you can adjust them to be less intrusive; let's take a closer look.
-
Open the Messages app on your Mac.
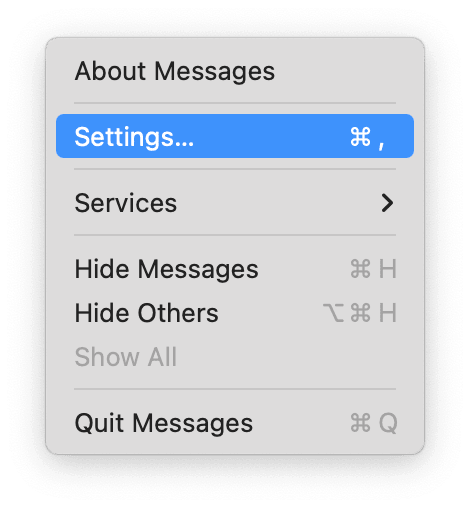
- Select the Messages menu > Settings > General.
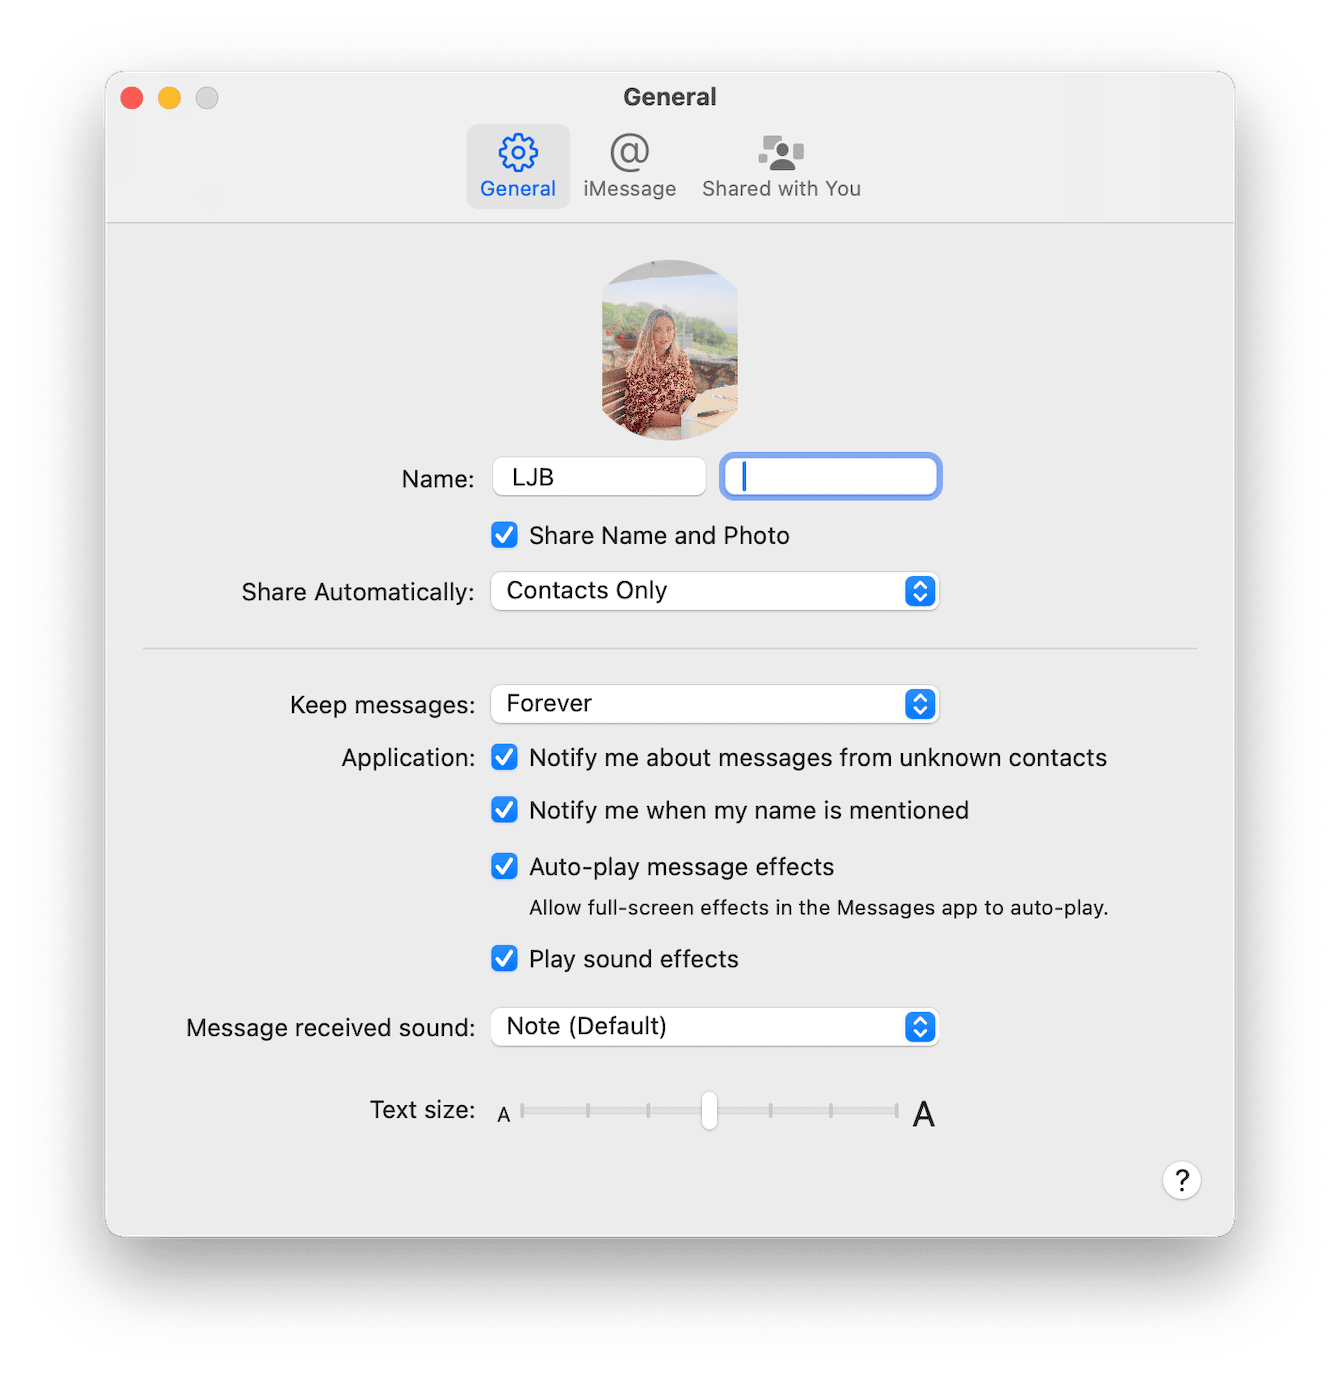
Here's a look at what you can do here:
Notify me about messages from unknown contacts
Select this if you want to be alerted when you receive a message from someone who isn't in your Contacts app, even if you have Hide Alerts turned on for the conversation.
Notify me when my name is mentioned
Select this option if you want to be notified when someone mentions your name in a message, even if Hide Alerts is on for that conversation.
Play sound effects
Select this to hear a sound effect when you receive a new message or when one of the above events occurs. You can choose the default sound from the "Message received sound" menu.
While you're adjusting your notification settings, it's the perfect time to run a maintenance check on your Mac.
Maintain your Mac with CleanMyMac
Did you know that it is important to maintain your Mac to ensure that it works flawlessly for as long as possible? CleanMyMac is an excellent tool for keeping your Mac in top shape (Apple has notarized it, too).
This clever app simplifies maintenance and optimization tasks by clearing out junk, managing startup items, and running vital system checks, all in a few clicks. From outdated cache to old iMessage attachments, this app ensures your Mac runs like new; here's how to use it:
-
Open the application (get your free trial here).
-
Select Smart Care > Scan.
-
Wait a few moments for completion and click Run.

This kind of regular maintenance will help you keep your Mac in top shape and free from performance issues.
Ok, let's take a look at a final way to turn off notifications on your MacBook.
Alternative ways to turn off iMessage notifications on Mac
You can use the Focus feature on your Mac to minimize distractions and stay focused. This smart feature from Apple allows you to pause all notifications or only allow notifications from certain contacts or apps; here's how:
-
Go to the main Apple menu > System Settings > Focus.
-
Add a new Focus and pick a name to get started.
-
Next, customize which apps or people can disturb your focus time.
-
Add a schedule if this type of focus time will be recurring.
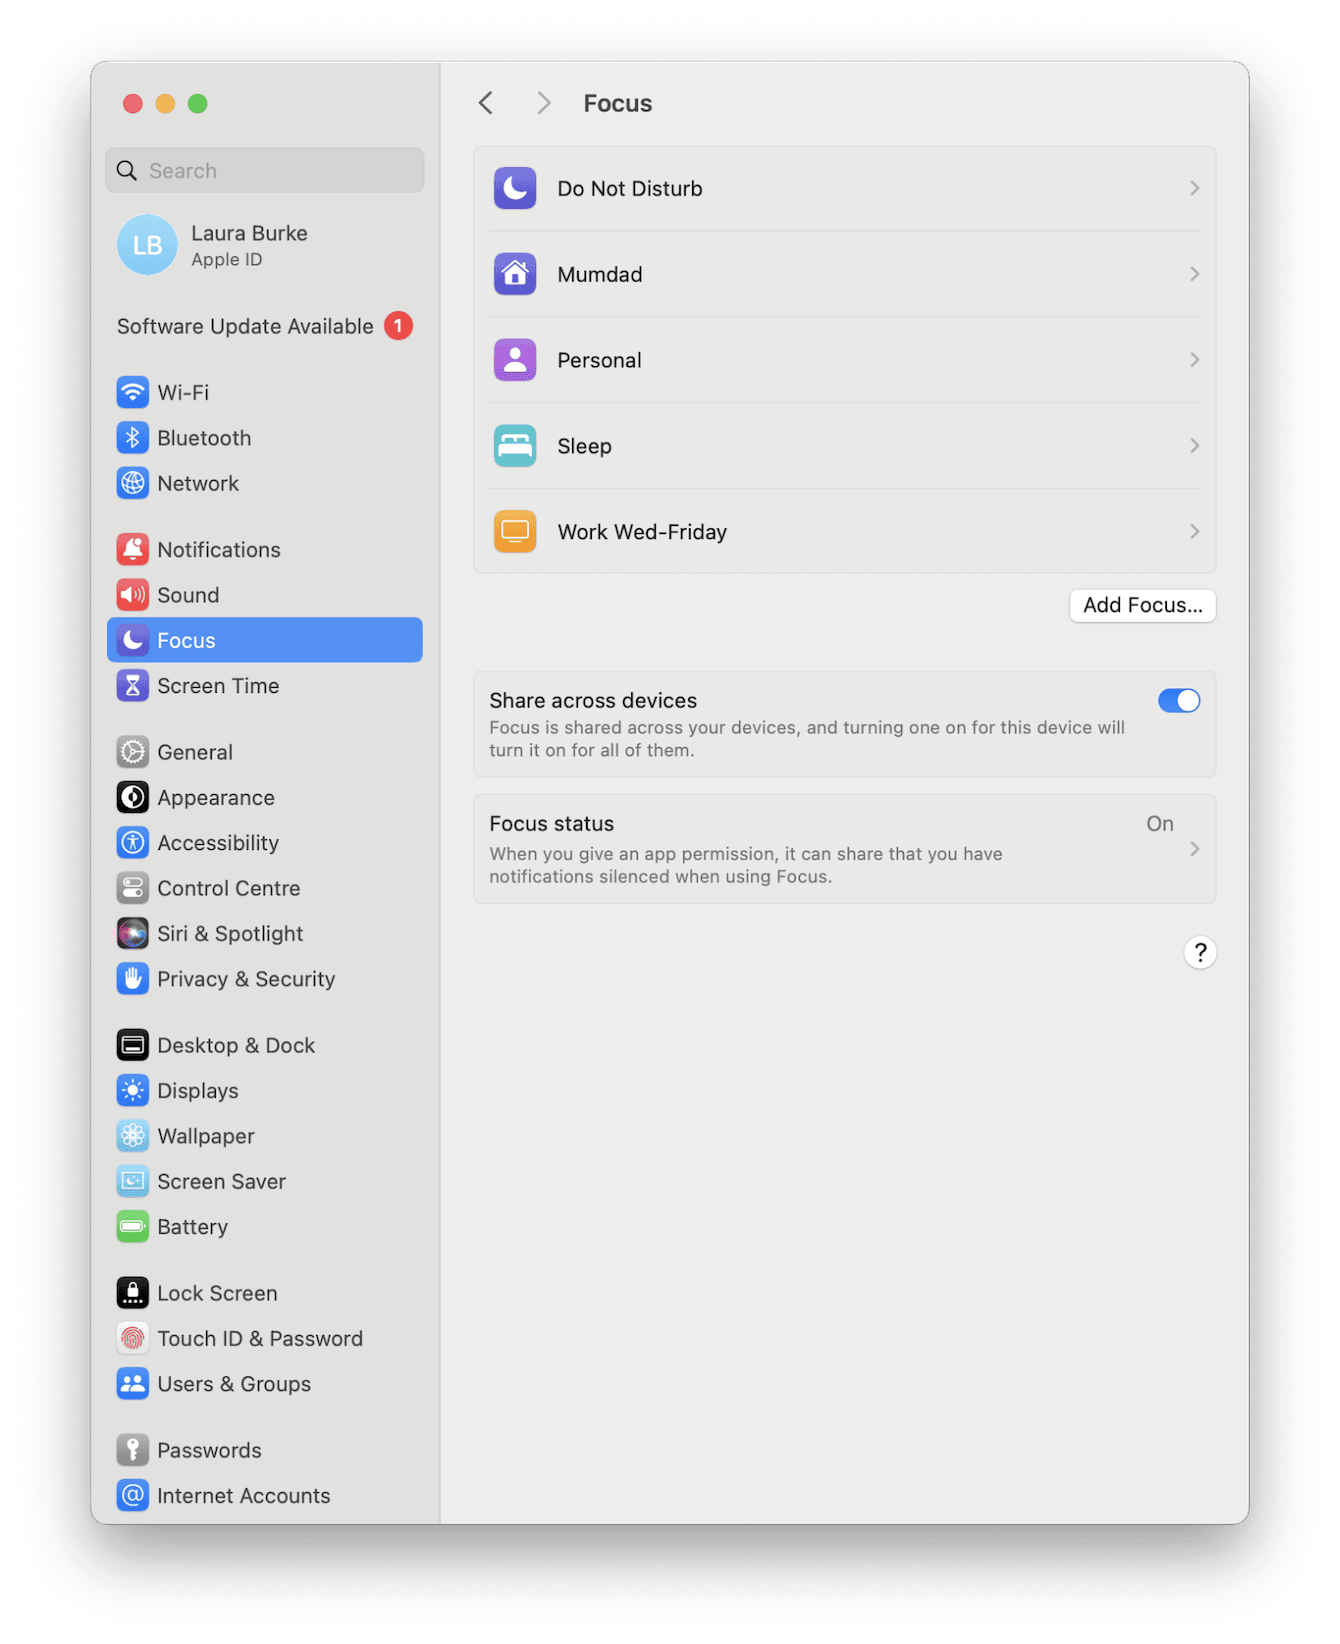
You can toggle it on or off at any time by going to the Notification Center from your top menu bar and selecting it.
Now, let's proceed with disconnecting iMessage.
How to unsync messages from Mac
If you use a shared device, or you simply want your chats to stay on your iPhone but disappear from your Mac, here's what you can do:
-
Open the Messages app and select the main Messages menu > Settings.
-
Select the iMessage tab and click the Sign Out button.
-
Confirm the action.
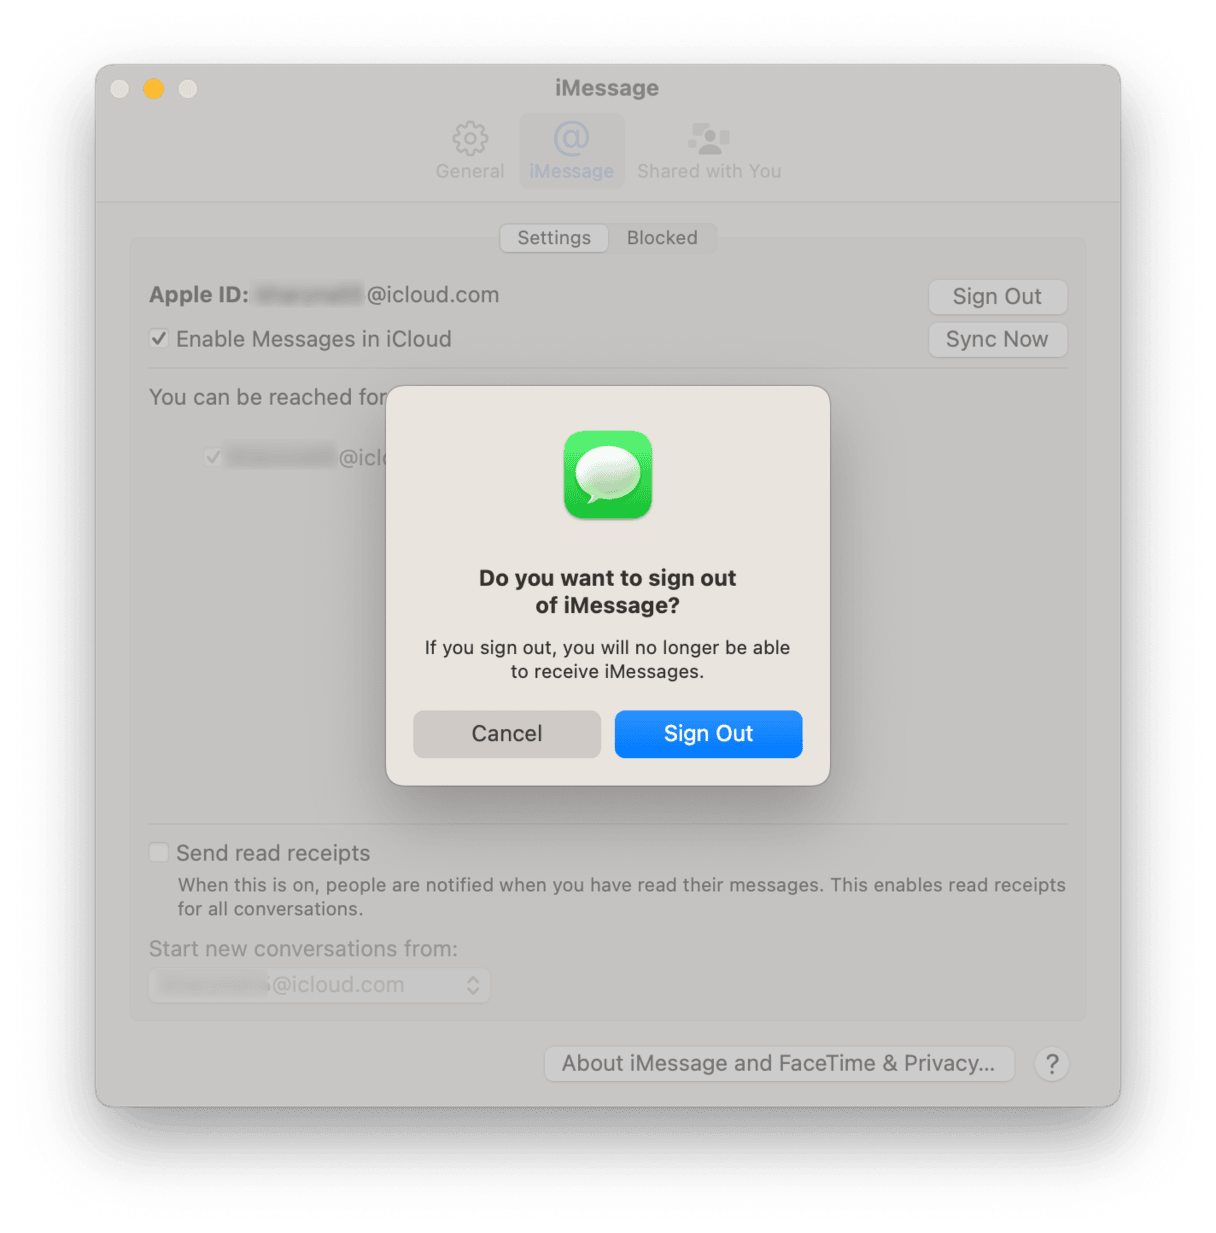
This ensures that Messages will no longer sync between your Mac and any other Apple devices.
If at any point you want to reverse this action, just sign back in to sync and receive messages again on your MacBook.
How to turn off iMessage on Mac
If you're wondering what the difference is between turning off and unsyncing your Messages app, there actually isn't any. The steps are exactly the same to stop or disable messages on Mac:
-
Open the Messages app.
-
Select the main Messages menu > Settings.
-
In iMessage, click Sign Out.
If you don't want to sign out completely, what about muting notifications? This way, your Mac still receives messages but doesn't interrupt your flow all the time.
As you can see, turning off iMessage notifications on your Mac can help you stay focused and productive. Whether you choose to silence notifications completely or just customize them, these simple steps enhance your Mac experience. Before we finish up, let's take a look at some FAQs.
Frequently asked questions
Why won't my Messages sync on Mac from my iPhone?
If messages sent and received on your iPhone are not showing up on your Mac, or vice versa, there could be a few reasons:
-
You might not be signed in with your Apple ID on both devices.
-
Messages in iCloud may not be enabled on your Mac or iPhone.
-
There could be an issue with your internet connection.
-
Apple's servers might be experiencing problems.
Can you force messages to sync on your Mac?
Yes, there is a simple way; here's how:
- Open the Messages app.
- Select the Message menu > Settings > iMessage.
- Click Sync Now.
Is signing out of Messages the same as deleting the app?
No, signing out simply prevents the app from syncing your messages. The Messages app remains on your Mac and can be reactivated anytime.
Will I lose my messages if I disconnect Messages on my Mac?
No, your messages will remain on other devices connected to the same Apple Account (like your iPhone).
Will disconnecting Messages delete attachments like photos or videos?
Yes, when you log out from or unsync Messages, attachments stored locally on your Mac may be removed, so make sure you back up any important files first.

