How to clear Apple mail cache on Mac
Knowing how to clear your Mail cache can be really useful when your Mac is low on space, or your Mail app is sluggish.
There's no doubt that the macOS Mail app is great, but it doesn't change the fact that it's a major storage consumer. And if you let the cache build up, you may encounter some frustrating issues like:
-
Mail app is crashing
-
Emails or attachments not loading
-
Mail app is running slow
So let's take a closer look at how to clear the Mac Mail cache.
What is Mail cache?
Essentially, Mail cache is copies of emails stored on your hard drive. Cache helps your Mac locate emails instantly when you're searching through your mailbox. Sounds handy, but this comes with a price — SPACE.
If your Mail app has been acting strange or sluggish, it might be the cache that's weighing it down. Here's how to check how much storage it's taking up:

Go to System Settings > General > Storage. Under the Storage tab, click the Mail icon.
The only problem with this calculation is that it's not entirely accurate. It doesn't include your downloaded messages and email attachments. Before I'll show you how to tackle those, let's first take a look at some of the ways to get rid of your Mac cache.
The quick way to clear Mail cache
Instead of wasting time poking around Library files and folders, I use a tool called CleanMyMac to handle my cache.
The app has an awesome Cleanup feature, which can clear your system of junk, cache, and broken items. It not only reclaims space but also keeps your Mac optimized, all in a few clicks. Here's how you can automatically clear the Mail cache:

-
Open the app — start your free trial here.
-
Select Cleanup from the sidebar and click Scan.
-
Once the scan is finished, click Review All Junk.
-
Select System Junk > User Cache Files. Find the Mail app, select it, and clean it up.
It's honestly as simple as that! But if you like the manual method, keep reading.
How to clear Mail cache manually
Personally, I'm not a fan of the manual method, but if you are, here's how it's done.
It might be a good idea to make a backup just in case something goes wrong.

-
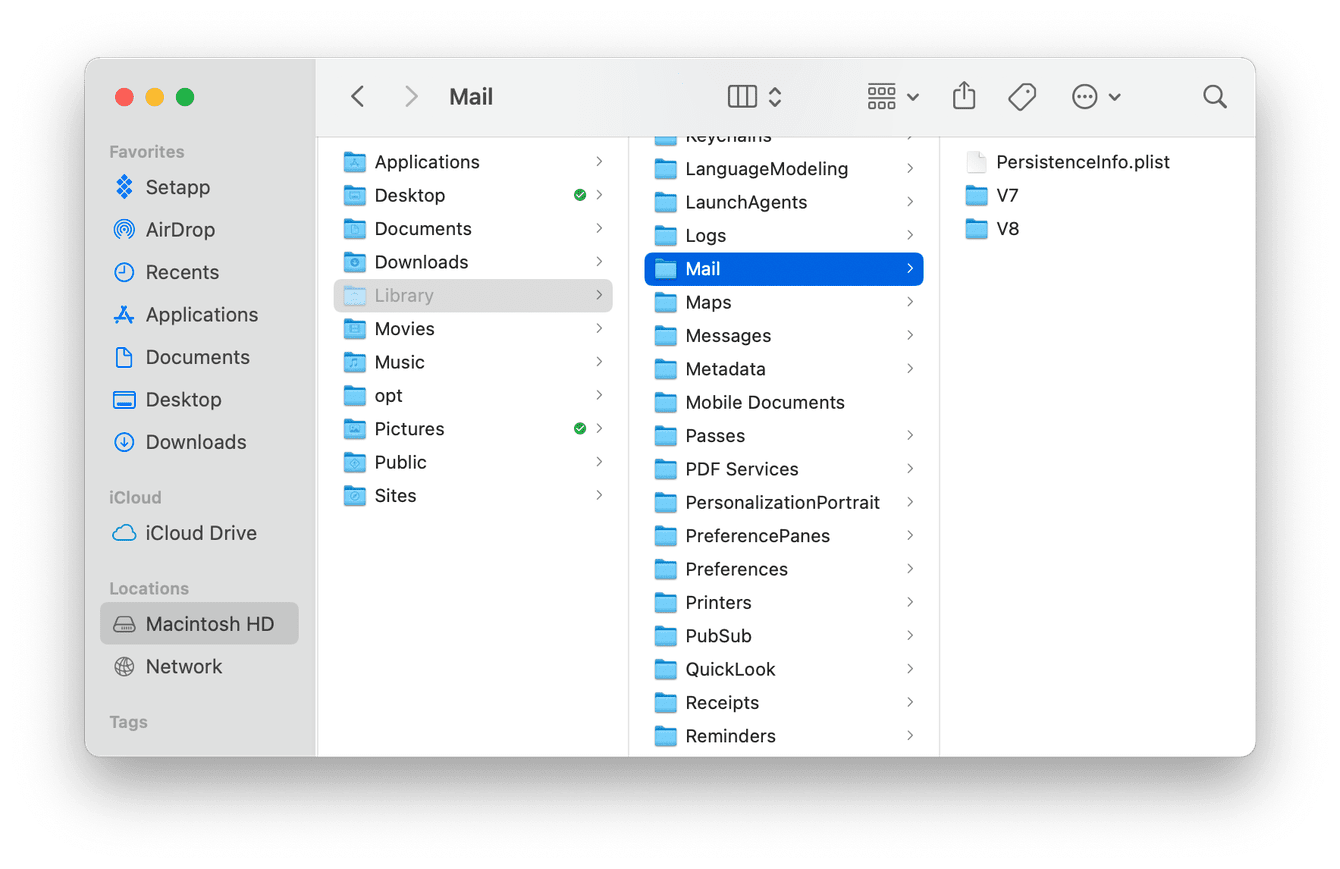
Open the Finder Window and select Go > Go to Folder.
-
Type in the following and press Return ~/Library/Mail/V8 (you may have a different number after V).
-
Check through the folders you find here and remove items to the Trash.
-
Empty Trash once finished and test the Mail app.
Now that your Mail cache is clear, I wanted to share a couple of hacks on how to keep your Mail app optimized.
1. Remove email attachments
Email attachments take up valuable space. It's not just the obvious PDFs and images; email signatures containing logos are also attachments.
Removing email attachments is a great way to reclaim storage capacity and keep the Mail app running smoothly.
Using the app I mentioned earlier, you can quickly delete attachments. Here’s how to do that:

-
Open CleanMyMac.
-
Select Cleanup > Scan > Review All Junk.
- Select Mail Attachments and clean up the necessary items.
Tip: If you have third-party mail apps on your Mac and actively use them, they also generate cache, so it is recommended to clear it out. If the app of your choice is Outlook, here's an article on clearing its cache on Mac.
2. Delete Junk Mail and deleted items
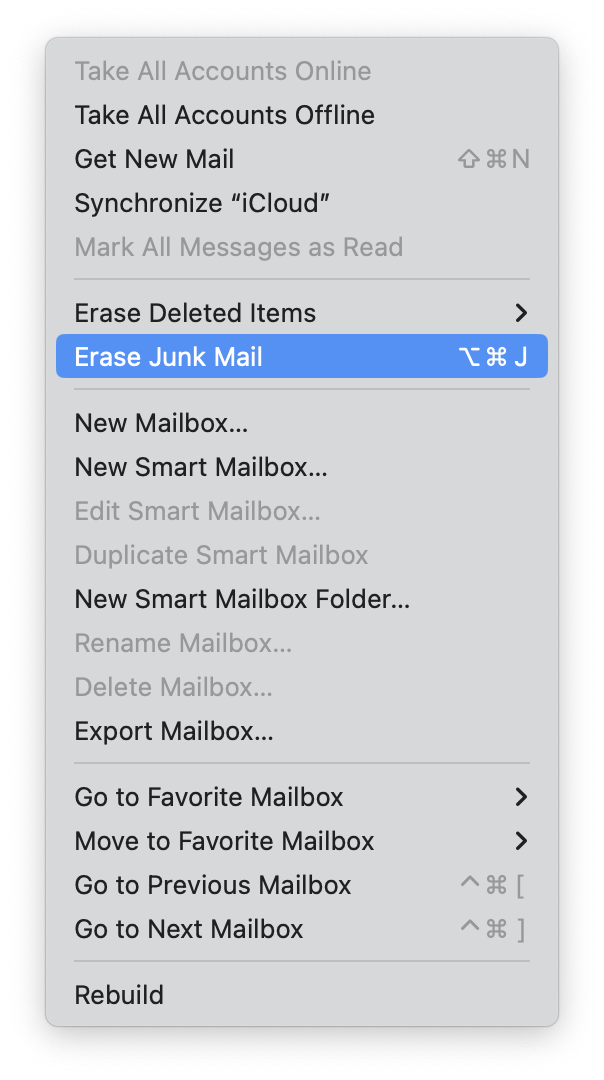
Another quick space-saving tip is to delete Junk Mail and your deleted items. Here's how:

-
Open your Mail and select Mailbox from the top menu.
-
First, select Erase Deleted Items, then Erase Junk Mail.
How to Manage Mail App Storage on Mac?
To save yourself time clearing your mail cache now and then, try managing Mail App storage on your Mac. There are two ways to accomplish that: cut down space usage of your Mail apps or use alternatives to your Mail.
1. Reduce space usage of your Mail apps
Mail apps like to download and keep all your attachments on Mac so you can access them any time, even when you’re offline. But do you need all of them pilling up and occupying storage space? Probably not. So take control of your storage by removing automatic attachment download from Mail settings. Here’s how:
-
Launch the Mail app.
-
Go to Mail menu > Settings.
-
Choose which account settings you want to change. Then click the selector next to "Download Attachments" and and choose "None".
Done! Now your Mac won’t download email attachments behind your back.
Did you know? All apps generate cache on Mac, and clearing it is a sure way to free up space and avoid Mac getting slow. One known space hogger is Excel, and here's how to clear its cache.
2. Use alternative email services
If your Mac is low on space, it might be worth considering not using the Mail app at all. Switching to other email services, especially cloud-based, like Gmail, is another method to manage your Mail storage more efficiently, avoiding Mail cache build-ups. In this case, you have to disable your Mail app, and here’s how:
-
Launch your Mail app.
-
Go to Mail menu > Settings > Account. Then, uncheck "Enable this account".
-
Then go to Finder > Go To Folder.
-
Type: ~/Library/Mail/V2 and press Return.
-
Right-click on the folder with the name of your email account. Then “Move to Trash”.
-
Empty Trash.
Well, we've reached the end. I hope this helped you successfully clear your Mac Mail cache and optimize storage space. Stick around for more Mac tips & hacks!

