How to delete duplicate photos on Mac
Thanks to camera phones and DSLRs, it’s easier than ever to take photos. And because you’re not using film, you can take as many shots as you want until you capture the perfect pic. You know the one I’m talking about. The perfect framing with the best lighting.
While it’s great to be able to shoot like this, the downside is that your photo library is probably littered with duplicate and similar looking pictures. Don’t worry, though. This article will show you a couple of different ways to clean up your library. And get rid of the duplicate clutter on your computer.
How to remove duplicate photos automatically
The easiest way is to use a duplicate finder to help you find and take care of the duplicates automatically. Thankfully, you can try CleanMyMac for free. Then, when you start your free CleanMyMac trial, it will scan a specific folder or your entire hard drive, searching for duplicate files with just a few clicks. Here’s all you have to do:
-
Open CleanMyMac.
-
Go to My Clutter.
-
Choose a folder you’d like to scan and click Scan.
-
Click Review All Files and look through duplicate files found.
-
Select unwanted duplicates and click Remove.

And that’s seriously all you have to do. CleanMyMac also identifies large & old files, similar images, and forgotten downloads, making it easier to declutter your storage and free up space for important files.
How to delete duplicate photos on Mac manually
Of course, you can always delete duplicates manually. It will obviously take a little bit longer to sift through all of your pictures. Definitely not impossible though. With a little patience and a lot of determination, you can do it. But how you do it, will depend on where you have your pictures stored on your Mac—the Photos app or Finder.
Remove duplicates from Photos app
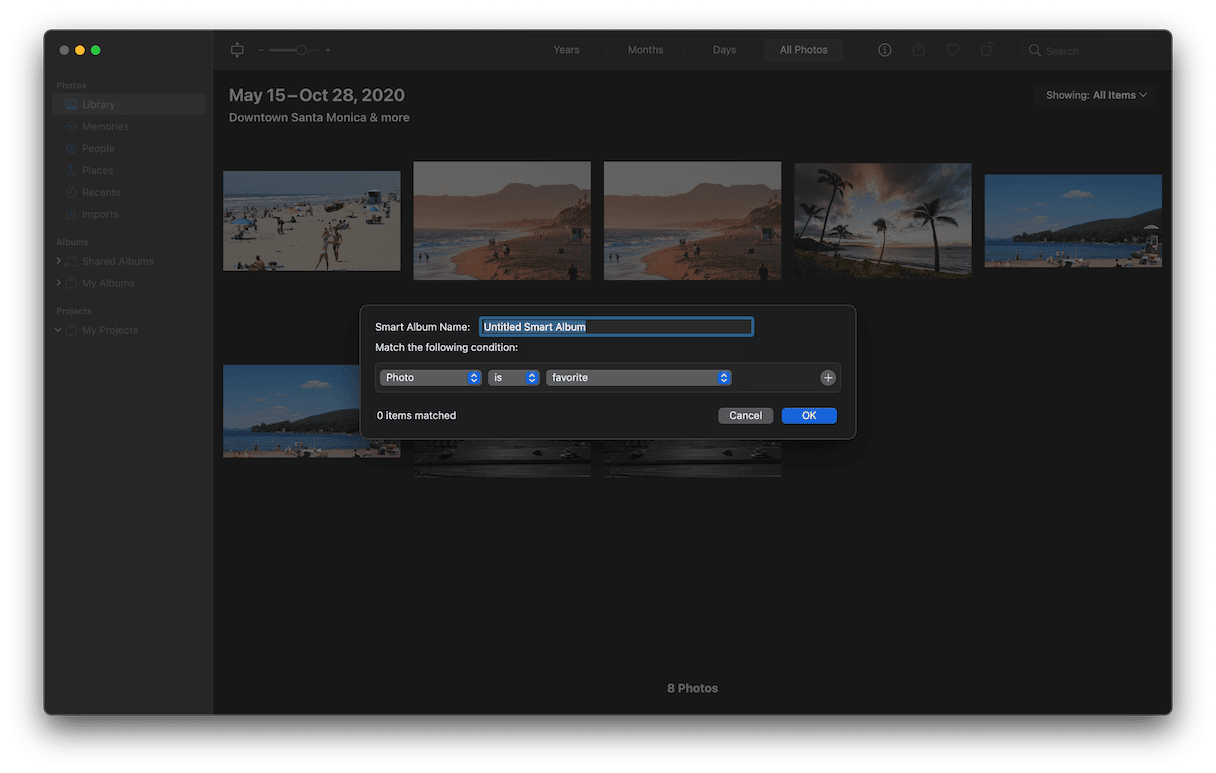
The most common place to have your pictures stored is in the Photos app. Especially, if you’re syncing your iPhone or iPad with your Mac. By default, macOS will start saving your pictures in the app. While Photos doesn’t have a “show duplicates” tool like other apps, you can use Smart Albums to help you spot the similar images quicker.
Smart Albums lets you only view pictures based on certain criteria like the file name, date the image was taken, camera model, and more. Once you have the Photos app open, all you have to do is follow these steps:
-
Click File > New Smart Album.
-
Name your Smart Album and set the filter settings.
-
Choose the images you want to delete.
-
Right-click (or hold down Command and click) on those pics and click Delete.
-
In the sidebar, click Recently Deleted.
-
Then, click Delete All in the top right corner.

The best part about using the Smart Albums method is that they’re automatically saved in the sidebar. So, there’s no need to try and get through all your duplicates in one sitting. You can always get back to the Smart Album.
Delete duplicate photos on Mac in Finder
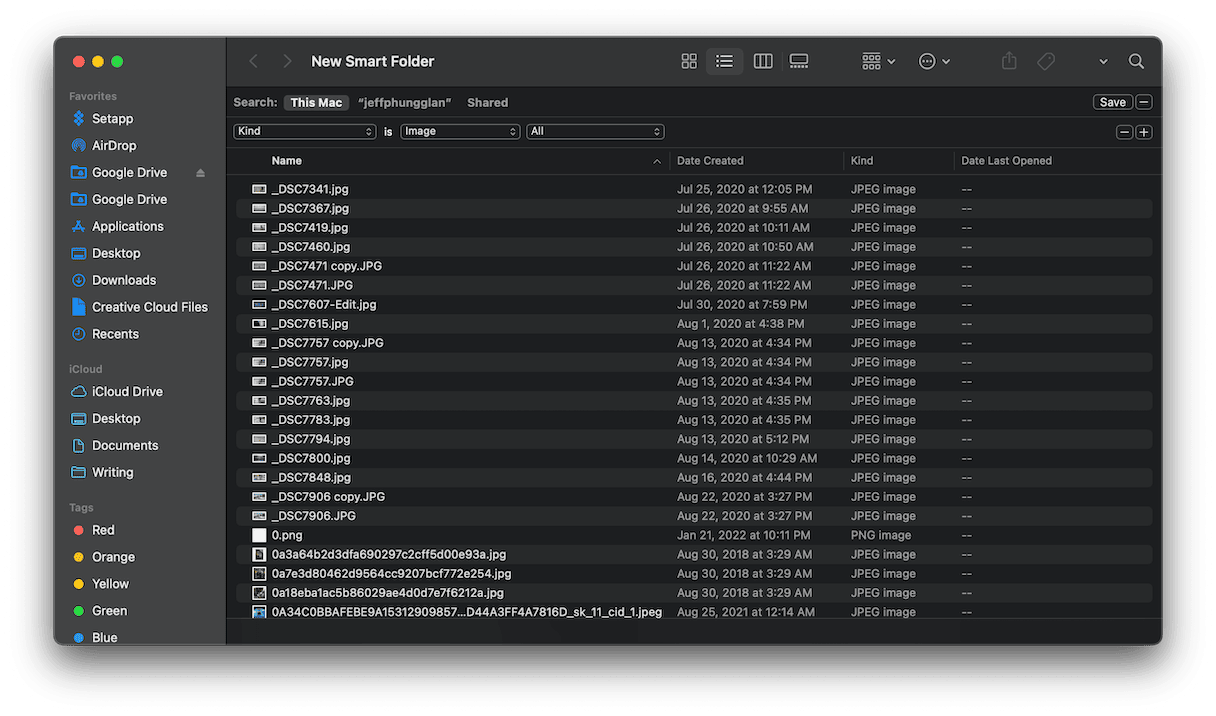
Now, if you’re just keeping your pictures in various folders across your Mac, don’t worry. You’re not out of luck. Similar to Smart Albums, you can use Smart Folders to help you view all of your images in one window. Here’s how you can setup Smart Folders:
-
In Finder, click File > New Smart Folder.
-
Select “This Mac” and click +.
-
Set the drop-down menus to “Kind” and “Images”.
-
Then, click on the Name column to sort your files by name. Note: Duplicate pictures are likely to have the same or consecutive file names, but sorting by date or size might be easier for you.
-
Select the duplicates you want to delete.
-
Right-click or hold down Control and click on the images. Then, click Move to Trash.

Don’t let the duplicate clutter take over the rest of your photo library. Spending the extra few minutes to clean it up will make a world of difference. Not only will it free up space on your hard drive, but it’ll also make your pictures easier to find when you’re looking for them later. Plus, sorting through your photo library with CleanMyMac is a breeze.

