Chrome keeps crashing on Mac? Proven fixes (2026 update)
Google’s Chrome is a terrific browser. It’s fast, stable, and supported by pretty much every website. It’s even better if you use Gmail or Google Docs on your Mac because they are perfectly integrated into the browser, making the work with this suite of apps even more convenient. It’s also highly customizable due to lots of extensions that can be installed from the Chrome Web Store.
However, like any other browser, Google Chrome is not perfect, and it does sometimes crash. And for some people, it just keeps crashing. So, if that happens to you, and you ask yourself, “why does Chrome keep closing?” here’s what to do about it.
Why does Chrome keep crashing on Mac
Before we proceed with the fixes, let us explain why Chrome keeps freezing on Mac:
- Outdated Chrome. If you still use an old version of the browser, it may be buggy, and so will crash.
- High memory and CPU usage. Chrome is known for being a significant resource hogger, so if you have a lot of browser tabs open and, at the same time, have multiple apps running in the background, your Mac will run out of memory. As a result, Chrome will freeze or crash. The same goes for the CPU.
- Hardware acceleration is enabled. Hardware acceleration is a feature developed to make watching videos, scrolling pages, and running other graphics-intensive processes on websites smooth. However, it increases GPU usage, and so may cause Chrome to crash or become unresponsive.
- Misconfigured settings. You may have changed some settings by mistake, and it leads to Chrome crashes.
- Malware or viruses. If your Mac is infected with malware, a lot may be running in the background without you even noticing it. As a result, it will consume memory and CPU and make all apps, including Chrome, slower and increase the likelihood of them crashing.
- Buggy extensions. Some Reddit users share that Chrome started crashing after the transition from Intel-based to Macs with Apple silicon because of extensions.
- Network issues. It usually affects specific websites, but may also make Chrome freeze.
How to fix it when Chrome keeps crashing
Now that you know why Chrome keeps stopping, let us look at how to fix it. Spoiler alert: it is not as complicated as you think.
Quick fixes: try these first
1. Quit Chrome and then restart it
This should be your first step the first time you see Chrome crashing on your Mac. The quickest way to quit Chrome, as with any Mac app, is to press Command-Q. However, Chrome has a setting called Warn Before Quitting, which means you have to hold Command-Q for a few seconds to make sure it quits. You can switch that setting off in the Chrome menu, or you can just go to the Chrome menu and choose Quit Google Chrome.
If Chrome has crashed so badly that it won’t quit, you’ll need to Force Quit. There are two ways to do that:
-
Click the Apple menu, choose Force Quit, and then choose Chrome in the window that opens, then Force Quit.
-
Press Command-Option-Escape, then Chrome, then click Force Quit.
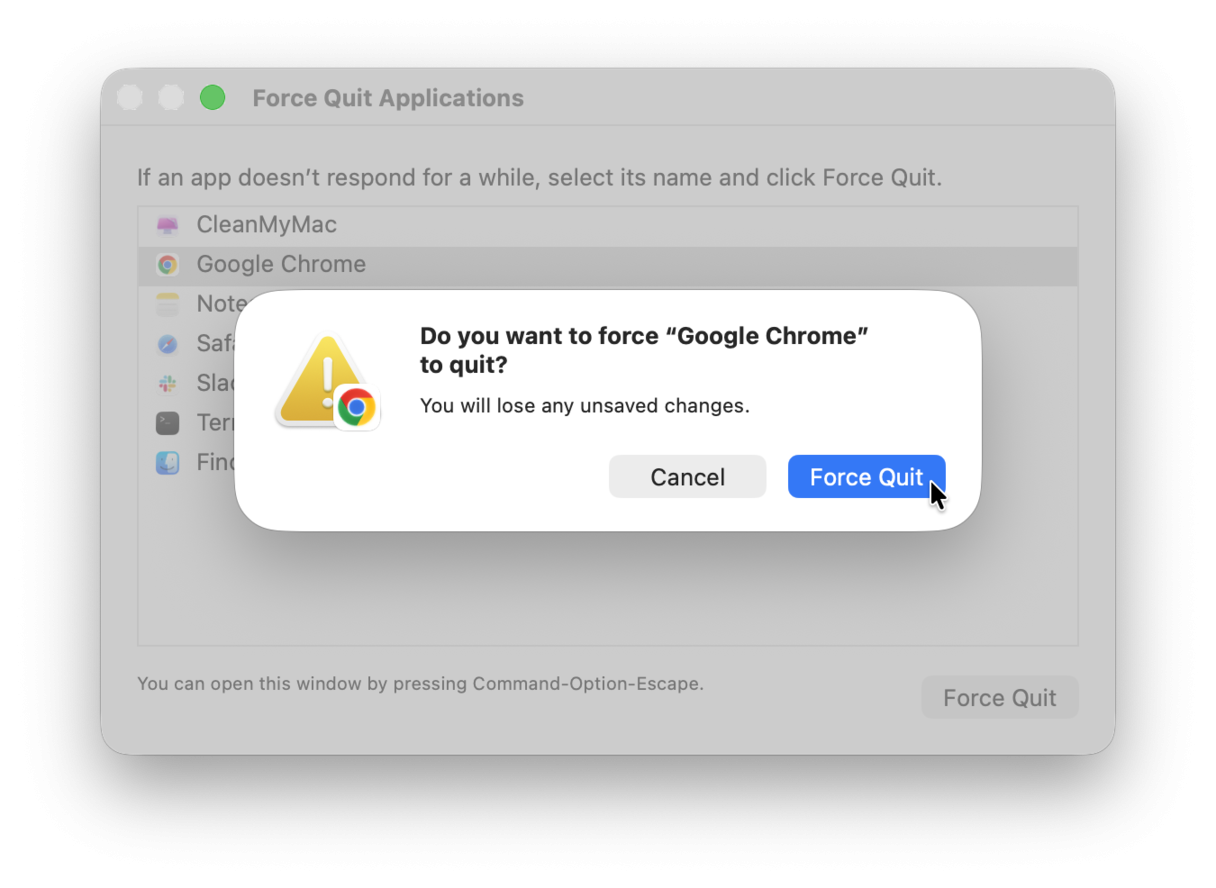
Once it has quit, you can restart Chrome.
Tip: Most of the steps below involve removing data of one kind or another, whether data stored by Chrome as you use it or malware. This can be quite a laborious process. However, there is a quick way to accomplish it and do much more to improve your Mac’s performance, free up space, and keep it safe. CleanMyMac can do all of that. We’ll explain how to use it to help stop Chrome crashing later in the article.
2. Restart your Mac
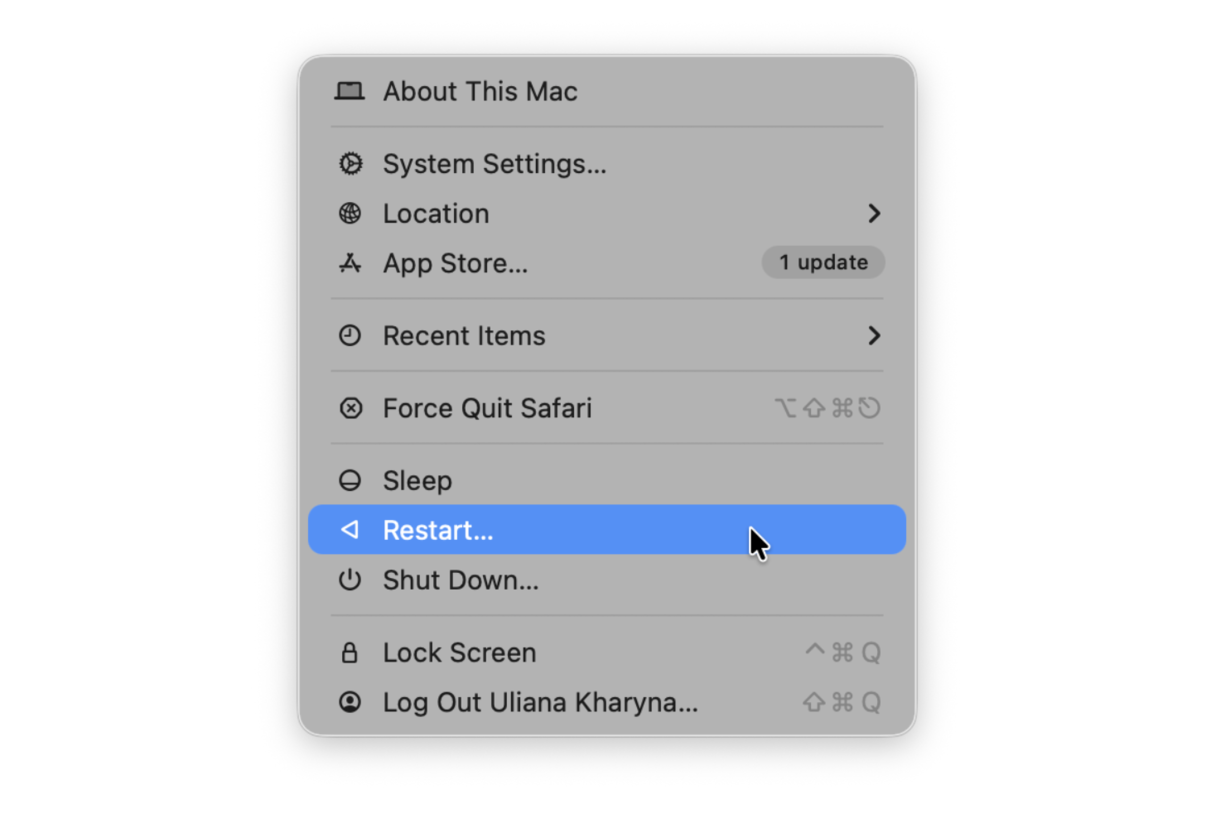
Next, try restarting your Mac. It clears temporary files and frees up memory and may fix the problem — at least, temporarily.
So, go to the main Apple menu and choose Restart.
3. Update Chrome
If the first two fixes did not help, try updating Chrome. Here's how:
- Open Chrome and click Chrome > About Google Chrome from the menu bar.
- If an update is available, click Relaunch.
Still no luck? Jump into more advanced fixes.
Advanced troubleshooting methods
1. Check your extensions [Apple silicon-specific, but also works for Intel]
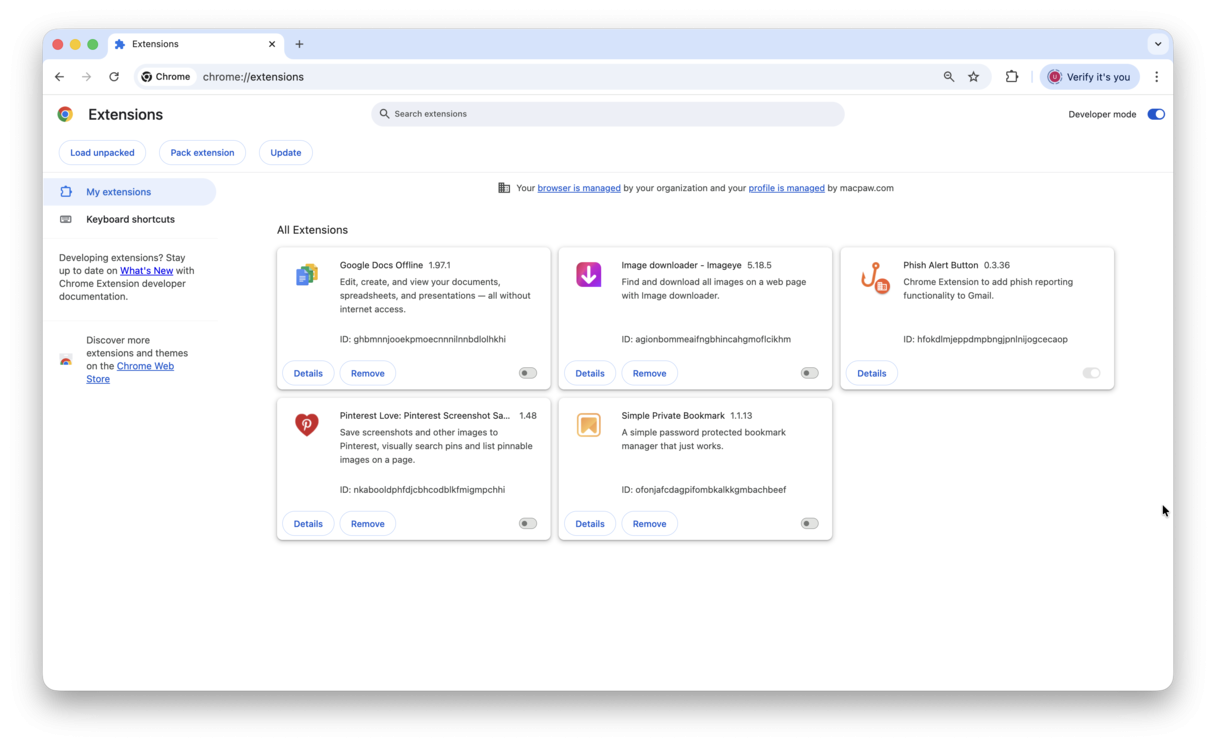
Rogue extensions, as well as legitimate extensions that haven’t been updated, are a common cause of web browsers crashing, so you should review those you have installed.
-
In Chrome’s address bar, type: chrome://extensions
-
Look through the extensions displayed in the window. Are there any you don’t recognize or no longer need? If so, click Remove under the relevant extension.
-
Click Update to update the remaining extensions. If you don’t see the Update button, enable Developer mode top right — it should appear.
Pay close attention to an extension named Momentum. If you have it, disable it — some users with M1 Macs fixed Chrome crashing by doing so.
While checking extensions, you may have noticed some extensions you don’t remember installing. If you have, it may be a sign that your Mac is infected with malware, so it’s recommended to run a quick Mac virus scan. We'll show you how do to it in a few quick moments.
If removing extensions has not helped, and you have a Mac with M1, try opening Chrome from Rosetta. Just find Chrome in your Applications folder, right-click it, choose Get Info, and select Open with Rosetta. Try reopening Chrome.
2. Check your Mac for malware
We recommend CleanMyMac. It’s notarized by Apple, meaning that it’s absolutely safe to install and use. Also, it has a constantly updated database of known threats, so it can detect even the latest malware. Best of all, it can find all types of infections like cryptocurrency miners, browser hijackers, keyloggers, Trojans, and the like. On average, it detects and removes over 320K Mac-specific threats each month!
Here’s how to use CleanMyMac to scan your Mac for malware:
-
Open CleanMyMac — get your free trial here.
-
Click Protection > Scan.
-
Once the scan is complete, you’ll either get a clean bill of health or see the Remove button.
-
Click it, and all detected malware will be removed. Easy!

Key benefits of running CleanMyMac:
- Trusted by users in 185+ countries
- Helps not only remove malware but also clean up Macs: on average, users detect and remove over 6.5 GB of junk files during the 7-day free trial
- Cleans over 50K Macs every day
- Trustpilot rating: 4.6/5 (85% excellent reviews)
- 17 years of Mac expertise
Get your free CleanMyMac trial — test the market leader for 7 days free.
If your Mac is malware-free and Chrome keeps crashing, there’s still a lot you can do to fix it.
Did you know? Malware can also make your Mac randomly shut down. In addition to removing threats with CleanMyMac, there are a few more things you can do to fix it.
3. Clear browsing data
Like all web browsers, Chrome stores data on your Mac as you use it. It could be websites you visit, what you do on those sites, tabs you have open, or information for forms. Over time, much of the data that should be deleted automatically remains on your Mac and accumulates, potentially causing Chrome to crash. You can remove some of it like this.
-
Type the following into Chrome’s address bar: chrome://settings/clearBrowserData
-
Alternatively, click the three dots to the right of the address bar and choose Delete Browsing Data.
-
Click More and choose All time.
-
Select the checkbox next to the items you want to remove. You can leave “Autofill form data” deselected — it is not the reason why Chrome is crashing. If you delete it when you’re signed into a Google account, it will be immediately copied back when Chrome syncs with your account.
- Click Delete from this device.
.png)
4. Reset Chrome settings
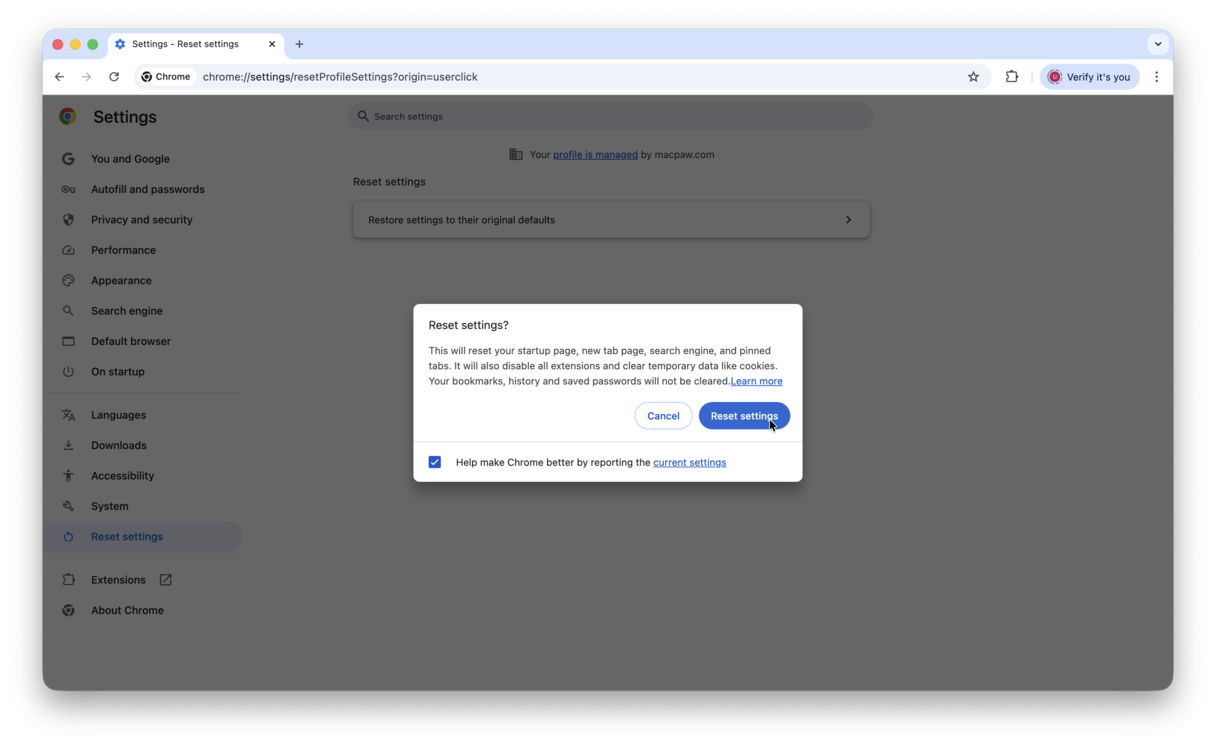
Sometimes, misconfigured Chrome settings can make it freeze or crash. Luckily, it is easy to reset them. Just paste chrome://settings/reset into the address bar and click Restore settings > Reset Settings.
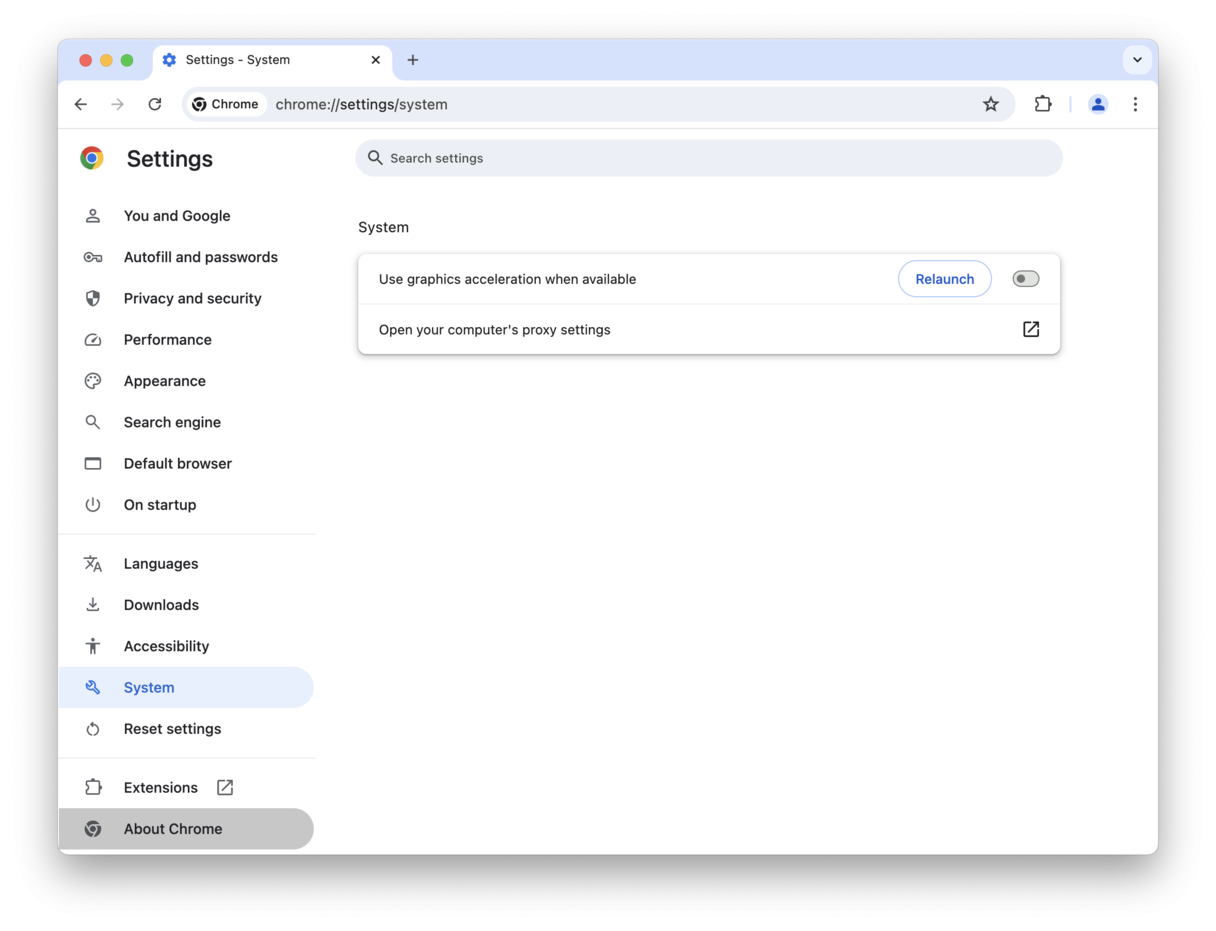
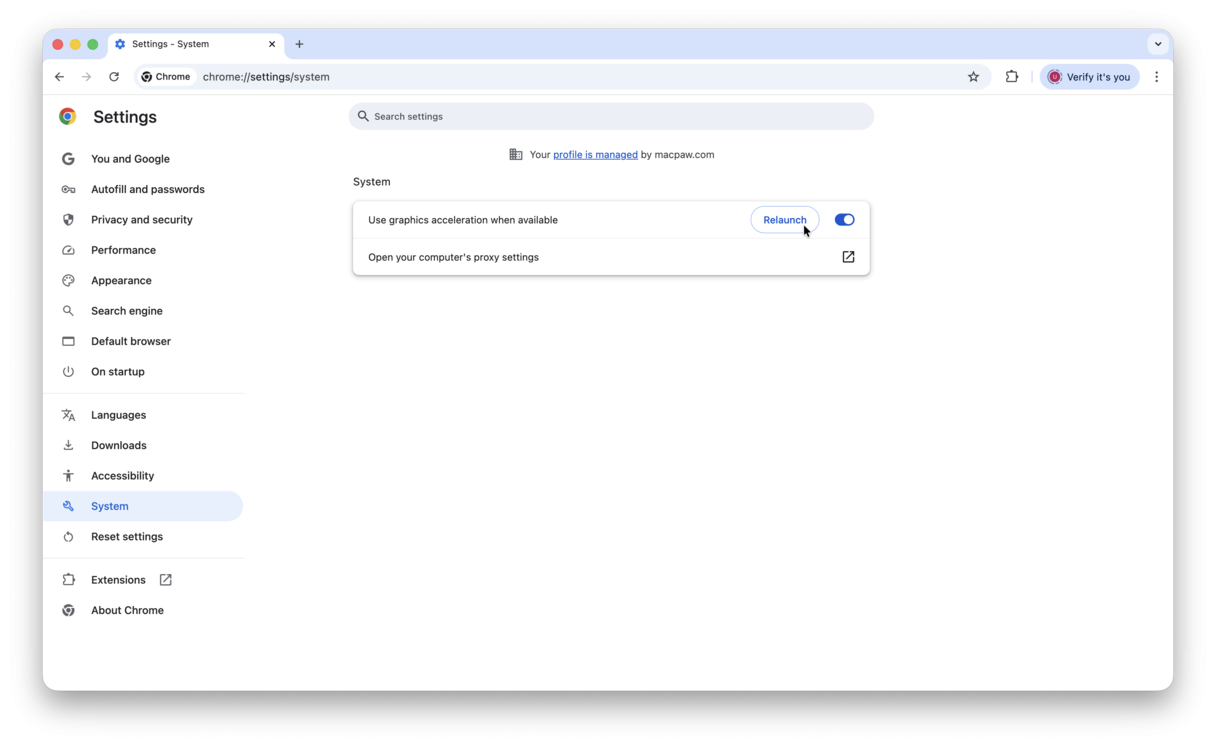
While you're in settings, it is also a good idea to disable hardware acceleration — it is a known cause of Chrome crashing issues. Here's what to do:
- Paste chrome://settings/system into the address bar.
- Disable “Use graphics acceleration when available.”
- Relaunch Chrome.
5. Uninstall and reinstall Chrome
The easiest way to uninstall it is to use a dedicated uninstaller like CleanMyMac. CleanMyMac can also remove browsing data and reset apps. Here’s how to uninstall Chrome using CleanMyMac:
-
Follow the instructions to install it, then open it.
-
Click Applications > Scan > Manage My Applications > Uninstaller.
-
Select the box next to Google Chrome.
-
Click Uninstall to completely remove Chrome.

If you want to reset Chrome, click an arrow (>) next to it, select everything except Binaries, and click Remove.
Tip: Another common issue with Chrome is the browser being slow. Here's an article on why it happens and how to speed up Chrome on Mac.
Additional fixes [by crash type]
If none of the above worked, here are a few extra fixes based on crash type.
Chrome freezing at startup
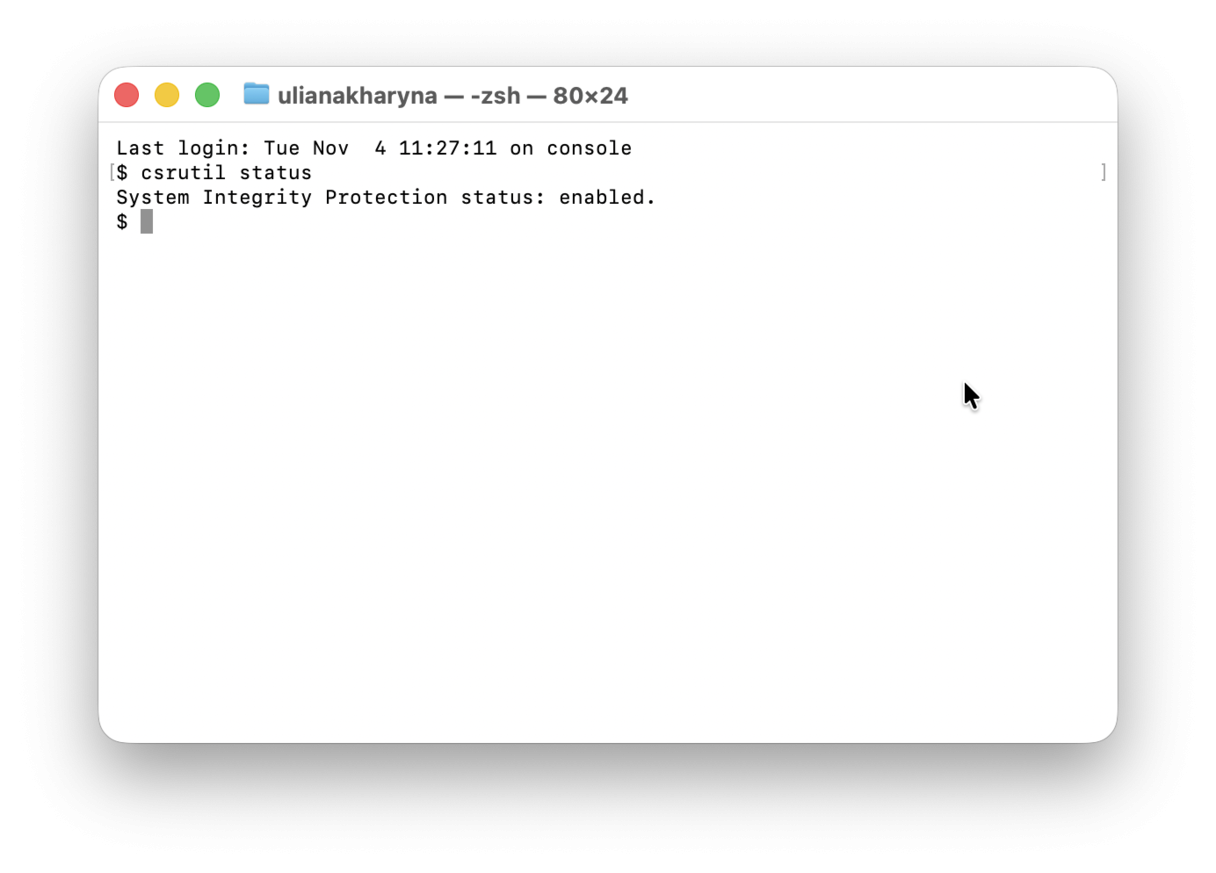
- Check the status of system integrity protection (SIP): open Terminal and run this command: csrutil status — SIP should be enabled.
- Run Chrome in incognito mode: right-click the Chrome icon and choose New Incognito Window.
Chrome freezing after startup
If Chrome launched and then freezes when you start opening new tabs, try these fixes:
- Close unused tabs (bookmark for later those you might need again). If you need to restore any, use the Command+Shift+T shortcut.
- Check if your profiles causes the problem: create a new user profile and see if Chrome stops crashing. Alternatively, if you have several profiles, start deleting them one by one to find the culprit.
- Limit the number of open tabs: do not have more than 100 tabs open — it is considered a hard-coded threshold crossing which crashes the browser. Some users suggest creating extra profiles if you need that many tabs.
- Check your internet connection.
Chrome crashing
Unlike freezing (a case in which Chrome becomes unresponsive), crashing is when it quits unexpectedly. Here are a few extra fixes to try:
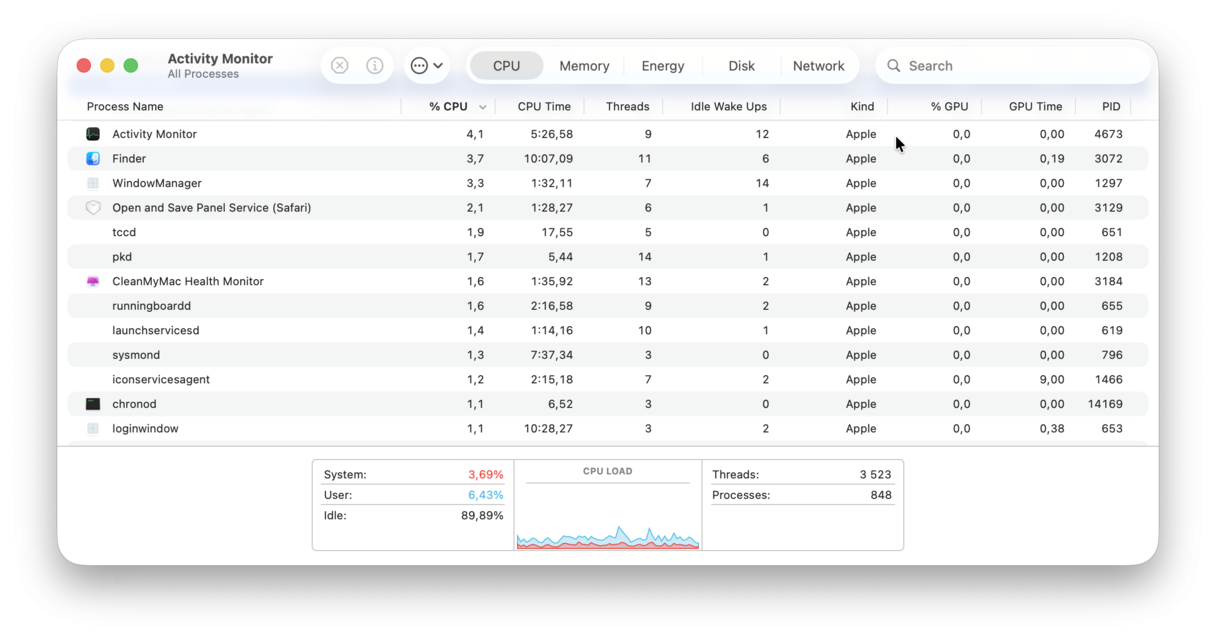
- Quit background apps: your Mac may be out of memory and CPU. You can use Activity Monitor to identify top consumers and quit those you do not need at the moment.
- Disable your antivirus if you have one: users share that they start experiencing issues with Chrome after installing Sophos antivirus. It's worth checking if your antivirus does not cause Chrome glitches, even if it is other than Sophos.
- Delete a corrupted Chrome folder: Open the Finder, press Command+Shift+G, paste ~/Library/Application Support, and press Return. Find the Google folder and delete the Chrome subfolder there. Note that it will delete all user data (like your profile, bookmarks, and extensions), but it can fix all types of glitches leading to Chrome crashes. Important: back up the folder first if you think you might need to restore any data in the future.
If none of the above worked for you, it may indicate a larger issue with the operating system or hardware. First, try updating macOS from System Settings > General > Software Update. If Chrome still crashes (and you do not want to switch to another browser), contact Google support for additional fixes and Apple support or an Apple-certified repair center to rule out hardware problems.
How to prevent Chrome from crashing and ensure long-term Chrome stability
Hopefully, one of the fixes above helped you fix Chrome crashing. To avoid it in the future, follow these basic recommendations:
📌 Keep Chrome updated to the latest version.
📌 Do not keep unneeded extensions enabled.
📌 Do not run Chrome together with other resource-intensive apps (like video or photo editors).
📌 Limit the number of open tabs.
📌 Have hardware acceleration disabled.
There are several reasons why Chrome might keep crashing on your Mac. However, by following the steps above, you should be able to eliminate them one by one and make sure Chrome runs smoothly on your Mac from now on.
Frequently asked questions
Is Chrome crashing more common on M1 Macs or Intel-based Macs?
Neither Apple silicon (M1 or any other M chip) nor Intel has a consistently higher rate of Chrome crashes. This kind of glitches is more connected to software issues in general than chip architecture.
Does iCloud Private Relay cause Chrome to crash on Mac?
No, since it is designed to work in Safari or some unencrypted activity within Apple apps. It means that it cannot affect the work of other browsers in any way.
Is Chrome more likely to freeze or crash on older macOS versions?
Yes and no. If you run an older version of Chrome on an older macOS version, it is unlikely to crash as long as neither of them is buggy. However, if you use the latest Chrome version on an outdated macOS version, crashes and freezes may become more common because of incompatibility, lack of security updates/bug fixes, and increased resource demands of newer Chrome versions on aging hardware/software.
Does the "Aw, Snap!" error mean that Chrome has crashed?
Yes, it implies that Chrome has crashed while trying to load a webpage. It commonly occurs if Mac has run out of memory, the internet connection is unstable, or there are issues with hardware acceleration or incompatible extensions.

