How to clear your scratch disk without opening Photoshop on Mac [4 ways]
So, you’ve just seen the Photoshop error “scratch disks are full” on your screen for the first time?
It may seem puzzling, but it’s a widespread problem among Mac users who work with the creative Adobe Suite. In this article, I’ll explain what a scratch disk is and how to fix the “scratch disks are full” error to keep your laptop in tip-top shape. Let’s dive in!
What is a scratch disk?
A scratch disk is a storage drive or space on a computer’s hard drive or solid-state drive (SSD) that applications use as temporary memory when there is not enough RAM to complete a task. It acts as virtual memory, helping programs like Adobe Photoshop process large files or complex tasks. When the system’s physical memory is full, the scratch disk provides extra space to store temporary data, improving performance and preventing crashes.
Did you know? When working on a large or complex project in Photoshop, it’s quietly producing a massive amount of temporary files that eat up your drive space. It can grow up to 200 GB in just a few weeks!
What is a Photoshop “scratch disk full” error?
When you see a scratch disk error message, it is likely an excessive build-up of temporary files. Those files accumulate without leaving traces, making it tricky to diagnose as they often aren’t visible as occupied memory.
That’s why when you force quit Photoshop, you might end up having tons of temporary system files lurking around, which Photoshop has saved for you (just in case.)
Other reasons why you see the “scratch disk full error” on Mac:
-
You’re running out of space
-
Photoshop’s disk partition is full
-
Not enough RAM is available for Photoshop to use
Whatever the reason, I bet you want to solve it quickly and get back to work. So here are some tips to help you resolve and clear your scratch disk.
How to clear scratch disk without opening Photoshop
Note: Since clearing scratch disks removes all temporary files, any unsaved progress will be lost. Otherwise, important files should not be affected.
1. Clear photoshop cache
Cache and other system junk, if left unattended, can cause the build-up or other annoying issues on your Mac (like Photoshop’s “scratch disk full error.”) So if you can’t open Photoshop, my #1 tip: clear your cache and run regular maintenance on your Mac. A tool like CleanMyMac can help ensure that your Mac always has enough free space and RAM to run all your apps smoothly.
CleanMyMac’s Cleanup feature can clear outdated caches that slow down your Mac and optimize your system in minutes.
Here’s how to clear Photoshop cache and other unneeded stuff with just 2 clicks:
-
Open the app — get your free trial here.
-
Now, select Cleanup from the left sidebar and click Scan.

-
Wait for the scan to complete and click Clean.

If you want to free up only Photoshop-related files, click Review All Junk > System Junk and select them in the User Cache Files section. But I do recommend cleaning all preselected files CleanMyMac has found to make your Mac snappier. You do not have to worry about losing any vital files — the Cleanup tool deletes only absolutely unneeded ones.
2. Remove temporary files
Photoshop’s temporary files eat away your scratch disk space; it’s a good idea to run a search for them and remove them, buying you back some valuable space. Here’s how:
-
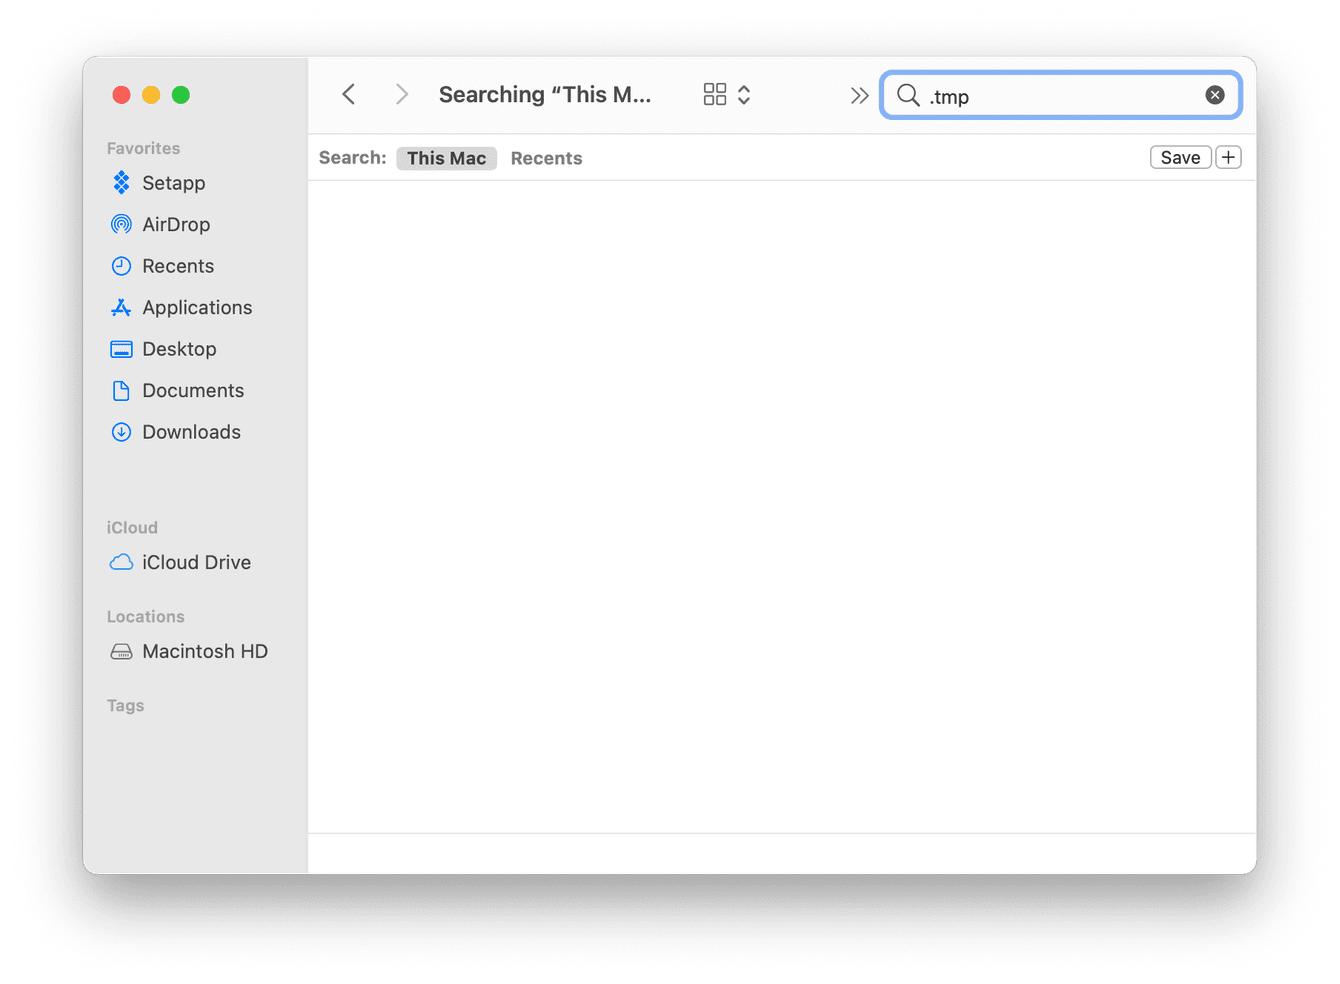
Open a new Finder window.
-
Search for any files with the extension “.tmp.” Photoshop always begins its filename with “pst,” and anything matching those parameters can be deleted.

3. Clear your disk space
The other root cause of the “scratch disk error” is storage space. So, it’s time to take some action. The first step is to check your storage. Simply follow the instructions below.

-
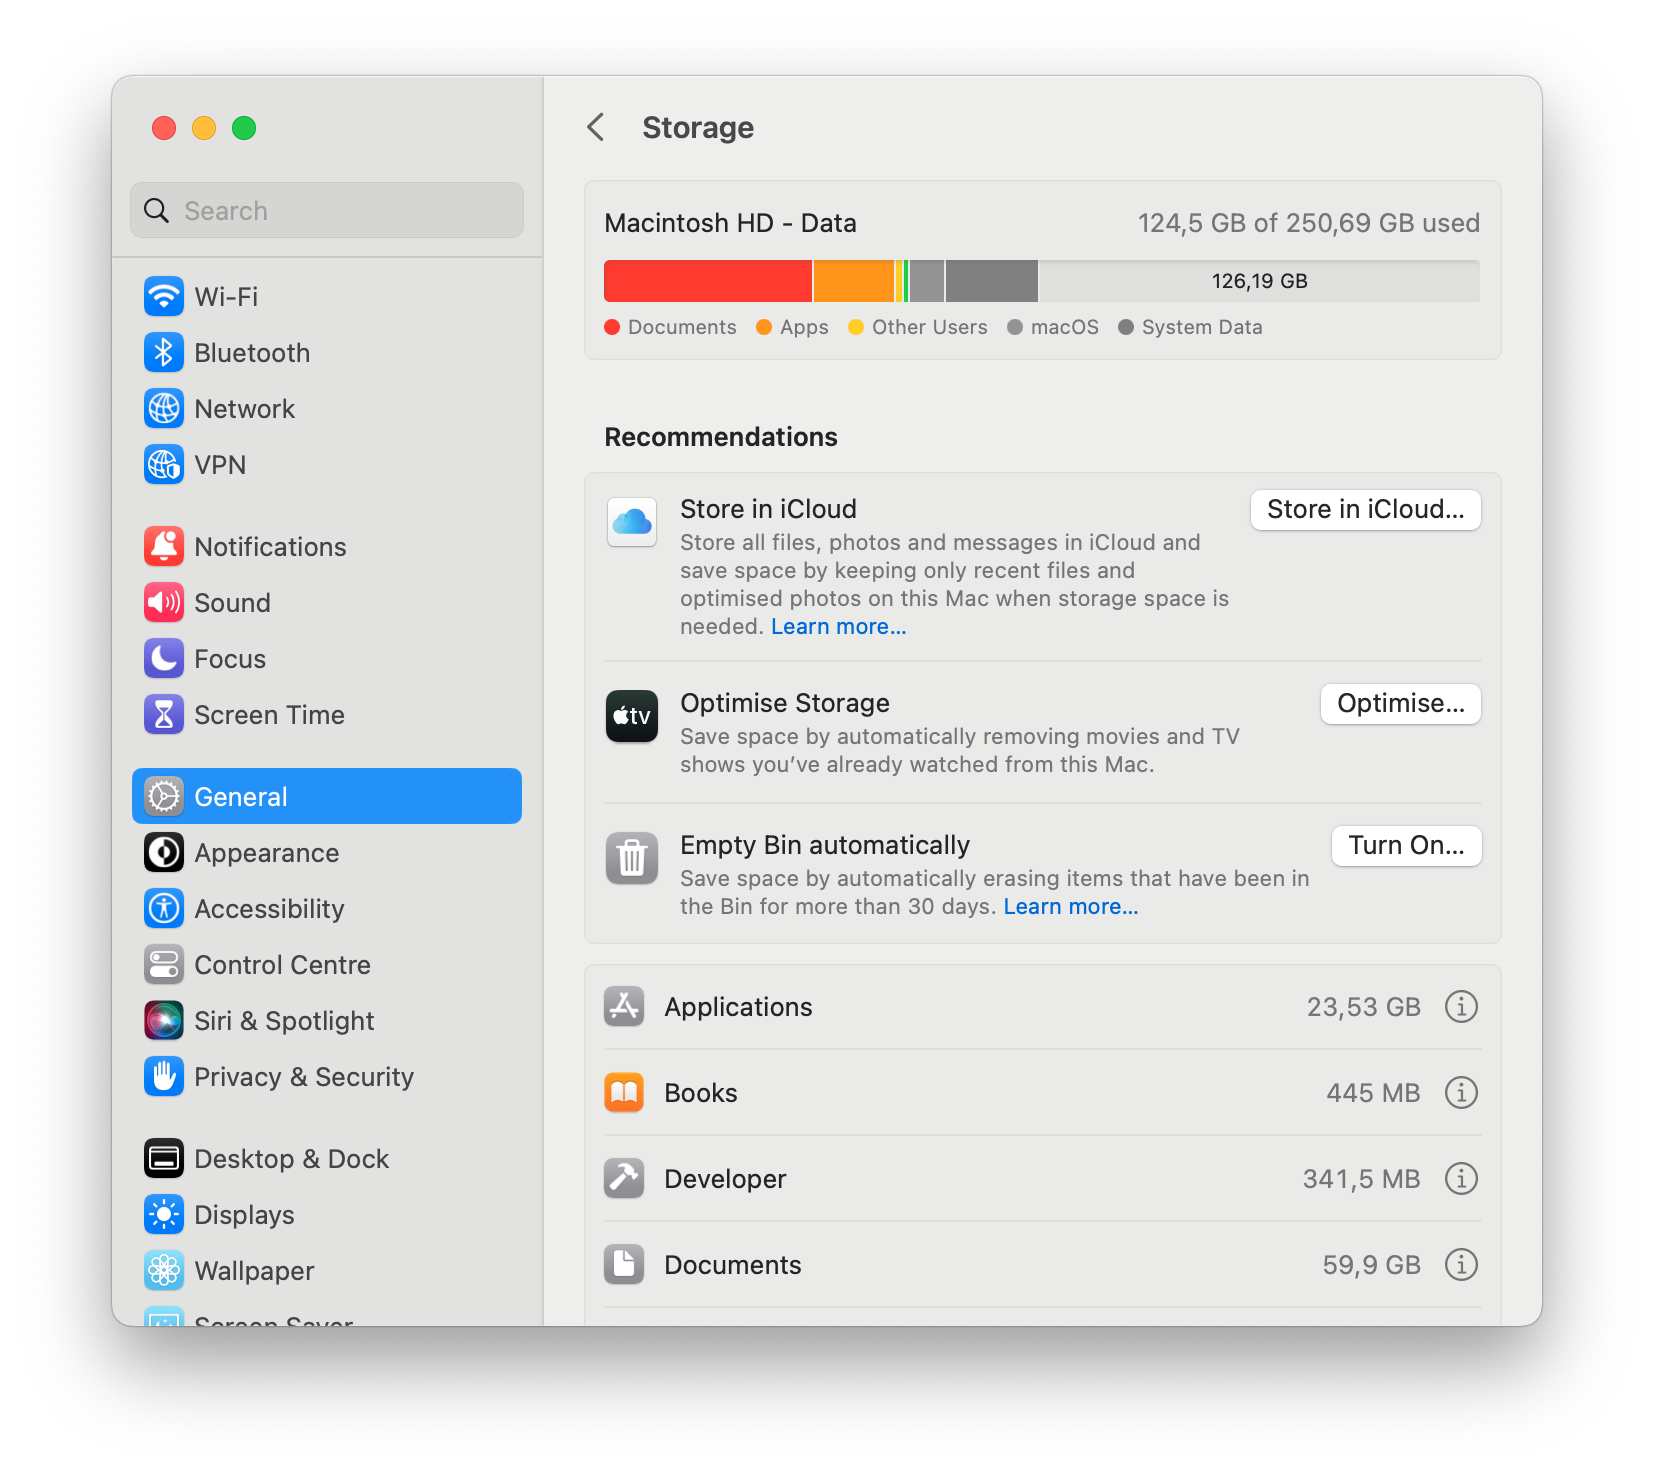
Go to System Settings.
-
Click General and then Storage.
Take a good look at your overview; you can hover over the bars to see what each color represents. What can you remove to free up storage on your Mac?
If you have an external drive or cloud storage account, now is a good time to consider transferring some items. If you choose cloud storage, first, declutter it. CleanMyMac can help you out. It comes with the Cloud Cleanup feature that scans connected cloud accounts and lists the largest files stored locally or on the cloud. You can then remove or unsync them and free up some space for new files.

Otherwise, here are a few other things to consider:
-
Remove old or large files
-
Empty Trash
-
Tidy desktop
-
Clear Downloads folder — here are all the ways to do it
I’m not going to lie, clearing your disk space manually is time-consuming and exhausting. So, if you want to get the same results but speed up the process, try the CleanMyMac Cleanup feature I mentioned above. Again, it removes stacks of unneeded files that eat up gigabytes of the storage, like old cache files and logs, unused languages, Xcode junk, etc. These files are generated automatically and can be removed safely (follow the steps above.)
If storage is always a struggle for you, it’s worth taking some time to deal with it once and for all. Read the article on 12 ways to clear space on your Mac.
4. Use Activity Monitor to free up RAM
A shortage of RAM is a sure way to stop Photoshop in its tracks; luckily, there’s a way to see what’s using most of your Mac’s resources.

-
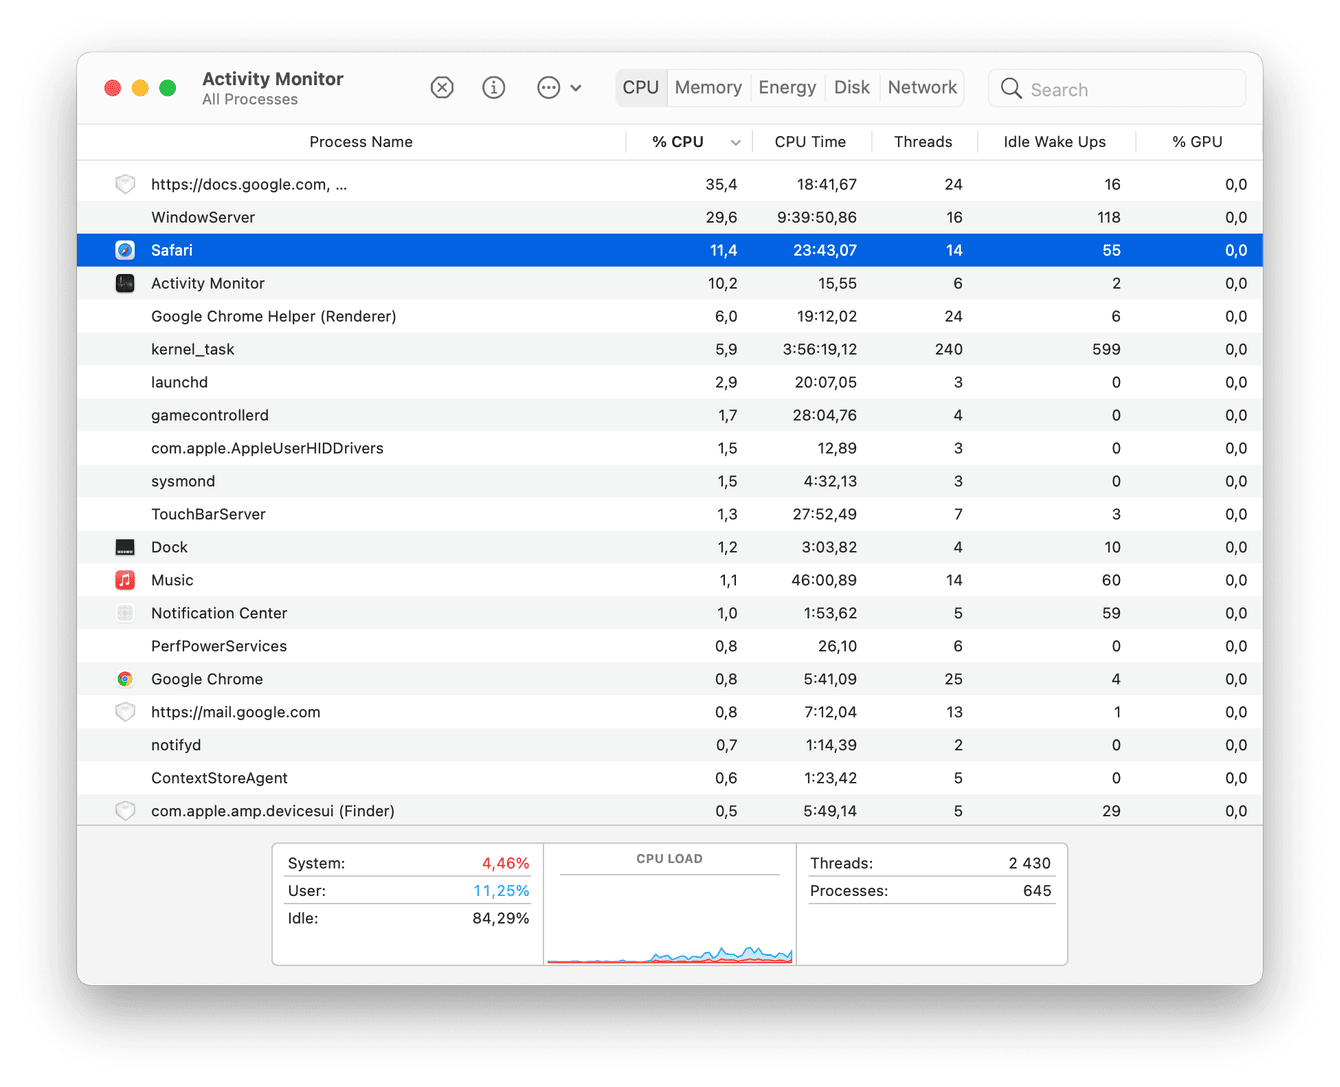
Open Activity Monitor (Finder > Applications > Utilities).
-
The most intensive processes are listed first.
-
If there is a process or an app you don’t need running, select it.
-
Click the “x” button to quit it.
In addition to freeing up RAM, you can also consider deleting purgeable space. Not sure how to do it? Here’s our handy guide on how to clear purgeable space on Mac.
Photoshop still misbehaving? First, turn it on!
If your Photoshop is still glitching after trying the above tips, turn it on and try the following troubleshooting tips.
1. Disable auto-recovery saving
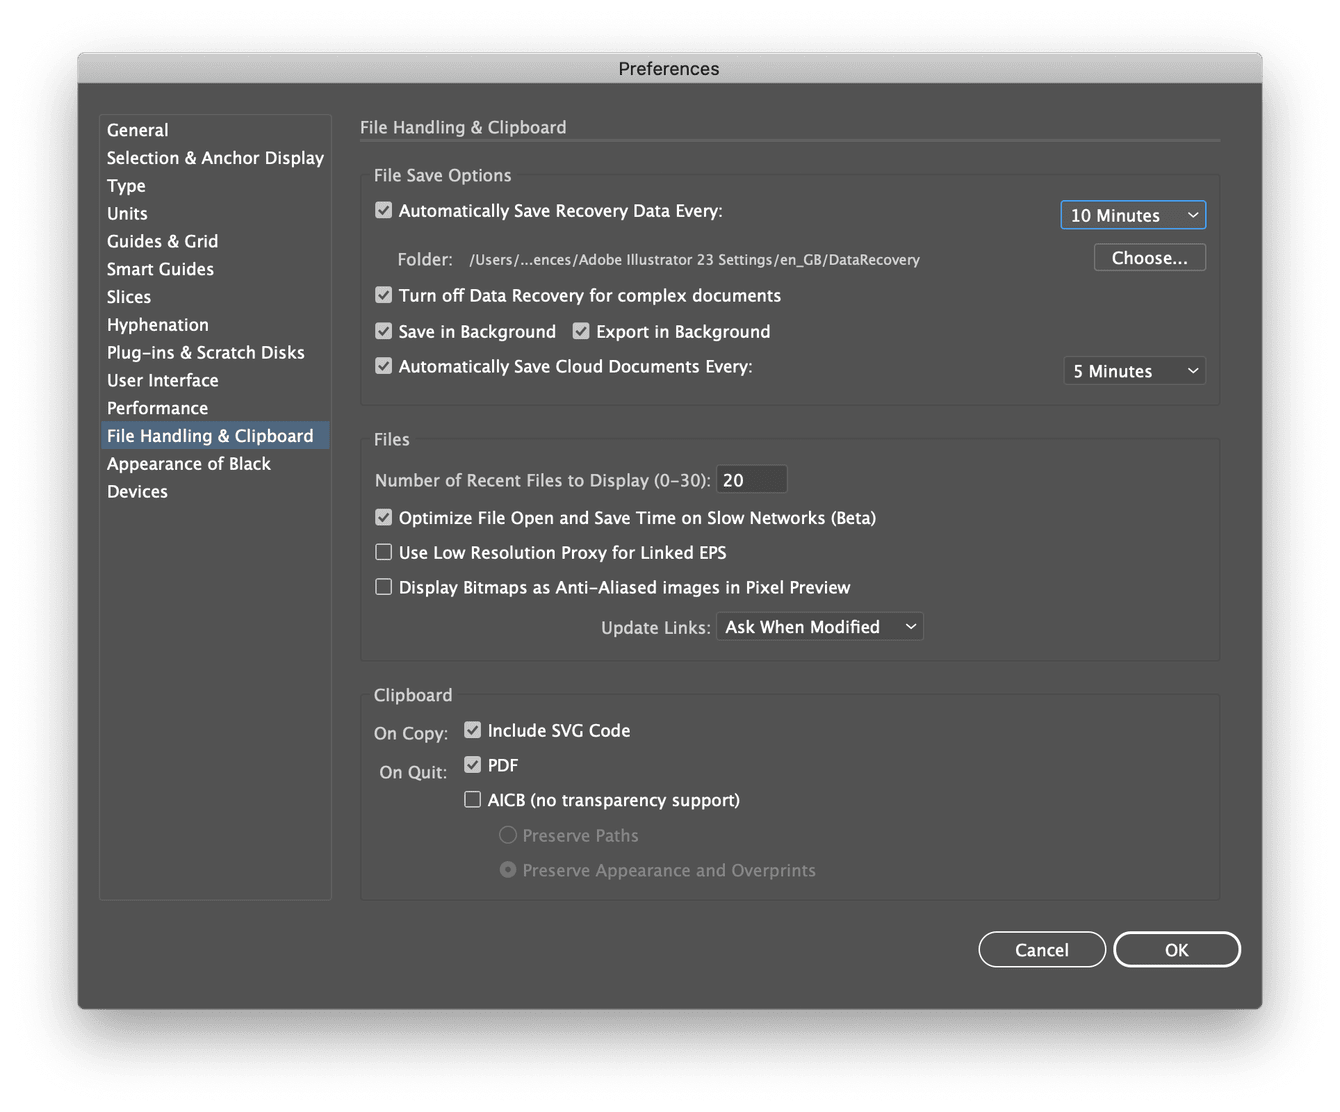
In case of an unexpected quit, Photoshop, by default, is set to auto-recover your files. That’s why it automatically saves recovery data every 30 seconds, creating countless temporary files. You can disable this feature or change saving settings to reduce those files. Follow these steps:

-
Open Photoshop from the top menu, and select Photoshop > Preferences > File Handling & Clipboard.
-
Uncheck Automatically Save Recovery Data to disable this feature or change the data recovery time by selecting the dropdown.
-
Click OK to save your changes.
2. Change your scratch disk
When you set up Photoshop, you will have the option to assign the scratch disk to the drive of your choice. I recommend only using your system drive if you have no other alternatives.
In case you want to change your scratch disk to another drive, follow these steps using Photoshop preferences:
-
Launch Photoshop.
-
Go to Photoshop > Preferences from the menu bar.
-
Select Scratch Disks and tick the checkbox to select or remove a drive as the scratch disk.
-
Click OK.
-
Reopen Photoshop.
3. Reset Photoshop preferences
Resetting Photoshop’s preferences is another way to fix the “scratch disk are full” error. Follow these instructions:
-
Launch Photoshop.
-
Go to Photoshop preferences: from the menu bar, choose Preferences > General.
-
In the window that appears, click Reset Preferences On Quit.
-
Click OK to confirm.
-
Quit Photoshop to complete the reset. Then, Launch Photoshop to see if the “scratch disk error” is resolved.
Photoshop’s “scratch disk full” error is frustrating, but plenty of simple ways exist to resolve it. It all boils down to storage, so remember to keep your Mac in shape. How? By running regular maintenance and clearing temporary files, cache, and other system junk. Stay tuned for more Mac tips & hacks!

