Apple Mail not working? Here's how to fix it
It’s frustrating when an app keeps crashing, freezing, or refuses to load — and Apple Mail is no exception. If you’ve been running into issues like these, you’re not alone:
-
Apple Mail crashes after being open for a while.
-
It quits unexpectedly.
-
It won't open at all.
How to troubleshoot Mail problems on Mac
The next couple of tips will require you to follow them in this exact order and test after each step. First off, check your internet connection. Go to System Settings > Wi-Fi and check that you're connected to your network.
Then, open a browser and visit any website. If it does not load, contact your broadband provider.
Also, if it is the first time you use the Mail app or you've recently changed your password, make sure that you've entered the correct password. If the website loads and the login info is correct, proceed with the fixes.
Let's jump right in.
1. Restart your Mail app and your Mac
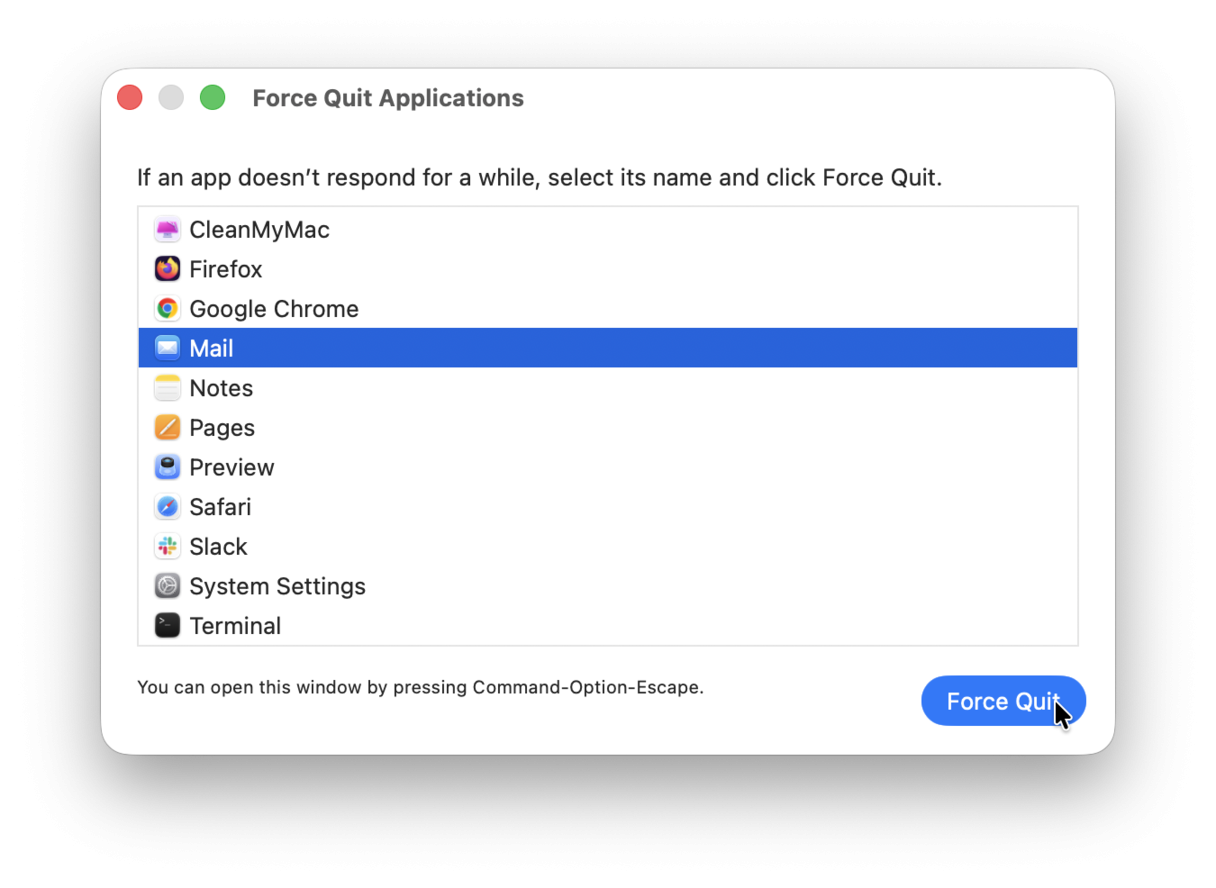
The very first thing to do is to restart your Mail app. To do it, press Option-Command-Esc to open the force-quit menu. Select Mail to quit the app. Then, reopen the app and see if the issues disappeared.
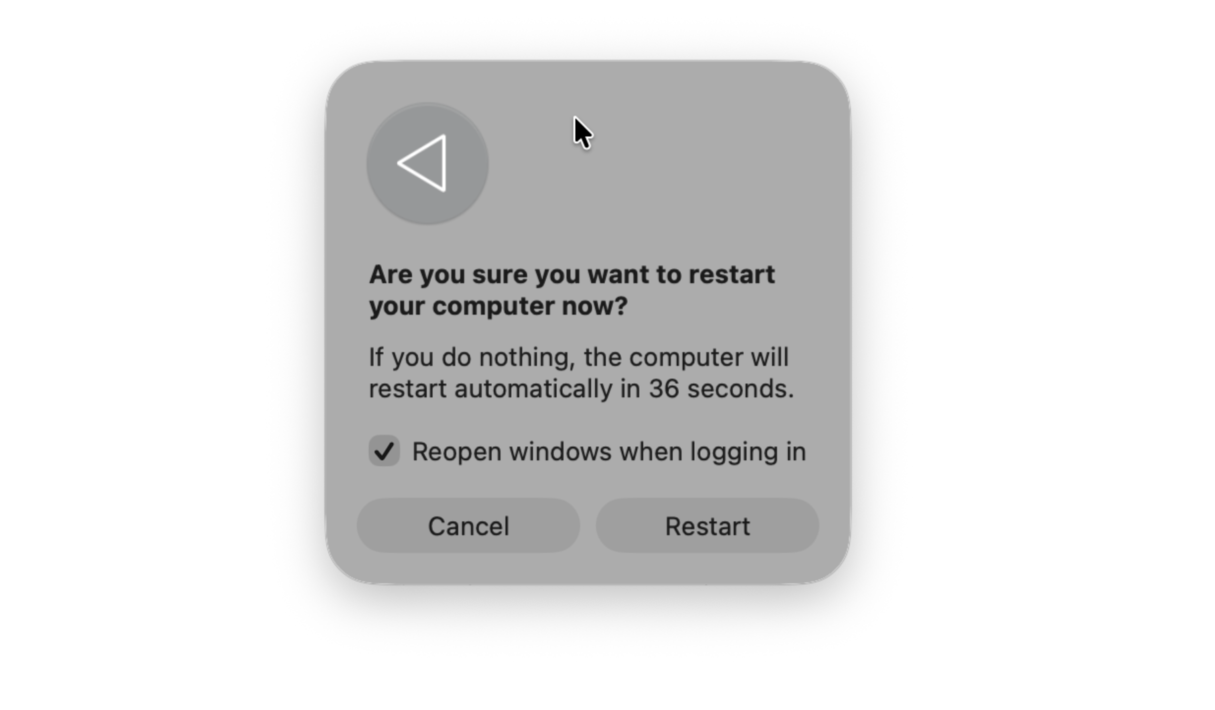
If restarting your Mail app hasn't helped, it's time to restart your Mac: go to the Apple Menu on the top left and select Restart. See if that worked and move on if required.
2. Rebuild Mail
Don't worry; this isn't as daunting as it sounds. Rebuilding your mailboxes might completely solve the problem.
Here is how to rebuild your Mac Mail:
- Open your Mail app.
- Select a mailbox from the left sidebar.
- On the top menu, select Mailbox > Rebuild.
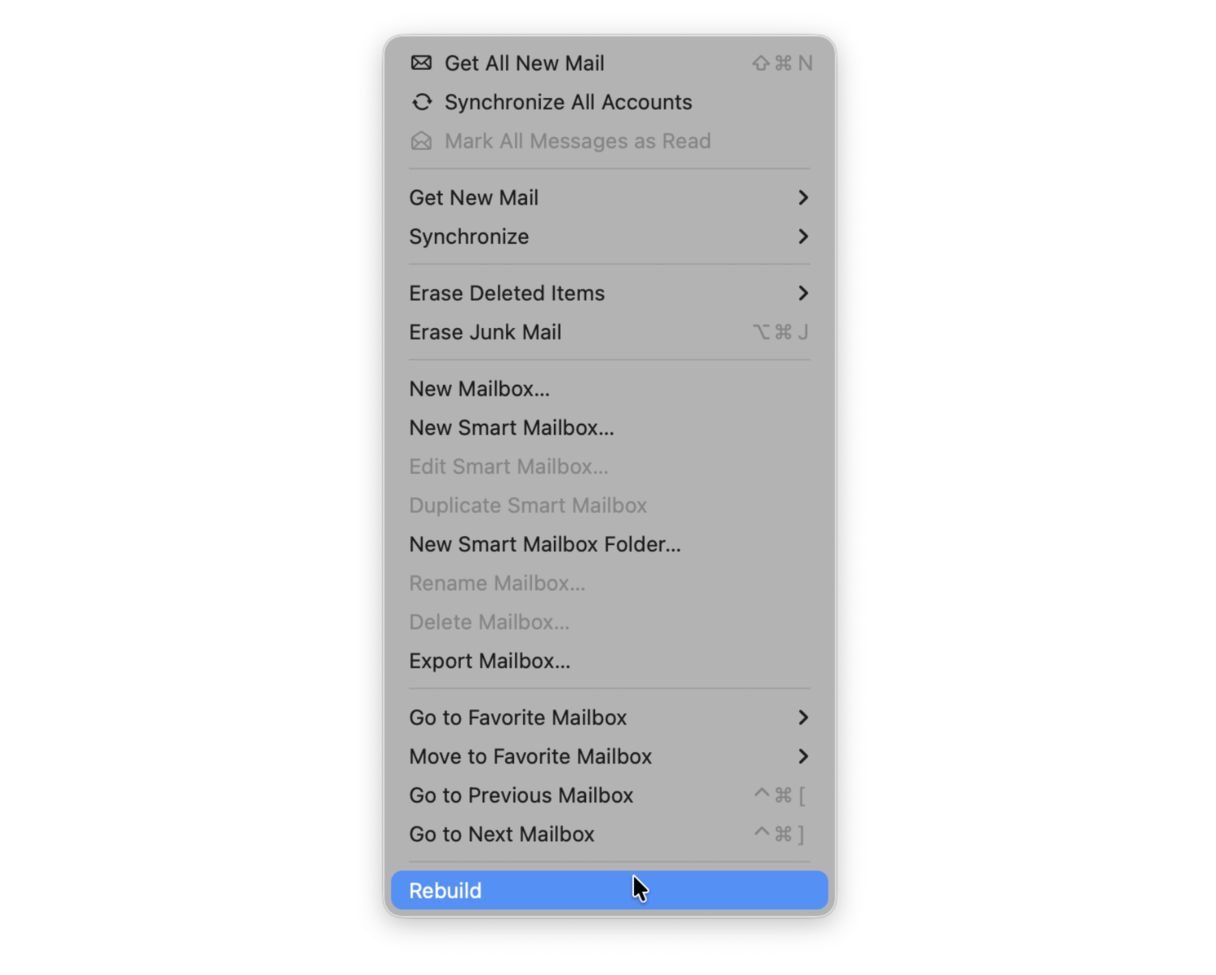
Try this for all your Mailboxes, then close Mail and reopen it. Now, test again.
3. Reset Mail app
Use CleanMyMac to quickly and securely reset Mac Mail. It won't delete the program but will get rid of all app-related items to bring the app as close to the default state as possible.
Here's how to do that:
- Open the app and select Applications from the left sidebar (get your free trial here).
- Click Scan.
- When the scan is complete, click Manage My Applications.
- Find Mail in your Application list and select the show more arrow.
- Select all the items except Binaries.
- Click the main Remove button below.

Why you should try CleanMyMac
- Can remove cache and other junk, too: on average, users remove 10.5 GB of junk files
- Cleans and maintains 51K Macs daily
- Removes over 81 GB of junk every minute
Get your free CleanMyMac trial — see it in action on your Mac (test free for 7 days).
4. Update your macOS
Keeping your Mac up to date is a sure way of working out the kinks. It's obvious but worth a try. How to check if you have the latest update installed:
- Select the Apple menu top left and go to System Settings > General.
- Click Software Update to find out if you need a quick update.
- If there are any updates available, click Update Now and follow the on-screen instructions.

Test again, and if Mail is still not opening on your Mac, it's time to move to the next tip.
Tip: Mac Mail app not working is just one issue you can experience while using your Mac. Check out other blog articles to learn how to fix Apple mouse not working, Trackpad glitches, and other nasty Mac problems.
5. Disable your email accounts
If you have multiple accounts, it's worth disabling them and then reloading them one by one to try and find if an account is corrupt. It usually helps if the Mail app is not showing new emails.
How to manually disable your Mail accounts:
- Open the Mail app and go to Settings > Account.
- Deselect the checkbox next to Enable this account.
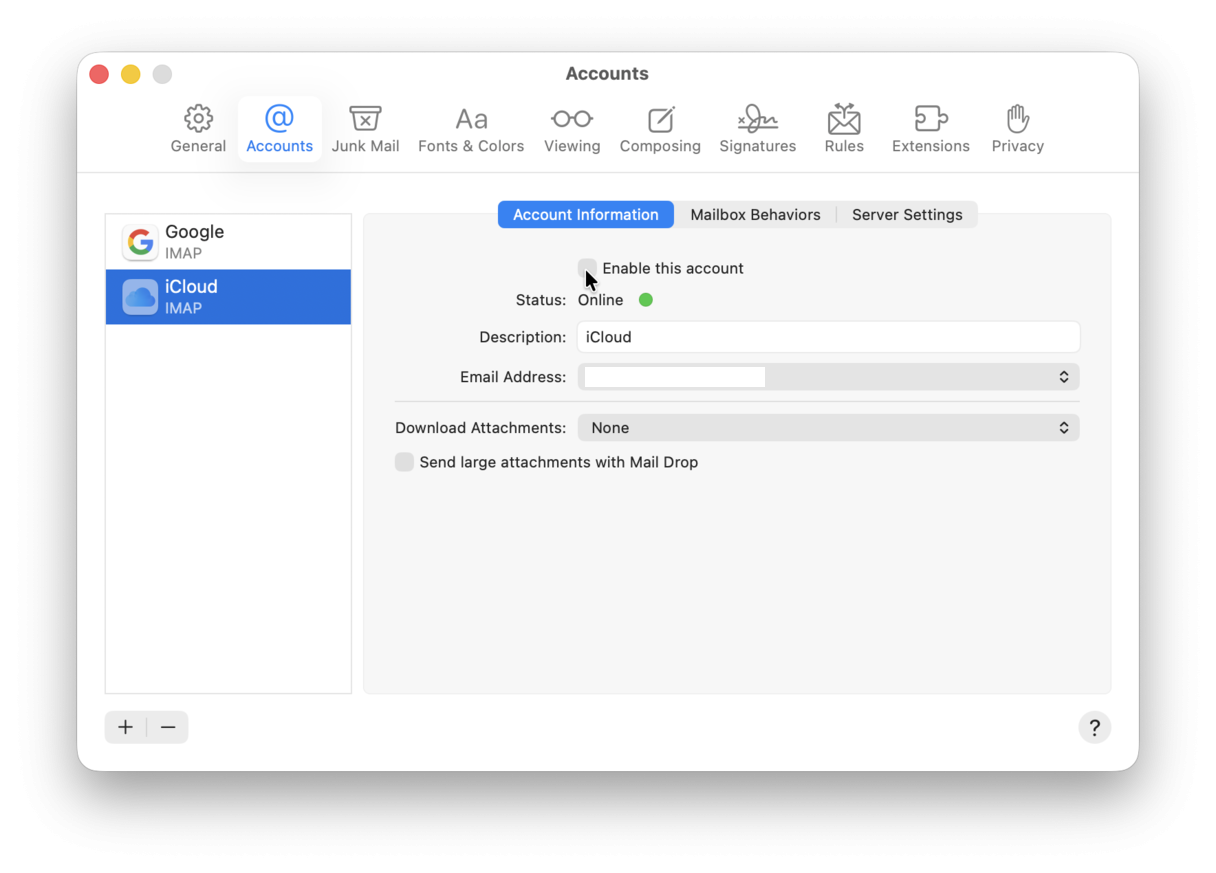
If the Mail app now works, then one of your Mail accounts is causing the issue. To find out which one, turn your accounts back on one by one, following the steps above to find the offender.
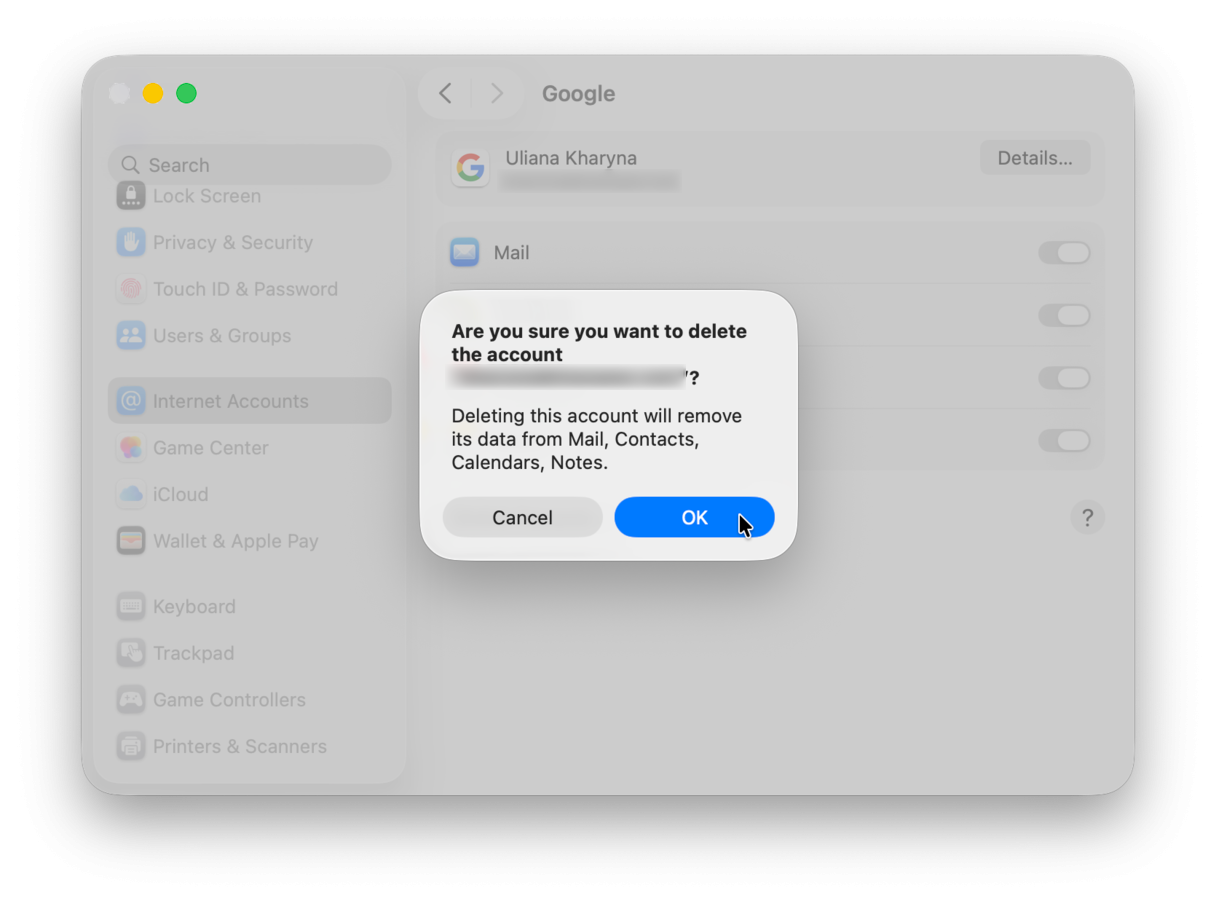
Once found, delete the mailbox account altogether. Here's how:
- Go to System Settings > Internet Accounts.
- Select your account and click Delete Account at the bottom of the window (if it is an iCloud account, you may need to scroll down).
Tip: Apple’s recent Mail Categories feature automatically sorts your emails into sections like Primary, Transactions, Updates, and Promotions, making it easier to find important messages at a glance. If you prefer the classic look, you can switch back to the standard view with just a click. But if you value your time and love a tidy inbox, it’s definitely worth a try.
6. Remove problematic Mail attachments
Sometimes, Mail does not work on a Mac because of a dodgy email attachment. This can be hard to identify unless Mail immediately crashes when you click on a specific email.
If your inbox contains a mountain of messages like mine, it can be tricky to pinpoint the corrupt item. It's a lot easier to clean up your attachments with a tool like CleanMyMac. Its dedicated Cleanup module can quickly and safely remove local copies of email attachments and downloads, clearing space and eliminating app crashes. Bonus point: Apple notarized the app, so it’s safe for your Mac.
How to remove mail attachments with CleanMyMac:
- Open the app — get your free trial here.
- Select Cleanup from the left sidebar and click Scan.
- Wait for the Scan to finish.
- Click Review All Junk.
- In the sidebar, click Mail Attachments and review the files to remove.

7. Remove and reindex envelope files
Mail uses an envelope index to catalog and search message headers; these can become defective and cause Apple Mail not to work.
How to manually remove envelope files:
- Quit Mail and open the Finder.
- Holding down the Option key from the top menu, select Go > Library.
- Now, select Mail > V9 folder (depending on your macOS, this could be another number).
- Now, select the MailData and locate the following files:
Envelope Index-shm
Envelope Index-wal
Envelope Index - Copy and paste them on your desktop, deleting the original files in MailData. Then, reopen Mail and test.
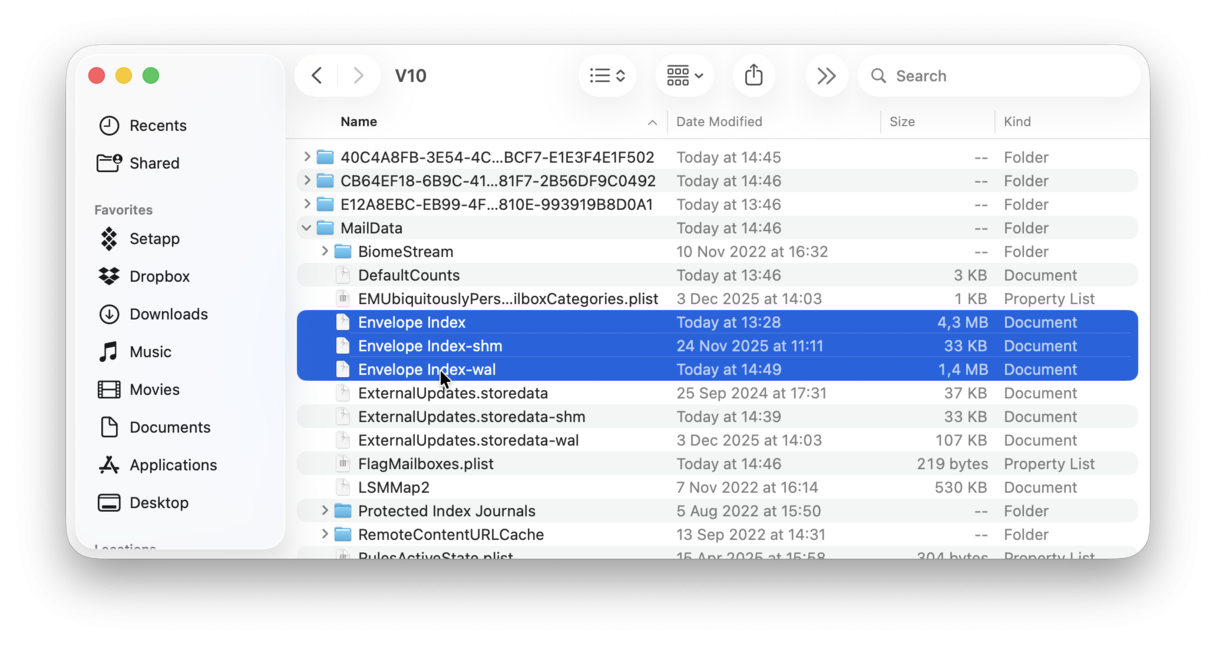
If it's working, delete the files on your desktop.
Don't fancy poking around in your Library folder? There's a quicker way to do this with the app I mentioned earlier. CleanMyMac has a Performance module that can do this in just a few clicks.
How to remove and reindex envelope files the quick way:
- Open CleanMyMac.
- Select Performance from the left sidebar and click Scan.
- When the scan is complete, click View All Tasks.
- Choose Maintenance Tasks and then select a box near Speed Up Mail.
- Click Run at the bottom.

Simple!
8. Test Mail in safe mode
Safe mode helps to identify whether an issue is being caused by startup software. It also clears the cache and repairs disks — sometimes solving what's wrong with Mail altogether.
To start Macs with Apple silicon in safe mode:-
Shut your Mac down and wait 10 seconds.
-
Turn your Mac back on, pressing and holding the power button for 10 seconds.
-
When the startup window appears, release the power button.
-
Now, select your startup disk, then press and hold the Shift key.
-
Click Continue in Safe Mode and release the Shift key.
![]()
-
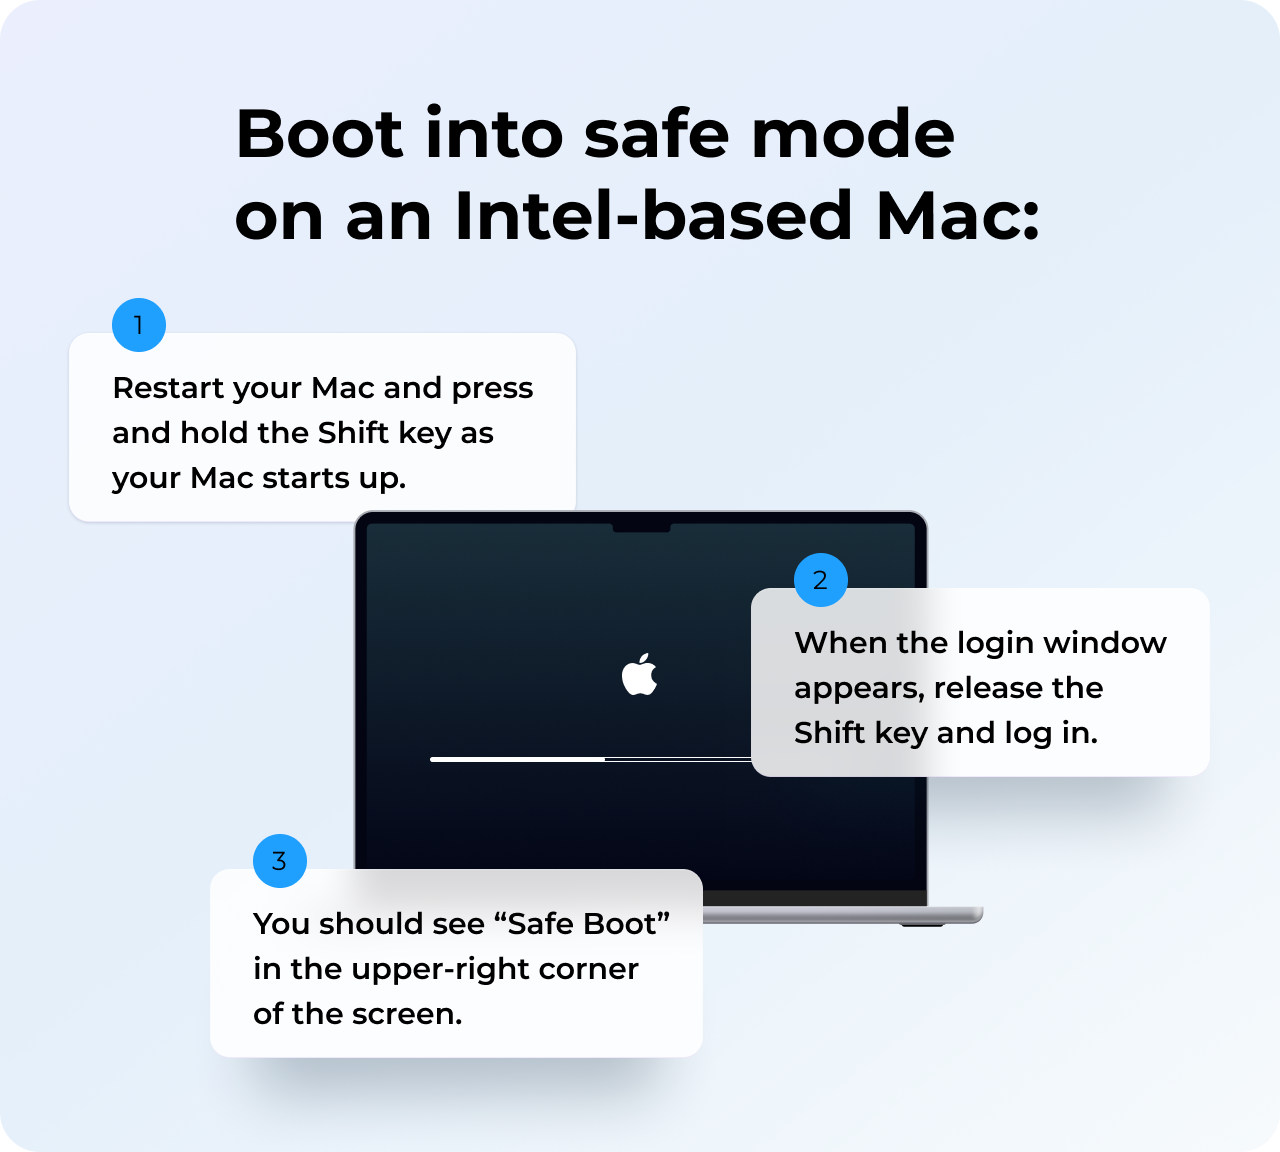
Shut down your Mac and wait 10 seconds.
-
Restart your Mac and press and hold the Shift key on startup.
-
When the login window appears, it's time to release the Shift key.
-
You might need to log in again. But you will see "Safe Boot” on either the first or second login window in the top right-hand corner.
Now, open the Mail in safe mode and see if it's working correctly. If the issue is no longer disturbing you, the problem should have been resolved. Now restart your Mac as usual.
9. Delete and reinstall Mail app
If nothing else has worked, it's time to delete and reinstall the Mail app. Since it is preinstalled, you cannot simply drag it to the Trash, but there's still a workaround. The process, though, is time-consuming and requires some effort.
Note that it will delete all of your data, so you should back up first and then recover your Mac. The easiest way to do it is to use Time Machine.
1. Disable SIP
All preinstalled apps are protected by SIP (System Integrity Protection), so to delete them, you'll need to disable it temporarily. First, you'll need to boot into recovery mode. Follow the steps below for your Mac.
Intel-based Mac
- Shut down your Mac.
- Press the power button and hold Command-R.
- Wait for the Apple logo to appear and release Command-R.
- You should eventually see the macOS Utilities window.
Mac with Apple silicon
- Shut down your Mac.
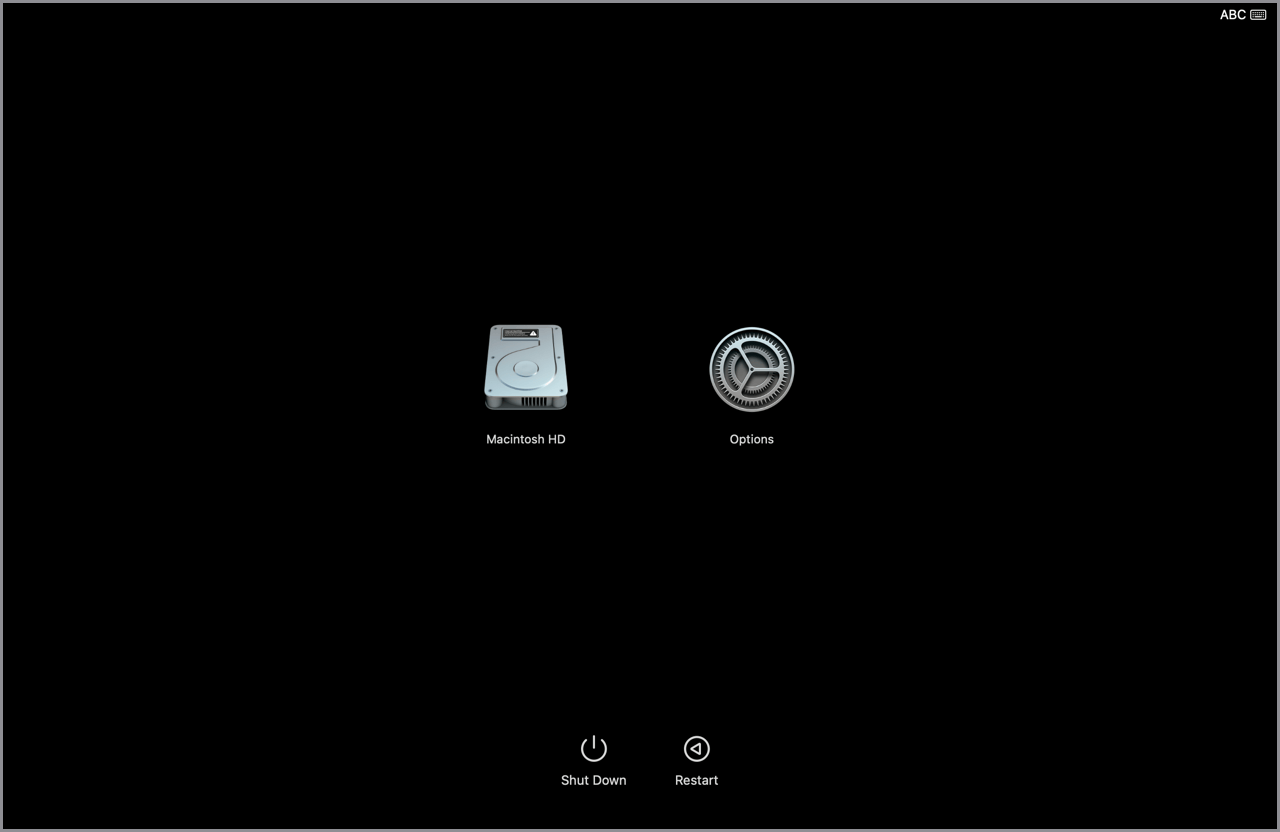
- Press and hold the power button (Touch ID).
- Keep holding the power button until you see the startup options.
- Click Options, then click Continue.
- Enter your admin password, then click Continue.
Once in recovery mode, click Utilities in the menu bar and open Terminal.
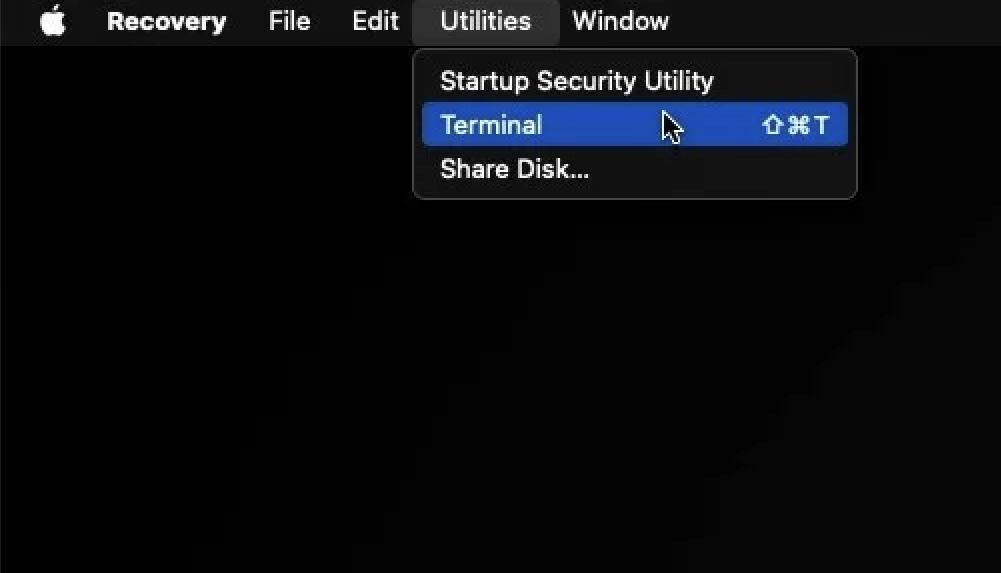
Then, follow these steps:
- Type in csrutil disable and press Return.
- If asked, press Y and press Return again.
- Enter your admin password and press Return.
- Reboot your Mac.
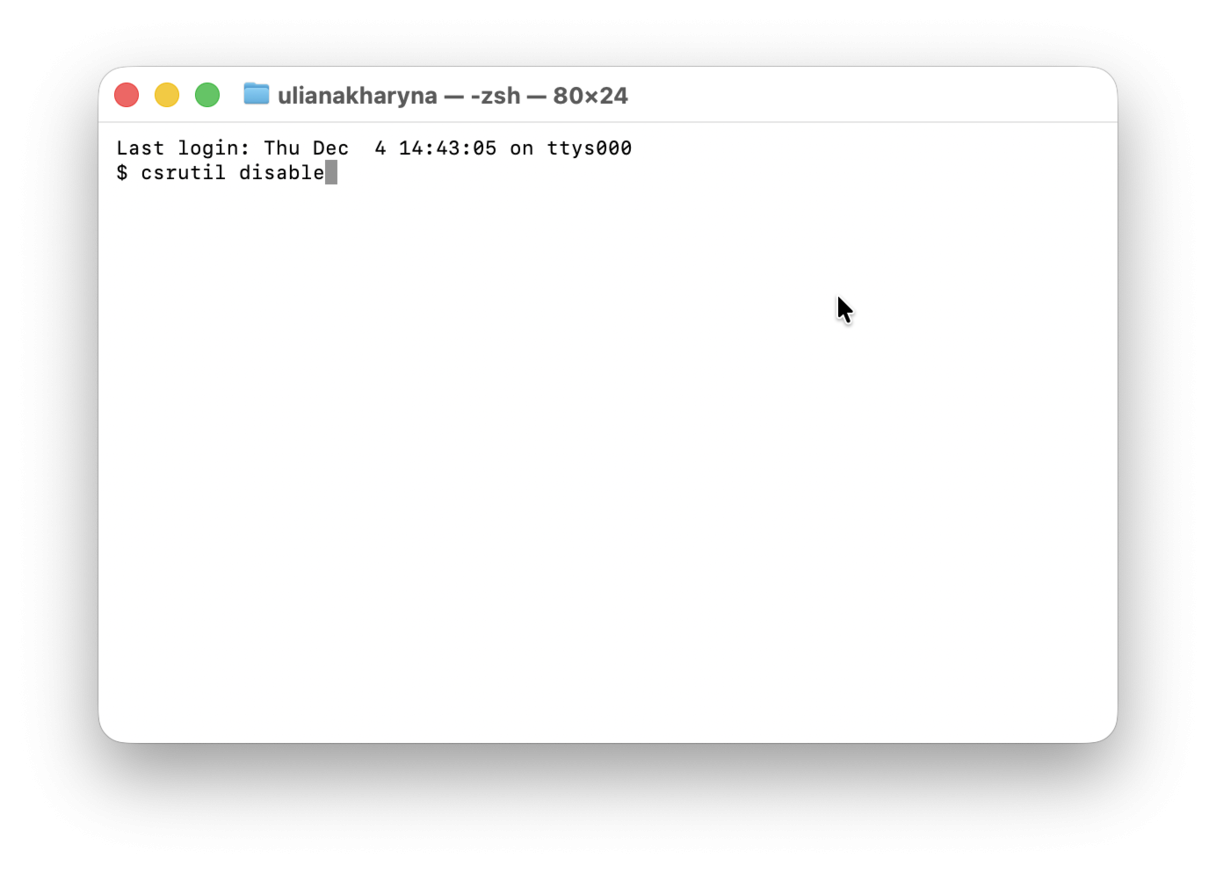
2. Delete the Mail app
Now that you've disabled SIP, it's time to delete the Mail app.
- Open Terminal from Applications > Utilities.
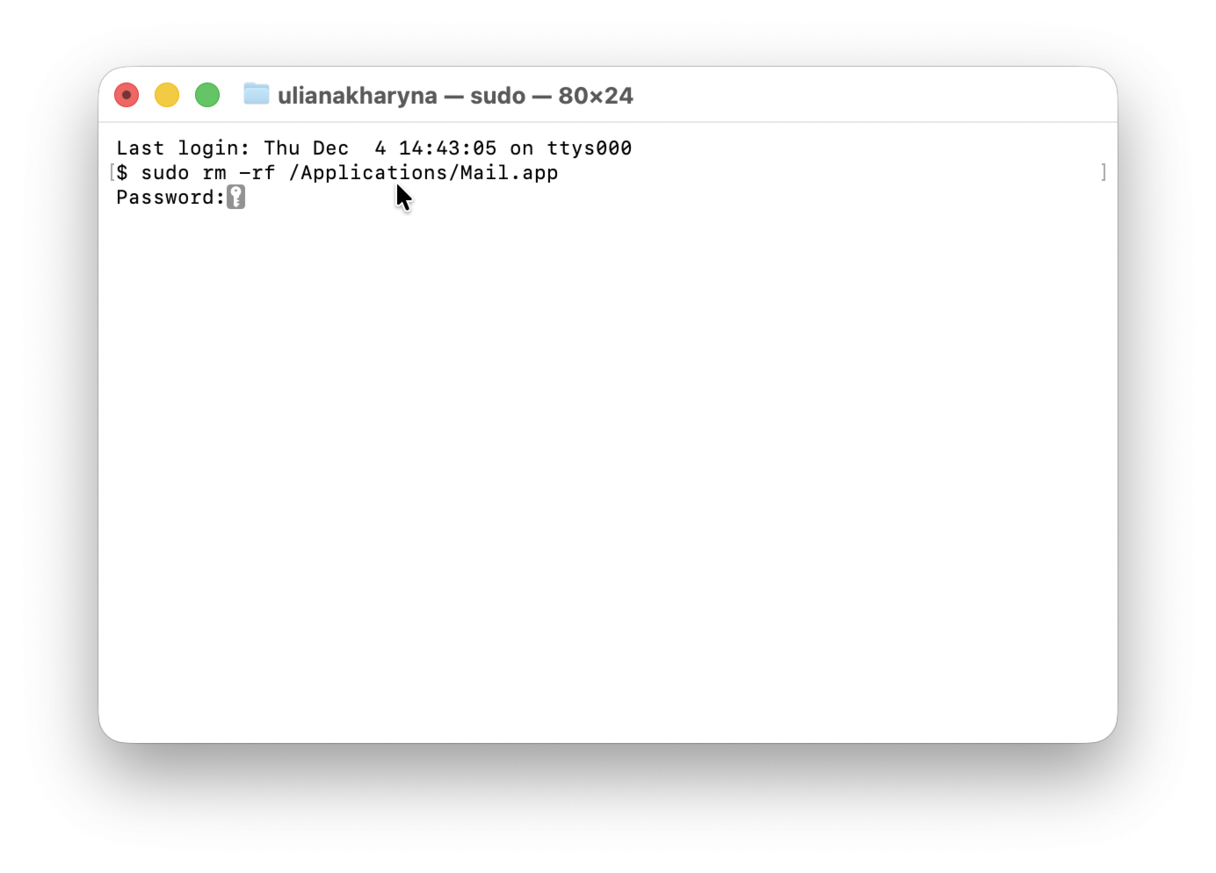
- Type sudo rm -rf /Applications/Mail.app — this command will delete Mail app.
- Press Return and type in your password followed by Return if asked.
3. Enable SIP
The final step in deleting the Mail app is to enable SIP:
- Boot into recovery mode following the steps above.
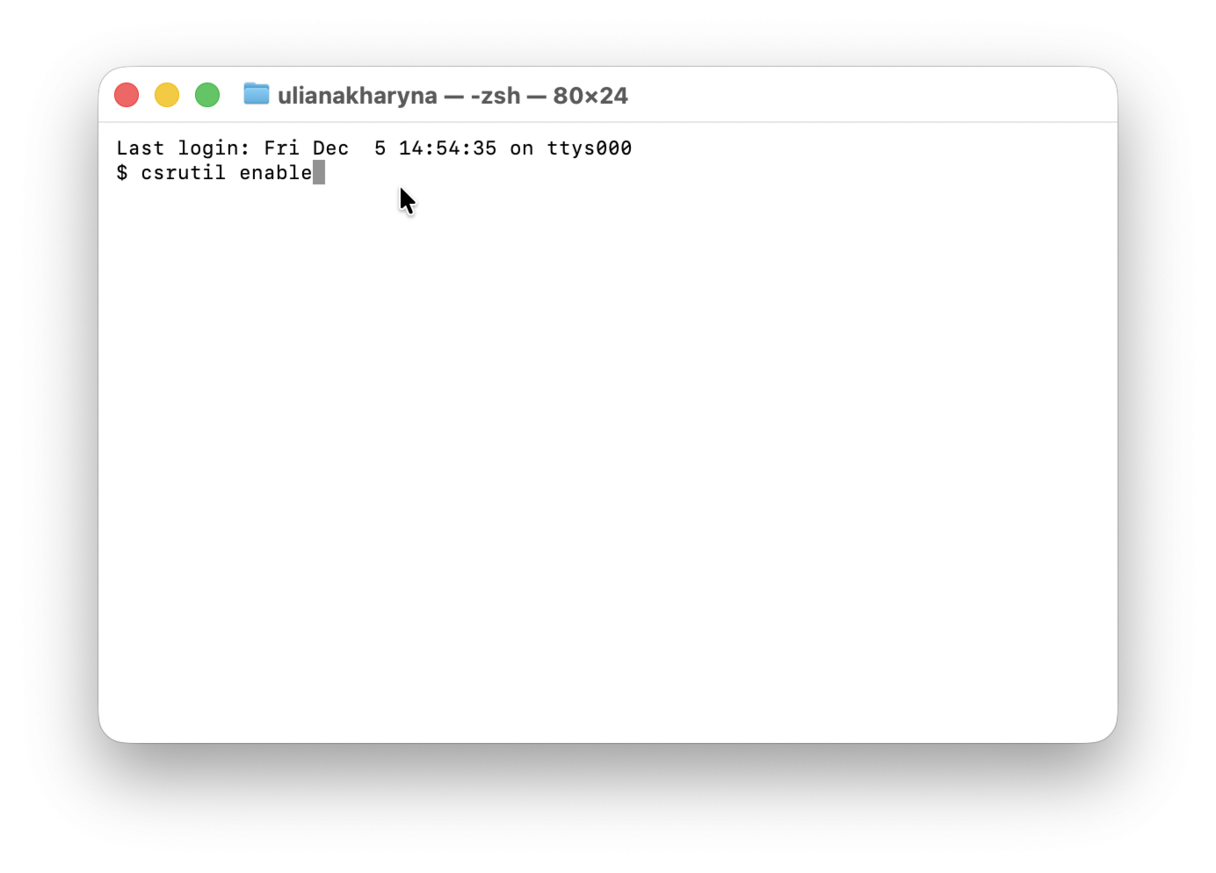
- Open Terminal and paste this command: csrutil enable
- Press Return and reboot your Mac.
4. Reinstall the Mail app
Finally, you can now reinstall the Mail app. The main problem with doing it is that you cannot simply download it from the internet. You will have to reinstall macOS, and the Mail app will be installed on your Mac with the fresh version of the operating system.
If you're ready to reinstall macOS and have backed up your data, boot into recovery mode once again and click Reinstall macOS. Follow the on-screen instructions.
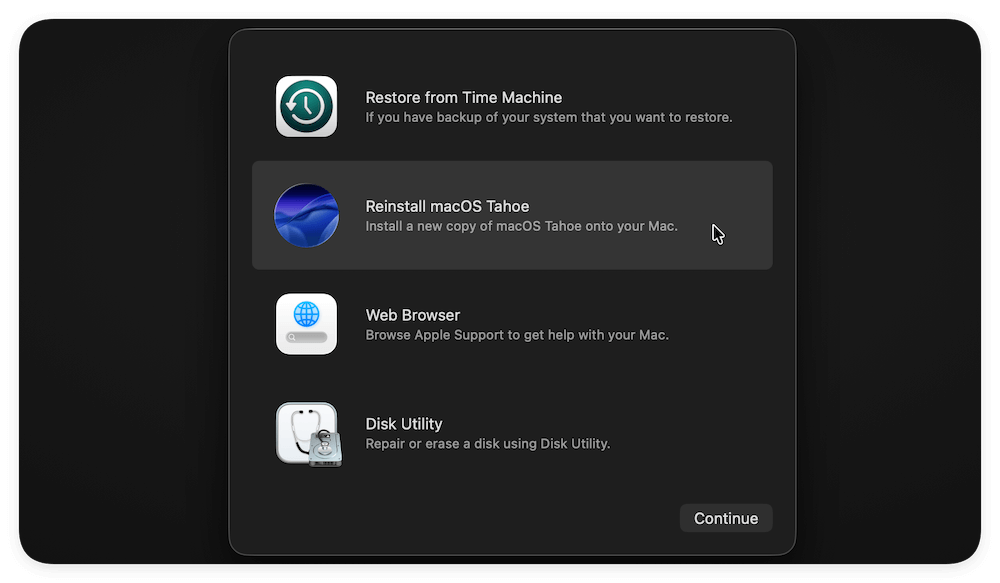
Note: If you haven't updated your Mac in step 4, try doing it before deleting and reinstalling your Mac app. It may be all you need to do to fix any issues.
Bonus tip: Understanding Mac Mail error codes
Sometimes, the Mail app returns error codes. Here's what they mean and how to fix them:
| Error code | Meaning | Fixes |
| 101 | General connection or authentication failure |
Check the internet connection |
| 201 | Authentication or network issue |
Check the internet connection |
| 301 | Service outage or incorrect account settings |
Check the internet connection |
| 404 | Cannot find the email server |
Check the internet connection |
These troubleshooting tips should fix Mail if it's not working correctly on your Mac. Time to get back to those emails.
Frequently asked questions
Why does my Mail show blank/white screen?
It is often a temporary glitch caused by a stuck message or an issue with the mailbox index. To fix it, quit the Mail app. If it does not help, resend any unsent email. Then, rebuild your mail and update macOS. If still no luck, delete Mail-related files: com.apple.mail from ~/Library/Containers/ and Mail-related files from ~/Library/Group Containers/. Alternatively, use CleanMyMac to reset the Mail app.
Why is my Mail slow and how do I fix it?
The problem is usually caused by the accumulation of cache files. Follow the steps above to clear it. Additionally, go to ~/Library/Mail/V9 (the number after the V may differ) and delete subfolders. Extra fixes include deleting unneeded drafts and merging all windows (Window in the menu bar > Merge All Windows).
How to fix it if the Mail search is not working?
If the Mail search stopped working, first restart the Mail app. Next, go to System Settings > Spotlight and make sure Mail is enabled. If it still does not work, rebuild Spotlight via Terminal. You will need to run these commands one by one:
sudo –i (followed by Return and your admin password)
mdutil –Ea
mdutil -ai off
mdutil -ai on
Once reindexing is over, the Mail search should work.
Should I use Mail alternative?
The Mail app should work just fine since it is built in and created specifically for macOS. You can try accessing your emails from the browser by logging in to icloud.com and clicking Mail there. If you want to try an alternative, some great options are Canary Mail and Spark Mail.
What to do if the Mail app does not work on iPhone/iPad?
The steps are pretty similar to those you need to take on a Mac: check the internet connection, restart your device, make sure it is up-to-date (Settings > General > Software Update), delete and re-add your account in Settings > Mail > Accounts, and reset the Mail settings (toggle Mail off and back on under Settings > Mail > Accounts).

