How to delete Time Machine backups and snapshots
Apple’s native backup mechanism, Time Machine, is an essential tool for most Mac users, and it’s arguably one of the easiest ways to back up your important personal data. Once you’ve activated and enabled Time Machine, it’ll automatically back up your files hourly, daily, and weekly to your connected external hard drive or storage device and simultaneously store local snapshots.
The problem is both backups and local snapshots take up precious space on a MacBook, so knowing how to thin these out can help you reclaim capacity and enhance your Mac performance. In this article, we’ll show you how to do it.
What’s the difference between Time Machine backups and snapshots?
Wondering what is the difference between Time Machine backups and snapshots? We’ve got you covered.
The primary difference between backups and snapshots is backups are saved to your connected external hard drive, whereas local snapshots are stored on your Mac.
- Time Machine backups essentially store all your files and folders that are not considered part of the macOS installation, so these are things like music, applications, documents, and photos.
- Time Machine local snapshots are images of your macOS at a specific point in time; they aid recovery and protect your personal data against data corruption or hardware failure.
Should you delete those?
The short answer is yes if you are running low on space. Also, if you are planning to sell or give away your Mac, it is a good idea to delete backups and snapshots stored locally on your Mac to keep your data private.
However, make sure that you always have the latest backup kept somewhere in a safe place. As for the old backups, they can be safely removed. Snapshots should be deleted automatically by the macOS unless a software glitch prevents it from doing so.
How to delete Time Machine backups
How to delete Time Machine snapshots
How to use Time Machine (if you haven’t yet)
If you don’t regularly back up your personal data, now is the time to start. Data loss is a subject no one ever wants to encounter. Plus, Time Machine is so simple to set up; here’s a reminder for those who haven’t configured it yet.
-
Connect your chosen external storage device.
-
From the main Apple menu > System Settings > General > Time Machine.
-
Click the Add Backup Disk button and select your storage device from the list.
-
Click Set Up Disk and simply follow the instructions.

Now that you know how to set up Time Machine, it’s time to delete unnecessary old backups and reclaim space. Let’s go.
Tip: While we're on the topic of setting up Time Machine, here are some additional tips for you: transferring Time Machine backup to a new disk and more on what Time Machine backs up.
How to delete Time Machine backups on a Mac
Time Machine automatically removes old backups when it starts to run out of space which is a great built-in feature, but there are still times when you might also want to do this manually:
-
To create additional storage space on your external device for non-backup files.
-
When Time Machine indicates there isn’t enough available space on your external drive to complete a backup.
If these scenarios sound familiar, you’ve got three options; let’s take a look.
1. Use Time Machine
You can use the Time Machine application itself to remove old backups; here’s how:
- With your external storage device connected, open the Time Machine application from Launchpad.
- Locate a backup for removal, then select it.
- Click the gear and select Delete Backup.
- You’ll need to confirm your password to complete the removal.
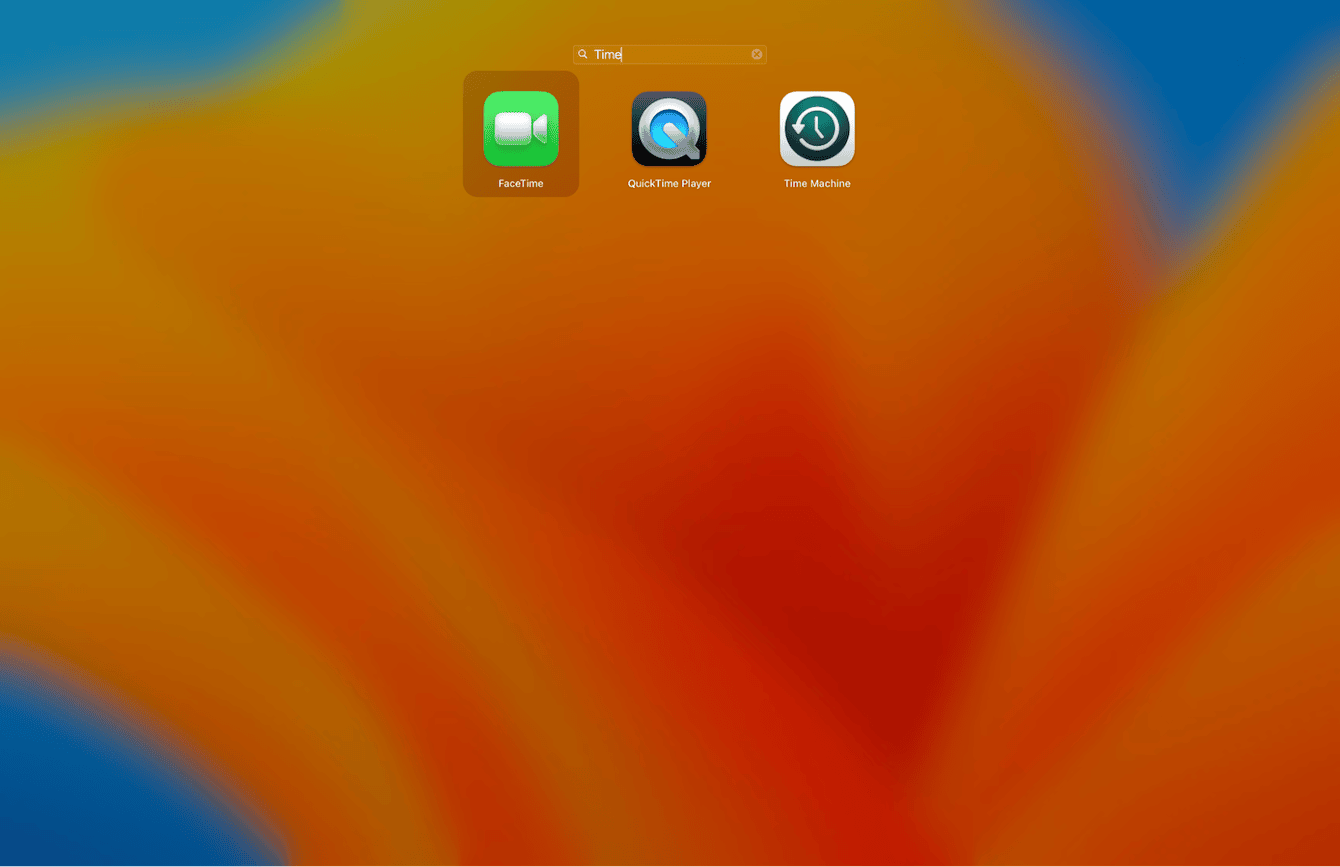
This method is fairly simple, but there are other ways, too; head to the next tip to see your options.
2. Use the Finder
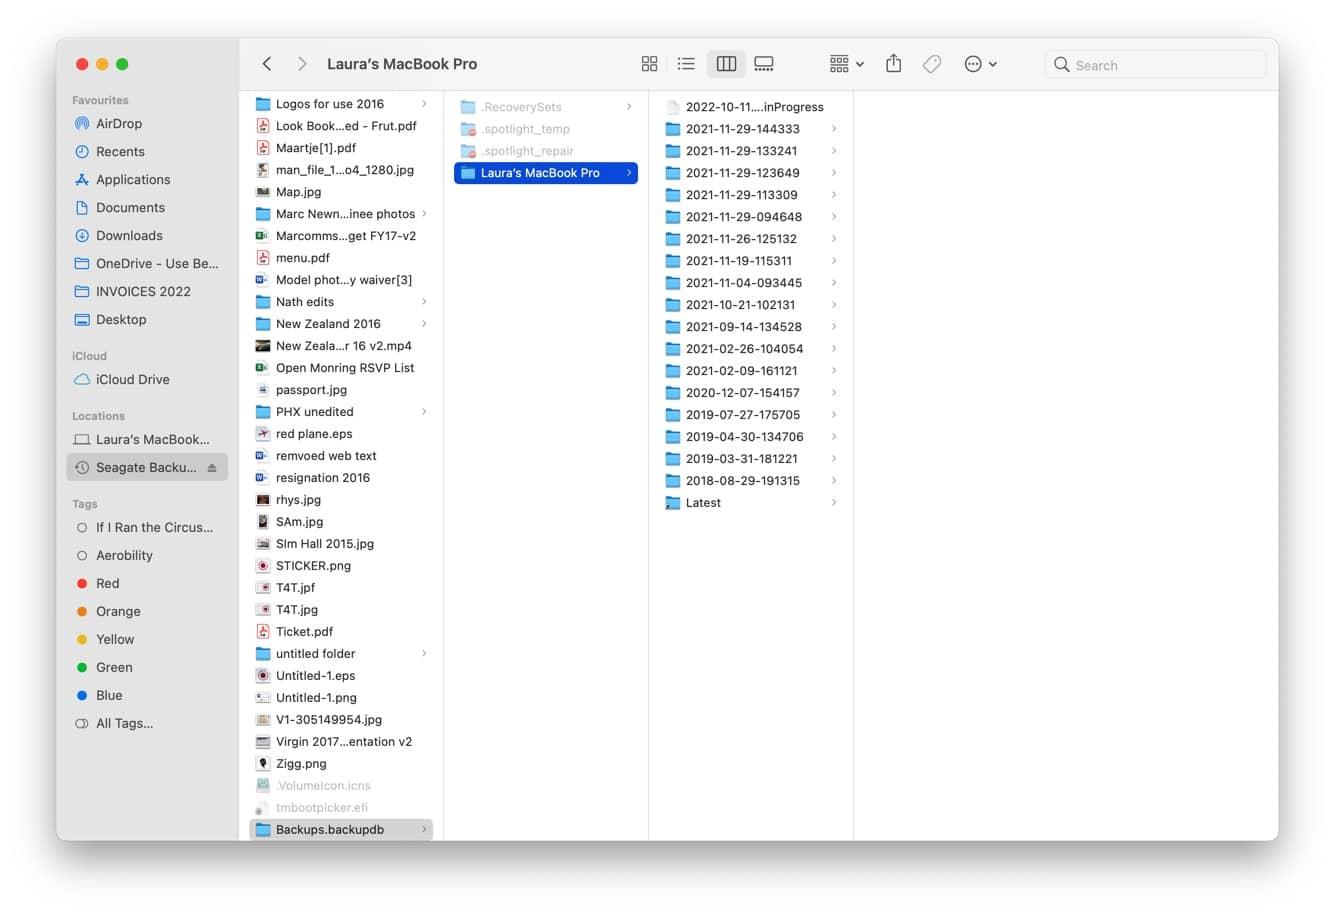
- With your external storage device connected, open the Finder and locate your external drive in the sidebar.
- Open your external drive and locate > Backups.backupdb.
- Inside, find a folder that has the same name as your device.
- Backups will be displayed individually; the date it was created will form their name.
- Right-click on any backup that you want to remove and select Move to Bin/Trash; don’t forget to empty your Bin/Trash before safely ejecting your external drive.
Risks of deleting Time Machine backups via the Finder
Normally, everything goes well, but sometimes, deleting Time Machine backups via the Finder is associated with some risks:
- Corrupted backups and incomplete restores: Deleting files within a backup can corrupt the entire backup process, making future restorations difficult or even impossible.
- Data loss: It may happen if you delete the latest backup or a backup becomes corrupted.
- Issues with the Trash: Once you send a backup to the Trash, it won't empty, and your Mac will think that the space it occupis is still taken.
Note that these risks are rare, but you still may be in the number of those "lucky" ones who face them. So, you might want to delete Time Machine backups via the Time Machine app, which is generally considered safer.
3. Use Terminal
If you’re a fan of Terminal, then you’ll be pleased to hear you can also delete Time Machine backups via Terminal. Here’s how:
-
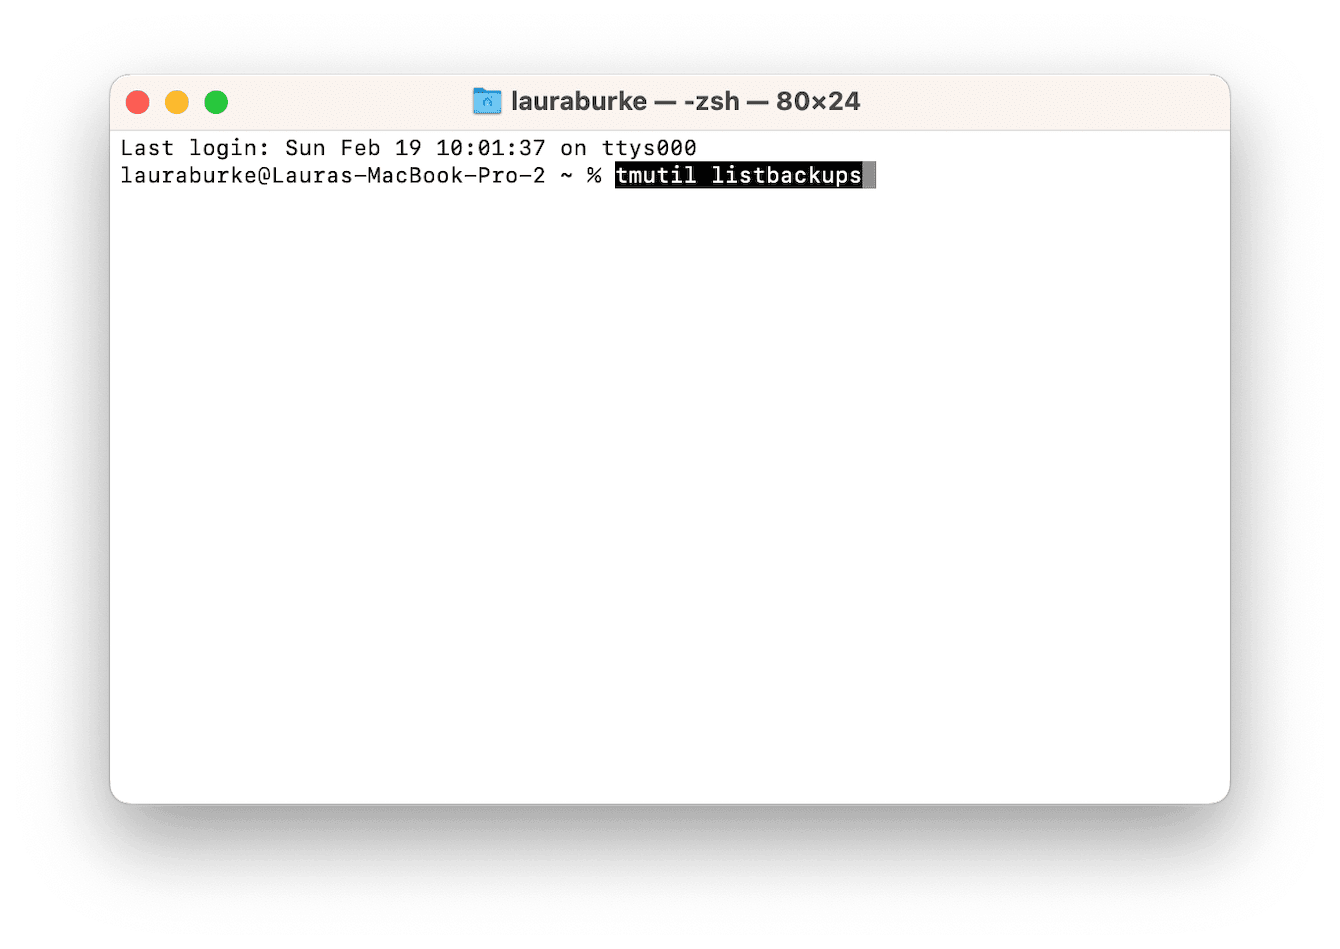
Open the Finder and go to Applications > Utilities > Terminal.
-
Type in this command:
tmutil listbackups -
Backups are displayed by date. Once you locate the backup you want to delete, make a note of its directory path, enter the below command followed by its path:
sudo tmutil delete -
Press Return to delete it.
Can you turn off automatic Time Machine backups?
If you find yourself spending masses of time manually cleaning and removing backups, it might be a good idea to turn off automatic Time Machine backups; this way, you can control the frequency and save space on your external device. It’s simple to do; here’s how:
-
From the main Apple menu, go to System Settings > General > Time Machine.
-
Connect your external hard drive and wait for it to install.
-
Click Options and choose Manually next to Backup Frequency.
If you do disable automatic backups, don’t let this task slip from your radar. Backups are important, so add a couple of calendar reminders to help you stay on track.
So, you’ve successfully cleared some space on your external storage device; now, let’s tackle the local snapshots and free up some space on your Mac.
How to delete Time Machine snapshots
Like backups, Time Machine should automatically remove snapshots, but it’s not always the case. It’s quite normal for users to want to have manual control over what’s on their device and when it’s deleted, so here are a few tried and tested methods to help you remove snapshots.
1. Snapshot thinning
The easiest way to thin your snapshots and save space is to use the Performance tool from CleanMyMac. It has a specifically designed feature called Time Machine Snapshot Thinning. It does exactly what it says. No need to fish around finding old snapshots — this tool does all the hard work for you, carefully selecting the right and necessary data for removal.
How to remove snapshots the easy way:
- Open CleanMyMac — get your free trial here.
- Select Performance from the sidebar and run a scan.
- Click View All Tasks and select Time Machine Snapshot Thinning from the list.
- Click Run.

You may also see the option that says “Thin Time Machine Snapshots” on the screen after the scan. You can click Run there.
Tip: If instead of Automatically you choose "Manually" next to Backup Frequency in System Settings > General > Time Machine > Options (for the external drive you use for a backup), it will delete all snapshots and won't create new ones.
2. How to delete Time Machine snapshots in Terminal
Follow the steps below to locate and delete Time Machine snapshots in Terminal.
-
Open Terminal from within Launchpad and type in the following command:
tmutil listlocalsnapshots / -
Snapshots have names similar to this one: com.apple.TimeMachine.2023-02-25-180515
-
Locate the snapshot you want to delete and make a note of its name.
-
Then type in the below command followed by the date, for example:
tmutil deletelocalsnapshots 2023-02-25-180515
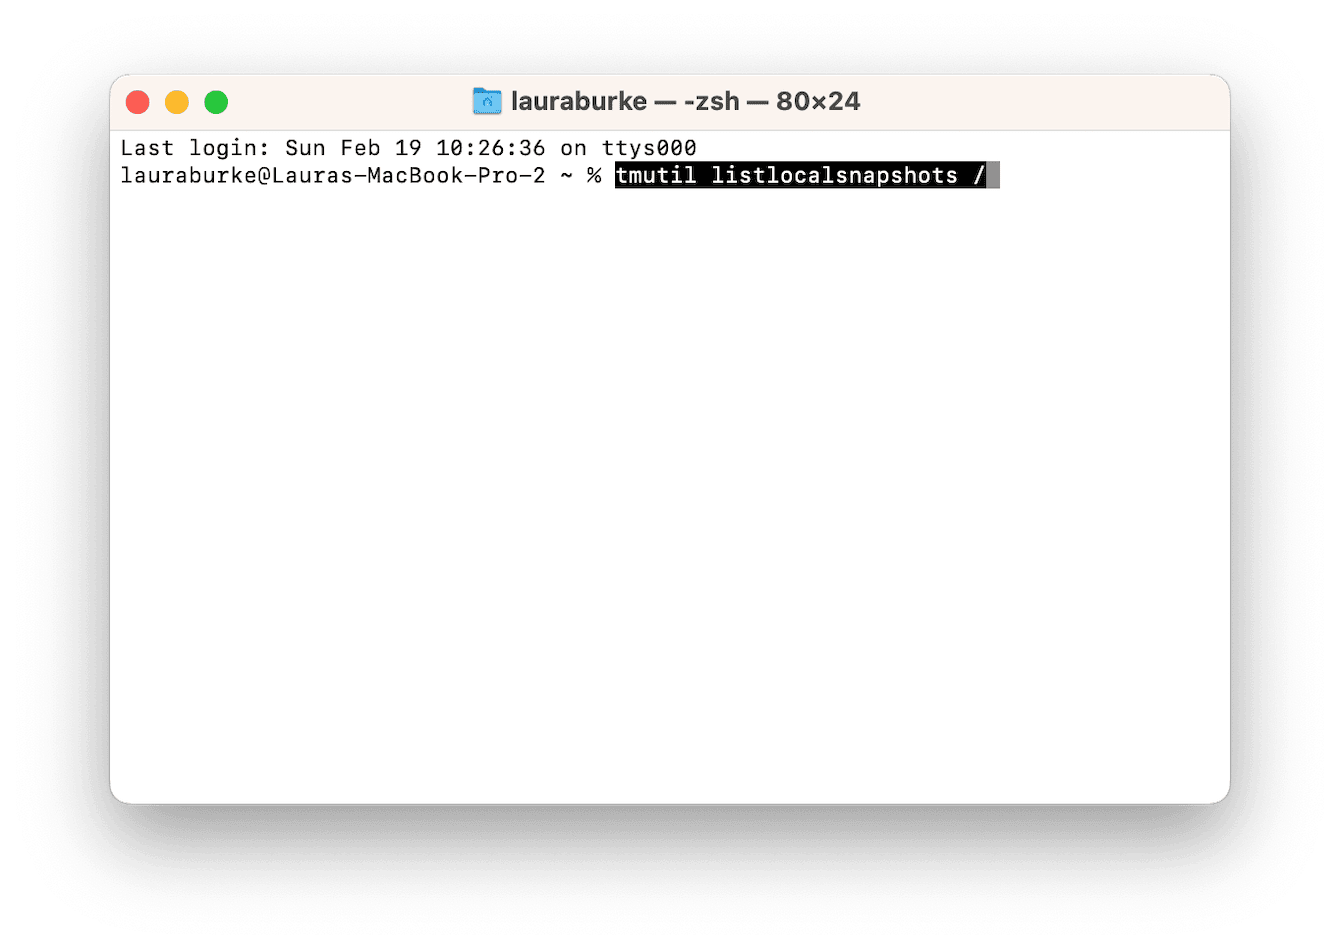
You’ll need to replicate this process for every single snapshot you no longer want, so although it works, it’s most definitely not as simple or efficient as the method outlined in the tip above.
Why Time Machine won't autodelete backups
Time Machine should automatically delete old backups and snapshots when the backup disk is full. However, sometimes, it doesn't. It happens if there is not enough space for a new backup or snapshot. The logic is simple: Time Machine is designed to make it possible to restore files, so if there's no room for a new backup, an older one has a higher priority as the only way to keep the integrity of the backup system.
In other cases, it may be a problem with the external drive you use for a backup that prevents Time Machine from deleting old backups. Jump to the next section to see how to fix it.
What to do when Time Machine fails to delete backups and snapshots
To fix the glitch with the external drive, you will have to use Disk Utility — a built-in utility that can repair software issues or erase the disks. Here's what to do:
- Open Disk Utility from Applications > Utilities.
- Connect your external drive and select it from the sidebar in Disk Utility once it appears.
- Click Run First Aid > Run.

Then, check if you can now delete backups. If not, the last resort is to erase your external drive. Note, though, that you will lose all your backups, so the first thing you have to do after you reformat it is make a new backup. You can also copy old backups to another external drive or a cloud storage if you know that you might need them in the future.
To reformat your external drive, follow these steps:
- Connect it to your Mac and open Disk Utility.
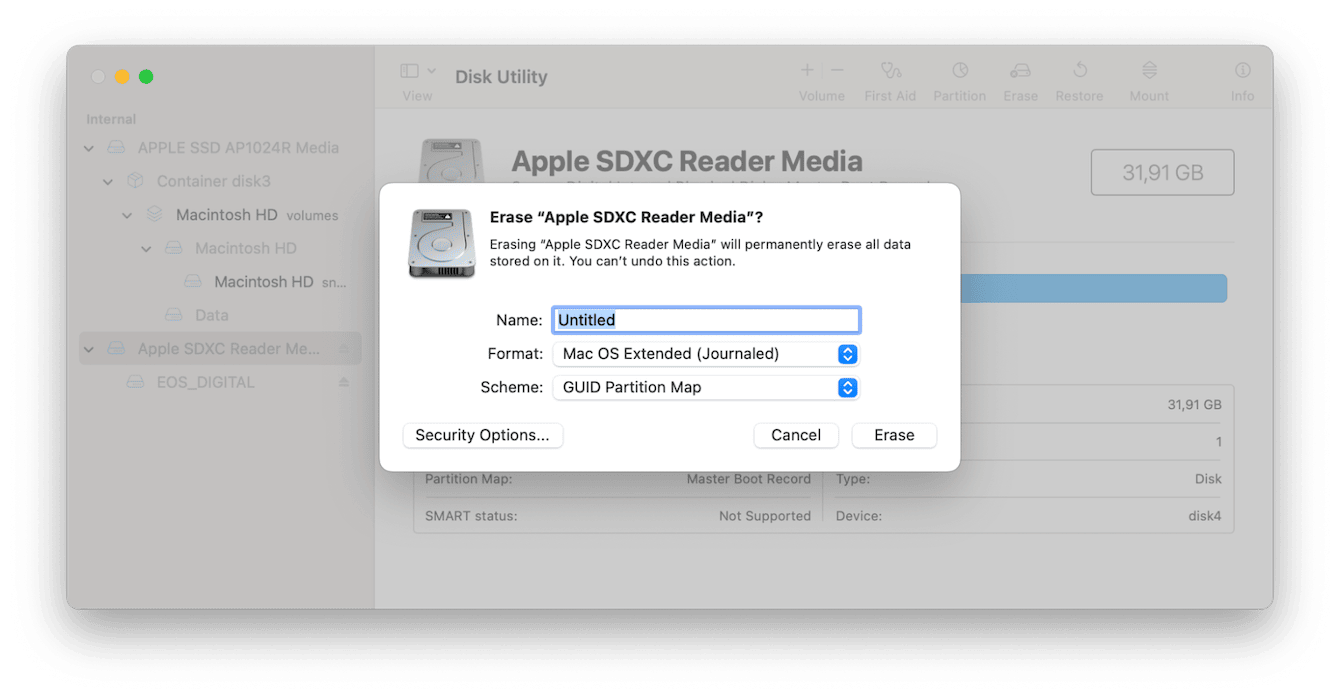
- Select your external drive from the sidebar and click Erase in the toolbar.
- In the window that pops up, enter a new name, choose APFS as a format, and set GUID Partition Map for Scheme.
- Click Erase and wait for the "Erase process is complete" message.
- Click Done.
- Now, go to System Settings > General > Time Machine and click Set Up to add your reformatted disk and back up your Mac.
Now you know everything there is about how to delete old backups on Mac.
These smart and simple tips will help you save valuable storage space on your Mac and external hard drive.

