Google Chrome Helper (Renderer) high CPU: 9 tested-and-tried fixes
Let us first put your mind at ease: the Google Chrome Helper (Renderer) process, although strange, is not a virus.
If your Mac feels slow or sluggish when you browse on Chrome, you might have tried to investigate the problem by opening Activity Monitor, only to discover multiple entries for something called Google Chrome Helper.
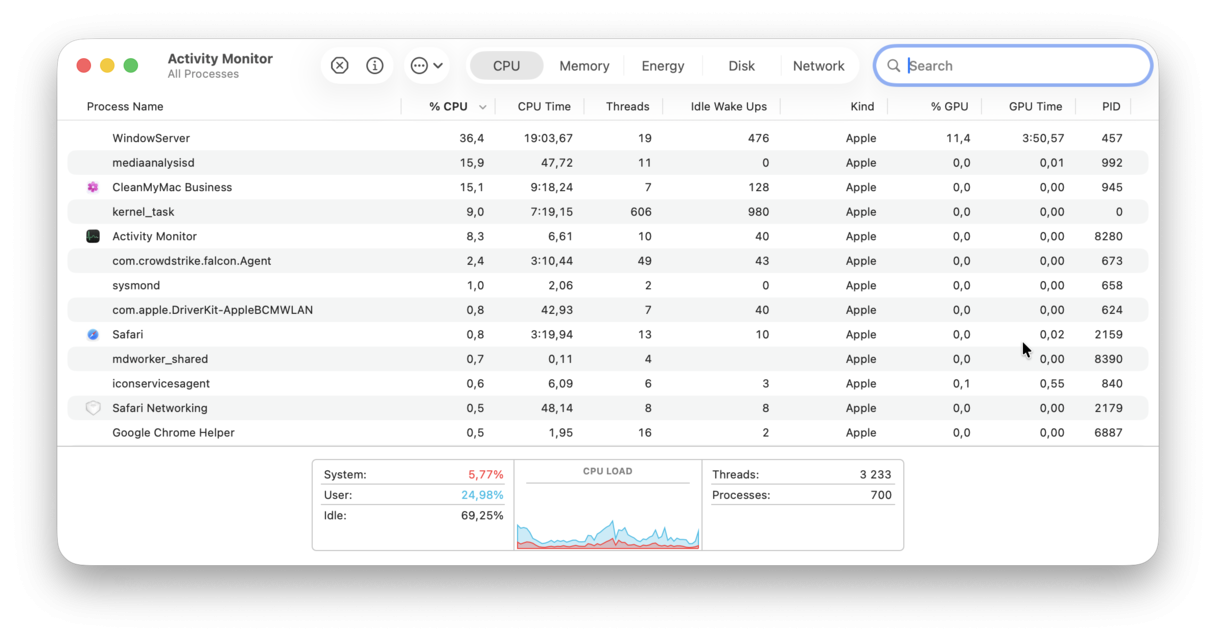
If Chrome is your top browser of choice, then you're probably well acquainted with the downsides of this popular and undeniably high-performing web browser — high memory and CPU usage.
Let's start by looking at these strange processes, what they mean, and how to reduce your Mac's CPU usage.
What is the Google Chrome Helper process?
The Google Chrome Helper process helps Chrome load third-party content, like plug-ins or videos, in your browser. And the Google Chrome Helper (Renderer) process is responsible for displaying web content like CSS, HTML, JavaScript, and media. There is at least one such process for each open tab and extension. It is a part of Chrome sandboxing — an approach to browser design that helps prevent a buggy web page from crashing all other open tabs or installed extensions.
Extensions and web apps are just one of many reasons why Chrome is so popular. They allow you to create a completely customizable browsing experience, but sometimes, that's where the problem lies.
All these amazing third-party extensions might not be fully compatible, so Google Chrome Helper allows the browser to link with external content seamlessly, bridging your browser and third-party content.
If you're wondering what this has to do with your CPU, read on.
Why does Google Chrome Helper (Renderer) use high CPU on Mac
Except for extensions, here are a few causes of high CPU usage:
- Resource-intensive websites (e.g., those with heavy animations, autoplaying videos, and complex JavaScript)
- An outdated browser version that handles processes inefficiently
- Corrupted or accumulated browser
- Having numerous tabs open at the same time and running resource-intensive background apps
- Conflicting hardware acceleration settings
For the same reasons, it may show high virtual memory usage.
How to diagnose the issue
As you may have guessed, to see how much CPU the process eats up, go to Activity Monitor from Applications > Utilities and type Google Chrome Helper into the search bar (make sure you do this in the CPU tab). At the same time, this process can eat up RAM (you can check it in the Memory tab).
%20macOS%20Tahoe.png)
If you are wondering why you should diagnose and fix it, the answer is simple: if CPU usage grows too high, it may slow down your Mac, make your fans noisy, and drain your battery. If the issue remains unaddressed, it may damage hardware in the long run due to exposing internal elements to excessive heat.
You may also ask yourself whether you should back up Chrome before troubleshooting the issue. Generally, there's no such need since it should not affect data. However, you can enable syncing in your Chrome account settings.
Google Chrome Helper Renderer high CPU: proven solutions
Although Chrome gets a bad name for its high RAM and CPU usage, it's not actually the browser itself but all the extensions and plug-ins installed that are using it.
Your extensions use considerable processing power, which then causes your CPU to take a hit and your Mac to slow down.
Monitoring your CPU usage is essential to solving this issue. So, before we get into the fixes and disabling options, it's wise to take some time to monitor what is really going on.
A simple way to monitor your CPU is with the quick view Menu App from CleanMyMac. This smart tool instantly shows you which apps are consuming resources, highlights any unusual activity, and displays your system load.

If you don't use it already, get a free trial of the app. Next, we'll guide you through how to enable the Menu App and start monitoring your CPU with ease:
-
Open the application, and from the top menu bar, select CleanMyMac > Settings > Menu.
-
Ensure you tick Enable Menu.
-
Select the app's icon from your top menu bar (iMac icon) to open CleanMyMac Menu App.
-
Look under the CPU monitor tab and select it for a more detailed view of top consumers, temperature, and uptime.

Because Chrome uses so much system resources, it may be draining your Mac's battery. If that is your case, check out this article to fix it. Also, while the Menu App is open, check out the Protection tab to rule out the increase in CPU usage due to malware and to make sure Chrome is not hijacked.
Tip: If you'd rather remove malware manually, start with checking your applications and browsers for anything suspicious. For more fixes, check out this guide with proven solutions.
Can you disable Google Chrome Helper?
Although it is possible to disable the Google Chrome Helper, it's not first on our troubleshooting list. Disabling it will stop the functionality of your third-party extensions, meaning you'll likely discover your video players don't work anymore.
So, before we get to that, first, let us show you some simple ways to reduce CPU usage on your Mac. Head to the next step to find out how.
How to reduce CPU usage
1. Check your browser plug-ins
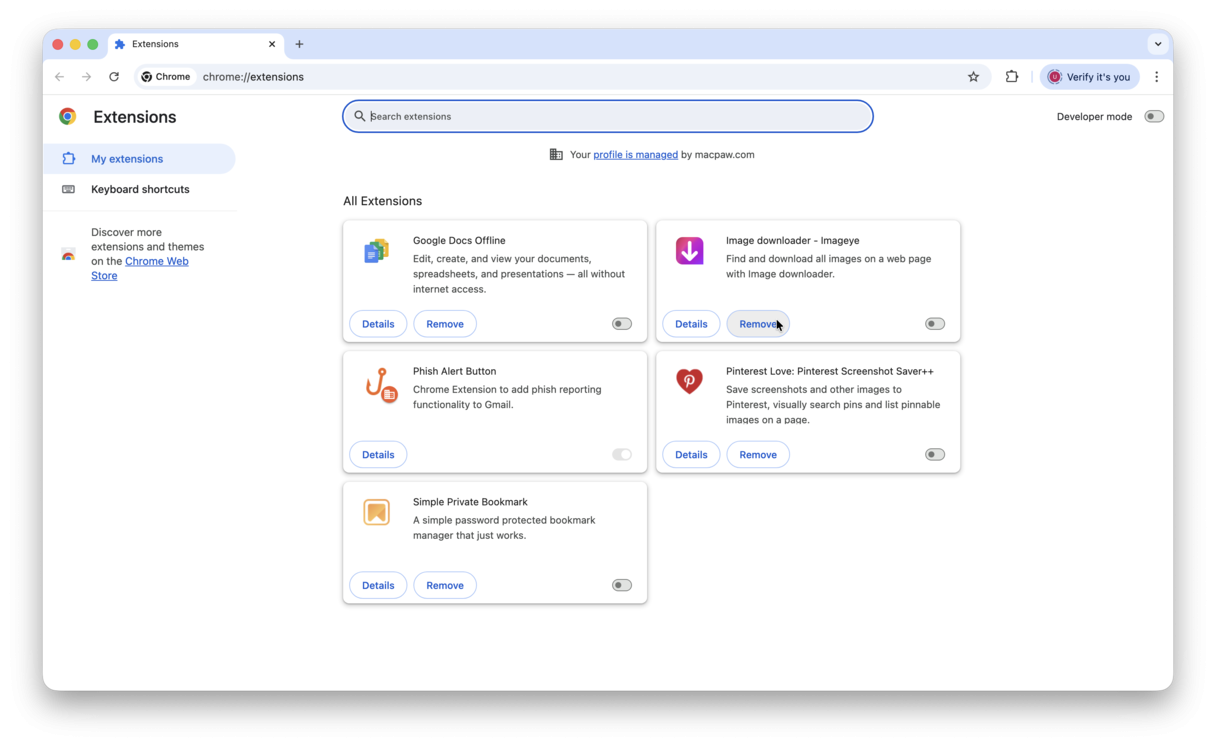
It's worth checking which plug-ins you have installed on Chrome. Removing any you no longer need will definitely help ease the burden on your CPU. Here's how:
-
Open the browser and select the main Chrome menu.
-
Select Settings > Extensions.
-
Here, you'll see all of your installed extensions. You can either choose to toggle them off or completely remove them. Pay close attention to password managers, shopping extensions, and media-related extensions — they are the most common CPU hoggers.
2. Update your Mac and Google Chrome
Is your Mac up-to-date? CPU issues can often be solved with a quick update, so before we go on, select the main Apple menu, select System Settings > General, and click the Software Update button to see if you're running the latest macOS.

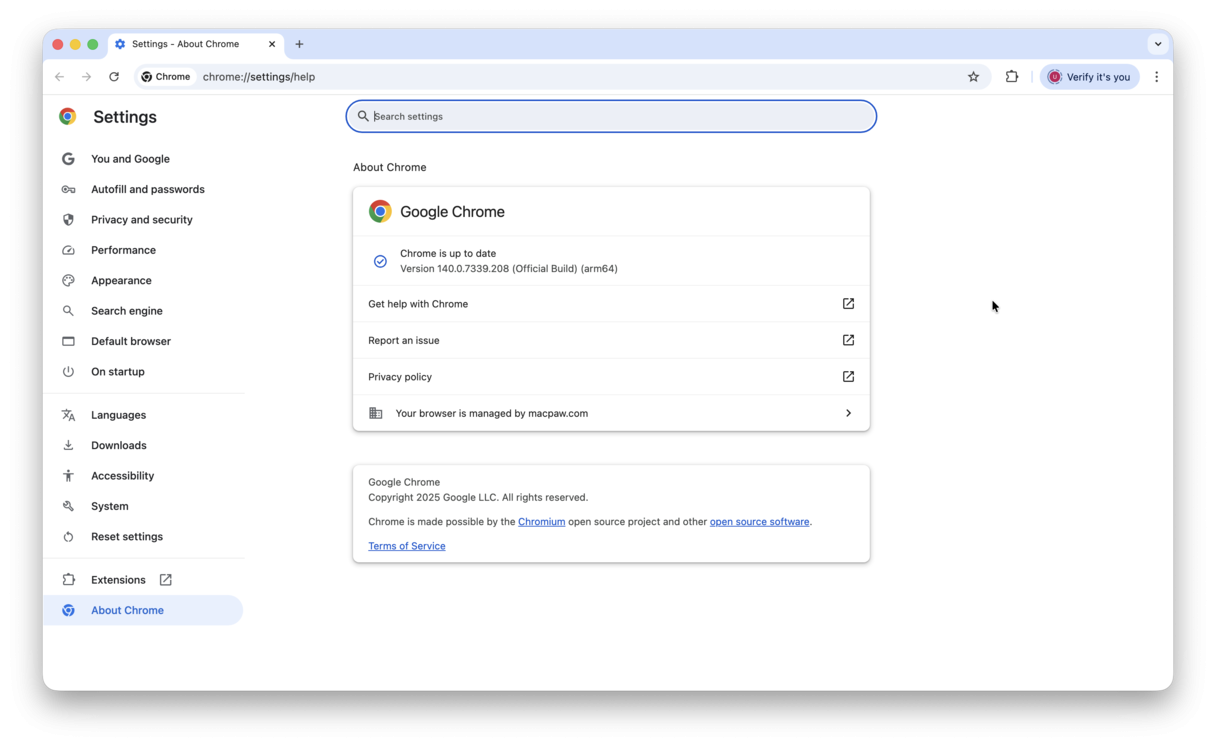
After updating macOS, take a moment to update Chrome, too. Open it and choose About Google Chrome. If an update is available, click Relaunch.
3. Check for resource-heavy applications
Chrome might be the obvious resource-heavy application, but plenty of other apps and processes run quietly in the background. Identifying and closing them down is a great way to give your Mac some breathing room.
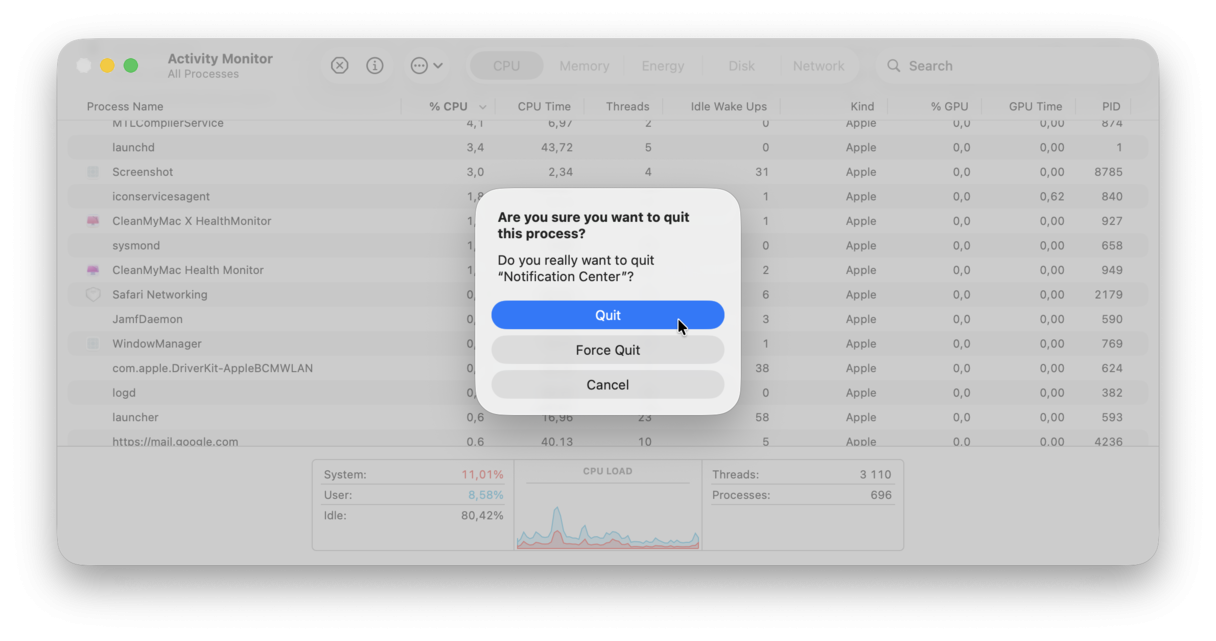
Here's how to check for heavy consumers with Activity Monitor:
-
Open Finder > Applications > Utilities > Activity Monitor.
-
Select the CPU tab and browse toward the top of the list.
-
Select a process or app, then click the X button to close it down.
4. Declutter your desktop and optimize tabs
Another simple way to reduce CPU usage on your Mac is to tidy up and declutter your desktop. Forgotten files soon build up over time.
Move any unneeded items to your Trash, and don't forget to empty it afterward.
Then, proceed with optimizing tabs. Close those you no longer need and bookmark those you might need in the future. Fun fact: a series of tests showed that 8 is the optimal number of tabs resource- and management-wise.
Tip: One more nasty issue users discuss online is Chrome being slow. If you've experienced this, it's time to take some action. Here are the fixes you can try to get it back to optimal performance.
5. Disable hardware acceleration
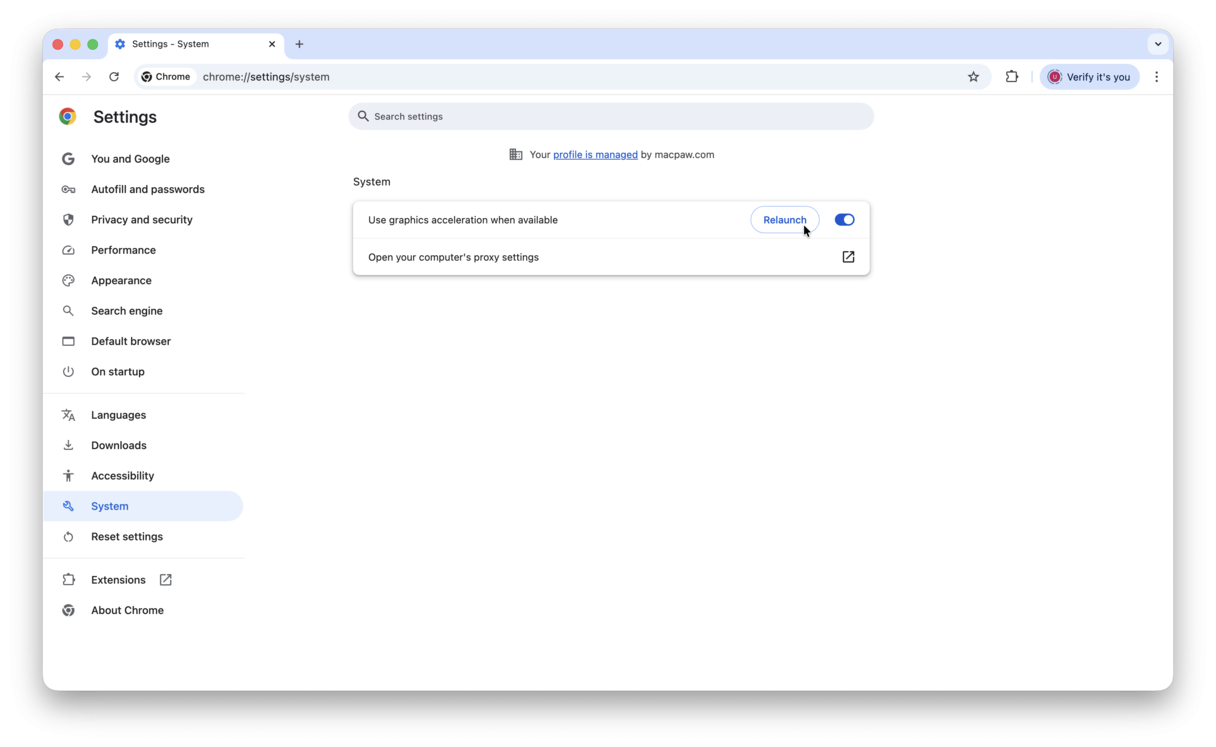
You can also prevent Chrome from using CPU by disabling hardware acceleration. To do it, follow these steps:
- Once again, go to Chrome Settings.
- Click System.
- Depending on the version of Chrome you use, you will see either "Use hardware acceleration when available" or "Use graphics acceleration when available".
- Turn it off and click the Relaunch button.
6. Clear browser data
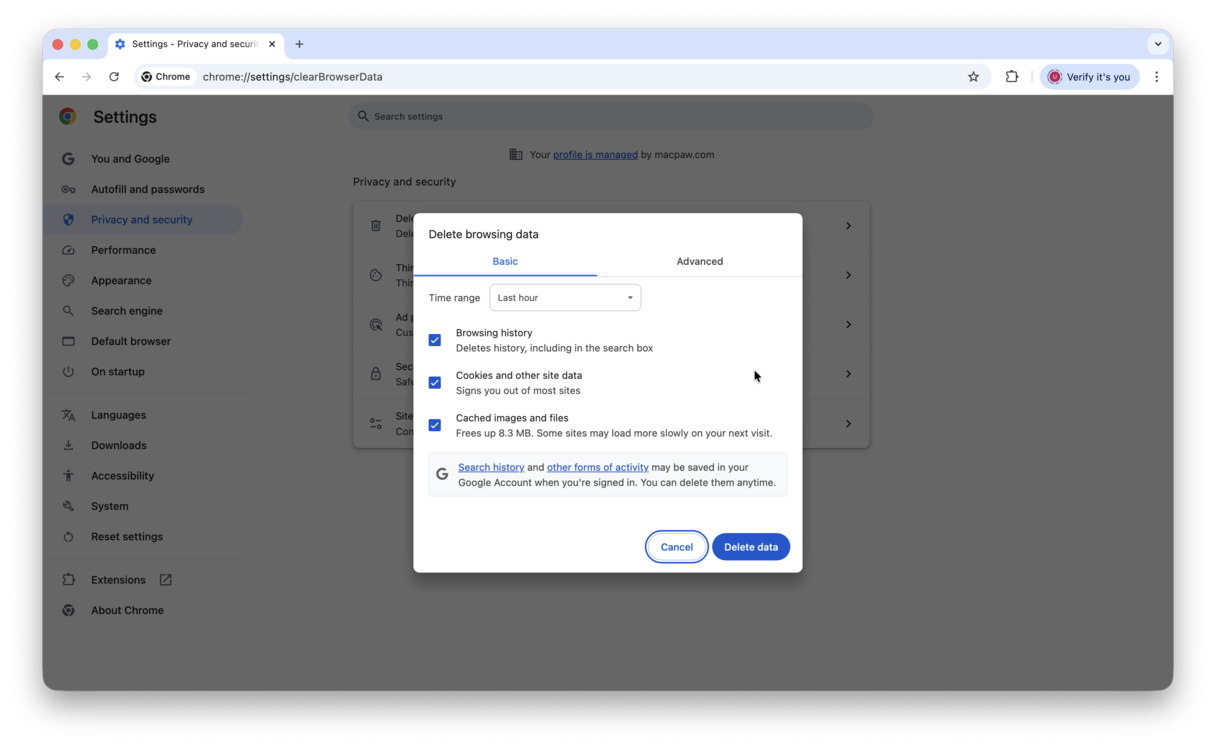
The next step is to delete accumulated browser data: cache, cookies, etc. You can do it from Chrome settings:
- Open Chrome and go to Settings > Privacy and security.
- Click Delete browsing data.
- Choose a time range and select the types of data to remove.
- Click Delete data.
7. Disable Google Chrome Helper (Renderer)
So, if the above tips didn't fully solve your high CPU issue, then you can, of course, try disabling Google Chrome Helper. Here's how:
-
Open Chrome, select the three-dot menu top right, and choose Settings > Privacy and Security > Site Settings > Advanced Settings.
-
Locate Additional Permissions > Unsandboxed plug-in access.
-
Toggle the slider off to disable Google Chrome helper.
%C2%A0%20macOS%20Tahoe.png)
You can always reverse this by toggling the slider back into the on position. These steps would work for older Chrome versions.
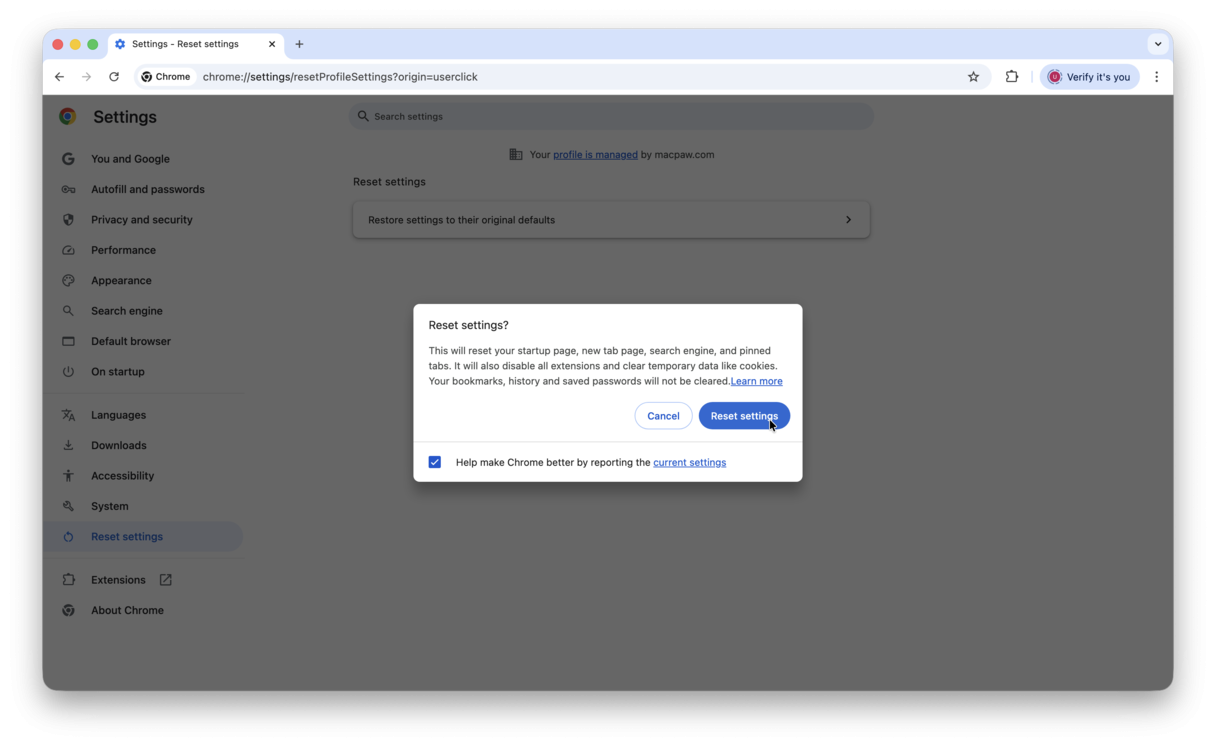
For newer versions, simply reset settings to default. To do it:
- Open Chrome, select the three-dot menu top right, and choose Settings.
- Navigate to Reset Settings and follow the on-screen instructions.
8. Quit Google Chrome Helper (Renderer)
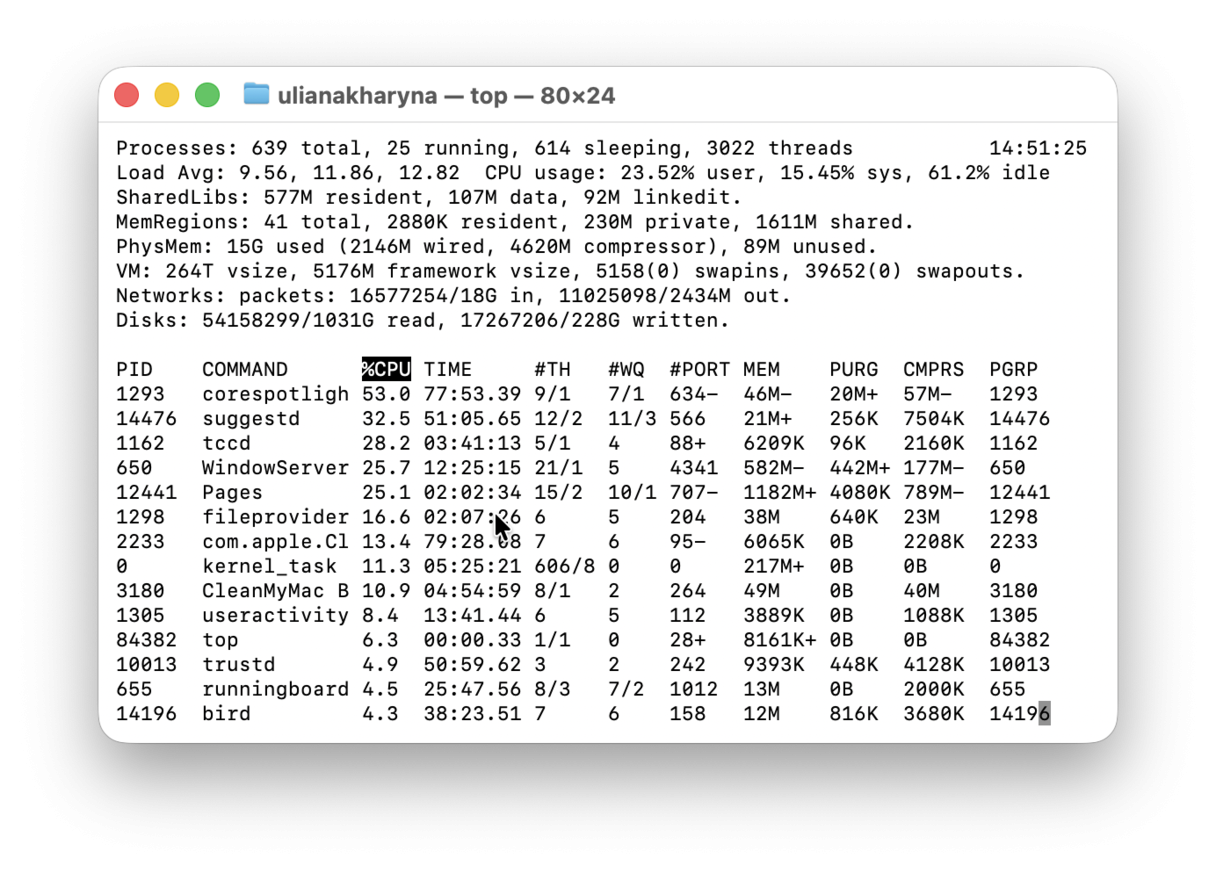
Instead of disabling the process, you can quit it using Chrome Task Manager. To open it, select the main menu (three vertical dots) > More tools > Task Manager. Find Google Chrome Helper (Renderer) there, select it (there may be more than one process), and click End Task. Or you can use Terminal:
- Open Terminal and run this command: top (you will see something like Activity Monitor).
- Take note of all Google Chrome Helper (Renderer)'s PIDs.
- Now, click q and run this command: kill <PID> for each of your PIDs.
9. Reset Chrome
The final resort is to reset Chrome altogether. By reset, we mean removing all app-related data scattered across your macOS and starting afresh. The easiest way to do it is to use the Applications feature in CleanMyMac (the app we mentioned above). It quickly finds such files and lets you delete them with a click. Here's how to use it:
- Open CleanMyMac — get your free trial here (you can test it for 7 days).
- Click Applications and run a scan.
- Click Manage My Applications and find Chrome in the Uninstaller section.
- Click an arrow (>) next to it and select everything except Binaries.
- Hit Remove — Google Chrome will be reset to the state it was in once you first installed it.

So, now you're no longer wondering what the Google Chrome Helper (Renderer) process is, and your Mac should be running much smoother, too. And if you've all of the steps above regularly (perhaps without resetting Chrome and disabling the process), it is the best way to prevent Google Chrome Helper (Renderer) from eating up CPU.
Frequently asked questions
Should I switch to another browser?
If Chrome continues to eat up CPU even after you've reduced the number of tabs, uninstalled unnecessary extensions, and cleared browser data, yes, you might need to switch to another browser. Try using Safari — it is fast, secure, and reliable, but it is true that it doesn't allow the same level of extensions-based customization as Chrome does.
How do I migrate from Chrome to another browser while keeping my data?
First, you'll have to export your data into an HTML file for bookmarks or CSV file for passwords. You need to do it in Chrome. Once these files are ready, look for an Import option in your new browser and choose something like "import from file." All you then have to do is choose the file you've created earlier and wait for the import to end.
Can Chrome update cause Google Chrome Helper (Renderer) high CPU?
It should not. However, if it does, it will most likely be fixed in another version, so you will have to wait for it to be released. Luckily, Chrome releases updates every two to four weeks, so you won't have to wait long.
Does this problem affect a specific Mac or macOS?
The short answer is no. It is more related to how you use Chrome and other apps in general, not a specific Mac model or macOS version.
How do I remove malicious Renderer processes?
No Chrome Helper (Renderer) process is inherently malicious, but it may be related to a malicious extension. So, check out add-ons and remove those that turn out to be malicious.

