Top 13 tips for optimizing your Mac
Nobody likes a slow, glitchy Mac, but a little maintenance can go a long way. Taking a few minutes to optimize your Mac can save you time and prevent costly repairs down the line. You can start by cleaning up unused apps, organizing storage, and managing startup items. Keep on reading to find out how to optimize Mac performance by doing all of these and even more.
How to optimize your Mac
To give your Mac a few performance points, you'll need to start by finding its weak spots. Most often, it's storage and abundance of rarely used and problematic apps. So let’s start with software as our first idea to optimize your Mac.
1. Keep your software updated
Although obvious, this has to take first place on the list. Keeping your Mac software up to date means you'll benefit from bug fixes, performance improvements, new features, and security enhancements.
Here's how to check if you need a software update:
-
Select the Apple menu top left.
-
Go to System Settings > General > Software Update.
-
Follow the instructions to install an update if you need one.

While there, make sure Automatic updates are turned on. If you don't need an update, keep on reading.
2. Clear up system junk
You can spend hours, sometimes days, scouring your Mac for old, broken, and temporary files, old apps, forgotten folders, cache, system logs, and all the other stuff we collect, or you could use a dedicated and specialized tool like CleanMyMac to do the hard work for you.
Key benefits of CleanMyMac:
- 7.3M GB of junk files deleted every month — an average user deletes 55GB of junk per trial period
- Used in 185 countries
- Trustpilot rating: 4.6/5
- Comes with 25+ tools to clean, optimize, and maintain your MacBook
Start your free CleanMyMac trial — test a dedicated cleaner app that's been in the market for over 15 years.
I was utterly shocked by just how much system junk it found the first time I used it. Like seriously, I had no idea how much junk I was hoarding.
Now, I like to run the Cleanup feature regularly to keep my Mac running smoothly. Extra plus points for the app being notarized by Apple. How to clear your system junk with CleanMyMac:
- Open CleanMyMac.
- Go to Cleanup from the left sidebar.
- Click Scan and then, finally, Clean.

Sit back, relax, and effortlessly optimize your Mac.
Tip: If you want to clear cache manually, follow the steps outlined in this article. But remember that cache is just one kind of system junk.
3. Use Apple's built-in optimization tool
Apple's built-in optimization tool will provide you with some basic recommendations to optimize your storage for increased Mac performance.
Here's how to access Apple's optimization feature:
-
Go to the main Apple Menu > About This Mac.
-
Click More Info > Storage Settings.
-
Check Recommendations under the colored bar.

The Recommendations section gives you 3 options to help you manage disk space. These are relatively self-explanatory and straightforward recommendations. They won't be the complete answer to a smooth Mac. Still, I always think every little helps when it comes to optimization.
Also, check the categories of files and data occupying disk space to see what can be deleted. They are located under Recommendations. Just click i next to each of them, select what you want to remove, and click Delete. Confirm the deletion and click Done.
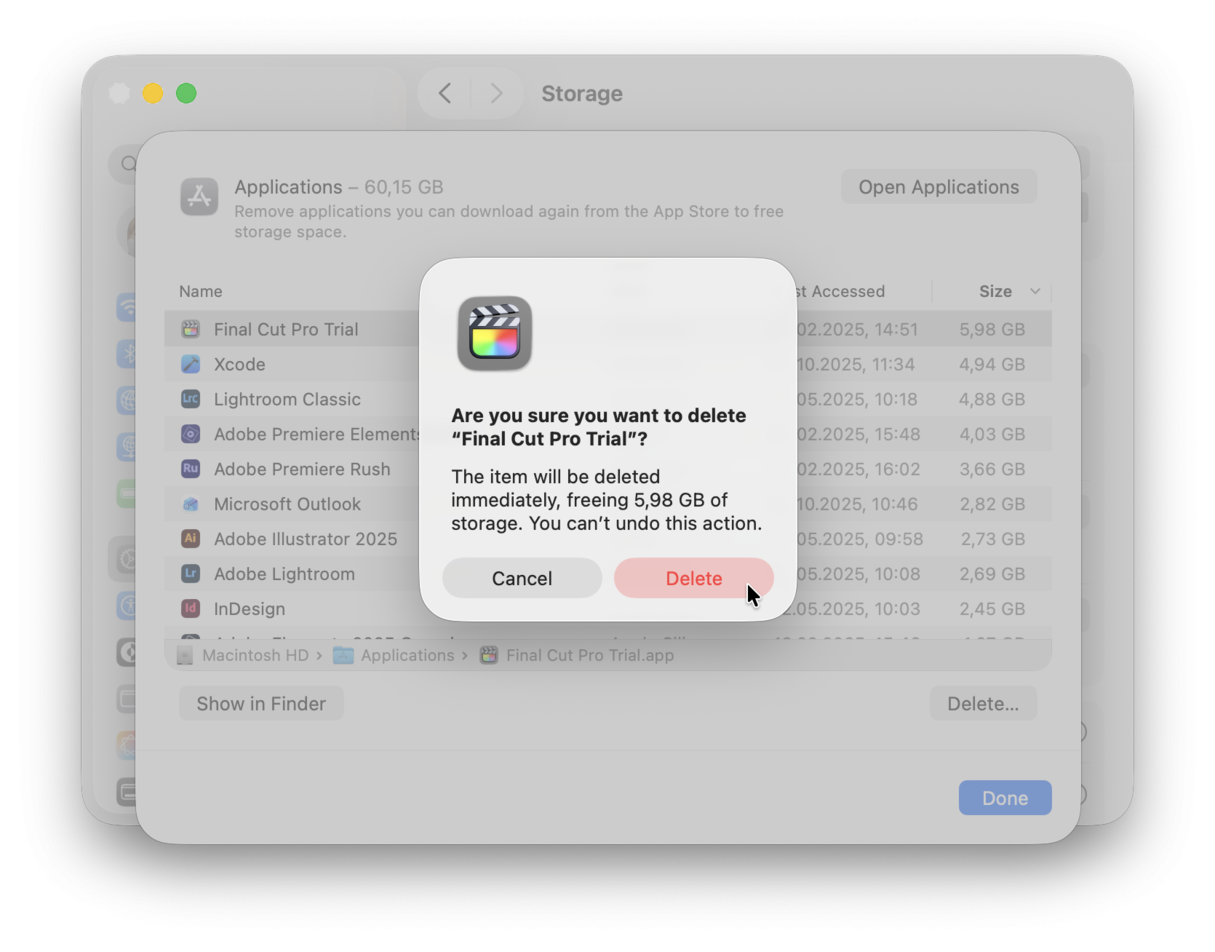
Pay close attention to "Store in iCloud" — it is an effective way to release some space since only recent files, photos, and messages are stored locally. Other files are offloaded to iCloud: files from the Desktop and Documents folders go to iCloud Drive, videos and photos are sent to iCloud Photos, and messages and attachments are in iCloud. You can change it in iCloud, Photos, and Messages Settings. Don't forget to go to System Settings > Apple Account > iCloud and enable Photos there.
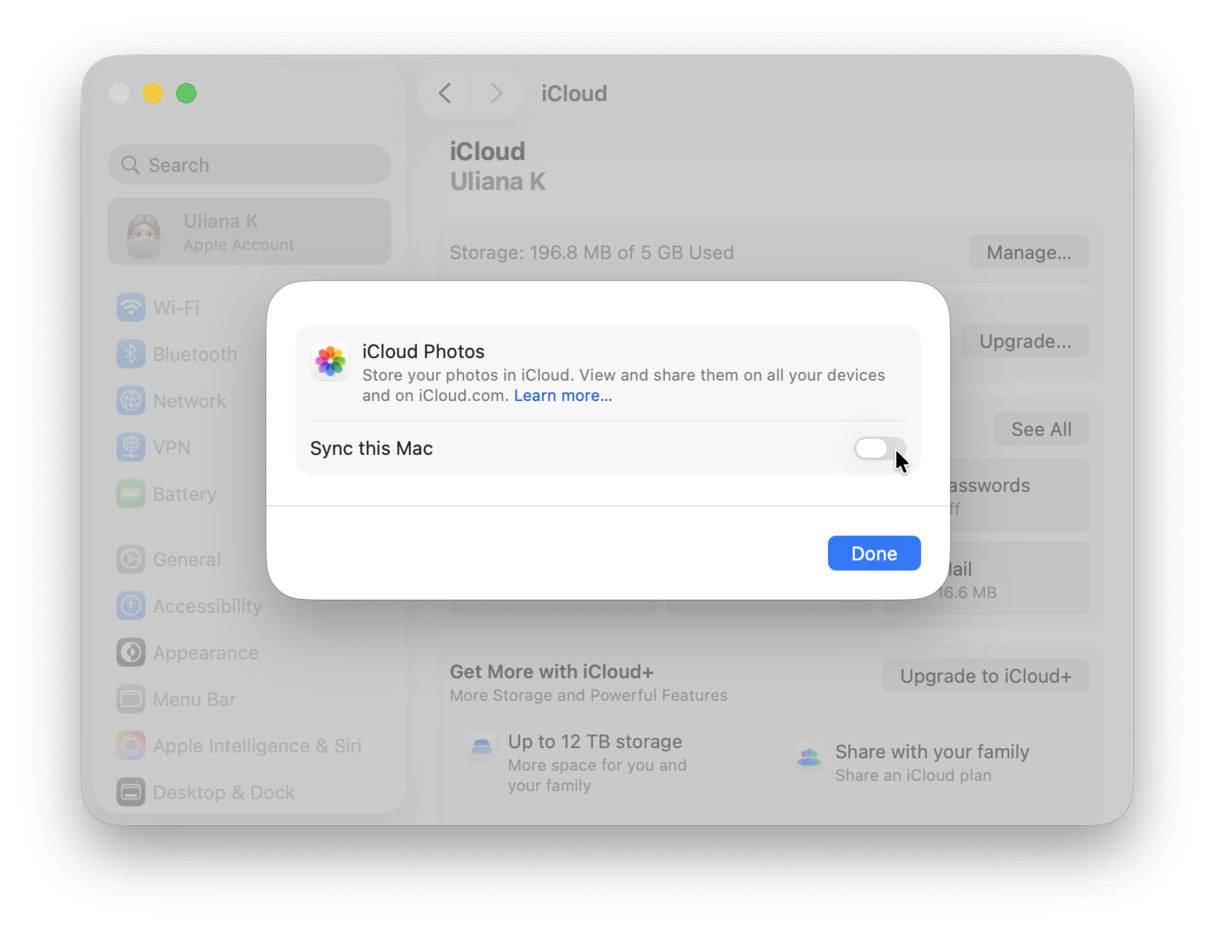
If you enable this option, make sure your iCloud Drive is always clutter-free so that there is enough room for important files. The easiest way to do it is to use another feature that comes with CleanMyMac — Cloud Cleanup. Once you connect your iCloud account, all it takes is one scan, and you can quickly reveal space hoggers and remove them with a click.

4. Check your Downloads folder
When it comes to Mac optimization, clearing up your clutter is a must. Why not check your Downloads folder? This is a place where large and forgotten files like to hang out and take up precious space.
The first time I cleared out my Downloads folder, I was genuinely amazed at what junk I'd collected over the years.
Here's how to check your Downloads folder:
-
Open a new Finder window and select Downloads in the sidebar.
-
Scroll through your list and remove what you no longer need.
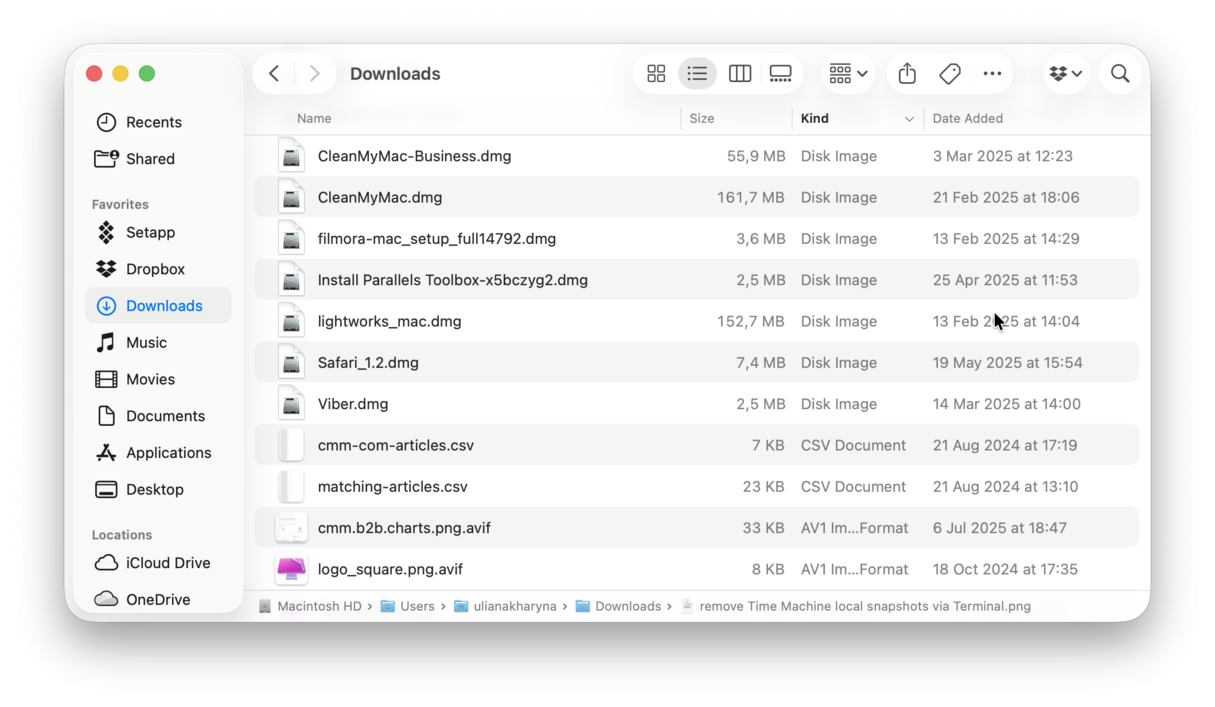
Don't forget to empty your Trash bin afterward.
Tip: It is also a good idea to get rid of other unnecessary files. To make sure that no file is missed, check out this article on how to view all files on Mac.
5. Quit resource-heavy apps
Another way how to optimize your MacBook Pro is to close resource-hungry apps. Some apps use considerable processor resources, which can drain your Mac's performance.
Curious to see which applications and processes are dragging your Mac down? Here's how you can check:
-
Open Finder > Applications > Utlilies > Activity Monitor.
-
Open the CPU tab and sort by %CPU.
-
Resource-hungry apps will be listed at the top of the list; select an item and click the "X" to terminate it.
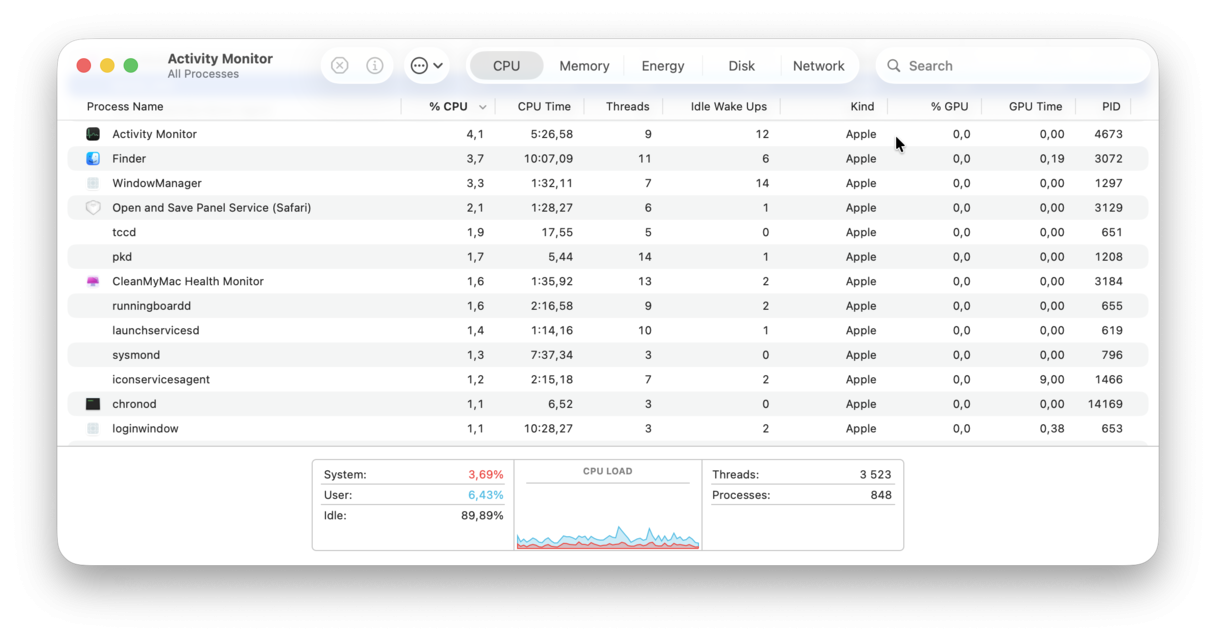
Closing down an app from the list will immediately give your Mac some extra breathing space, but If you discover an app that you no longer need is taking up valuable CPU, it's worth deleting it.
Another way to check heavy memory consumers
Another way to manage resource-hungry apps is with the tool I mentioned previously. CleanMyMac has a handy Menu App that provides 360° optimization and allows you to spot what's overloading your CPU. Here's how to use the Heavy Consumers tool:
- Run CleanMyMac and click a little iMac icon in the menu bar.
- Click on the CPU tab and check Top Consumers at the bottom.
- Select Heavy Consumers and click Quit.
If you have any applications that are sucking away your CPU, you'll find them here. You can either decide to exit them or distribute your Mac's capabilities more effectively. 
I was surprised to find the Zoom app among my resource-heavy apps. Get your free trial here.
6. Reduce your desktop clutter
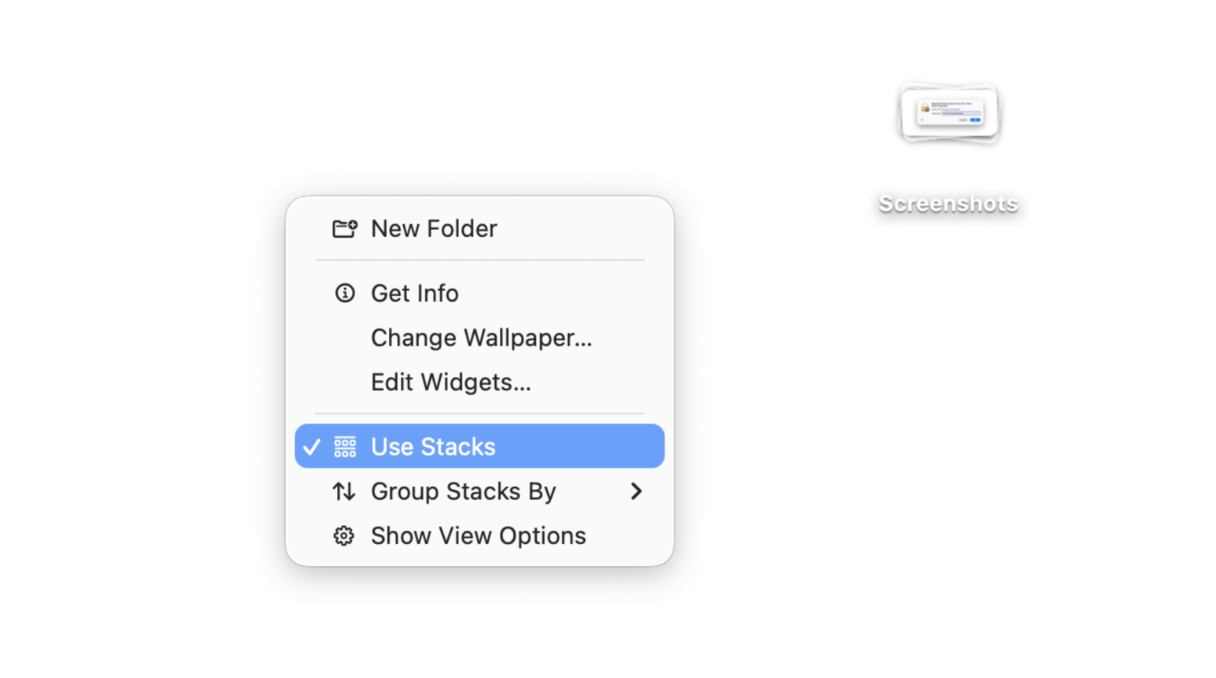
How's your desktop looking? Mine is very tidy because I'm using stacks. This feature first appeared on macOS Mojave (if you run an older macOS, sorry). It keeps files cleverly organized in groups, helping you reduce clutter and keep your Mac in shape.
Once activated, whenever you save a new file to your desktop, it will automatically be added to the appropriate stack. To start using Stacks, right-click anywhere on your desktop > Use Stacks. Super simple.
7. Delete unused apps
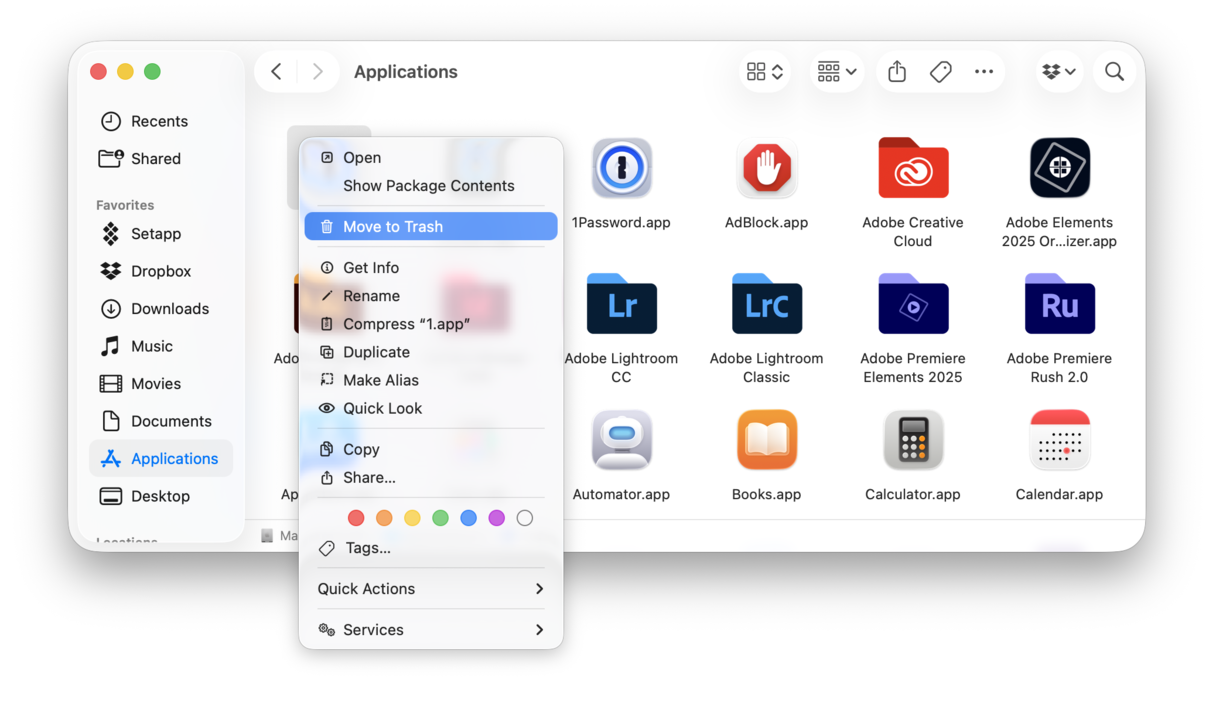
It's no secret that apps take up a lot of space, and if you don't update them when needed, the risks of glitches and software conflicts increase. None of these will help your Mac run smoothly, so it is better to delete unnecessary apps.
A good rule of thumb is to get rid of any apps you haven't used for three months. What are the chances that you will need them again? In fact, you can always download and install them in the future. Remember to take a note of licenses and activation details if you have any apps that will require this information in the future.
Now that you've saved license information, go to your Applications folder and send to Trash anything you no longer need. Note, though, that another crucial step in app removal is to find and delete leftover files because dragging an app to the Trash removes its binary only and not the files associated with it. Check out this guide on how to do it.
8. Manage login items and launch agents
Another great way to optimize your Mac is to reduce its workload on startup. There's really no need to have loads of applications automatically loading up when you start your Mac; it just causes your Mac to slow down.Here's how to manage your startup items:
- Go to Apple Menu > System Settings.
- Then, go to General and select Login Items & Extensions.
- Search through the apps in the list and remove any applications by clicking "-" under the list.
- Also, check apps under Allow in the Background and turn off any you don't need.

Again, you can also use CleanMyMac's Performance feature to manage login items and shut down background processes.
You can see why it's my preferred tool; everything is together in 1 place. So here's how to manage your login agents:
- Open the app and click Performance from the sidebar.
- Click Scan > View All Tasks.
- Search through Login Items and Background Items.
- Select the items you want to remove and click Remove.

9. Move large media files to an external drive
Now that you've removed unused apps and system junk, as well as managed your login items and heavy consumers, it is time to proceed with another easy optimization trick — moving large media files to an external drive.
We all love our photos and videos because they are our precious memories, but they are also space hoggers. So, consider investing in an external drive and transferring these files there.
Once done, you can remove them from your Mac. This way, you can make sure that your media files are always accessible but no longer eat up storage on your computer.
10. Disable hardware acceleration in Chrome settings
The final tip is to tame another resource hogger on your Mac — Google Chrome. If you have it on your computer, of course.
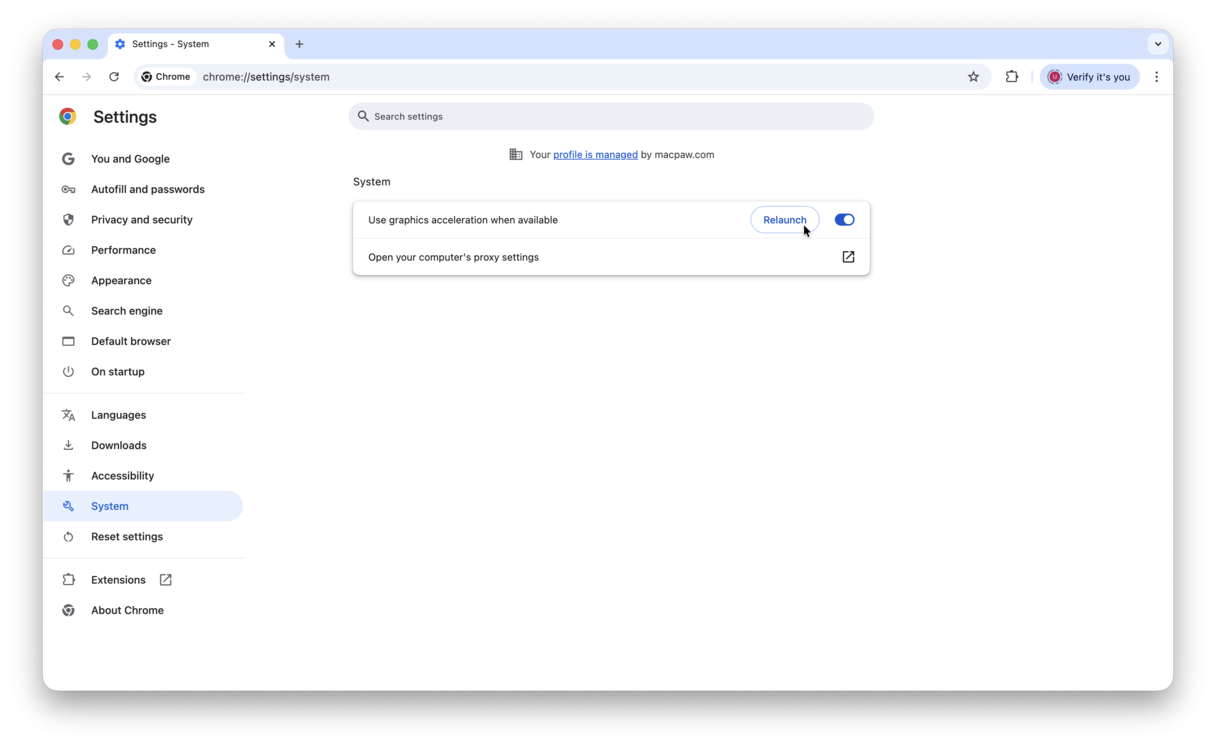
This browser is known for not only its functionality and ease of use but also the likelihood of slowing down over time and making your Mac feel more sluggish. Luckily, there is a workaround:
- Open Chrome and click the three-dot icon top right.
- Go to Settings > System.
- Depending on the version of Chrome you use, turn off "Use hardware acceleration when available" or "Use graphics acceleration when available".
- Relaunch Chrome.
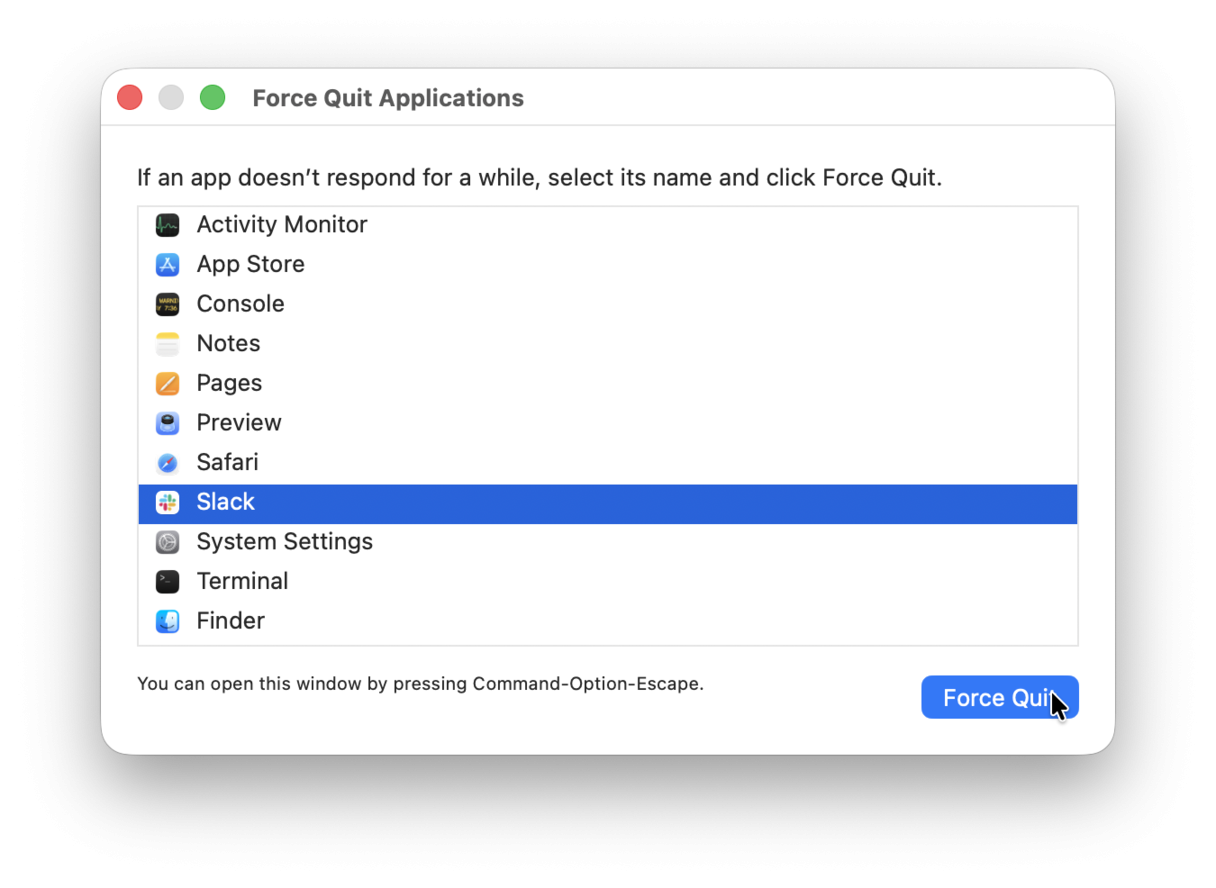
Bonus tip: If you experience app crashes or system freezing, it may be that your disk is failing. Then, it is time to use First Aid to repair it. Here is an article on how to do it along with some additional maintenance tips to prevent it.
11. Maintain your disk
If you have any issues with your startup disk, like system freezes or crashes, macOS comes with a built-in tool to fix it — Disk Utility. Here’s how to use it:
-
Open Disk Utility from Applications > Utilities.
-
Select your startup drive.
-
Click First Aid > Run.

12. Upgrade your hardware
If nothing so far has helped, or your Mac is still slower than you expected, consider upgrading your Mac’s hardware if possible:
-
Replace a hard disk drive (HDD) with a solid-state drive (SSD). SSDs are usually faster than HDDs, and you can also increase your storage capacity.
-
Upgrade RAM, and you will be able to run more resource-intensive apps.
If you upgrade both, your Mac will be snappier, and you will forget about the lack of free space and slowdowns. At least, for some time. Note, though, that only older Macs come with upgradable components. If your Mac is not on the list, the only way to upgrade SSD and RAM would be purchasing a new MacBook.
Macs with upgradable SSD |
Macs with upgradable RAM |
|
📌 MacBook Pro (2016-2017) 13-inch (non-Touch Bar) |
📌 pre-2012 MacBook Pro |
|
📌 Mac Pro (2019) Tower |
📌 MacBook Pro 17-inch |
|
📌 iMac (2020) Intel-based |
📌 MacBook (2007-2011 models) |
|
📌 Mac Pro (all models) |
|
|
📌 Mac mini (2010-2012 models) |
|
|
📌 pre-2020 iMac (Intel-based) |
Also, note that an upgrade is not always an economically sound decision — if you replace both RAM and SSD, it may be more expensive than buying, say, a base MacBook Air, especially if you seek professional assistance in replacing these components. We strongly recommend that you do not do it yourself if you do not have enough expertise and knowledge in this area.
13. Physically clean your Mac
All of the steps above were about optimizing your Mac on the inside, so why not devote a few minutes to making it look good, too? Here’s a cleaning checklist:
✅ Wipe your keyboard. You can use disinfecting wipes (without bleach) or a dry cloth, depending on how dirty it is. You can also try blowing out the dust. Just remember to do it gently to avoid damage.
✅ After wiping the keyboard, clean the trackpad. You can use the same wipes or cloth.
✅ Clean your screen. Use soft tissue and distilled water. Dampen the cloth instead of directly spraying water on the screen.
✅ If you have any connected accessories (like a mouse, keyboard, or trackpad), do not forget to clean them, too.
✅ Clean up the vents. You may need compressed air to do it. While all other steps are more about aesthetics, cleaning the vents may help avoid overheating.
✅ Now, close the lid of your Mac and wipe it. If you use a damp cloth, avoid USB and other slots.
General maintenance habits
Now that you’ve followed all of our recommendations, your Mac should be faster. However, remember that timely maintenance is a key to keeping it in top shape for as long as possible, so here are a few more tips:
💡 Restart your Mac regularly (say, once a week) — it will free up memory and, on Macs with Apple silicon, reset NVRAM and SMC, thus fixing minor glitches.
💡 Quit any apps that you do not use. This way, they won’t eat up CPU and memory.
💡 Develop your own maintenance schedule and stick to it. We recommend following our tips once a month, but you may work on your own approach. For instance, complete smaller cleaning and decluttering portions every week.
💡 Always have a recent Mac backup. You can set up Time Machine to back up your entire Mac or just sync the most important files to iCloud or another cloud storage. Just make sure that you do not ignore it so that when you need to restore a file, you can do it easily.

💡 Take care of battery health. Neither overcharge the battery nor discharge it completely to prolong its lifespan.
Well, there you have it, all the best tips and tricks for optimizing your Mac. Remember to follow these recommendations from time to time to keep your Mac in tip-top shape. Thank you for reading and keep sticking around for more Mac tips.

